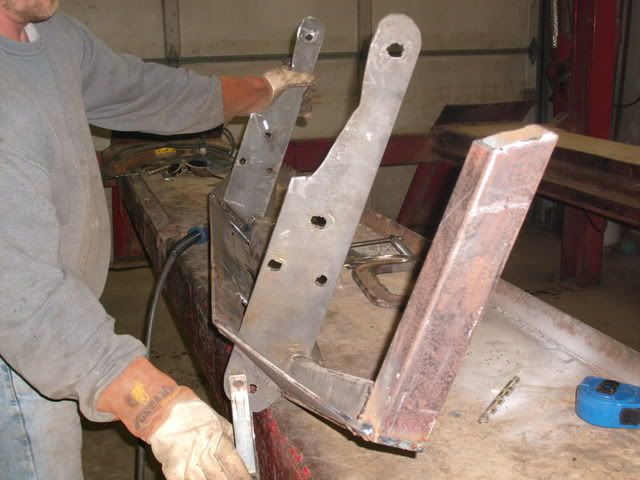
New Bumper
#46
Okay, tomorrow i'm cutting new brackets that will go through the tubing. I don't want to have any problem with this bumper. Also will have the option of "d-rings" like shown in the frist pic, 2" receiver or 3/4" flat stock welded to the new brackets for 3/4" shackles. I'm also tacking a piece on the bottom to cover the cross member to see what it looks like.
suggestion...weld the mounts all the way through the bumper, and use 1/4".
this is an example of my rear bumper
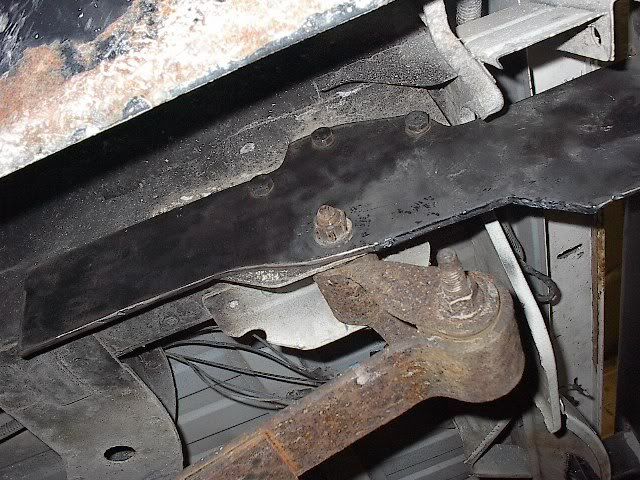
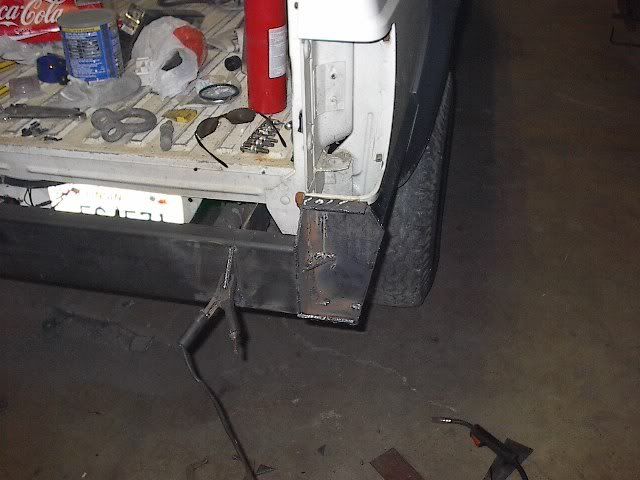
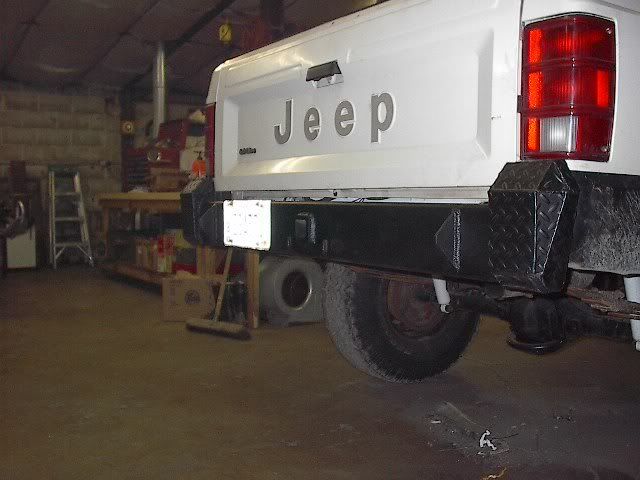
the bracket is placed all the way through the bumper. I then cut it to the desired shape for the clevis, and welded it fully with vertical up welds (stronger than vert. down or horizontal as it penetrates/heats more) on both sides of the main body of the bumper
it's not done yet, but I am going to plate both sides of the clevis mounts with more 1/4" plate that is chamfered to fit over the welds on the piece that is welded through. then drill it out, and plate the outside edge of the mounts.
I'd suggest thinking of doing it in this manor.
#47
Senior Member
Joined: Jan 2009
Posts: 684
Likes: 0
From: Brooklyn, In
Year: 1987
Model: Cherokee
Engine: 4.0
that's a better idea.
suggestion...weld the mounts all the way through the bumper, and use 1/4".
this is an example of my rear bumper


the bracket is placed all the way through the bumper. I then cut it to the desired shape for the clevis, and welded it fully with vertical up welds (stronger than vert. down or horizontal as it penetrates/heats more) on both sides of the main body of the bumper
it's not done yet, but I am going to plate both sides of the clevis mounts with more 1/4" plate that is chamfered to fit over the welds on the piece that is welded through. then drill it out, and plate the outside edge of the mounts.
I'd suggest thinking of doing it in this manor.
suggestion...weld the mounts all the way through the bumper, and use 1/4".
this is an example of my rear bumper


the bracket is placed all the way through the bumper. I then cut it to the desired shape for the clevis, and welded it fully with vertical up welds (stronger than vert. down or horizontal as it penetrates/heats more) on both sides of the main body of the bumper
it's not done yet, but I am going to plate both sides of the clevis mounts with more 1/4" plate that is chamfered to fit over the welds on the piece that is welded through. then drill it out, and plate the outside edge of the mounts.
I'd suggest thinking of doing it in this manor.
thats badas" i would love to have that bumper on my mj
#48
that's a better idea.
suggestion...weld the mounts all the way through the bumper, and use 1/4".
this is an example of my rear bumper


the bracket is placed all the way through the bumper. I then cut it to the desired shape for the clevis, and welded it fully with vertical up welds (stronger than vert. down or horizontal as it penetrates/heats more) on both sides of the main body of the bumper
it's not done yet, but I am going to plate both sides of the clevis mounts with more 1/4" plate that is chamfered to fit over the welds on the piece that is welded through. then drill it out, and plate the outside edge of the mounts.
I'd suggest thinking of doing it in this manor.
suggestion...weld the mounts all the way through the bumper, and use 1/4".
this is an example of my rear bumper


the bracket is placed all the way through the bumper. I then cut it to the desired shape for the clevis, and welded it fully with vertical up welds (stronger than vert. down or horizontal as it penetrates/heats more) on both sides of the main body of the bumper
it's not done yet, but I am going to plate both sides of the clevis mounts with more 1/4" plate that is chamfered to fit over the welds on the piece that is welded through. then drill it out, and plate the outside edge of the mounts.
I'd suggest thinking of doing it in this manor.
#50
#52
it's part one of two...I have yet to build the inner frame brackets. I did drill 4 more holes for bolts in the bracket, and welded nuts in the forward most two on each side. the other two will be drilled through the frame rails and the inside brackets (the inside brackets are shorter) and I'll weld sleeves in through the rails then grade 8 bolts through
#55
CF Veteran
Joined: Feb 2009
Posts: 1,184
Likes: 4
From: Ohio
Year: 1992
Model: Cherokee
Engine: 1995 ZJ 4.0
I liked the bumper cause it was plain and very tight to the body. The only thing I would like to see is some d-ring holes like this one has
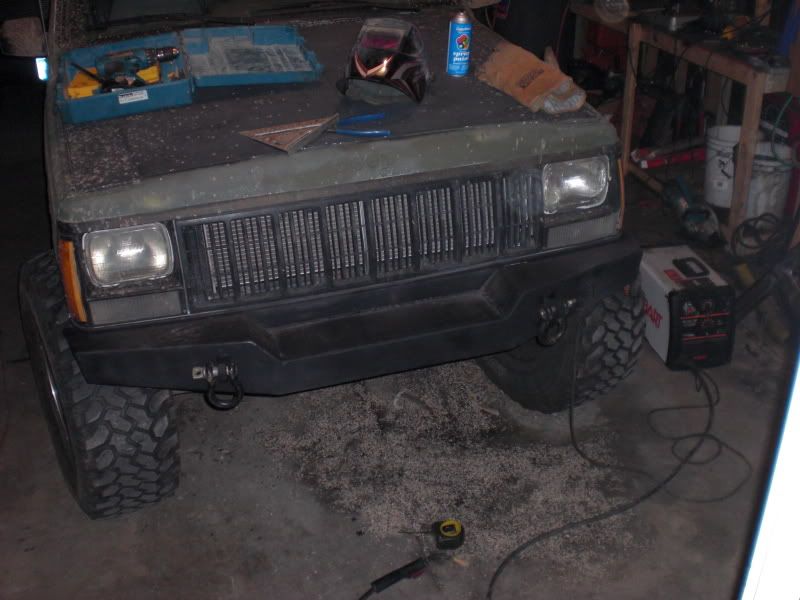
or even if the mounts were longer with the d-ring hole in them and then you could just slide the bumper into place and tack it then pull it off and weld it up. I hope I have not lost everyone I don't know how else to explain it. Like how jonb8 has it .

or even if the mounts were longer with the d-ring hole in them and then you could just slide the bumper into place and tack it then pull it off and weld it up. I hope I have not lost everyone I don't know how else to explain it. Like how jonb8 has it .
#56
I liked the bumper cause it was plain and very tight to the body. The only thing I would like to see is some d-ring holes like this one has

or even if the mounts were longer with the d-ring hole in them and then you could just slide the bumper into place and tack it then pull it off and weld it up. I hope I have not lost everyone I don't know how else to explain it. Like how jonb8 has it .

or even if the mounts were longer with the d-ring hole in them and then you could just slide the bumper into place and tack it then pull it off and weld it up. I hope I have not lost everyone I don't know how else to explain it. Like how jonb8 has it .
that's exactly what I was trying to say when I showed my rear bumper.
#57
CF Veteran
Joined: Feb 2009
Posts: 1,184
Likes: 4
From: Ohio
Year: 1992
Model: Cherokee
Engine: 1995 ZJ 4.0
Yea I mean his mounts look great they should just be longer in the front then just put the d-ring hole in the piece that sticks out the cut some slits in the already made bumper slide it on till it looks good then tack it up.

#58
Thread Starter
Junior Member
Joined: Apr 2009
Posts: 70
Likes: 0
From: Falling Waters, WV
Year: 1997
Model: Cherokee
Engine: 4.0
I know what you guys are talkin about. How's this?
Last edited by flyn2er; 04-16-2009 at 10:32 PM.
#59
CF Veteran
Joined: May 2008
Posts: 2,495
Likes: 3
From: Edmond, OK
Year: 1993
Model: Cherokee
Engine: 4.0 ltr
I like the clean close to body look, it reminds me alot of the JCR front bumper. As much as I like the close clean look I also need a place to mount lights on the bumper. Keep up the good work.
Yours doesnt come up quite as much on the ends...as the JCR below.
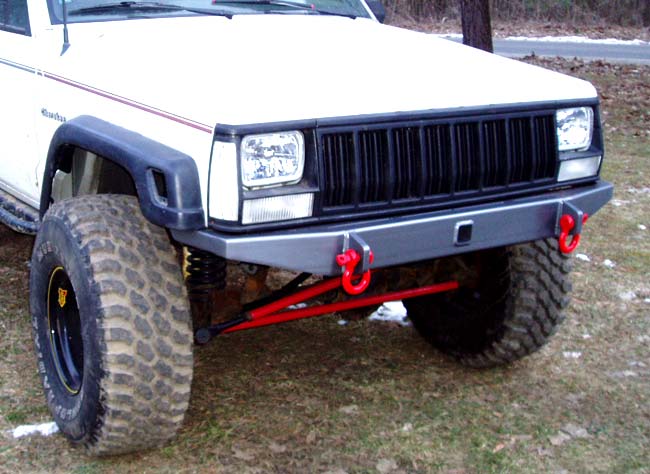
Yours doesnt come up quite as much on the ends...as the JCR below.

Last edited by prerunner1982; 04-16-2009 at 05:13 PM.


