
RMS How I Hate You
 04-07-2014, 06:07 PM
#16
::CF Moderator::
Join Date: Aug 2011
Location: Prescott, Az
Posts: 43,971
Received 1,559 Likes
on
1,263 Posts
Year: 1990
Model: Cherokee (XJ)
Engine: 4.0
Bracket from exhaust pipe to bell housing.
 04-07-2014, 07:50 PM
#17
CF Veteran
Thread Starter
I thought that might be it but it seems no matter how I arrange it, the flange doesn't line up with the exhaust hangar. I'll try again since I have to start over...
OMG! This is the project from hell. I finally got everything lined up, got RTV in all the places I'm supposed to put RTV, bolted everything down, reinstalled my starter, filled it up with oil, reconnected the battery and fired it up. No problems for about 2 minutes then oil started dripping (worse than before) from the bell housing. That area at the back where the gasket goes around the bearing cap is stupidly engineered. It takes 10 tries to keep the gasket from slipping out and it seems that no matter what you do there's never a good seal. I don't know what to do, I can't just keep spending days at a time taking it apart and putting it back together again in the hopes that this time it won't spew oil. Have I missed something? Here's what I did...
Removed oil pan
Scraped pan clean
Scrapped block mating surface clean
Removed rear bearing cap
Removed RMS half in bearing cap
Used a wooden dowel to remove RMS half in block (it came out relatively easy)
I did nothing to the new RMS, I just took it out of the bag, checked and double-checked that it was facing the correct direction and used the same dowel to push it into the channel around the bearing (It was a little tight but went in smoothly). At the very end there was a microscopically thin sliver of orange rubber that sheered off from the sharp edge of the block but it was from the back side of the seal, not where it seats on the bearing. I would guess the sliver was 1/2" long and between .001" and .002" thick.
I then installed the other half of the RMS into the bearing cap (it only goes in one way), applied a little bead of RTV on the "arms", oiled the bearing and reinstalled torquing first to 40#, then to 70#, then to 80#.
I then placed the gasket on the pan and used dental floss through a few of the holes to keep it in place.
Then I applied RTV to the rear portion where the "U" begins and ends and to gap between the bolts that straddle the block and timing chain cover.
Then I reinstalled the pan, light-to-medium torque with a 1/4" driver in an X pattern beginning in the middle of the pan and working my way to the ends.
I can't see the gasket in the "U" at the RMS end, I suppose it could have squished out into the pan? I don't know. Any advice you might have would be greatly appreciated. Sorry for the long post.
04-07-2014, 08:24 PM
#18
Member
Join Date: Aug 2012
Location: Atlanta Georgia
Posts: 171
Likes: 0
Received 2 Likes
on
2 Posts
Year: 1997
Model: Cherokee
Engine: 4.0L
Looking over your steps it appears that you took the correct steps. I have a good friend that had the same problem and never knew why. I was pretty crazy about the directions I followed ( that of course I cannot find now ). I actually went to the dealer and purchased the ridiculous red sealant ( that looks like fake blood used at Halloween ) for the main bearing cap. My oil pan leaks a little from the front because after follow EVERYTHING including my personal experience when I got to the parts house they didn't have a Fel-Pro oil pan gasket, only a Victor. Sorry, IMHO my fault. Not the same. Now I've lifted my XJ and have thought about doing the oil pan gasket again, correctly, with a Fel-Pro gasket. IF I tackle this again with all that I've done with my front-end I would just DROP THE ENTIRE axle. Yeah, well maybe you have to have a new front end alignment but...think of the stress fighting with that oil pan you WON'T have. So, sorry to rattle on but really the only thing I would have done really DIFFERENT would have been to maybe wait at least 8 hours before adding oil and re-assembly. It's always the some simple little thing that bites me in the butt as well. Good Luck.
04-07-2014, 08:41 PM
#19
Member
Join Date: Jun 2013
Location: Richmond, VA
Posts: 145
Likes: 0
Received 0 Likes
on
0 Posts
Year: 1998
Model: Cherokee
Engine: 4.0
I just did RMS this past weekend. It sounds like you cut the edge of the top half as it slide in. Did you get a plastic shoehorn with your new seal? It comes with the FelPro. You place the small end into the hole on the passenger side of tranny and then slide the upper half in. It prevents the edge of the opening from cutting the seal. You should not have any orange slivers after you push it in.
Here is the write-up I used.
http://www.dailydriventj.com/forum/viewtopic.php?t=811
Here is the write-up I used.
http://www.dailydriventj.com/forum/viewtopic.php?t=811
04-07-2014, 09:37 PM
#20
CF Veteran
Thread Starter
I just did RMS this past weekend. It sounds like you cut the edge of the top half as it slide in. Did you get a plastic shoehorn with your new seal? It comes with the FelPro. You place the small end into the hole on the passenger side of tranny and then slide the upper half in. It prevents the edge of the opening from cutting the seal. You should not have any orange slivers after you push it in.
Here is the write-up I used.
http://www.dailydriventj.com/forum/viewtopic.php?t=811
Here is the write-up I used.
http://www.dailydriventj.com/forum/viewtopic.php?t=811
EDIT: I used GoJeep's write-up
Last edited by F1Addict; 04-07-2014 at 09:41 PM.
04-07-2014, 10:02 PM
#22
CF Veteran
Join Date: Sep 2009
Location: ☼ Blackhole Sun
Posts: 8,567
Likes: 0
Received 18 Likes
on
16 Posts
Year: My Jeep is a GMC
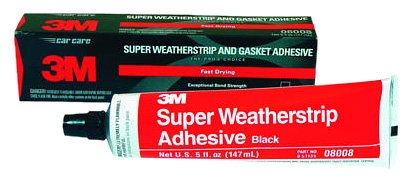
This material is also useful for gluing the oil pan gasket to the block. Once it sets (about 1 min) no way that gasket can creep on you, but it is not fun to remove.
04-07-2014, 10:42 PM
#23
CF Veteran
Thread Starter
Regarding the oil, it's impossible to get it all off the mating surface because every time I wipe it off more seeps out of the block before I can seat the pan... it's infuriating. I wipe one side, then the other, then there's oil dripping from the first side again.
04-08-2014, 12:10 AM
#25
CF Veteran
Thread Starter
Maybe five drops a day. Sounds trivial but my boss wasn't happy about what it was doing to her driveway and she was less happy about the hooptie cardboard I put down to save her driveway. The "It's a Jeep thing" excuse didn't work, either.
04-08-2014, 09:19 AM
#27
CF Veteran
Thread Starter
 04-08-2014, 09:44 AM
#29
Member
Join Date: Aug 2012
Location: Atlanta Georgia
Posts: 171
Likes: 0
Received 2 Likes
on
2 Posts
Year: 1997
Model: Cherokee
Engine: 4.0L
The 3M adhesive recommended by Turbo X J is AWESOME when used exactly as suggested.
That is what I've always used for valve cover gaskets. Glue the gasket to the cover. Set the cover on the head GENTLY and let it set. After drying pop the cover back off and give it a quick spray with Copper Spray a Gasket ( if necessary ). Tada! Pretty much a permanent gasket. You might never need to buy that gasket ever again.
IF you were lucky enough to have a block laying around you could do this with wow what a solution. END OF CRAZY GASKET RANT.
04-08-2014, 10:40 AM
#30
CF Veteran
Thread Starter
I'm going to pull the entire thing this morning and start over. I love the idea of cutting the bolts and using them for alignment pins but I've got so little room to maneuver in there I don't think I'd be able to get the pan in with the alignment pins screwed into the block. This would be much easier if I could just flip my Jeep upside down so gravity was working in my favor... Oh well, wish me luck.
P.S. they didn't have that weatherstrip adhesive at AutoZone or O'Reilly's so no love there :/
P.S. they didn't have that weatherstrip adhesive at AutoZone or O'Reilly's so no love there :/