
Water leaking from cowl
 10-20-2011, 12:20 AM
#31
Member
Join Date: Mar 2009
Location: Punta Cana , Dominican Republic.
Posts: 249
Likes: 0
Received 1 Like
on
1 Post
Year: 1988
Model: Cherokee
Engine: 4d56td
you guys can try with some fendix, at least that's how we called here, its almost the same as the herculiner stuff it will act as a seal,i used some thinner to make it less viscus couse its really heavy, you can try dripping it from the drivers side if you dont want to open the cowl from the passenger side,which i did, if that is the case i suggest using a stick with a paintbrush attached so you can get to every part of the vent ,remember to take off the wiper motor and transmission before doing this so you can make a nice job, i did that and worked fine for me , also i suggest you check the sealant from your windshield , my jeep uses a chrome strip around it , i took it off and cleaned all the edge of the glass and sealed it with black silicon again , that can help too, couldnt take pictures because of the messy hands, so use gloves in case...
Last edited by preppye; 10-20-2011 at 10:55 PM.
 11-07-2011, 12:58 PM
#32
Newbie

Join Date: Nov 2011
Posts: 1
Likes: 0
Received 0 Likes
on
0 Posts
Model: Cherokee
My 98' XJ is leaking also on the passenger side but it is leaking from the right side of the dash right next to the fuse box. I have taken most of the dash apart but haven't taken out the heater box. anybody have an idea where it might be coming from?
11-07-2011, 04:55 PM
#34
Seasoned Member

Join Date: Jul 2010
Location: Mass.
Posts: 320
Likes: 0
Received 0 Likes
on
0 Posts
Year: 1999
Model: Cherokee
Engine: 4.0
3M makes a seem sealer that is the smelliest, stickiest, nastiest stuff you ever saw. It comes in a caulking tube or a can so you can brush it on, works great.
11-21-2011, 05:27 PM
#35
CF Veteran
Join Date: Feb 2011
Location: Long Beach, Ca
Posts: 3,500
Likes: 0
Received 0 Likes
on
0 Posts
Year: 2000
Model: Cherokee
Engine: 4.0 I6
Thank you for this thread guys. Out recently rained here and now my passenger side floor is wet. After reading this I quickly figured out the problem. The xj was parked up hill in the driveway so that tells, after reading the entire thread that it's coming through the cowl in the fresh air intake. I'll try to pull it apart this weekend and seal it up.
01-25-2012, 04:35 PM
#36
Newbie

Join Date: Jan 2012
Location: MS
Posts: 14
Likes: 0
Received 0 Likes
on
0 Posts
Year: 96
Model: Cherokee
Engine: Straight 6
Does anyone have any updates on anything they might have done different to fix this problem? My 96 is leaking in the same way and im thinking this is it. Before i removed the cowl i had my wife spray everything on the passenger side and i noticed it leaking by what im assuming is the blow motor box on passenger side far right hand side. Anyways any help trying to access this would be great or there is anything new that i might can try. thanks
02-20-2012, 06:11 PM
#37
CF Veteran
Thread Starter
Okay so after starting this thread over 2 years ago I have finally lit a fire under my own *** and fixed it. You may not like the answer but it is fixed properly without doing a half assed job. To make a long story short, the dash has to come out.
I decided to replace the entire cooling 200K mile cooling sustem to ensure that family would have sufficient heat. It only made sense to tackle this while I had the heater box out replacing the heater core. So here are some pics of what I had to do
After unbolting the dash I pulled the passenger side out and hung it from the grab handle to keep it out of the way. In order to completely remove it I would have had to pull the steering wheel and i am not screwing with the airtbag.

This shows the bottom lip of the plastic fresh air intake between the cowl and the heater box.

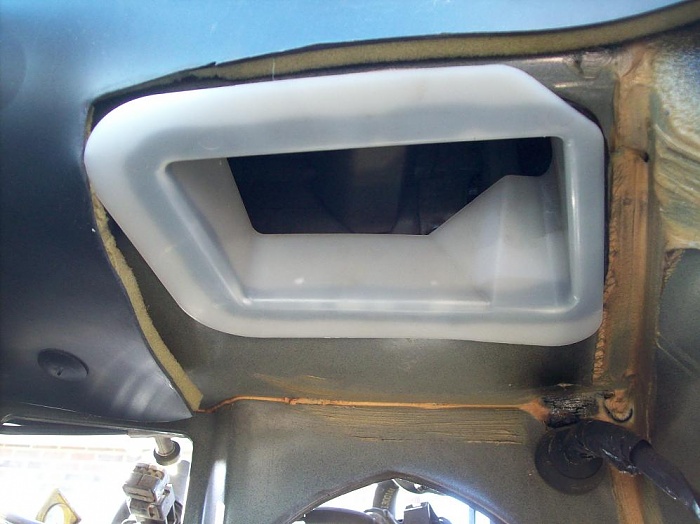
After the heater box was removed you can see the intake better. It is held in by plastic clips that are molded into the piece. And yes every damn one of them broke upon removal.

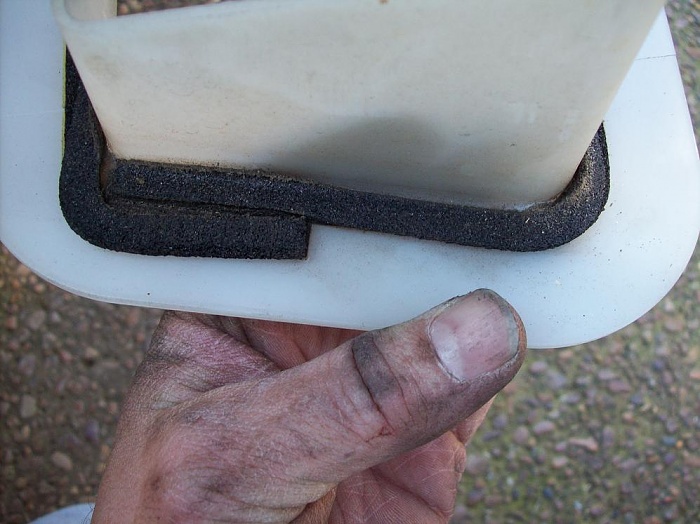
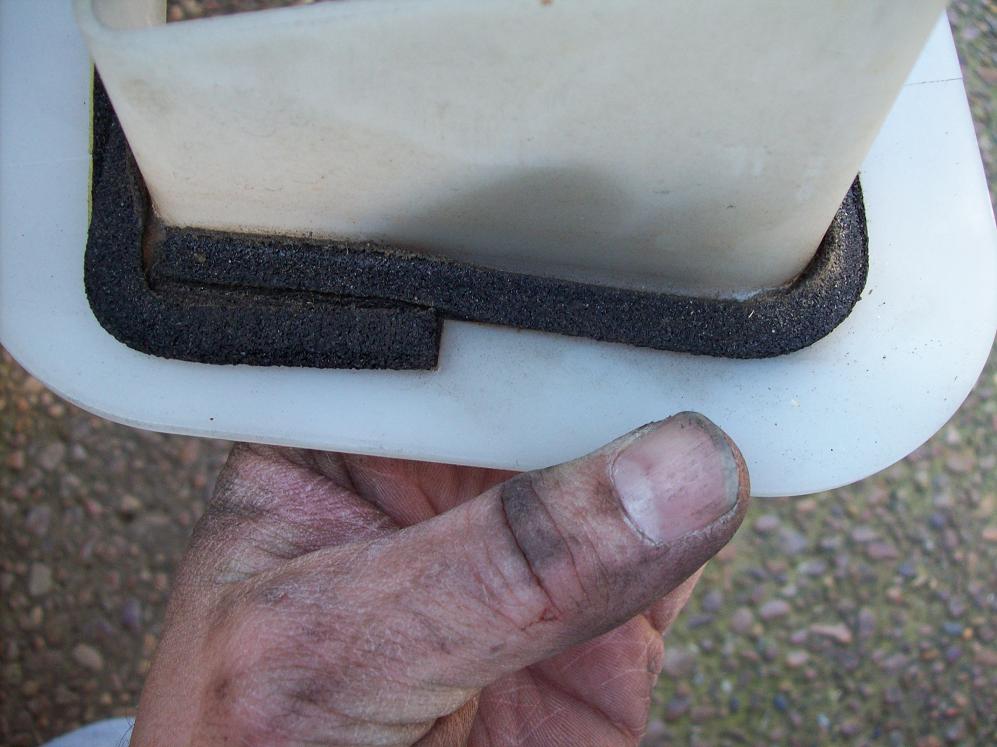
This is the pansy little seal that Chrysler used to stop water from entering the cab. It literally fell off when I pulled it out from age.
This is what I used to reseal the intake after I cleaned all out the years of dirt and grime off of it. Bought it at Advance Auto for $23 and it is some sticky stuff.

I decided to replace the entire cooling 200K mile cooling sustem to ensure that family would have sufficient heat. It only made sense to tackle this while I had the heater box out replacing the heater core. So here are some pics of what I had to do
After unbolting the dash I pulled the passenger side out and hung it from the grab handle to keep it out of the way. In order to completely remove it I would have had to pull the steering wheel and i am not screwing with the airtbag.

This shows the bottom lip of the plastic fresh air intake between the cowl and the heater box.
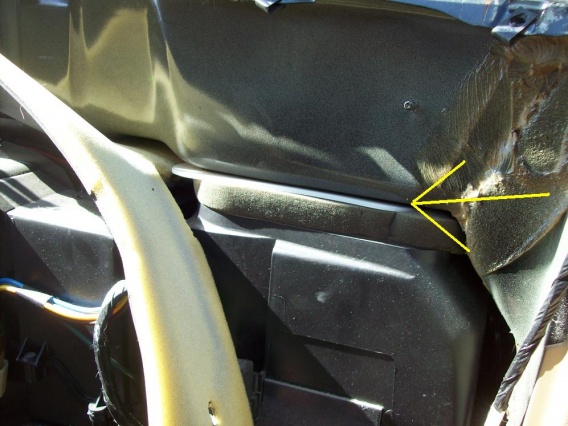
After the heater box was removed you can see the intake better. It is held in by plastic clips that are molded into the piece. And yes every damn one of them broke upon removal.

This is the pansy little seal that Chrysler used to stop water from entering the cab. It literally fell off when I pulled it out from age.
This is what I used to reseal the intake after I cleaned all out the years of dirt and grime off of it. Bought it at Advance Auto for $23 and it is some sticky stuff.
 02-20-2012, 06:20 PM
#38
CF Veteran
Thread Starter
A better look at the product out of the package. It is very pliable and can be pressed into the tight corners of the plastic intake.

After apply it I pressed the intake firmly back into place making sure that the sealant was squeezed up into all of the gaps to form a permanent seal.
It will take an act of congress to ever get the intake back out, but a permanent solution was what I was after.
It is quit an involved project that has required my Jeep to be own for 2 days just to fix this issue. On the plus side, I found almost $10 in change inside the console from the previous owner.
After apply it I pressed the intake firmly back into place making sure that the sealant was squeezed up into all of the gaps to form a permanent seal.

It will take an act of congress to ever get the intake back out, but a permanent solution was what I was after.
It is quit an involved project that has required my Jeep to be own for 2 days just to fix this issue. On the plus side, I found almost $10 in change inside the console from the previous owner.
 02-21-2012, 08:03 AM
#40
Junior Member
Join Date: Mar 2011
Location: Security, CO
Posts: 68
Likes: 0
Received 0 Likes
on
0 Posts
Year: 1999
Model: Cherokee
Engine: 4.0L
First off, I like the job. Plus the fact this problem should never happen again, regardless of which way the vehicle facing. I'm sure the job is better than if the stealership were to perform it, and much more cheaper.
However, how difficult was pulling the dash (partially), and I assume it was a PIA? I have zero mechanical abilities, and possibly the necessary time, as the Jeep is my daily driver, and only vehicle. How long did it take you to do the job (properly) from start to finish? What parts should I have in place prior to attempting the job. What tools were involved? You don't live near Colorado do you?
Lastly, is the heat output much different that it was before?
Pat
02-21-2012, 10:08 AM
#41
Member
Join Date: Mar 2009
Location: Punta Cana , Dominican Republic.
Posts: 249
Likes: 0
Received 1 Like
on
1 Post
Year: 1988
Model: Cherokee
Engine: 4d56td
well ,thats why we have tried every way to do it without taking off the dashboard , because its a hard job, i can dismount and mount my dashboard in about 2 hours , but i have already done it about 5 times so i know where every bolt is , but the issue to this is that you need to remove the heater box and to that you need also to remove the a/c evap and that will lead to loose the gas and o-rings so i think that the easiest solution of all is to just flexseal it , you need to remove the wiper transmission and motor but that is pretty easy , pour it inside and with a brush try to get it everywhere ...
02-21-2012, 10:23 AM
#42
CF Veteran
Thread Starter
First off, I like the job. Plus the fact this problem should never happen again, regardless of which way the vehicle facing. I'm sure the job is better than if the stealership were to perform it, and much more cheaper.
However, how difficult was pulling the dash (partially), and I assume it was a PIA? I have zero mechanical abilities, and possibly the necessary time, as the Jeep is my daily driver, and only vehicle. How long did it take you to do the job (properly) from start to finish? What parts should I have in place prior to attempting the job. What tools were involved? You don't live near Colorado do you?
Lastly, is the heat output much different that it was before?
Pat
However, how difficult was pulling the dash (partially), and I assume it was a PIA? I have zero mechanical abilities, and possibly the necessary time, as the Jeep is my daily driver, and only vehicle. How long did it take you to do the job (properly) from start to finish? What parts should I have in place prior to attempting the job. What tools were involved? You don't live near Colorado do you?
Lastly, is the heat output much different that it was before?
Pat
I won't lie and say that it is an easy task because it is a complete pain. However, with the tools handy and even with just basic skills it can be done in a day. It has taken me longer and it is still not back together for several reasons. First, it is not my only vehicle so I can have it down for extended periods of time. Second, I am also replacing the radiator, water pump, tstat, heater core, and all of the hoses at the same time and I am still waiting on a couple of parts to be delivered for final reassembly.
That was the first time I have removed a dash from the newer style interior of the XJ and it took me a little longer to do it vs an older dash. If I wasn't 1200 miles away I would help you with it, but that's just a wee bit of a drive.
As far as heat output, it will have to be better than it was due to the age and corrosion of the old system. Hence the reason it is undergoing complete replacement. Plus the replacement heater core is thicker than the original unit so it should be able to produce more heat.
02-21-2012, 08:51 PM
#43
Newbie
Join Date: Jul 2009
Location: Byrdstown Tennessee
Posts: 29
Likes: 0
Received 0 Likes
on
0 Posts
Year: 1999
Model: Cherokee
Engine: 4.0
I discovered a large amount of water in my passenger floor in my 99. My leak was the blower motor seal, but due to this thread I was concerned about the intake also. I could not get the intake to leak with a realistic simulation. I decided to address it before it does happen, and I have to pull the carpets to dry-AGAIN.
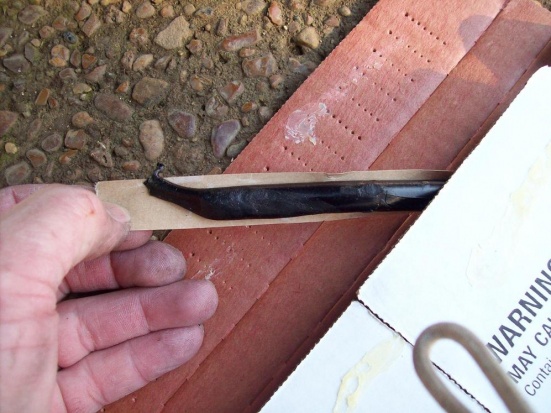
I opted for the lazy option
1. cut a small access into the cowl
2. Cleaned the area with thinner
3. use 3M caulk strips around the potential leak gaps
4. cover access hole with scrap sound deading material
Mine is not necessarily the "right" way to do it, but it is a fast down and dirty way to keep the floors in your XJ.
02-22-2012, 11:16 AM
#44
Member
Join Date: Mar 2009
Location: Punta Cana , Dominican Republic.
Posts: 249
Likes: 0
Received 1 Like
on
1 Post
Year: 1988
Model: Cherokee
Engine: 4d56td
same as i did , the only thing is that i used flexseal and covered both holes the one that i opened and the one thats on the drivers side where is the wiper motor...
02-22-2012, 06:25 PM
#45
Junior Member

Join Date: Feb 2010
Location: Bex Hill
Posts: 50
Likes: 0
Received 0 Likes
on
0 Posts
Year: 2000
Model: Cherokee
Engine: 4.0 L
I like the hole-in-the-cowl fix. Well done.
Solves the problem, with limited p.i.t.a. troubles.
The dash is a BIG mess for anyone to do the first time, and totally un-necessary unless you are replacing other parts, as was the case.
I would use a custom plate, with a rubber-sheet gasket and pop rivets to cover instead of the roof-valley snow shield route, but I like the thinking here.