When you click on links to various merchants on this site and make a purchase, this can result in this site earning a commission. Affiliate programs and affiliations include, but are not limited to, the eBay Partner Network.
Stock XJ Cherokee Tech. All XJ Non-modified/stock questions go hereXJ (84-01)
All OEM related XJ specific tech. Examples, no start, general maintenance or anything that's stock.
Totally agree however, there are some good guys on there, they just don't seem to be the ones posting...Now let's see if I did the quote thing right!
Only a few good ones... I tried asking for help there and they all mocked me. "CPS," they said. I'm not an idiot (but somewhat uneducated about Jeeps). I'm pretty sure that the vast majority of them there don't know the answers to the questions being asked, so they just trash the place. It's a shame, really. Hard to find people that aren't butts, especially when it's online.
I don't mean to highjack this thread by any means, but my 98 Cherokee always feels like the brakes aren't present as they should be. I completely overhauled the rear drums with a kit I got from RockAuto and bled the entire system using a video by Chrisfix. I didn't do the front rotors or pads because they looked pretty good. Despite this, I don't start to slow until the pedal is a third of the way down... I'm sure the wheels would lock up if I put the pedal all the way down, but my Jeep doesn't have ABS (or at least there's no fuse in the ABS motor spot), so I don't want to risk losing control of the vehicle. I drove my father's truck and hit the brakes way too hard because I was used to the ones in my Jeep. Nearly gave my dad a heart attack. Whoops.
while you're at it, flush out your old brake fluid, it may have mixed dot 3 and dot 4. mix those two and you won't have any brakes.
definitely do the dual diaphragm booster upgrade, you won't believe the difference.
you could do the rear disc swap, but i have no problems with my properly set up drums. i can lock em up with 36 inch bias ply irocs on beadlocks, thanks to my dual diaphragm booster upgrade.
oh, and welcome to the best xj site for info. everyone here is pretty good, once you get past the skin of a few. we're all here for the same reason, to love and brag about our xj's. lol.
while you're at it, flush out your old brake fluid, it may have mixed dot 3 and dot 4. mix those two and you won't have any
DOT 3 and DOT 4 brake fluid are fully compatible. It's DOT 5 that's the problem and can't be mixed with 3 or 4. Regardless, a fluid flush is probably a good idea if it's not been done in a couple years.
Sounds to me like you're getting good advise. When you get the chance, check out the "Off Topic" section. You will get a better sense of who we are on this forum. You sometimes need a thick skin to roll with the punches, but it's all in jest and having fun. It took me awhile to realize they were just trying to bust my ***** to see what kind of reaction they'd get.
Getting back to your brakes. The rear shoes adjusted properly can raise the pedal so it takes the slop out of that first application. If you have ABS there's not much you can do to improve the pedal travel, but my 2000 XJ doesn't and I just had EVERYTHING except the booster replaced and there can't be more than an inch of travel before they start grabbing. If you have to replace any pipes, use copper/nickle instead of steel. It's much easier to bend and flare and IT NEVER RUSTS! Too bad the flare NUTS do! The proper way to adjust the rear shoes it to adjust the star wheel until you can't turn the tire at all, then back it off until the shoes just kiss the drum. By tightening them up, that centers the shoes in the drum so you can get them adjusted with minimum clearance. Trust me, I've worked with drum brakes for over 50 years.
Brake fluid absorbs moisture and with enough water in the fluid it can boil and rusts the internal parts of the calipers and cylinders. It's a good idea to change it on a regular schedule. I believe jeep recommends every 35K miles.
I just acquired a 1989 Jeep XJ, and I'm bleeding out (flushing) all the fluid after installing a new master cylinder today or tomorrow. (I have the parts, just need to put in the effort.)
The front brakes are not working (Jeep sat for 2 years unused), and the rear brakes aren't enough. It's been decades since I worked on drum brakes, but I remember the star adjuster... so I'll take the advice above and do that too.
I assume mine only has the single diaphragm booster, so I'll consider replacing it AFTER if the master cylinder/bleed/adjust isn't enough.
Still working on the fundamentals to get it road worthy, no off road stuff for this vehicle planned.
You guys are awesome! Great advice in this thread! Like I said somewhere/// I usually come online in the evenings after work Eastern Time/NJ. I think this Saturday If the weather is nice and the stars align correctly in the sky I will attempt the overhaul. Though many of you talk about the rear drums I have not even given a thought to them yet. But I do know for sure my fronts are not really working. Amazingly I think the drums are pulling the burden. Not sure cause in my opinion brakes are 80 / 20 front and rear. As to say that 80 percent of your braking power comes from the front. But she does stop. I will certainly post my progress on Saturday and then think about going into the rear drums. Thanks again for all the replies.
With you saying the fronts aren't working, I'd suggest take one off at a time (as not to pop the others piston out) and with a big pair of G clamps (the kind that are like Vice/Mole grips) lightly clamp the piston and press the pedal and see if you get movement and return. I say a big pair of G clamps if available as the ones we have at work due to the length have a bit of room for movement at the clamping end so provide a very nice spring effect when testing calipers. Correct me if I'm wrong but you shouldn't try using a lubricant spray to free them up as they have a square seal that is designed to help pull the piston back, by lubricating that surface you lose that pull. Finally check the visual condition of the piston and caliper for any damage. One of my pistons had a chip on the outer surface but the other had a crack down the piston itself. If there is any damage or it's stiff to push and return just get a rebuild kit. Very easy to do and only cost me �40 in the UK where options are limited for suppliers. I'm sure it'd be less over the pond.
Only one problem with rebuilding a caliper is almost all mechanics won't do them over here because of the insurance liability. As a matter of fact, any large shop will replace the rotors and calipers just so the customer doesn't come back with problems! It's even difficult to find rebuilding kits for calipers. It's not uncommon to spend over $600 USD for a simple brake job, then they usually don't even road test it!
OK: Working on the Master Cylinder, but having an issue:
Can't get the smaller of the two flair fittings to unscrew. The other one loosened fine (the larger one, toward front of engine compartment).
I purchased flair wrenches before starting, so I'm not trying to cheap out on the tools. It's still starting to round the nut, so I decided to stop and get some assistance before totally rounding them.
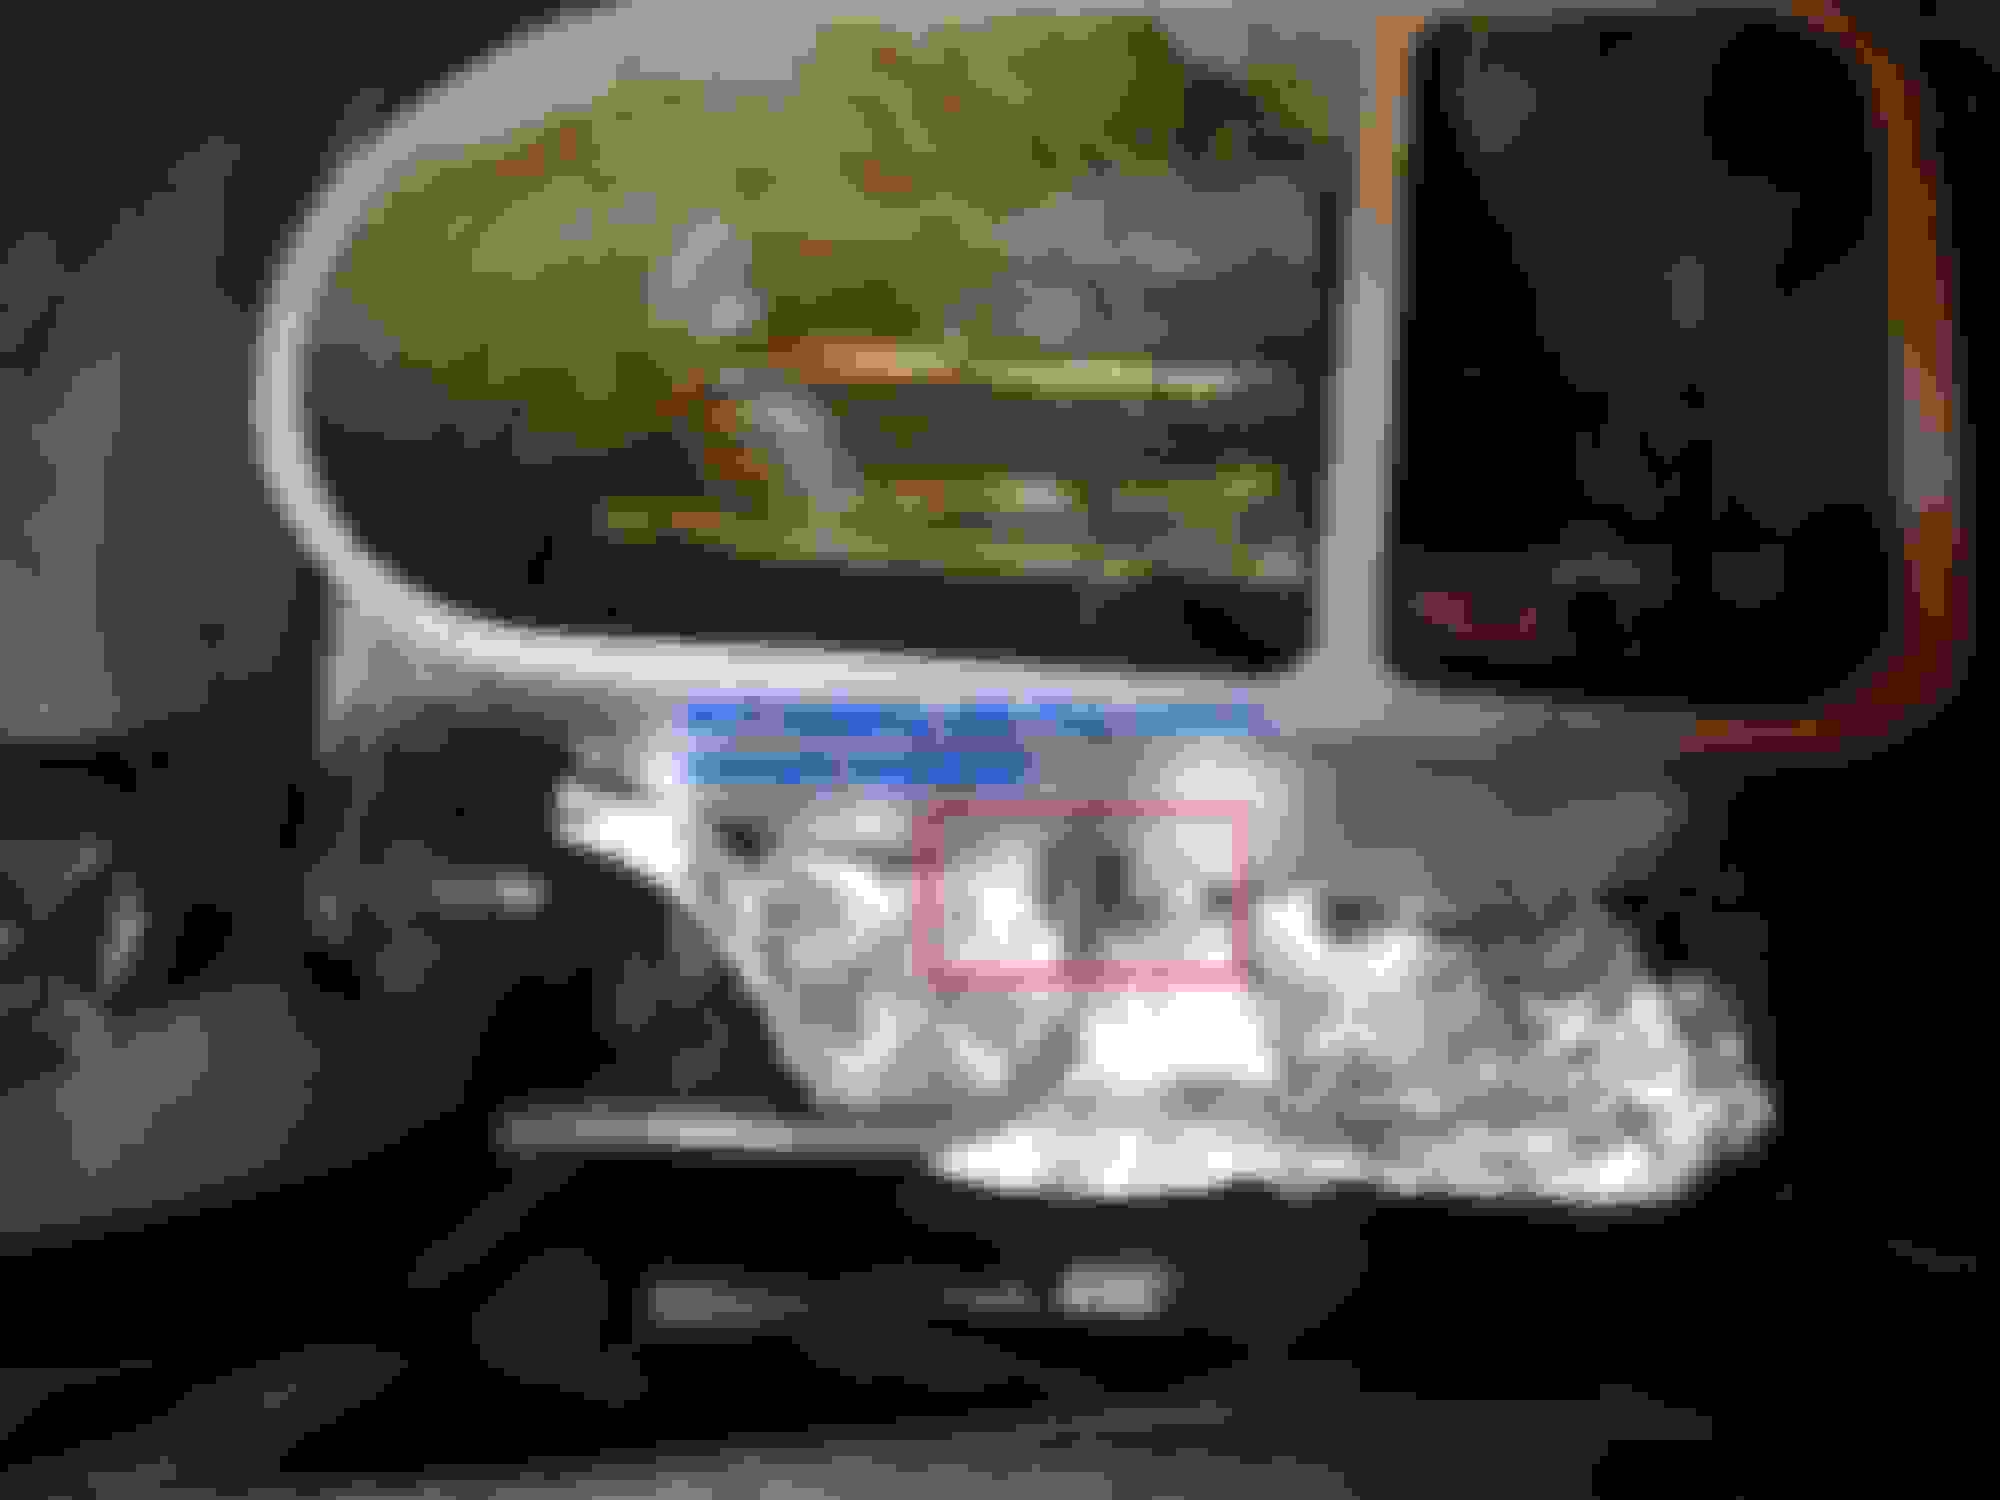
I put the aluminum foil there because I had a propane torch and applied a flame for a min or so targeting the thread area. (See attached photo.) I wanted a hacked heat shield for the wires below this fitting. I wasn't sure how long to apply heat, not sure if there are better methods, if it needs to be applied for X min, or if that's a weak idea on this type of fitting.
I've also sprayed with PB Blaster a couple hours before I started wrenching it. Sprayed some more just before this photo.
All ideas/suggestions welcomed! There has to be a way to remove that without destroying the nut, but I haven't figured it out yet.
******
PS: The cylinder had "mud" in it after I removed the fluid. No wonder it wouldn't stop well. I'm amazed the rear brakes worked at all...
I've never seen it that bad before but I do understand the fluid should be clear. I'll be flushing the complete brake lines after the cylinder is replaced.
The photo is AFTER I removed some of the sludge/mud with a paper towel. I didn't want fluid in the cylinder when applying the heat. No idea if that makes a diff, but didn't seem appropriate to me. (Feel free to correct me if I'm missing anything.)
OK: Working on the Master Cylinder, but having an issue:
Can't get the smaller of the two flair fittings to unscrew. The other one loosened fine (the larger one, toward front of engine compartment).
I purchased flair wrenches before starting, so I'm not trying to cheap out on the tools. It's still starting to round the nut, so I decided to stop and get some assistance before totally rounding them.
I put the aluminum foil there because I had a propane torch and applied a flame for a min or so targeting the thread area. (See attached photo.) I wanted a hacked heat shield for the wires below this fitting. I wasn't sure how long to apply heat, not sure if there are better methods, if it needs to be applied for X min, or if that's a weak idea on this type of fitting.
I've also sprayed with PB Blaster a couple hours before I started wrenching it. Sprayed some more just before this photo.
All ideas/suggestions welcomed! There has to be a way to remove that without destroying the nut, but I haven't figured it out yet.
******
PS: The cylinder had "mud" in it after I removed the fluid. No wonder it wouldn't stop well. I'm amazed the rear brakes worked at all...
I've never seen it that bad before but I do understand the fluid should be clear. I'll be flushing the complete brake lines after the cylinder is replaced.
The photo is AFTER I removed some of the sludge/mud with a paper towel. I didn't want fluid in the cylinder when applying the heat. No idea if that makes a diff, but didn't seem appropriate to me. (Feel free to correct me if I'm missing anything.)
You probably wont believe me, but the best thing to grab rounded off flare nuts like that, is a small "one size fits all" type spanner, that has teeth, and is spring loaded, (they are designed to get rounded-off fasteners)
Once the flare nut is too rounded off for anything else, I will go for that, saved my *** a few times, and it rarely makes the nut worse than it already is..ie you can re-use it.
I dont think this has failed on me since I started using it...I have a kit of 3 sizes, rarely use the 2 larger ones
alternative, cut line, and make a new one, buy a new flare nut...but the old one still has to be gotten out
If you don't care about saving it, you can grab it with vise-grips. It'll come out then. Once you get it out you can find a new nut at a good auto parts store. I've even had to reuse a crushed one before and as long as it seals on the flare, it won't leak. My Dodge Caravan had dual lines running to the rear brakes, one with standard sized nuts and one with oversized nuts, basically so you wouldn't get them confused. I couldn't find those oversized nuts so I had to reuse the old ones.
Only one problem with rebuilding a caliper is almost all mechanics won't do them over here because of the insurance liability. As a matter of fact, any large shop will replace the rotors and calipers just so the customer doesn't come back with problems! It's even difficult to find rebuilding kits for calipers. It's not uncommon to spend over $600 USD for a simple brake job, then they usually don't even road test it!
I suppose that makes sense. We don't normally rebuild them either but as it's my own and they are very simple, I went for it.
I had actually already ordered new calipers already when I started this thread! They should be here today or tomorrow I believe. I ordered the whole deal including slotted rotors which I fell in love with after I put them on my Altima.
I do hope everything comes in before Saturday! It is looking to be the only day I can do the job. I was too late to order the dual piston setup(read that on here) but I think a whole new setup will be just fine. If I do need new lines I can hit the local autozone or whatever...which I am probably gonna need. Anyway now it is just the waiting game annnnd I gotta get ready for work. Great posts on here! Thanks again everyone!

 12-24-2018, 01:11 PM