wonít shift until warm or first shift
#31
Yes it moved immediately when In first gear. But it moves immediately when in drive with the tcu connected so there was no difference except it had to be shifted manually.
Last edited by Jamelow; 10-02-2020 at 01:11 AM.
#32
::CF Moderator::
Joined: Aug 2011
Posts: 43,971
Likes: 1,566
From: Prescott, Az
Year: 1990
Model: Cherokee (XJ)
Engine: 4.0
Okay. Thanks. Have you ever completed Tip 10 on my website? Really refreshed the ground at the engine dipstick stud?
#33
when mine would not upshift from 1 to 2 until very high RPM (near redline when 1st cold), I found backing the throttle right off meant it would upchange at much lower RPM
very annoying for someone following behind
following a full flush, that problem disappeared
very annoying for someone following behind
following a full flush, that problem disappeared
#35
::CF Moderator::
Joined: Aug 2011
Posts: 43,971
Likes: 1,566
From: Prescott, Az
Year: 1990
Model: Cherokee (XJ)
Engine: 4.0
That's good, but no.
Read these. CRUISER'S MOSTLY RENIX TIPS
The Renix era XJs and MJs were built with an under-engineered grounding system for the engine/transmission electronics. One problem in particular involves the multiple ground connection at the engine dipstick tube stud. A poor ground here can cause a multitude of driveabililty issues, wasted time, failed emission tests, and wasted money replacing components unnecessarily.
All the components listed below ground at the dipstick tube stud:
Distributor Sync Sensor, TCU main ground, TCU “Shift Point Logic”, Ignition Control Module, Fuel Injectors, ECU main ground (which other engine sensors ground through, including the Oxygen sensor, Knock Sensor, Cruise Control and Transmission Sync signal. All extremely important stuff.
The factory was aware of the issues with this ground point and addressed it by suggesting the following:
Another area where the grounding system on Renix era Jeeps was lacking is the engine to chassis ground. There is a braided cable from the back of the cylinder head that also attaches to the driver’s side of the firewall. This cable is undersized for its intended use and subject to corrosion and poor connections at each end.
I prefer to add a #4 gauge cable from the firewall to a bolt on the rear of the intake manifold, either to a heat shield bolt or fuel rail bolt. A cable about 18″ long with a 3/8″ lug on each end works great and you can get one at any parts store already made up. NAPA has them as part number 781116.
A further improvement to the grounding system can be made using a #4 cable, about 10″ long with 3/8″ terminals at each end. Attach one end of this cable to the negative battery bolt and the other end under the closest 10mm headed bolt on the radiator support just forward of the battery. NAPA part number 781115.
For those of us with Comanches, it’s very important to remove the driver’s side tail lamp assembly to access the ground for the fuel pump. Remove the screw holding the black ground wire. Scrape the paint from the body and corrosion from the wire terminal. Add a 10 gauge wire, with an eyelet on each end, from that grounding point to a bolt on the frame. Better yet, on both Cherokees and Comanches, complete Tip 29 for the best fuel pump grounding. Be sure to scrape all mounting points to bare metal and apply also.https://i1.wp.com/cruiser54.com/wp-content/uploads/2015/10/Fuel-Pump-Ground-Comanche.jpg
If you want to UPGRADE YOUR GROUND AND BATTERY CABLES with custom made parts, contact Paul at www.jeepcables.com

Revised 02/04/2017
CRUISER'S MOSTLY RENIX TIPS

Over near the transmission dipstick tube are 2 rather large connectors. One is black and goes to the NSS and the gray connector goes to the transmission itself

. These 2 connectors carry all the info between TPS, TCU, NSS, speed sensor, and transmission solenoids.
Unplug each one, visually inspect for corrosion or bent pins, spray them out with electrical contact cleaner and plug them back in.
Additionally, if your Jeep is an ’87 to ’90 Renix, it’s always a good idea to reach up under the glovebox area and unplug the connector to the TCU and spray it out along with the receptacle of the TCU. While you’re there, find the fuse right in that area for the TCU. Remove it and spray out it’s receptacle and clean any corrosion from the fuse.
Read these. CRUISER'S MOSTLY RENIX TIPS
RENIX GROUND REFRESHING
OCTOBER 30, 2015 SALAD 59 COMMENTS EDITThe Renix era XJs and MJs were built with an under-engineered grounding system for the engine/transmission electronics. One problem in particular involves the multiple ground connection at the engine dipstick tube stud. A poor ground here can cause a multitude of driveabililty issues, wasted time, failed emission tests, and wasted money replacing components unnecessarily.
All the components listed below ground at the dipstick tube stud:
Distributor Sync Sensor, TCU main ground, TCU “Shift Point Logic”, Ignition Control Module, Fuel Injectors, ECU main ground (which other engine sensors ground through, including the Oxygen sensor, Knock Sensor, Cruise Control and Transmission Sync signal. All extremely important stuff.
The factory was aware of the issues with this ground point and addressed it by suggesting the following:
- Remove the nut holding the wire terminals to the stud. Verify that the stud is indeed tightened securely into the block. If the whole stud turns, you can use a 7/32″ six point socket or wrench to hold it so the nut can be removed. Worst case, cut the wires and remove the stud and nut. Install new terminal eyelets on the wires when going back together. Scrape any and all paint from the stud’s mounting surface where the wires will attach. Surfaces must be clean, shiny and free of any oil, grease, or paint.
- Inspect the wire terminals. Check to see that none of the terminals are crimped over wire insulation instead of bare wire. Be sure the crimps are tight. It wouldn’t hurt to re-crimp them just as a matter of course. Sand and polish the wire terminals until clean and shiny on both sides. Apply a liberal coating of , which is available at Lowe’s and other stores. Reinstall all the wires to the stud and tighten thhttps://i0.wp.com/cruiser54.com/wp-content/uploads/2015/10/dipstick-stud.jpge nut down securely.
Another area where the grounding system on Renix era Jeeps was lacking is the engine to chassis ground. There is a braided cable from the back of the cylinder head that also attaches to the driver’s side of the firewall. This cable is undersized for its intended use and subject to corrosion and poor connections at each end.
- Remove the cable end from the firewall using a 15mm wrench or socket. Scrape the paint off down to bare metal and clean the wire terminal. Apply . Reattach securely.
- Remove the other end of the cable from the rear of the head using a 3’4″ socket. Clean all the oil, paint and crud from the stud. Clean the wire terminal of the cable and reattach securely with a liberal coating of .
I prefer to add a #4 gauge cable from the firewall to a bolt on the rear of the intake manifold, either to a heat shield bolt or fuel rail bolt. A cable about 18″ long with a 3/8″ lug on each end works great and you can get one at any parts store already made up. NAPA has them as part number 781116.
A further improvement to the grounding system can be made using a #4 cable, about 10″ long with 3/8″ terminals at each end. Attach one end of this cable to the negative battery bolt and the other end under the closest 10mm headed bolt on the radiator support just forward of the battery. NAPA part number 781115.
For those of us with Comanches, it’s very important to remove the driver’s side tail lamp assembly to access the ground for the fuel pump. Remove the screw holding the black ground wire. Scrape the paint from the body and corrosion from the wire terminal. Add a 10 gauge wire, with an eyelet on each end, from that grounding point to a bolt on the frame. Better yet, on both Cherokees and Comanches, complete Tip 29 for the best fuel pump grounding. Be sure to scrape all mounting points to bare metal and apply also.https://i1.wp.com/cruiser54.com/wp-content/uploads/2015/10/Fuel-Pump-Ground-Comanche.jpg
If you want to UPGRADE YOUR GROUND AND BATTERY CABLES with custom made parts, contact Paul at www.jeepcables.com

Revised 02/04/2017
CRUISER'S MOSTLY RENIX TIPS
TRANSMISSION CONNECTOR REFRESHING
OCTOBER 30, 2015 SALAD 15 COMMENTS EDIT
Over near the transmission dipstick tube are 2 rather large connectors. One is black and goes to the NSS and the gray connector goes to the transmission itself


. These 2 connectors carry all the info between TPS, TCU, NSS, speed sensor, and transmission solenoids.
Unplug each one, visually inspect for corrosion or bent pins, spray them out with electrical contact cleaner and plug them back in.
Additionally, if your Jeep is an ’87 to ’90 Renix, it’s always a good idea to reach up under the glovebox area and unplug the connector to the TCU and spray it out along with the receptacle of the TCU. While you’re there, find the fuse right in that area for the TCU. Remove it and spray out it’s receptacle and clean any corrosion from the fuse.
#37
::CF Moderator::
Joined: Aug 2011
Posts: 43,971
Likes: 1,566
From: Prescott, Az
Year: 1990
Model: Cherokee (XJ)
Engine: 4.0
#38
is anything else from a 2000, such as trans or PCM ?
If what you are describing is the same as mine, and I am not sure, but think so, then imo, they are symptoms of an old transmission, and perhaps you are correct that it is a poor seal in the valve body, but unless the symptoms are worse than what you have described, I would continue on as normal, rather than delve into the guts of the trans
once you have performed all the external procedures outlined by cruiser & others
if it gets worse, you have no choice
#39
The trans is 1993. So after I check that ground and clean it up and clean all connections. Itís about 50 bucks for a valve body rebuild. If none of the suggestions work, would it be smart to just put new springs and seals into the valve body and change fluid and filter.
#40
So the problem has gotten worse. Now In the cold mornings it doesnít really move for a couple seconds. It feels like it takes a while for it to grab. Iím beginning to think this is definitely a fluid related problem Bc it worked fine all summer. Or something with a seal.
#41
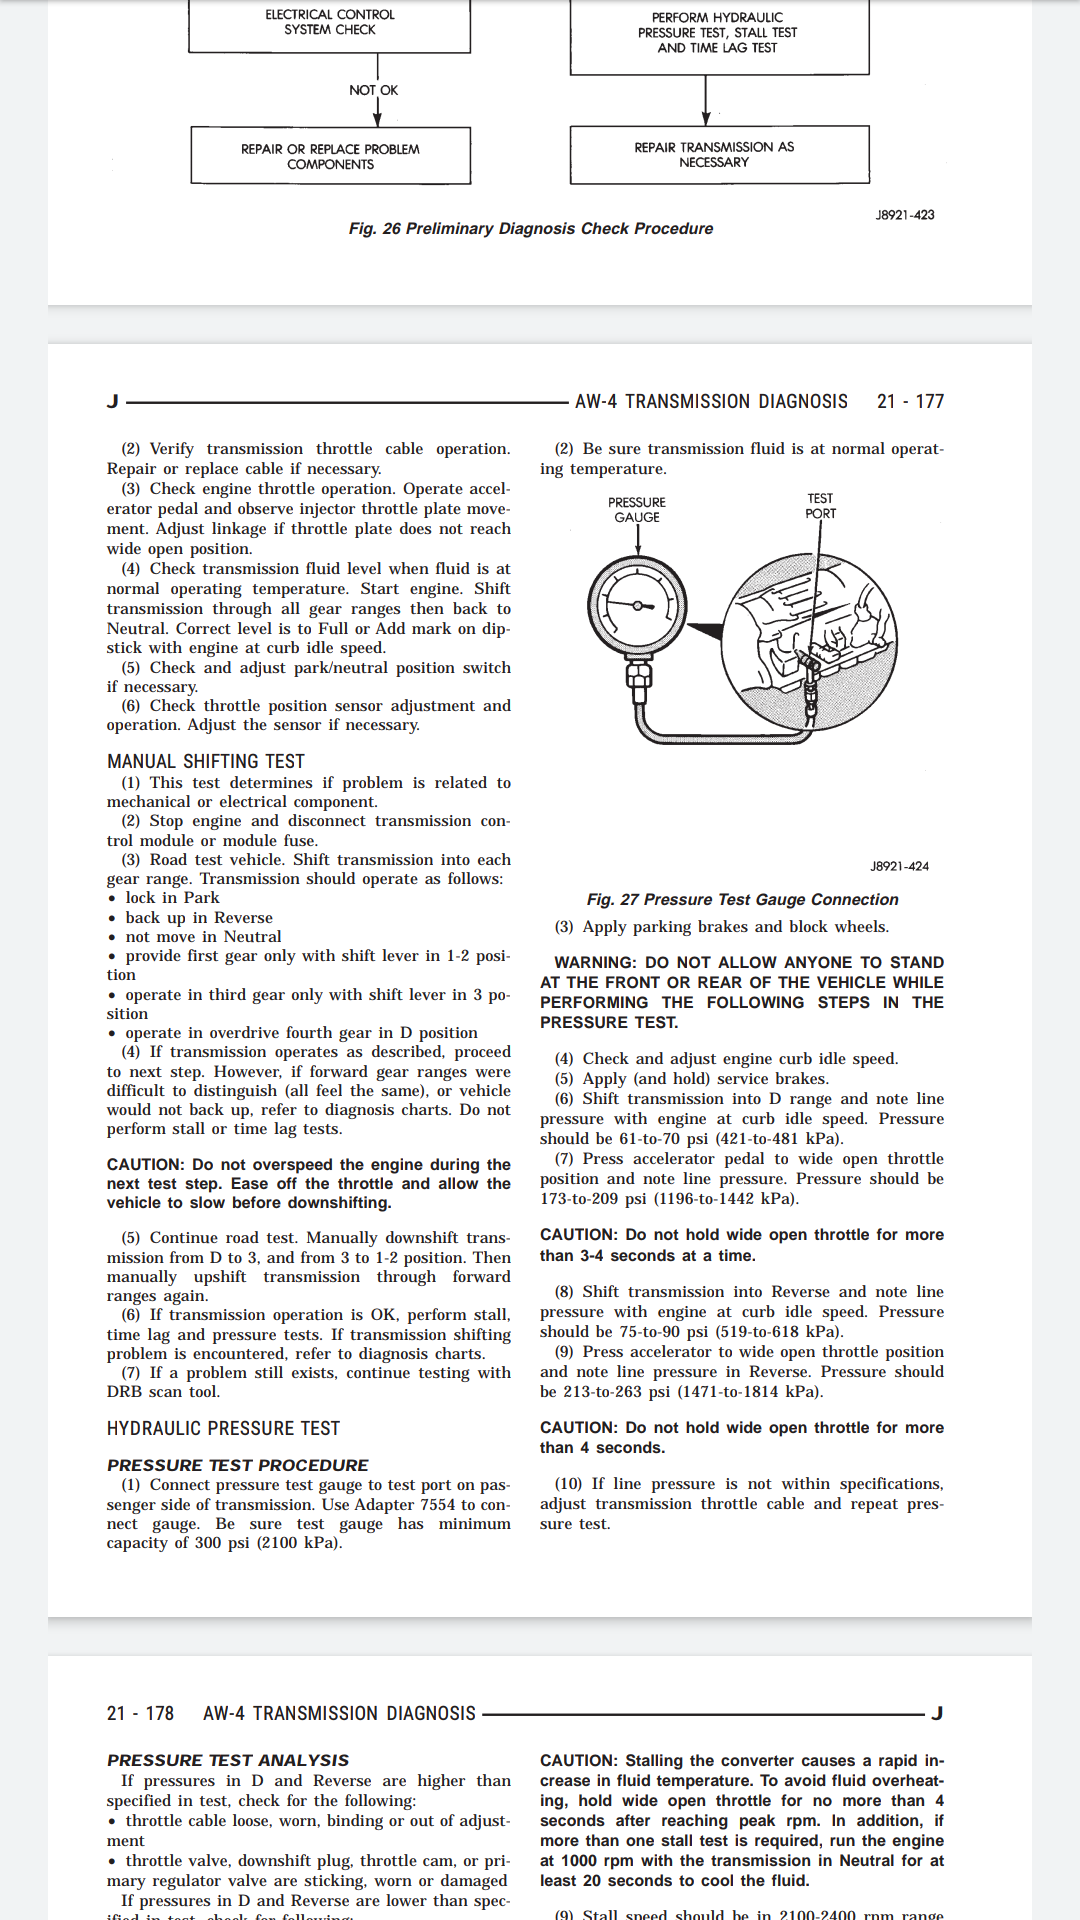
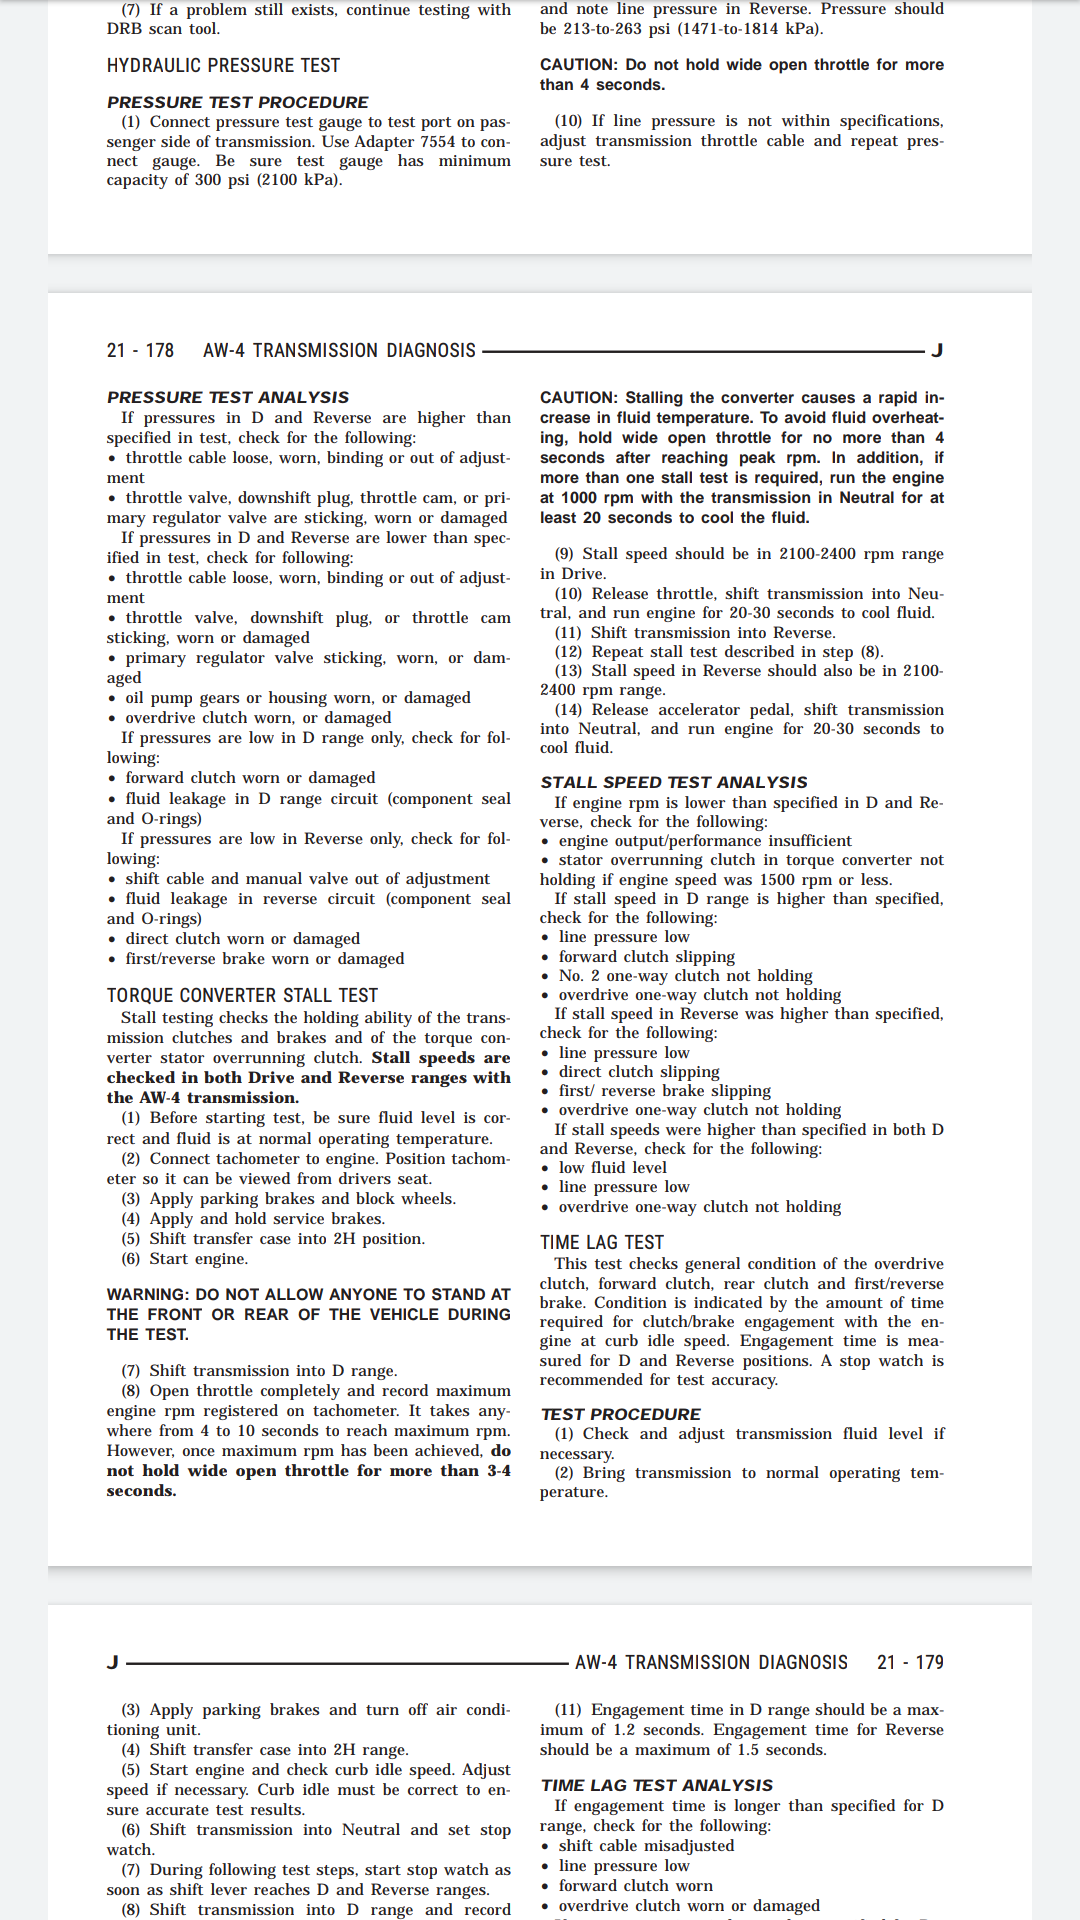
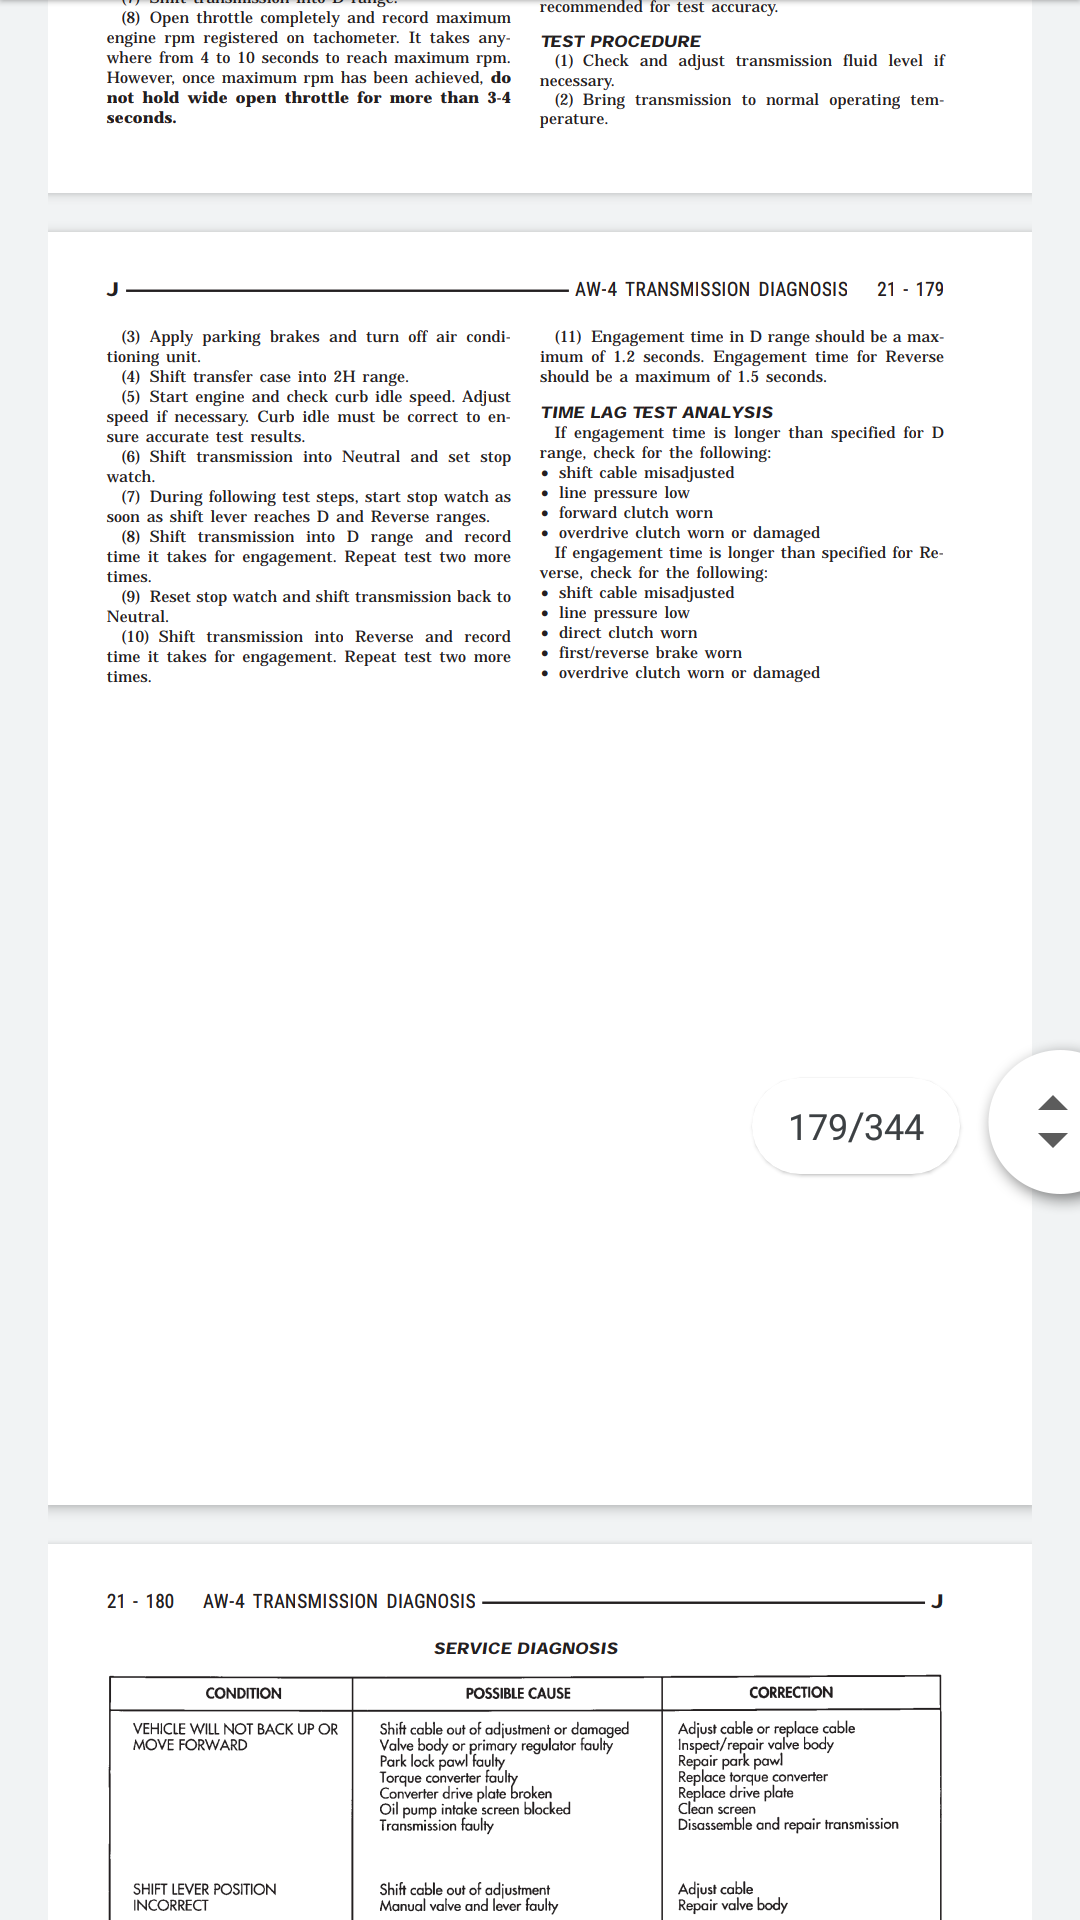
have you performed stall and pressure tests as per FSM ?
#42
So I took apart the valve body today and everything inside looks really good and very clean. The fluid that came out was very pink still and looked good. The accumulator seals and spring all check out. Looks like there already was a shift kit/valve body rebuild. All of the solenoids appear to be original. And my 1-2 solenoid is open all the time. I believe that it is my 1-2 solenoid causing the late shift on startup and just the torque converter draining that is causing the other problem. All the clutch plates and everything look almost new from underneath. Looks almost as if the trans was rebuilt.
#43
#44
Its just these are the standard test to perform on any auto trans, prior to diving in
both are fully described in the FSM, which I presume you have free downloaded
The stall test is quick and easy, and its purpose is to find any fault with your torque convertor, the pressure test will show if your pump is bad, need a gauge
It sounds like your issue might be the solenoid...I would still do the stall test


