88 cherokee
#181
Thread Starter
Senior Member
Joined: Oct 2010
Posts: 562
Likes: 0
From: Pagosa Springs, Colorado
Year: 88-ish
Model: Cherokee
Engine: 4.0 I6
Here are some of the pictures of the mostly finished project. Let me know if there is anything I want to see and I can go snap some pictures of it.
Rear Floor welded in and painted. As you can see its only a two seater now.

Wheel well in the back

Fuel pump electrics

Whats left of the tunnel
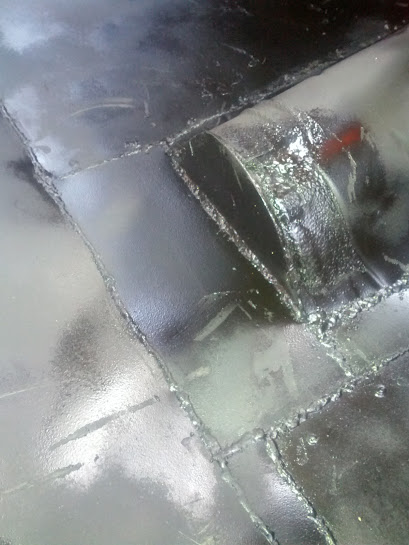
This is where the cage ties into the b pillar.


Rear Floor welded in and painted. As you can see its only a two seater now.

Wheel well in the back

Fuel pump electrics

Whats left of the tunnel

This is where the cage ties into the b pillar.


#183
Thread Starter
Senior Member
Joined: Oct 2010
Posts: 562
Likes: 0
From: Pagosa Springs, Colorado
Year: 88-ish
Model: Cherokee
Engine: 4.0 I6
Well i'm at the point where I'm ready to start cutting again. This time, the rear end. Bacially just chopping the rear off and setting it up with a removable window so I can take it out in the summer and pop it back in when the weather turns cold. I started with new hatch first so i can get that welded in and ready to go and then when it finally warms up here all I have to do it cut the top off and make new roof rack mounts for the back of the cage.
97 + hatch (only ones that are metal)


It will mount right along the C pillar X

Stencils for the wheel wells.

Transferred to the hatch.


First test fit

Cleaned it up a little and slid it in.

Welded in with and test fitting the air tank to see how it will look.

This is all the progress that I have so far. I'm going to try and work on it some more this weekend if it doesn't snow. Start boxing in the C pillar and the top of the cage up to the roof. Then its just a matter of figuring out what kind of glass/plexi to put it.
97 + hatch (only ones that are metal)


It will mount right along the C pillar X

Stencils for the wheel wells.

Transferred to the hatch.


First test fit

Cleaned it up a little and slid it in.

Welded in with and test fitting the air tank to see how it will look.

This is all the progress that I have so far. I'm going to try and work on it some more this weekend if it doesn't snow. Start boxing in the C pillar and the top of the cage up to the roof. Then its just a matter of figuring out what kind of glass/plexi to put it.
#185
Thread Starter
Senior Member
Joined: Oct 2010
Posts: 562
Likes: 0
From: Pagosa Springs, Colorado
Year: 88-ish
Model: Cherokee
Engine: 4.0 I6
Slightly more work before it snowed.
Angle Iron across the top to cap it and stiffen everything.


Here is that wider view that someone asked for.

And capped the wiper hole tonight as well

Angle Iron across the top to cap it and stiffen everything.


Here is that wider view that someone asked for.

And capped the wiper hole tonight as well

#187
Thread Starter
Senior Member
Joined: Oct 2010
Posts: 562
Likes: 0
From: Pagosa Springs, Colorado
Year: 88-ish
Model: Cherokee
Engine: 4.0 I6
I forgot to post this when I got it set up so here are some of the pictures that I have sitting around.
I was wheeling about a month ago and had a little flop and needed to pull my jeep back onto its wheels. In the process of doing this we ripped my front bumper off so I decided that its about time that I get a grown up bumper. The next weekend I was walking around the junk yard just looking for random parts that I would use and happened to run into a YJ that still had its rear bumper on it. Took some quick visual measurements and decided that it was worth a try to grab and see if I could fit it on my XJ. Walked out of the junk yard paying $23 dollars for it.
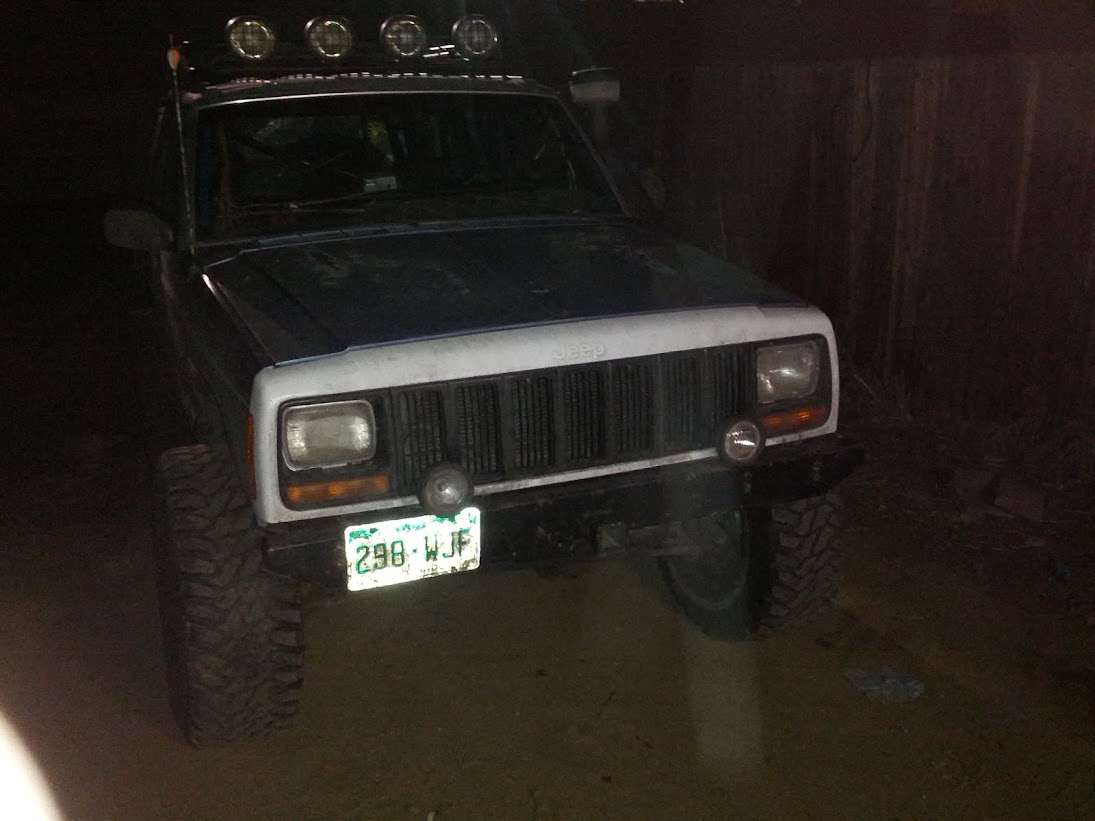
What it looked like when I got it home.

Ripped sheet metal bumper.

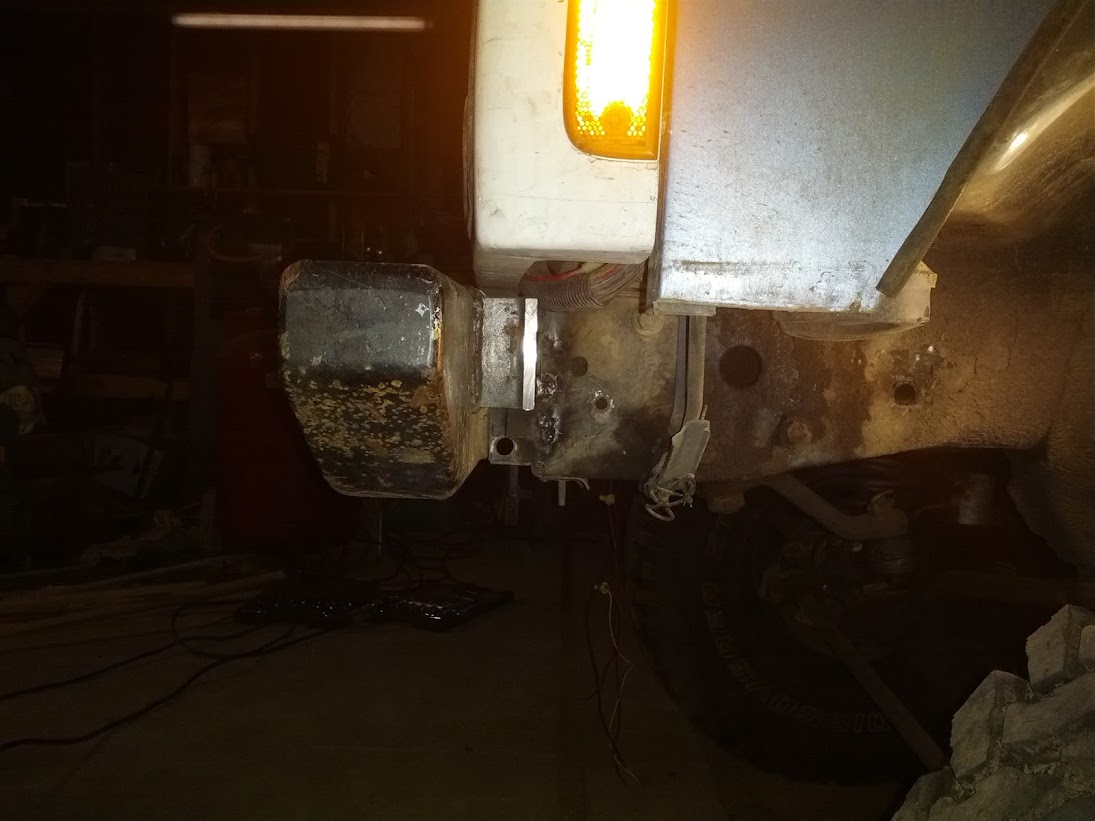
Another view of the YJ bumper. As you can see on the top, I cut the brackets flush with the top of the bumper.

I also had to cut the angle mounting location off from where it used to mount on the wrangler. I forgot to take before pictures for this so this is all I have to show.

A closer look at the cut bracket.

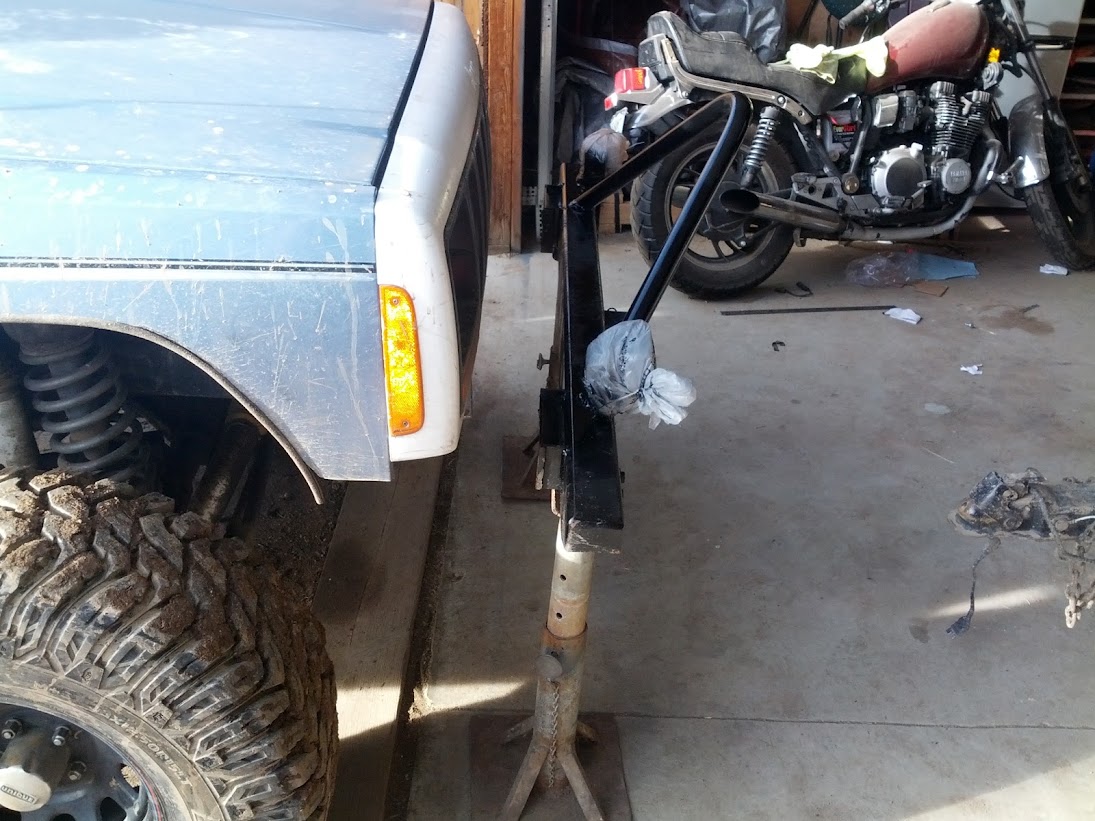
Sitting on stands so i can see how close its going to be and to make sure everything will line up right.

Side view again.

Pushed into place before I tacked it in to make sure everything would look/fit alright.

After I tacked it in place

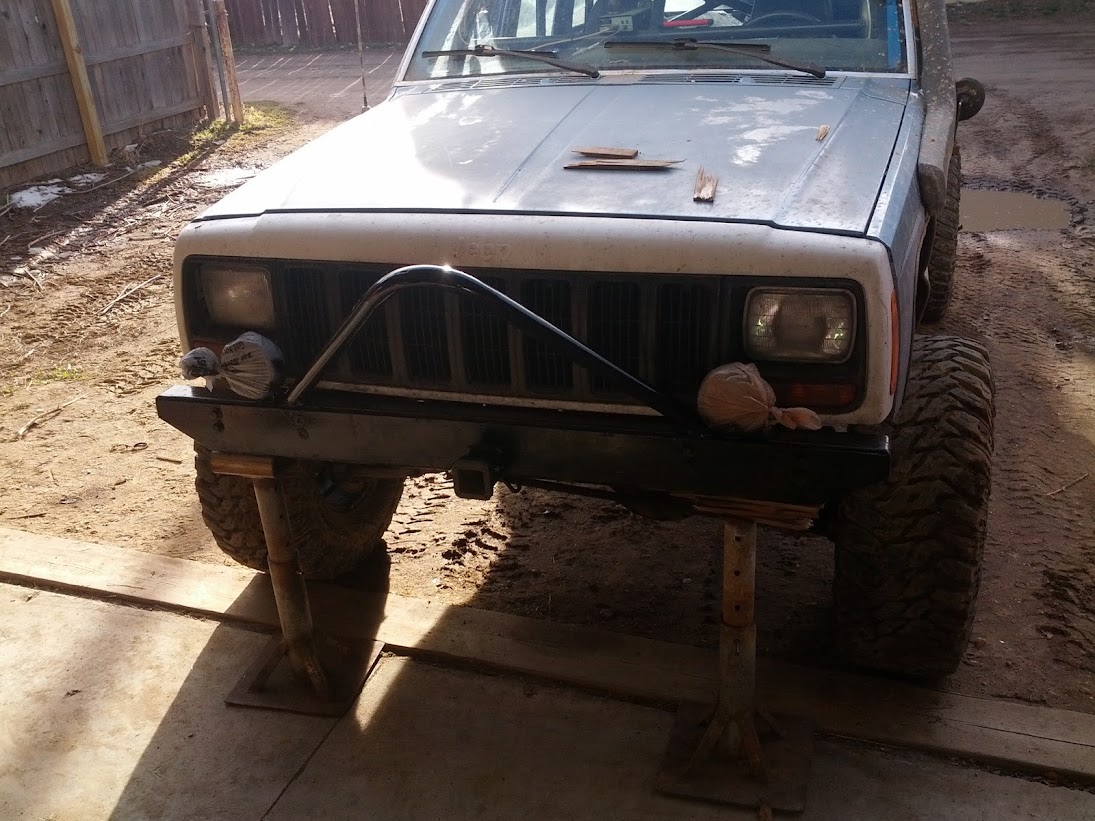
Temp tack welds to hold it up. It will get cut back off so I can paint and add a stinger to it. I'm supposed to get the stinger back from my buddy today and then i'll be read to go with it.
I was wheeling about a month ago and had a little flop and needed to pull my jeep back onto its wheels. In the process of doing this we ripped my front bumper off so I decided that its about time that I get a grown up bumper. The next weekend I was walking around the junk yard just looking for random parts that I would use and happened to run into a YJ that still had its rear bumper on it. Took some quick visual measurements and decided that it was worth a try to grab and see if I could fit it on my XJ. Walked out of the junk yard paying $23 dollars for it.
What it looked like when I got it home.

Ripped sheet metal bumper.

Another view of the YJ bumper. As you can see on the top, I cut the brackets flush with the top of the bumper.

I also had to cut the angle mounting location off from where it used to mount on the wrangler. I forgot to take before pictures for this so this is all I have to show.

A closer look at the cut bracket.

Sitting on stands so i can see how close its going to be and to make sure everything will line up right.

Side view again.

Pushed into place before I tacked it in to make sure everything would look/fit alright.

After I tacked it in place

Temp tack welds to hold it up. It will get cut back off so I can paint and add a stinger to it. I'm supposed to get the stinger back from my buddy today and then i'll be read to go with it.


#188
Thread Starter
Senior Member
Joined: Oct 2010
Posts: 562
Likes: 0
From: Pagosa Springs, Colorado
Year: 88-ish
Model: Cherokee
Engine: 4.0 I6
Getting paint.


Getting ready to mount

Mounted
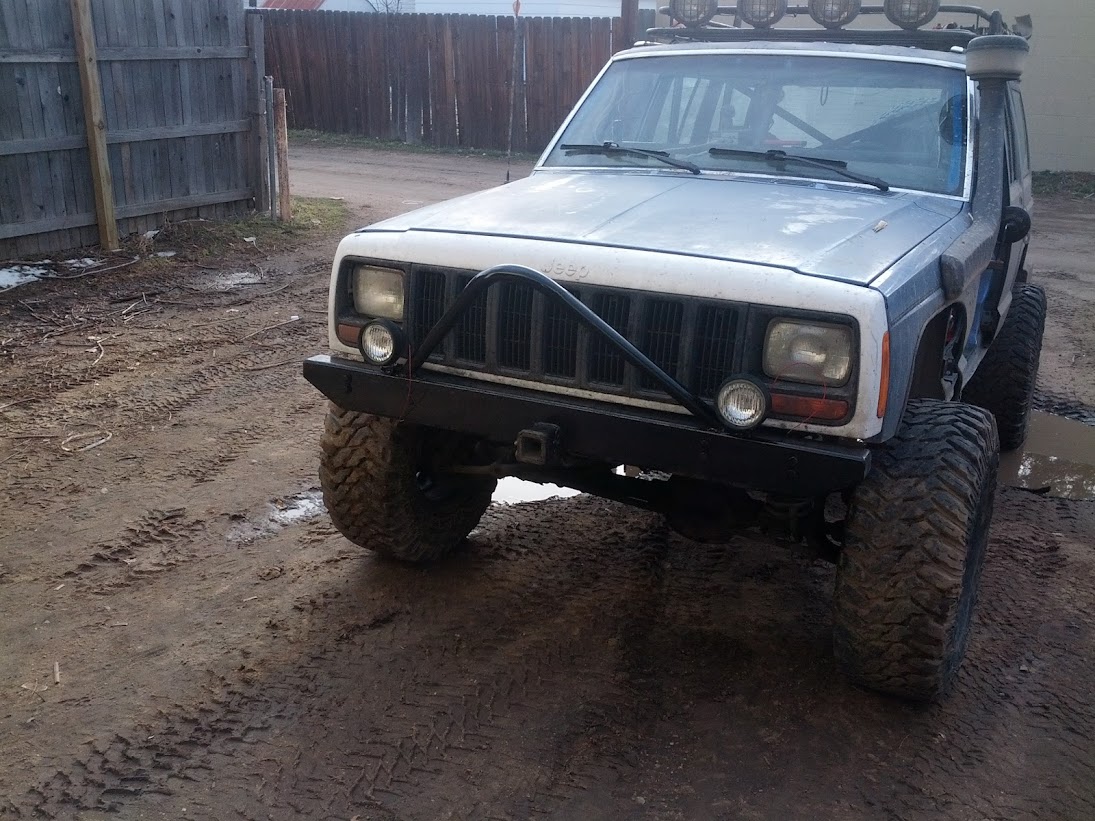

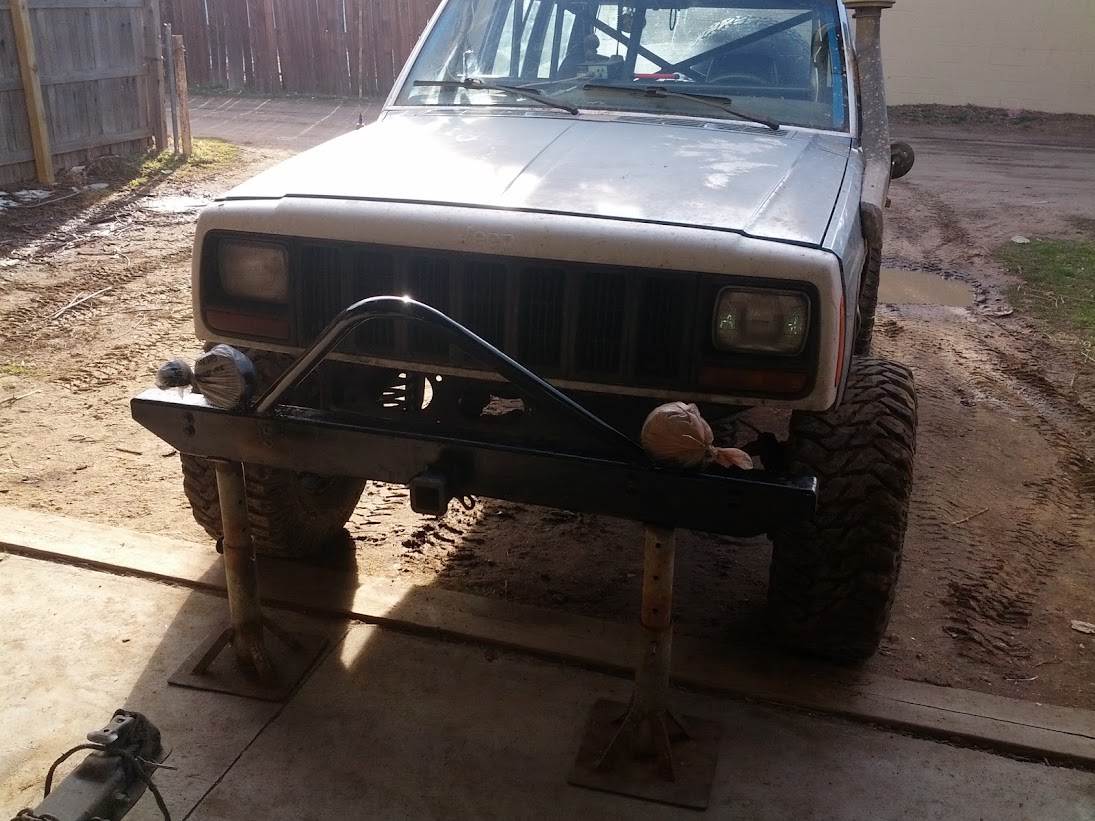
Welded in. There will be plates added on top of this that will follow the unibody all the way back and will be welded and bolted just for extra strength but the fact of the matter is, this IS part of the front unibody now. I welded all the way around the undibody on both side and weld it everywhere it touches. This picture is in the middle of the welding process. Also, Flame away, I know I'm going to hear it from some people on here but I trust my welds and know that it tied in nice and strong.


Getting ready to mount


Mounted


Welded in. There will be plates added on top of this that will follow the unibody all the way back and will be welded and bolted just for extra strength but the fact of the matter is, this IS part of the front unibody now. I welded all the way around the undibody on both side and weld it everywhere it touches. This picture is in the middle of the welding process. Also, Flame away, I know I'm going to hear it from some people on here but I trust my welds and know that it tied in nice and strong.

#189
Thread Starter
Senior Member
Joined: Oct 2010
Posts: 562
Likes: 0
From: Pagosa Springs, Colorado
Year: 88-ish
Model: Cherokee
Engine: 4.0 I6
Ok, things might get a little picture heavy here. Top is off and everything is mostly capped off and ready to go. I still have to get my removable window figured out but i'm getting closer.
Hatch off

Rack off

Ready to start

Did my best to mark a straight line across the top

Hit it with the disc grinder
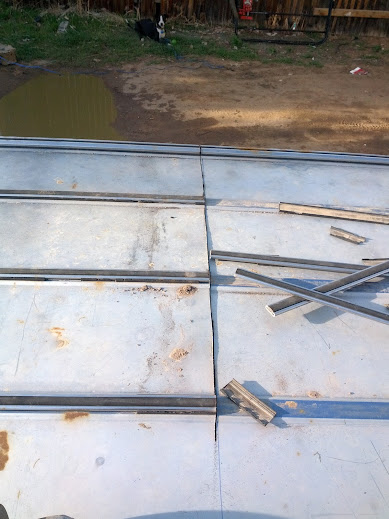
Its starting to fall off. And I even managed to save both the back windows

I ran out of discs and needed to finish before dark so the cutting torch came out.

still smoking a bit

Bent the rear a little with my high lift

Left me with this

Rear end.
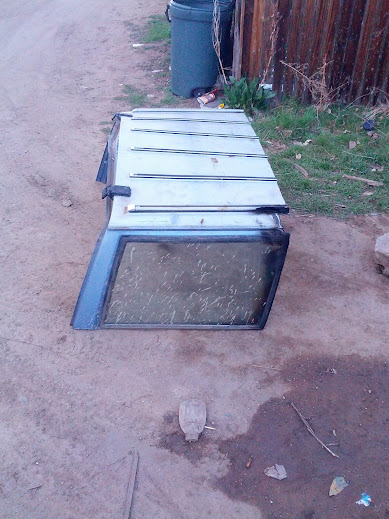
Now time to start the actual hard work

...

The back

I did screw up and cut the wire harness that runs through the roof to the passenger tail lights so I built a new harness to wire in. I'll wire it better down the road but this works for now

Hatch off

Rack off

Ready to start

Did my best to mark a straight line across the top

Hit it with the disc grinder

Its starting to fall off. And I even managed to save both the back windows

I ran out of discs and needed to finish before dark so the cutting torch came out.

still smoking a bit

Bent the rear a little with my high lift

Left me with this

Rear end.

Now time to start the actual hard work

...

The back

I did screw up and cut the wire harness that runs through the roof to the passenger tail lights so I built a new harness to wire in. I'll wire it better down the road but this works for now

#190
Thread Starter
Senior Member
Joined: Oct 2010
Posts: 562
Likes: 0
From: Pagosa Springs, Colorado
Year: 88-ish
Model: Cherokee
Engine: 4.0 I6
Day two -
Well there a few parts of this that I didnt get good pictures for. I got caught up in welding and cutting and forgot to snap some pics along the way. You can piece it together easy enough.
I welded in a piece of 1x1 angle across the roof to flatten it out and to give me something solid to work off of to get the top tied into the cage.


Then I took another piece of the angle and welded that right below so that it would match up with the top tube on the cage.

Beads

Then that left me with this.

This did add a slight bubble to the roof but honestly, once I got everything together and got the rack back on you cant really notice it. And its stiff enough that it doesnt rattle or anything either.

Next up is the sides

More angle

Tack tack tack

Same game plan for the sides. Since this has a slight curve to it I had to take some body hammers to it but it worked out pretty well and doesn't look terrible


Welding it all in.

I mainly just focused on that one side for the pictures. Its the same on the other side. Here it is with all of that welded in.

Now time for the corner caps. Used the ol cardboard template that i'm so fond of again for this one.

Which then gave me this.

Threw some primer on it til I can get around to painting it right.

I haven't capped the ends above the tail lights yet. After welding for a day straight to get it to this point I just didn't have it in my to work on it anymore. I'll probably cap that part either this afternoon or tomorrow sometime. All of the angle iron that I used for this came from a small bed frame that was given to me. I was walking around the flea market last month and one of the vendors was walking to the trash with the frame getting ready to trash it so I told him I would take it isn't. I still have enough left over after all of this to build another battery box to mount in the back. Basically, not counting welding supplies, I have about $15 into this project. So all you super budget guys should enjoy it as well. Really just takes some time to get everything boxed up and welded back together.


Well there a few parts of this that I didnt get good pictures for. I got caught up in welding and cutting and forgot to snap some pics along the way. You can piece it together easy enough.
I welded in a piece of 1x1 angle across the roof to flatten it out and to give me something solid to work off of to get the top tied into the cage.


Then I took another piece of the angle and welded that right below so that it would match up with the top tube on the cage.

Beads

Then that left me with this.

This did add a slight bubble to the roof but honestly, once I got everything together and got the rack back on you cant really notice it. And its stiff enough that it doesnt rattle or anything either.

Next up is the sides

More angle

Tack tack tack

Same game plan for the sides. Since this has a slight curve to it I had to take some body hammers to it but it worked out pretty well and doesn't look terrible


Welding it all in.

I mainly just focused on that one side for the pictures. Its the same on the other side. Here it is with all of that welded in.

Now time for the corner caps. Used the ol cardboard template that i'm so fond of again for this one.

Which then gave me this.

Threw some primer on it til I can get around to painting it right.

I haven't capped the ends above the tail lights yet. After welding for a day straight to get it to this point I just didn't have it in my to work on it anymore. I'll probably cap that part either this afternoon or tomorrow sometime. All of the angle iron that I used for this came from a small bed frame that was given to me. I was walking around the flea market last month and one of the vendors was walking to the trash with the frame getting ready to trash it so I told him I would take it isn't. I still have enough left over after all of this to build another battery box to mount in the back. Basically, not counting welding supplies, I have about $15 into this project. So all you super budget guys should enjoy it as well. Really just takes some time to get everything boxed up and welded back together.


#191
Thread Starter
Senior Member
Joined: Oct 2010
Posts: 562
Likes: 0
From: Pagosa Springs, Colorado
Year: 88-ish
Model: Cherokee
Engine: 4.0 I6
Backup light brackets added. Didn't get much done today cause I was helping a buddy with his sway bars and a few odds and ends on his jeep.


#192
Thread Starter
Senior Member
Joined: Oct 2010
Posts: 562
Likes: 0
From: Pagosa Springs, Colorado
Year: 88-ish
Model: Cherokee
Engine: 4.0 I6
Got my tank installed and a tarp thrown on it before the snow hit again.
Air!

Pre snow cover

Post snow. It really wasn't too bad driving with it covered like this today either.

Air!

Pre snow cover

Post snow. It really wasn't too bad driving with it covered like this today either.

#193
Thread Starter
Senior Member
Joined: Oct 2010
Posts: 562
Likes: 0
From: Pagosa Springs, Colorado
Year: 88-ish
Model: Cherokee
Engine: 4.0 I6
Capped off the ends of the body last night. I didn't want to go straight across and just cap everything so I cut the end caps at a 35* angle and then capped them.
Started with this
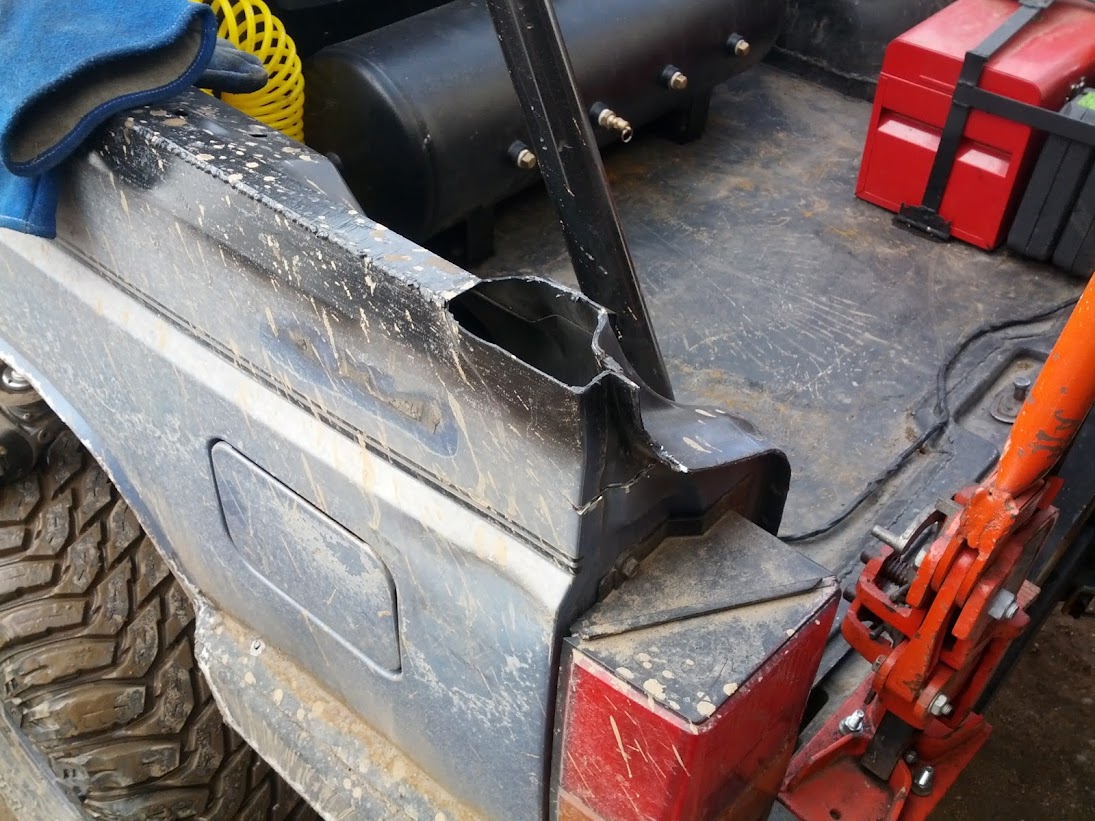
Then cut it down like so

Did the same on the other side

Template

Other side again

18 gauge sheet

Other side

Now it looks like this

And a little paint to match

I need to start working on the hatch part again and start boxing the C pillars so I can get it ready to start fabing the window section. I'm getting new doors and box for rocker replacement so I'll probably focus on that for the next week or so before I get back to working on the chop again. And the GF told me she would help me paint so I need to start on that soon while I still have willing help.
Started with this

Then cut it down like so

Did the same on the other side

Template

Other side again

18 gauge sheet

Other side

Now it looks like this

And a little paint to match

I need to start working on the hatch part again and start boxing the C pillars so I can get it ready to start fabing the window section. I'm getting new doors and box for rocker replacement so I'll probably focus on that for the next week or so before I get back to working on the chop again. And the GF told me she would help me paint so I need to start on that soon while I still have willing help.
#194
Thread Starter
Senior Member
Joined: Oct 2010
Posts: 562
Likes: 0
From: Pagosa Springs, Colorado
Year: 88-ish
Model: Cherokee
Engine: 4.0 I6
You know the drill already. This is what I did this weekend. This is a super easy build. There is really no reason not to do this if you know how to weld and need some better rocker protection. Took maybe 6 hours from getting the metal at my house to having them welded in. Here are some pictures.
Materials.

The reason I decided to do this in the first place. Landed hard on a rock last month and really did a number on my rocker.

First thing I did was cut a line 3 inches down on all 4 corners of the the metal.


Then chop off the ends like so...
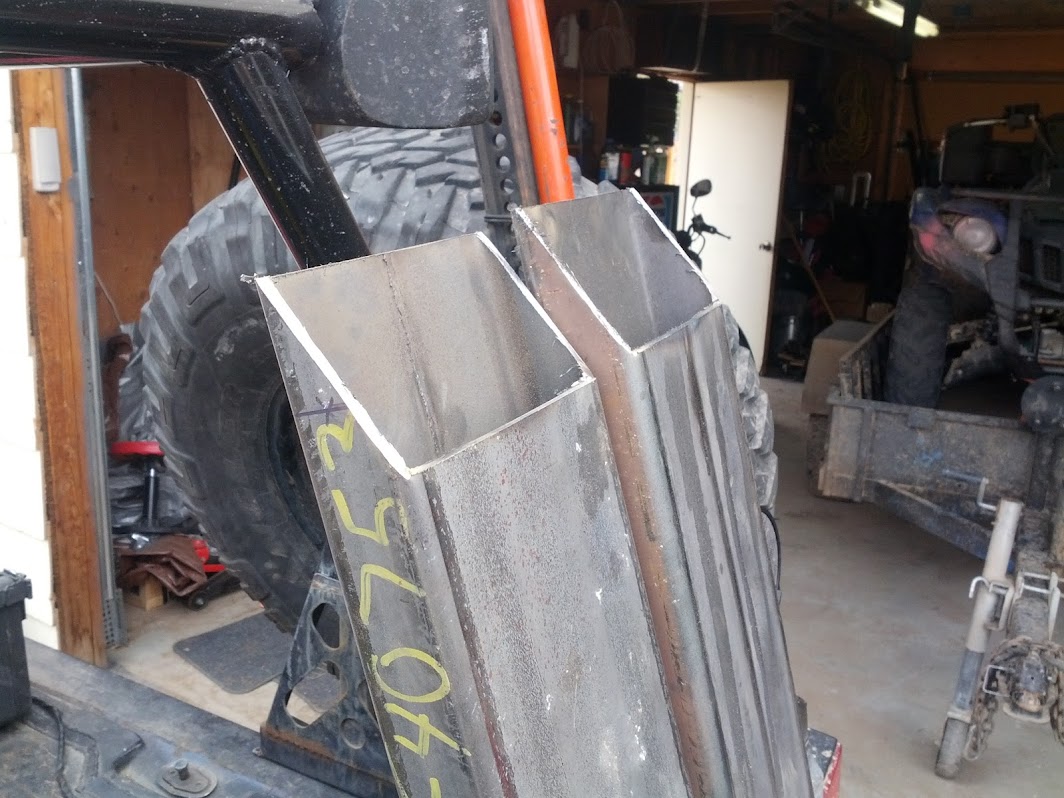
Then take some plate to close off the ends.

Welds

That leaves you with the sliders

Overall length on the top side if 64". I made my cut 3 inches down for the angle on the slider on each corner so the bottom side total length is 58".
Then take your die grinder and cut the rocker out. This is how bad my rockers looked once I got them out.

Push into place. I had to use a sledge hammer on the sides to get it to slide in under the pinch seam like it should.


Here is one side welded along the seam all the way across. Not hard but you do have to take your time and make sure you get the thick stuff good and warm before trying to weld it to the thin body.

Easier if you can take your doors off too. Some of the seam might be tricky to get to.
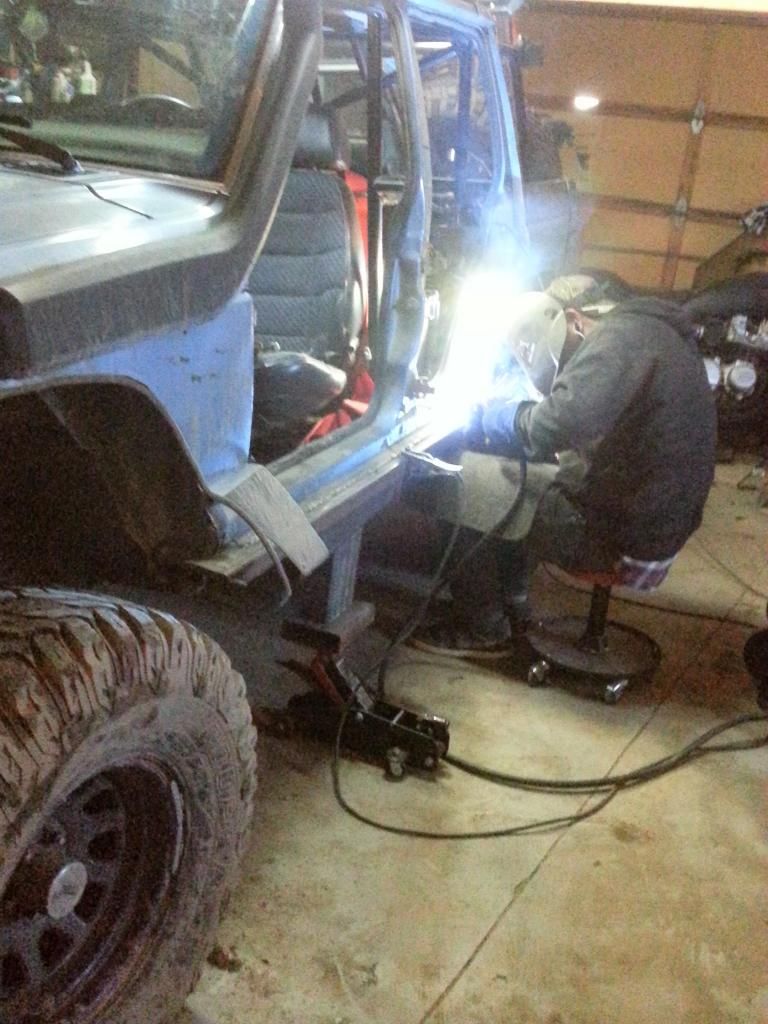
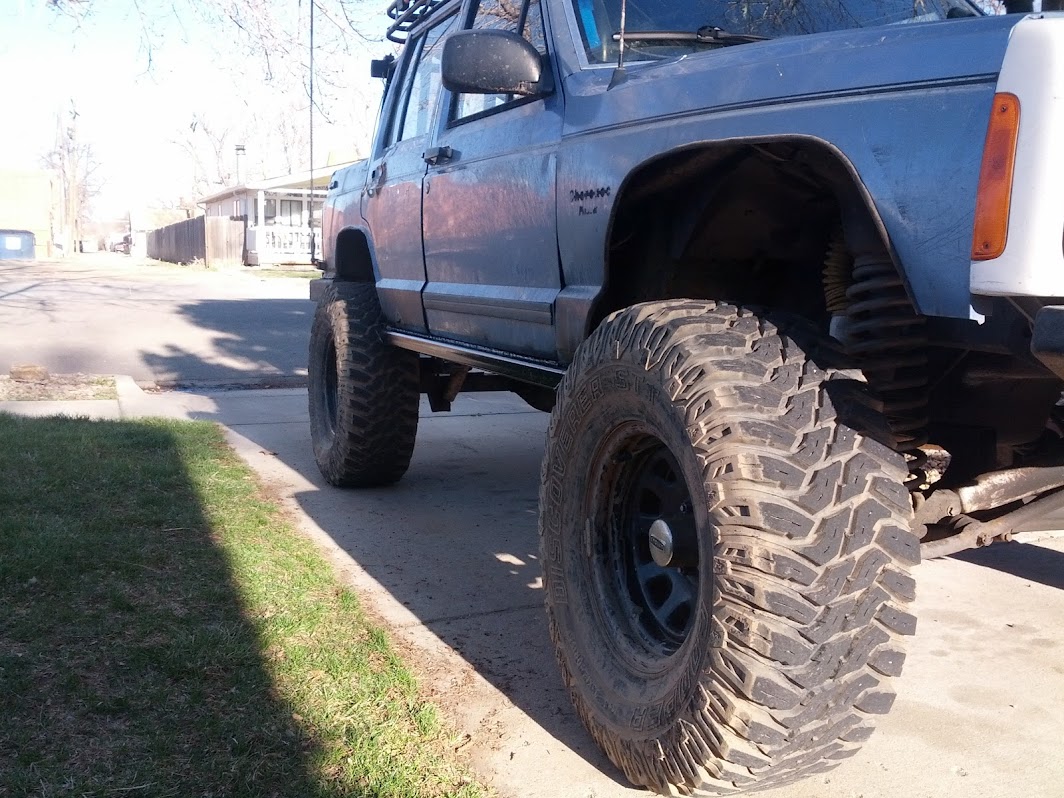
And here are a couple finished pictures. Hit them with $.97 black spray paint from home depot and called it good. I figure once they get scratched up I can spend another $1 and make them look as good as new again. I still have to tie them into my roll cage mounts but my GF was tired of being in the garage so I will get that part added later this week and post a picture or of that once its done.


Materials.

The reason I decided to do this in the first place. Landed hard on a rock last month and really did a number on my rocker.

First thing I did was cut a line 3 inches down on all 4 corners of the the metal.


Then chop off the ends like so...

Then take some plate to close off the ends.

Welds

That leaves you with the sliders

Overall length on the top side if 64". I made my cut 3 inches down for the angle on the slider on each corner so the bottom side total length is 58".
Then take your die grinder and cut the rocker out. This is how bad my rockers looked once I got them out.

Push into place. I had to use a sledge hammer on the sides to get it to slide in under the pinch seam like it should.


Here is one side welded along the seam all the way across. Not hard but you do have to take your time and make sure you get the thick stuff good and warm before trying to weld it to the thin body.

Easier if you can take your doors off too. Some of the seam might be tricky to get to.

And here are a couple finished pictures. Hit them with $.97 black spray paint from home depot and called it good. I figure once they get scratched up I can spend another $1 and make them look as good as new again. I still have to tie them into my roll cage mounts but my GF was tired of being in the garage so I will get that part added later this week and post a picture or of that once its done.


#195
Thread Starter
Senior Member
Joined: Oct 2010
Posts: 562
Likes: 0
From: Pagosa Springs, Colorado
Year: 88-ish
Model: Cherokee
Engine: 4.0 I6
I made a makeshift jig last night for my new project. DIY shackle boxes. And I welded a tab wrong so I'm making two sets now. I'll sell the second set to cover my costs of the slider and shackle boxes.


I'll post some proper pictures once I start getting closer to having something to show.


I'll post some proper pictures once I start getting closer to having something to show.


