The 88 Pirate XJ - by: HawK_Racing
#16
Thread Starter
Member
Joined: Mar 2011
Posts: 185
Likes: 0
From: Southern Indiana
Year: 1988
Model: Cherokee
Engine: I6 4.0L
#17
Thread Starter
Member
Joined: Mar 2011
Posts: 185
Likes: 0
From: Southern Indiana
Year: 1988
Model: Cherokee
Engine: I6 4.0L
UPDATE:
I really should stay off craigslist. I just bought a set of Bushwacker cut out fender flares that I will be putting on hopefully this weekend (sadly pushing back the roof rack project, but oh well). Thanks to everyone thats read this I apreciate it all and I absolutly love this Jeep. Yesterday some homeless guy yelled from across the road "Nice Jeep". I just love it. haha even some Wrangler guys wave at me.
Pics of the Bushwacker clean up and install soon to come
#18
CF Veteran
Joined: Apr 2011
Posts: 1,291
Likes: 0
From: ellington, missouri
Year: 1990
Model: Cherokee
Engine: 4.0l inline 6cyl
personally i'd go with "PlasmaGlo" or "StreetGlo". at the moment i have some blue l.e.ds' from walmart inside and some red neon lights for blinkers. the blues' are wired to a cigarette lighter thing, i had to cut and wire em cuz mine doesn't work. so far no probs and there brighter than the reds.
#19
Thread Starter
Member
Joined: Mar 2011
Posts: 185
Likes: 0
From: Southern Indiana
Year: 1988
Model: Cherokee
Engine: I6 4.0L
Thanks I'll check these out
Well the Bushwackers are looking good. I paid $75 for the set with 17/36 screws for it. Tomorrow I'm gonna call Bushwacker and see if I can buy the screw set to complete it. Right now I've been cleaning the fender flares and filling in holes and cracks with JB Weld.
Here's how it looked when I brought the kit home ( It's pretty dirty) ...
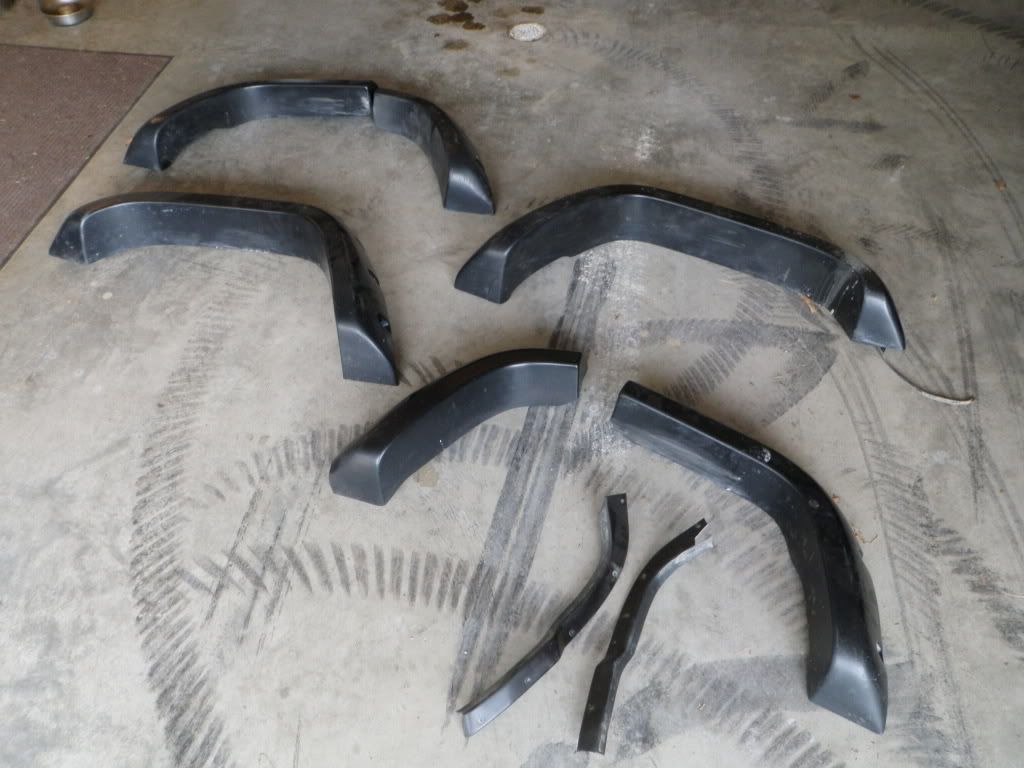
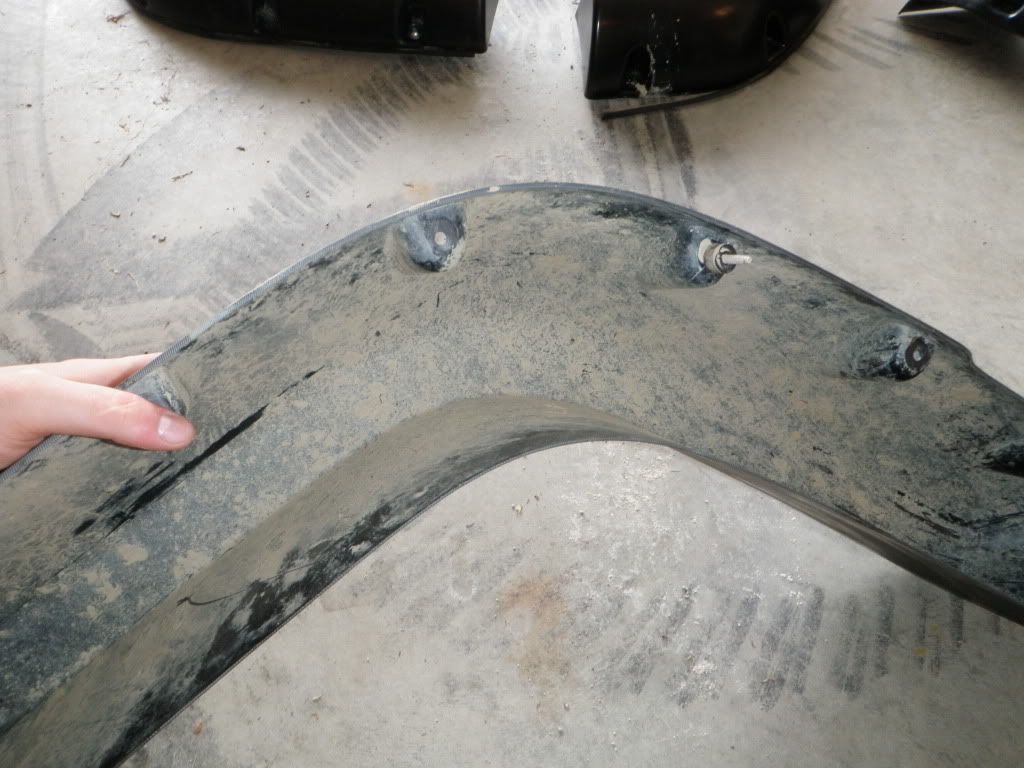
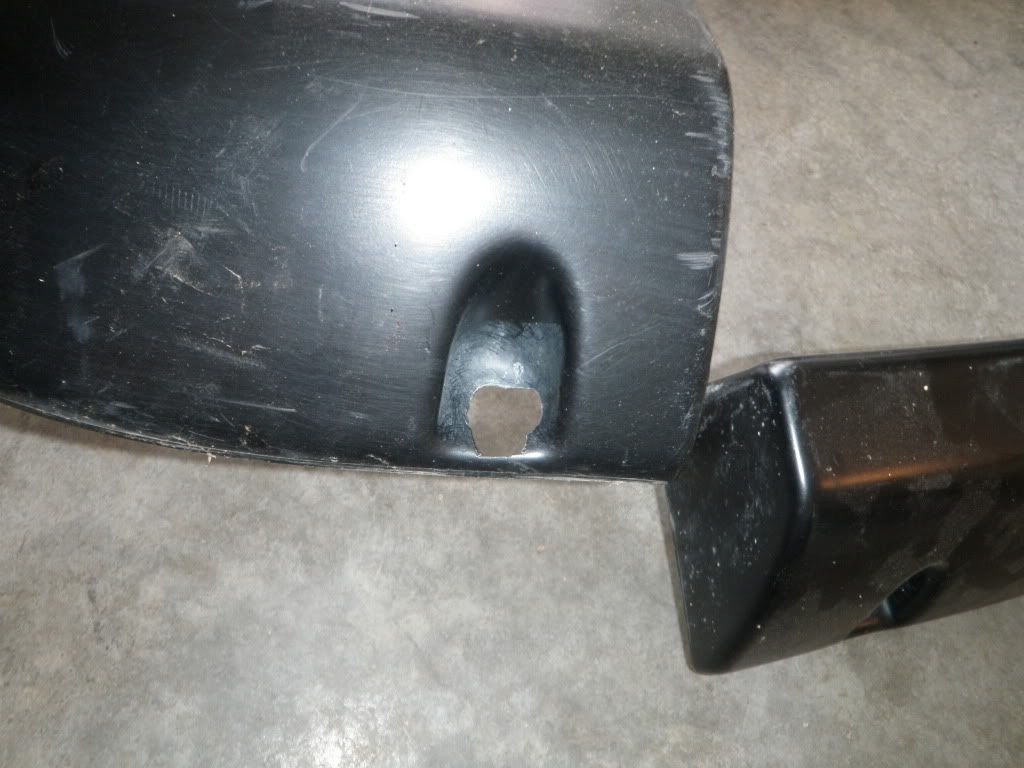
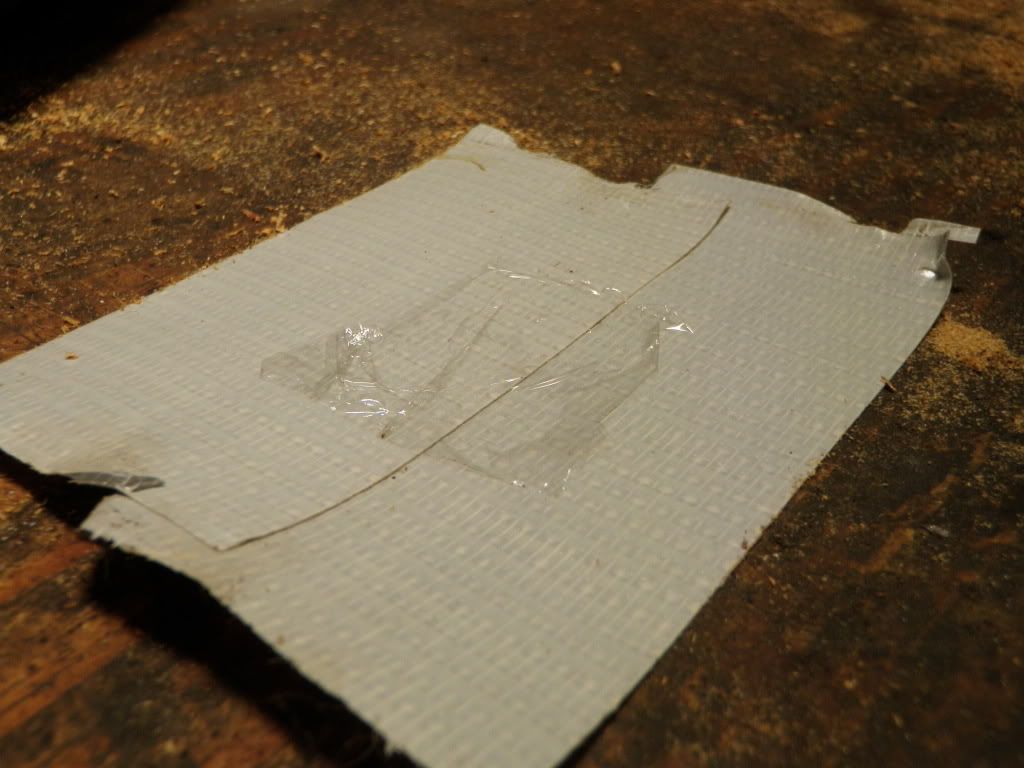
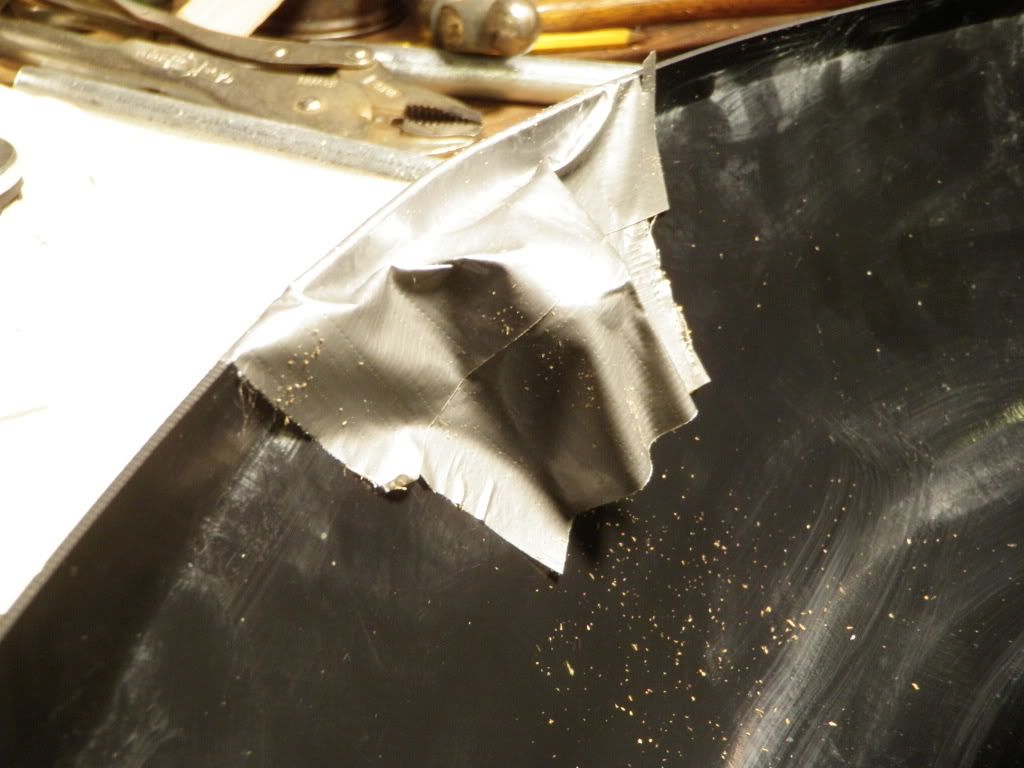
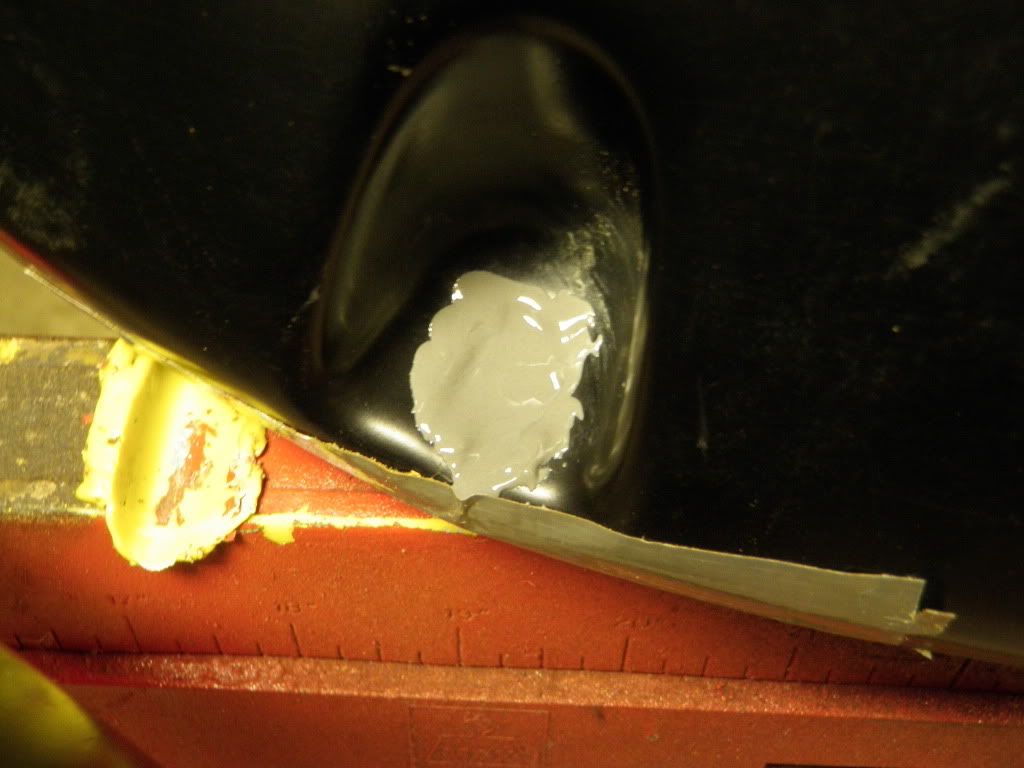
So after a little wash they started looking alot better. Last night I started JB Welding the holes and cracks in. So this was a shot in the dark but I thought it may work and help fill in holes, I used duck tape and Saran wrap to use as a "floor" to lay the JB Weld on. This is what the floor looked like...
One of the few holes from the last guy tearing them off..

Tape under the hole ready for the JB Weld...
JB Weld settling in...
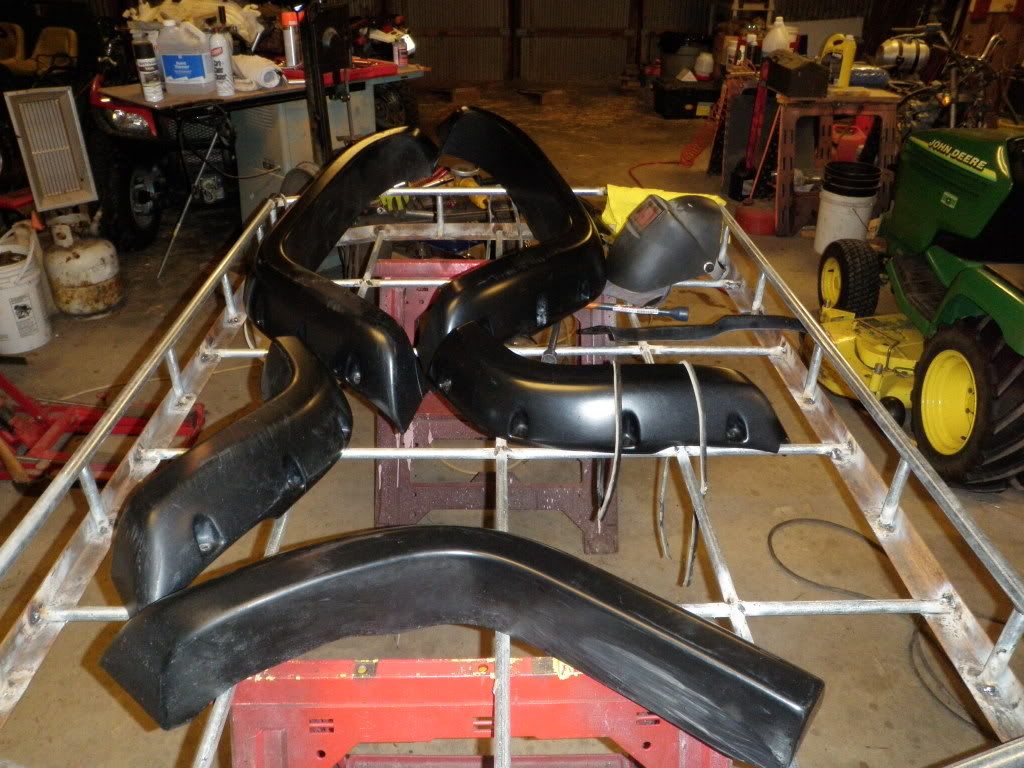
Final pic of how I left them last night. My roof rack works as a pretty good work bench when it isn't be worked on...
This morning I went outside to check my work from last night. I peeled off the Saran wrap and duck tape to find a beautiful clean filled in hole. I would HIGHLY recommend doing this again for anyone needing a strong filler for small holes. This evening I plan on drilling holes through the JB Weld and hopefully working more on the roof rack. JCROffroad.com rack mounts are on their way. I believe the $44 spent on them was well worth it.
Here's how one hole looked this morning, The rest looked great too...
As always more pics soon to follow. I just gotta keep building
Well the Bushwackers are looking good. I paid $75 for the set with 17/36 screws for it. Tomorrow I'm gonna call Bushwacker and see if I can buy the screw set to complete it. Right now I've been cleaning the fender flares and filling in holes and cracks with JB Weld.
Here's how it looked when I brought the kit home ( It's pretty dirty) ...


So after a little wash they started looking alot better. Last night I started JB Welding the holes and cracks in. So this was a shot in the dark but I thought it may work and help fill in holes, I used duck tape and Saran wrap to use as a "floor" to lay the JB Weld on. This is what the floor looked like...

One of the few holes from the last guy tearing them off..

Tape under the hole ready for the JB Weld...

JB Weld settling in...

Final pic of how I left them last night. My roof rack works as a pretty good work bench when it isn't be worked on...

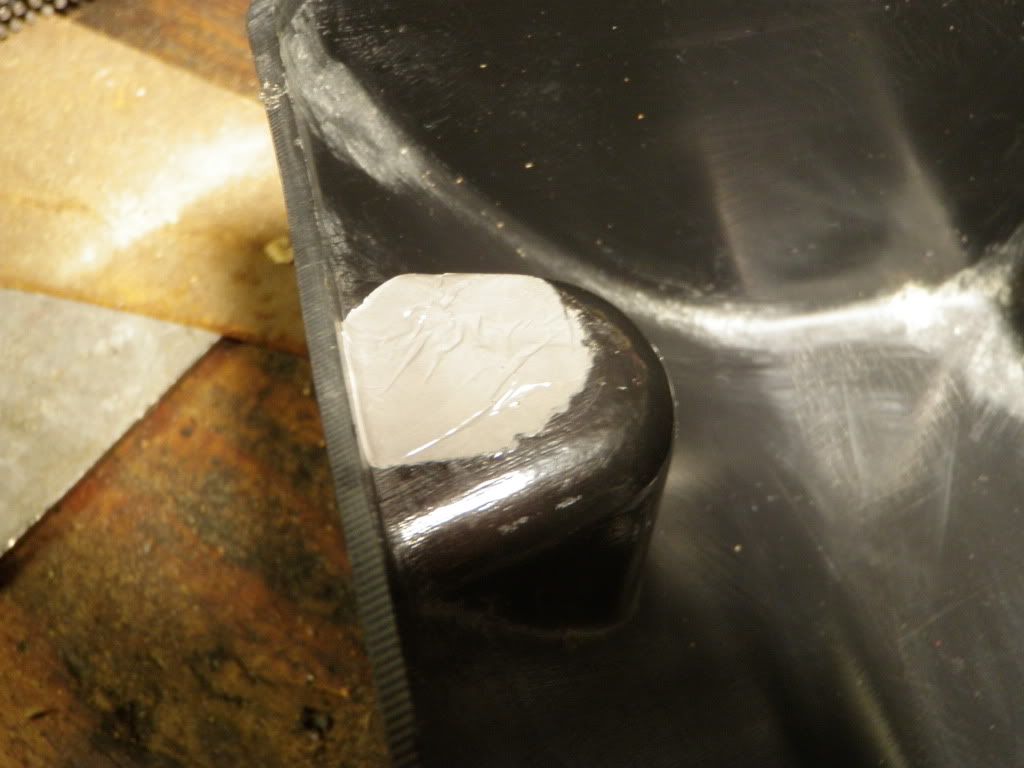
This morning I went outside to check my work from last night. I peeled off the Saran wrap and duck tape to find a beautiful clean filled in hole. I would HIGHLY recommend doing this again for anyone needing a strong filler for small holes. This evening I plan on drilling holes through the JB Weld and hopefully working more on the roof rack. JCROffroad.com rack mounts are on their way. I believe the $44 spent on them was well worth it.
Here's how one hole looked this morning, The rest looked great too...

As always more pics soon to follow. I just gotta keep building

Last edited by HawK_Racing; 06-14-2011 at 08:06 PM.
#20
Thread Starter
Member
Joined: Mar 2011
Posts: 185
Likes: 0
From: Southern Indiana
Year: 1988
Model: Cherokee
Engine: I6 4.0L
Not much work got done today on the fender flares but I did make significant progress on the roof rack here's a link to the fabrication thread. It's looking amazing! I am waiting on the JCROffroad mounts to come in. It's not to far from being painted and set up on top for good.
Roof rack fabrication thread:
https://www.cherokeeforum.com/f58/ho...1/#post1039936
Thanks again for reading!
Roof rack fabrication thread:
https://www.cherokeeforum.com/f58/ho...1/#post1039936
Thanks again for reading!
#21
Thread Starter
Member
Joined: Mar 2011
Posts: 185
Likes: 0
From: Southern Indiana
Year: 1988
Model: Cherokee
Engine: I6 4.0L
Significant progress on the roof rack. Everything seems like it's moving so slow. Tomorrow is my day off so I will be welding more on my roof rack along with replacing front right U-joint. I'll post all of that tomorrow and hopefully it goes smooth. I've been looking into upgrading the injectors but I really have no idea whats a cheap good way to go. I've heard of doing some Ford 18 thing but I'd rather not put any Ford parts on my Jeep 

#23
CF Veteran
Joined: Apr 2011
Posts: 1,291
Likes: 0
From: ellington, missouri
Year: 1990
Model: Cherokee
Engine: 4.0l inline 6cyl
#24
Thread Starter
Member
Joined: Mar 2011
Posts: 185
Likes: 0
From: Southern Indiana
Year: 1988
Model: Cherokee
Engine: I6 4.0L
lol I'm not going to be the d!ck and not tell u and say that the search engine is your friend, but hey! The search engine is your friend 
https://www.cherokeeforum.com/f18/ch...rs-sale-25888/
They are $2.50 for each and that includes shipping

https://www.cherokeeforum.com/f18/ch...rs-sale-25888/
They are $2.50 for each and that includes shipping
#25
Thread Starter
Member
Joined: Mar 2011
Posts: 185
Likes: 0
From: Southern Indiana
Year: 1988
Model: Cherokee
Engine: I6 4.0L
Right now I feel like I have 20 things going on at the same time. This is my progress today. Since I didn't have to work I had the opportunity to get alot accomplished... and as always a 30min job became an all day affair.
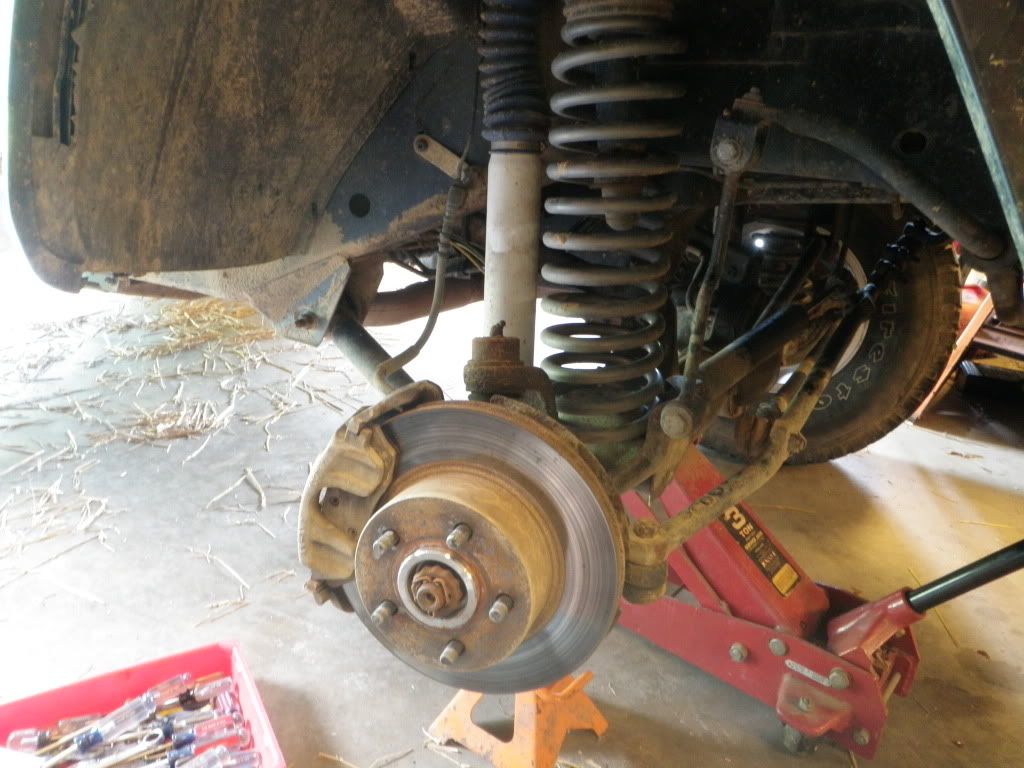
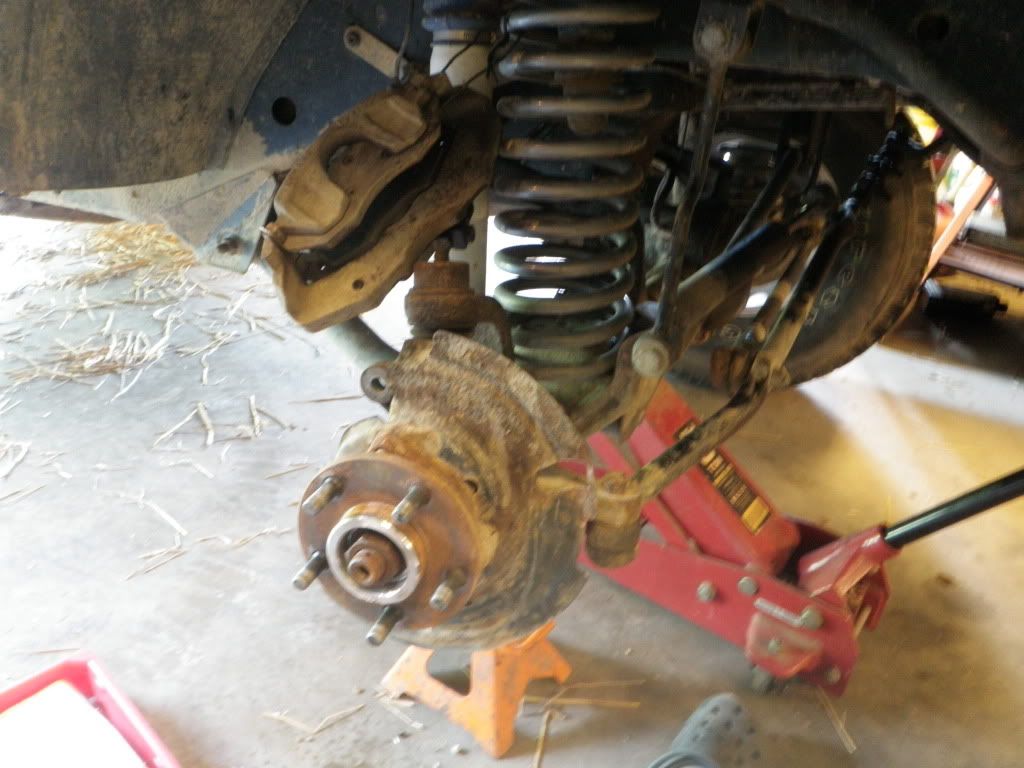
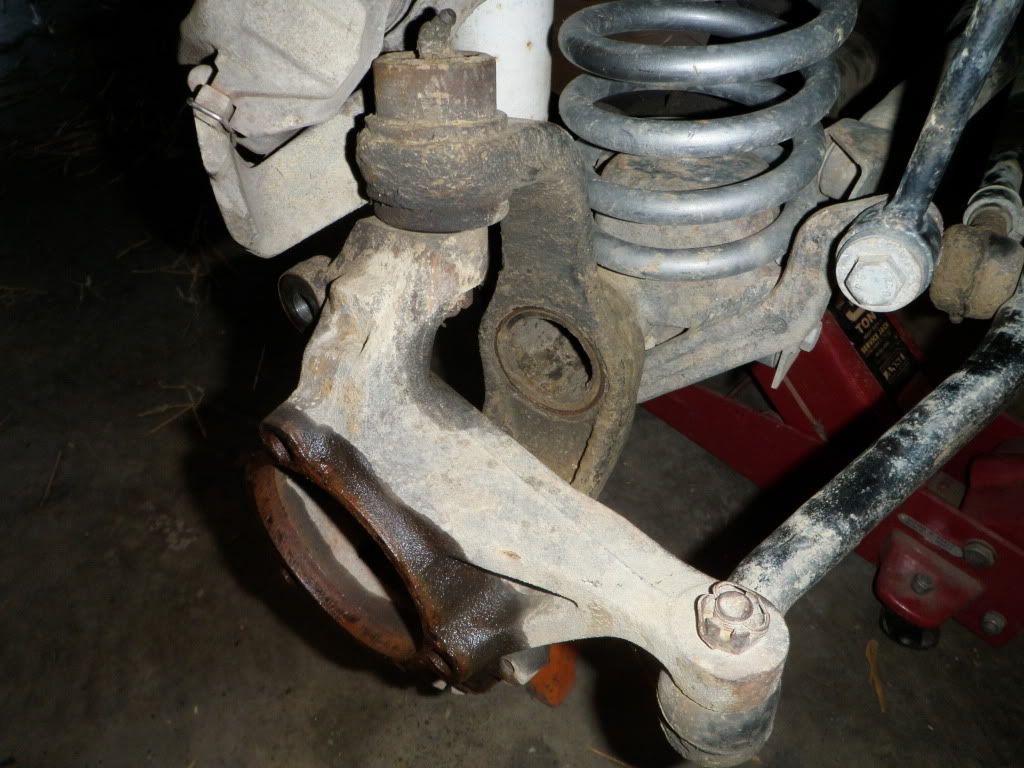
I woke up thinking I wanted to walk through all the front bushings and steering parts to make sure bearings and tie rod ends were all good. I knew my passenger U joint was going bad and decided to start with it. I got the Jeep in the shop, jacked it up and began working on her.
There's alot of threads out there on how to take the hubs off that I read before hand. However, there are always little issues that get in your way. Issue #1 began when I didn't have an extra 33mm or 1 7/16" socket to undo the nut at the end of the axle shaft. A quick trip up to my uncle's and I brought home a huge 1 7/16 socket that nearly has too big of a O.D. to fit inside the hub. Not to mention it's torqued down to 170 ft/lbs! So 3 ft of cheater bar and a good grunt got it loose. Issue #2 was that the entire hub assembly was held on by one bold. Yeah that's right, the so called three bolts holding it on was simply just a single guy holding on for all he's worth . Issue #3 started when I tried to take the hub out. In the Haynes manual it just says to smack it with a hammer. After fiddling with it for a while (breaking 2 Craftsman screwdrivers and a nice chisel) I ended up putting the bolt back in the 3 threads and hammering against a 13mm 12pt socket (also ruined). Hammering the socket was the only thing that truly helped. Please learn from my mistake and do not put your self through all this and just hammer it from the inside.
Here's a few pics of my progress:
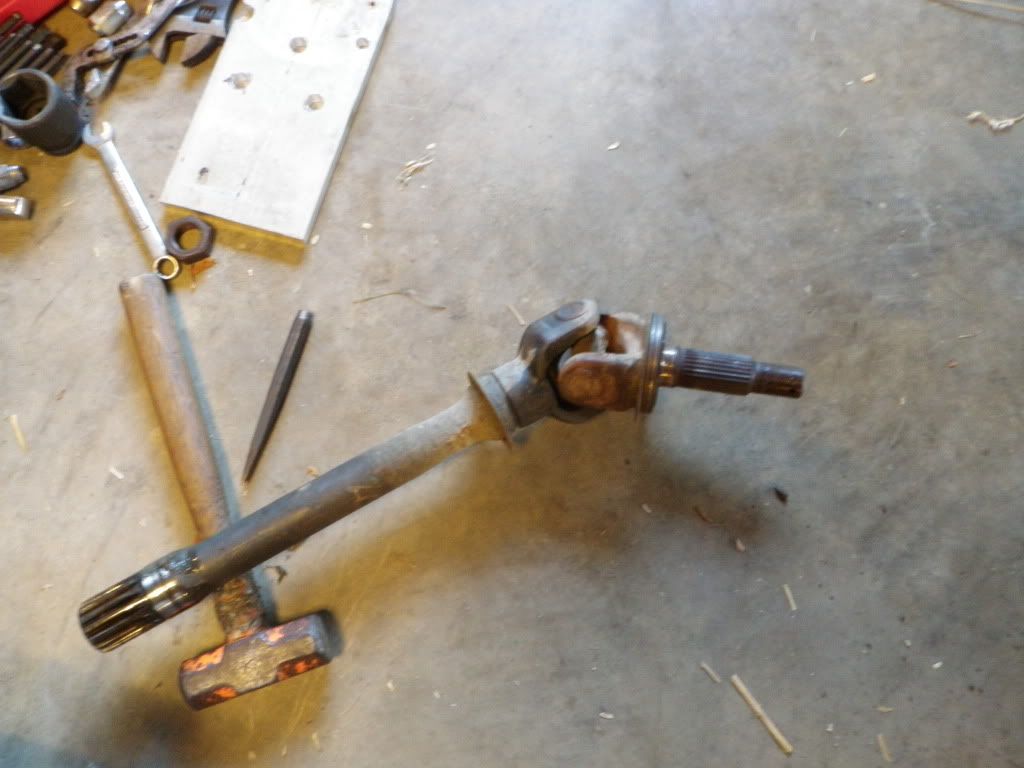
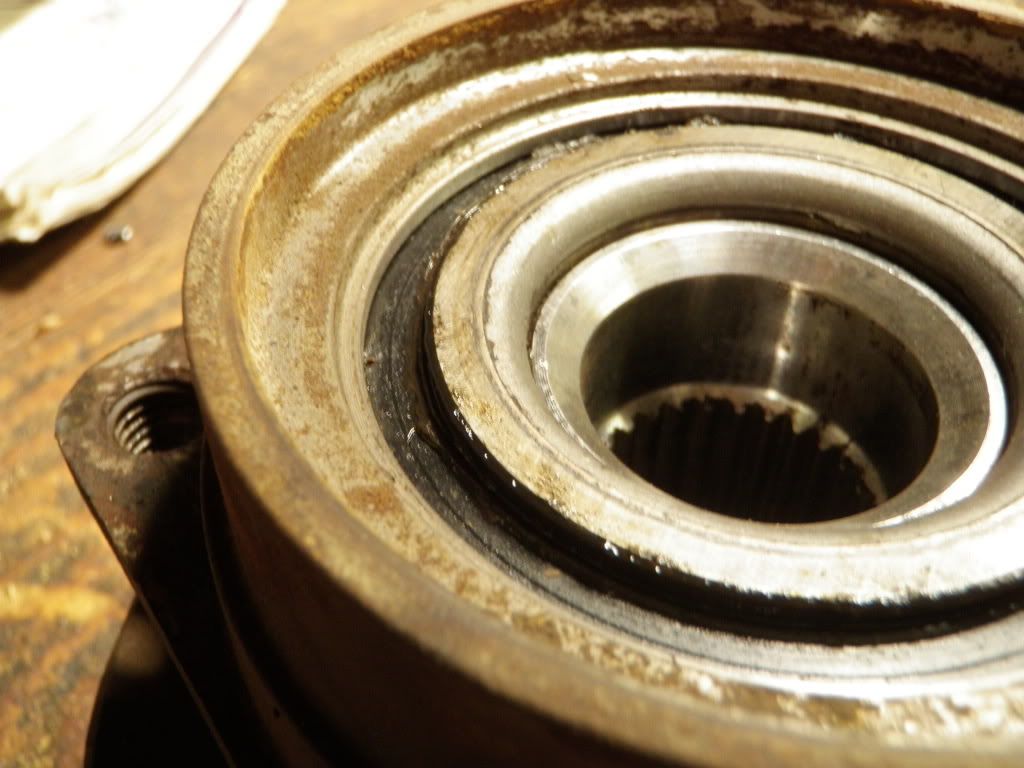
So I finally got the hub and the axle out. The U joint isn't terrible but it's worth changing anyhow. However, the wheel bearing are terrible. There was so much give that I'm surprised it didn't drive any worse that it did. Hopefully this will help my steering and some death wobble problems.
The Old:
***Notice how low the dust cover (black cover) is***
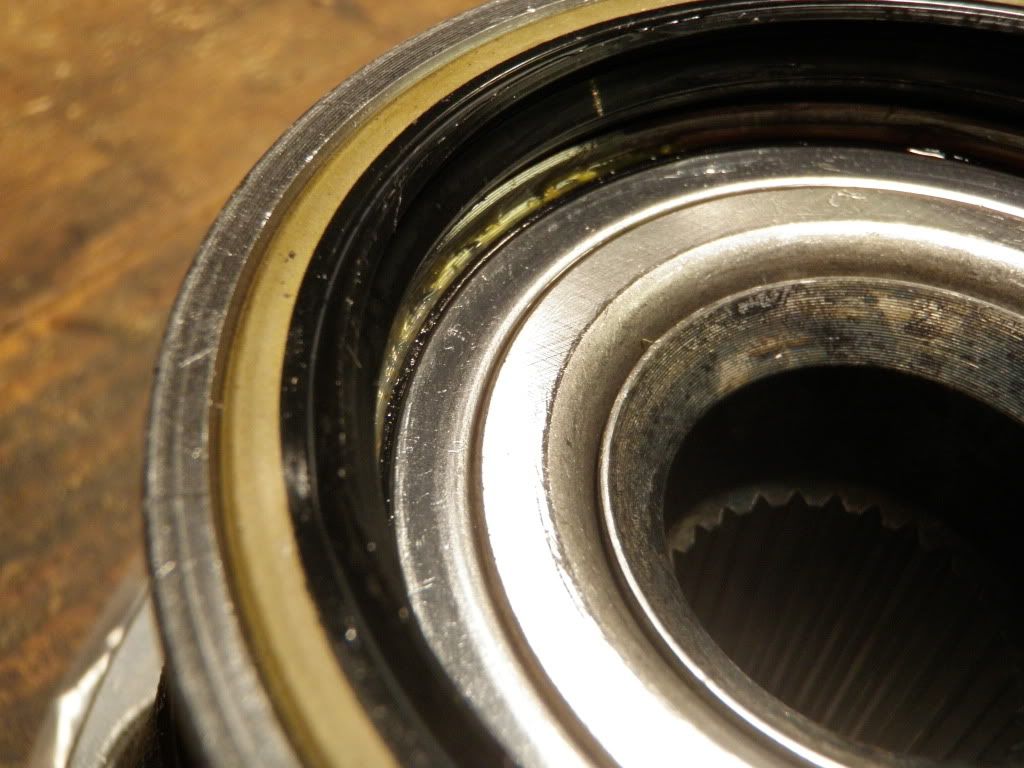
The New:
Side By Side:
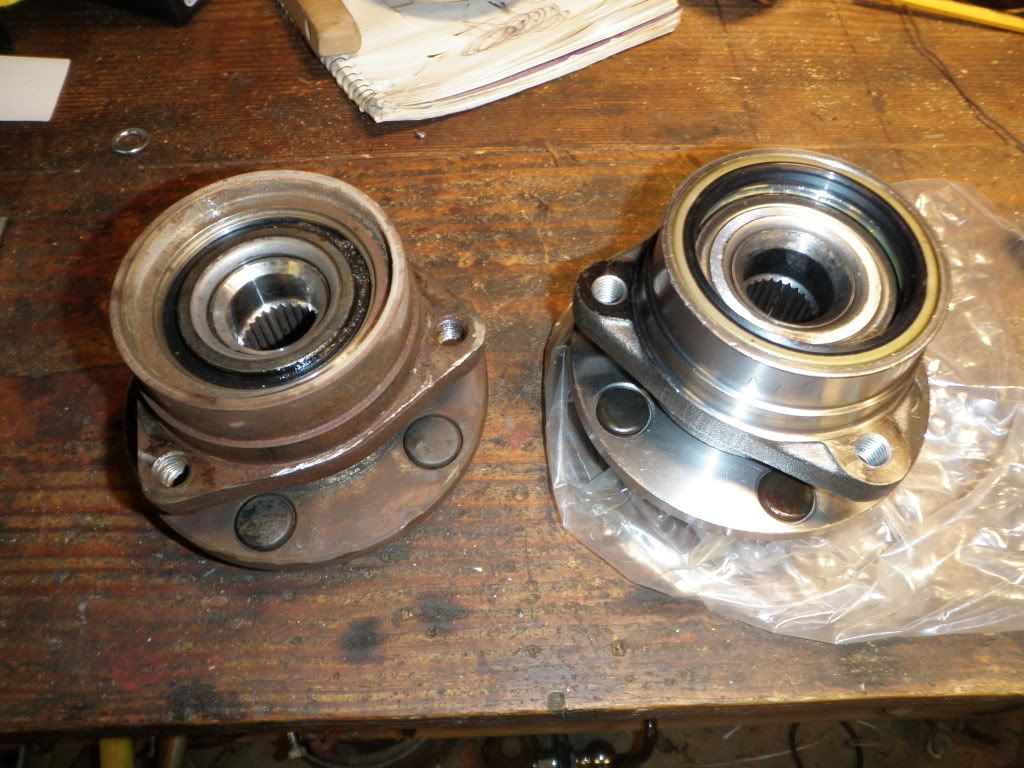
I got the new hub assembly with the bearings and everything for $70, not a terrible price considering what your buying. I wanted the nicer more expensive hub assemblies but I rather have the parts in now. I also bought a U joint from the smart feller from O'Reillys and found out that its the wrong one Oh well, in the morning I'll go exchange it before work. Hopfully I will have the passenger side done tomorrow if not by the weekend! If anyone has questions on the hub removal or anything let me know! Thanks again guys for reading
I woke up thinking I wanted to walk through all the front bushings and steering parts to make sure bearings and tie rod ends were all good. I knew my passenger U joint was going bad and decided to start with it. I got the Jeep in the shop, jacked it up and began working on her.
There's alot of threads out there on how to take the hubs off that I read before hand. However, there are always little issues that get in your way. Issue #1 began when I didn't have an extra 33mm or 1 7/16" socket to undo the nut at the end of the axle shaft. A quick trip up to my uncle's and I brought home a huge 1 7/16 socket that nearly has too big of a O.D. to fit inside the hub. Not to mention it's torqued down to 170 ft/lbs! So 3 ft of cheater bar and a good grunt got it loose. Issue #2 was that the entire hub assembly was held on by one bold. Yeah that's right, the so called three bolts holding it on was simply just a single guy holding on for all he's worth
Here's a few pics of my progress:


So I finally got the hub and the axle out. The U joint isn't terrible but it's worth changing anyhow. However, the wheel bearing are terrible. There was so much give that I'm surprised it didn't drive any worse that it did. Hopefully this will help my steering and some death wobble problems.
The Old:
***Notice how low the dust cover (black cover) is***

The New:

Side By Side:

I got the new hub assembly with the bearings and everything for $70, not a terrible price considering what your buying. I wanted the nicer more expensive hub assemblies but I rather have the parts in now. I also bought a U joint from the smart feller from O'Reillys and found out that its the wrong one
 Oh well, in the morning I'll go exchange it before work. Hopfully I will have the passenger side done tomorrow if not by the weekend! If anyone has questions on the hub removal or anything let me know! Thanks again guys for reading
Last edited by HawK_Racing; 06-16-2011 at 08:24 AM.
#26
CF Veteran
Joined: Apr 2011
Posts: 1,291
Likes: 0
From: ellington, missouri
Year: 1990
Model: Cherokee
Engine: 4.0l inline 6cyl
lol I'm not going to be the d!ck and not tell u and say that the search engine is your friend, but hey! The search engine is your friend 
https://www.cherokeeforum.com/f18/ch...rs-sale-25888/
They are $2.50 for each and that includes shipping

https://www.cherokeeforum.com/f18/ch...rs-sale-25888/
They are $2.50 for each and that includes shipping
#28
Senior Member
Joined: May 2010
Posts: 639
Likes: 1
From: Northern Indiana
Year: 1990
Model: Cherokee
Engine: Renix 4.0
I am about 1.5 hours north of you. I live near Redbird SRA. I see a wheeling trip in our future! Either Redbird of Interlake.
Sweet build! Keep it up!
Sweet build! Keep it up!
#29
Thread Starter
Member
Joined: Mar 2011
Posts: 185
Likes: 0
From: Southern Indiana
Year: 1988
Model: Cherokee
Engine: I6 4.0L
Hey thanks man! I wish I could say I know both places well but I really don't. I love going up to Interlake but I feel like the trails and terrain changes every time I go. The best spot around here is Turkey Bay in LBL. If your ever gonna be down close to Evansville let me know I'd love to see ur XJ!
#30
Senior Member
Joined: May 2010
Posts: 639
Likes: 1
From: Northern Indiana
Year: 1990
Model: Cherokee
Engine: Renix 4.0
I have been to Redbird maybe ten times(which isn't much for living 15min away for the past 3 years and having my Jeep 'ready' for 2yrs), Haspin once, and the Badlands twice. Badlands is by far my fav. I would like to checkout Interlake someday if you are down.
My rig should be ready to wheel again in three weeks or so.
Too bad I didn't catch you on here a year ago. I used to go down there often to see my X-gf.
My rig should be ready to wheel again in three weeks or so.
Too bad I didn't catch you on here a year ago. I used to go down there often to see my X-gf.


