When you click on links to various merchants on this site and make a purchase, this can result in this site earning a commission. Affiliate programs and affiliations include, but are not limited to, the eBay Partner Network.
Nice start to bumper. If you don't mind, I would like to add something to your design?
While the stock bumper mounts were adequate for the cheesy bumper these things came with, they were never designed to hold any kind of load. I would highly recommend tying in the bumper to the trailer hitch mount with a large nutsert strip especially if you plan any kind of tow rings or tire carrier in the future.
If you look back a couple pages you will see I have the nates 4x4 unibody tie ins, plus jcr nut strips, plus a 10 bolt class 5 hitch, plus two bolts that tie into the Shackle brackets for a grand total of 20 bolts holding everything together. The bumper weighs about 75lbs so I wanted to makes sure it wouldn't fall off.
Well, we decided it was time for a bigger welder. I picked this one up for 164 with a coupon from Harbor Freight. I had to change out a plug and rewire it back to 220vac, but the bigger issue was the tiny 12gauge plug it came with. I went to Home Depot and bought 25ft of 10 ga and am satisfied with the results. I spent a while dialing it in, and it is burying wire inside quarter inch plates nicely. My welding skills are novice at best, but this should get the job done. I finished welding all the end plates on and called it a night.
Last night was a cut and grind from hell for those massive gussets. I decided not to tie in the ends and just put a burly gusset in on both side thinking that would be easier. boy was I wrong. 2 people cutting and fitting for 3 hours solid without a break. It looks kinda cool like that, although those bits won't be seen unless you look under the bumper. Tacked to pillars and under tail light trims will be next, then on to the swing down.
Drop down tire carrier taking shape. Corners fully welded and finished. Mike looking for the 10mm socket.
Gussets cut and tacked on one side. Mike still looking for the 10mm socket.
Right side gusset mostly welded. Excuse the messy garage.
Finished up the gussets, ugly but well burned in. I also welded light tabs onto the bottom of the bumper for reverse lamps. I am now starting the drop down tire carrier now trying to get the angles cut right. This was a scrap piece and my first try cutting. It was a little off, but I should have it dialed in after next try.
Worked on the drop down carrier a bit tonight. I got the height correct and will work in the forward pitch. I also have one scrap pillar marked and set the way I want.
Bumper build continued.
Whilst on the crapper one day I realized that the brackets/pillars for the bumper were hollow. Knowing I recessed the pillars and if I ever dunked the rear the main beam might fill with water. So last night plates were made and welded in to seal the main beam by plating the rear of the pillars. I finished welding the pillars on and now she's sitting on her own. I need to trim out under the lights, but other than that the bulk of the bumper finished.
A little weekend fun and a little more finished on the rear bumper. Still debating on a top plate for it. Possibly a bolt on one so it's easier to get to the bolts.
I couldn't resist taking her out to meet my lady last Friday. Even though the back bumper wasn't painted and the water pump was about to blow. Ha ha ha! I made it home though and she rode pretty nice with the 91lb bumper on the back.
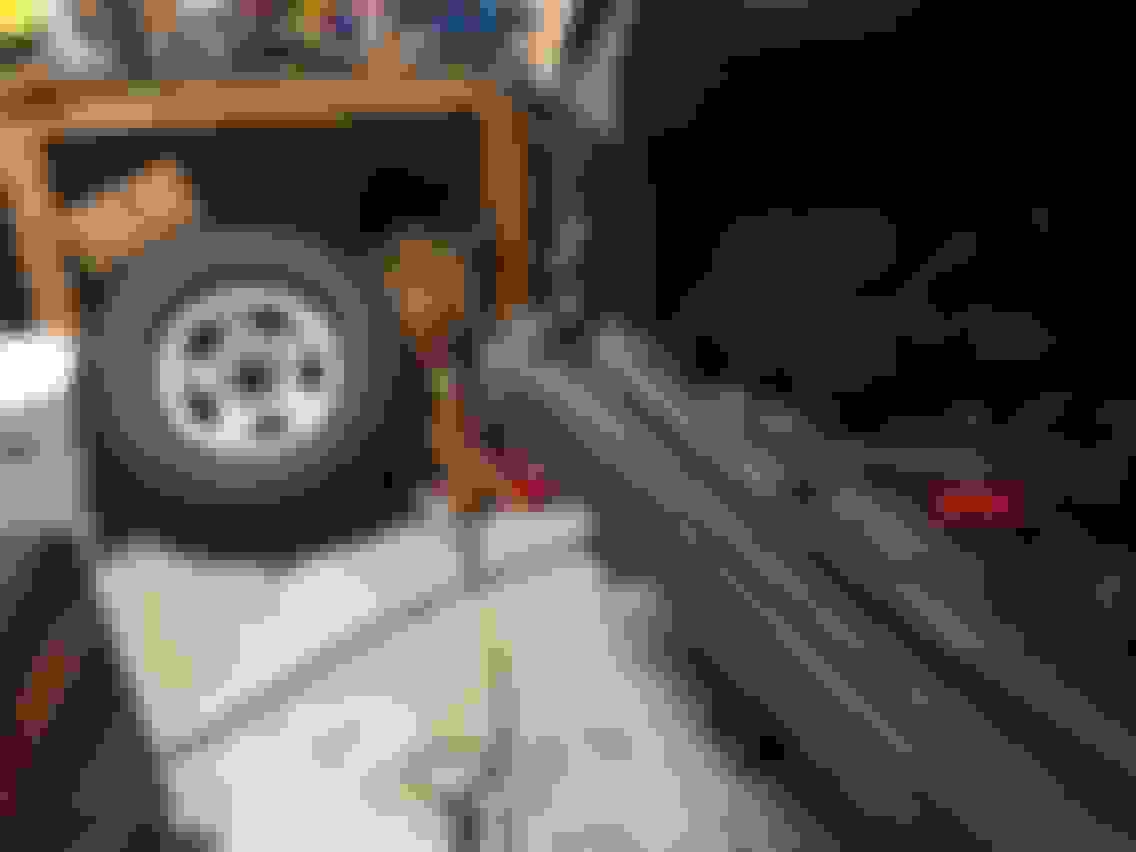
I got a late start tonight after I had to fix the tiller and get the garden worked up. New carb and she came back to life after sitting for 10 years. Not too shabby! Any way I hit it hard back into after a week off for vacation. I got the last bits of the filler trim done around the taillights and got the drop down tire carrier tacked together and test fitted the spare. Not too bad. I still have at odds with where to relocate the plate. There isn't enough room on either side of the hatch. A few more gussets on the tire carrier and it'll all be ready for paint. As of this post the bumper itself is done shy of grinding and paint.
I got the drop down tire carrier working and functional. Tacked on the latches and it's basically done minus the plate brackets and wire and cleaned up and paint. The rough mock up is done though. yeesh...
After an entire morning of grinding, sanding, and forming, and couple more tabs here nad there, the bumper is finally, FINALLY read for paint. I got the base primer coat on and will be hitting it with top coat tonight. The tire carrier pieces have a dececnt base coat on as well. I am seeing the light at the end of the tunnel for this long bit of build.

 02-23-2017, 08:49 PM