When you click on links to various merchants on this site and make a purchase, this can result in this site earning a commission. Affiliate programs and affiliations include, but are not limited to, the eBay Partner Network.
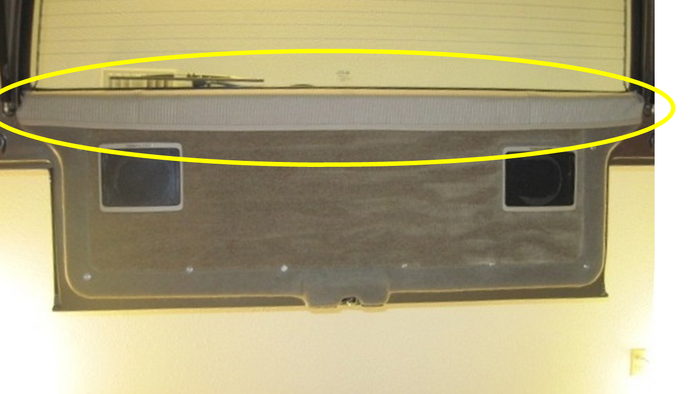
Cargo-strips attached. Cargo-hooks installed. Cargo-net installed. Cargo-cover installed. Spare-tire cover... Almost installed... Needs to sit in the sun when the weather warms up to stretch better over the tire. E-Z Flex carpet covering the sill.
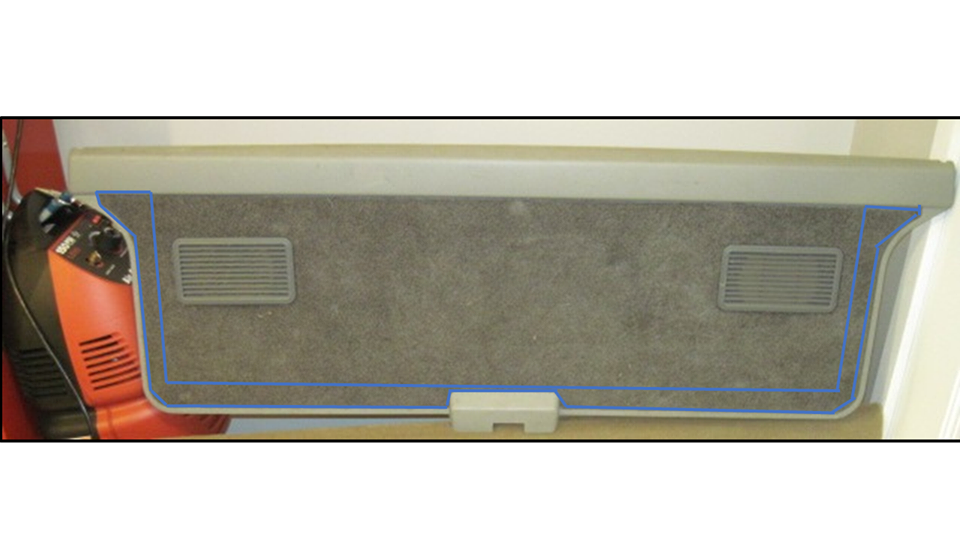
Stock:
I made a 3/8" wood frame to fit inside the blue-lines. Which allowed me to remove those two weird tail-ends at the top. Then had a straight-edge instead of the rounded-edge to butt the new carpet up to.
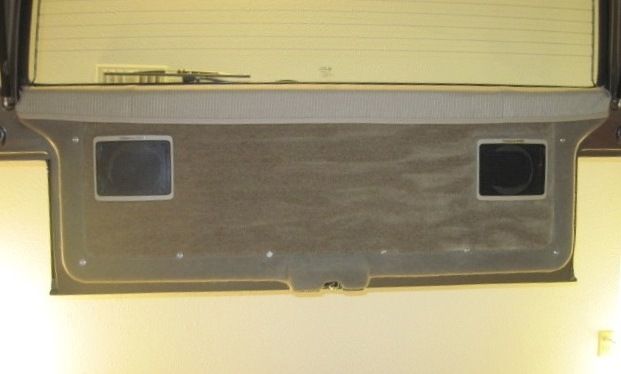
New Panel:
Replaced speaker-grates to match front-door speaker-grates; Re-painted to match interior color.
Flex-carpet wrapped around and under the edges. Standard-carpet in the center. FYI: I used 3M-tape to adhere materials to the plastic.
NOS fabric across the top; Vinyl-edging to match.
From experience... I find the plastic-clip hold-downs hard to work with. Therefore, I replaced them with screws/finishing-washers.
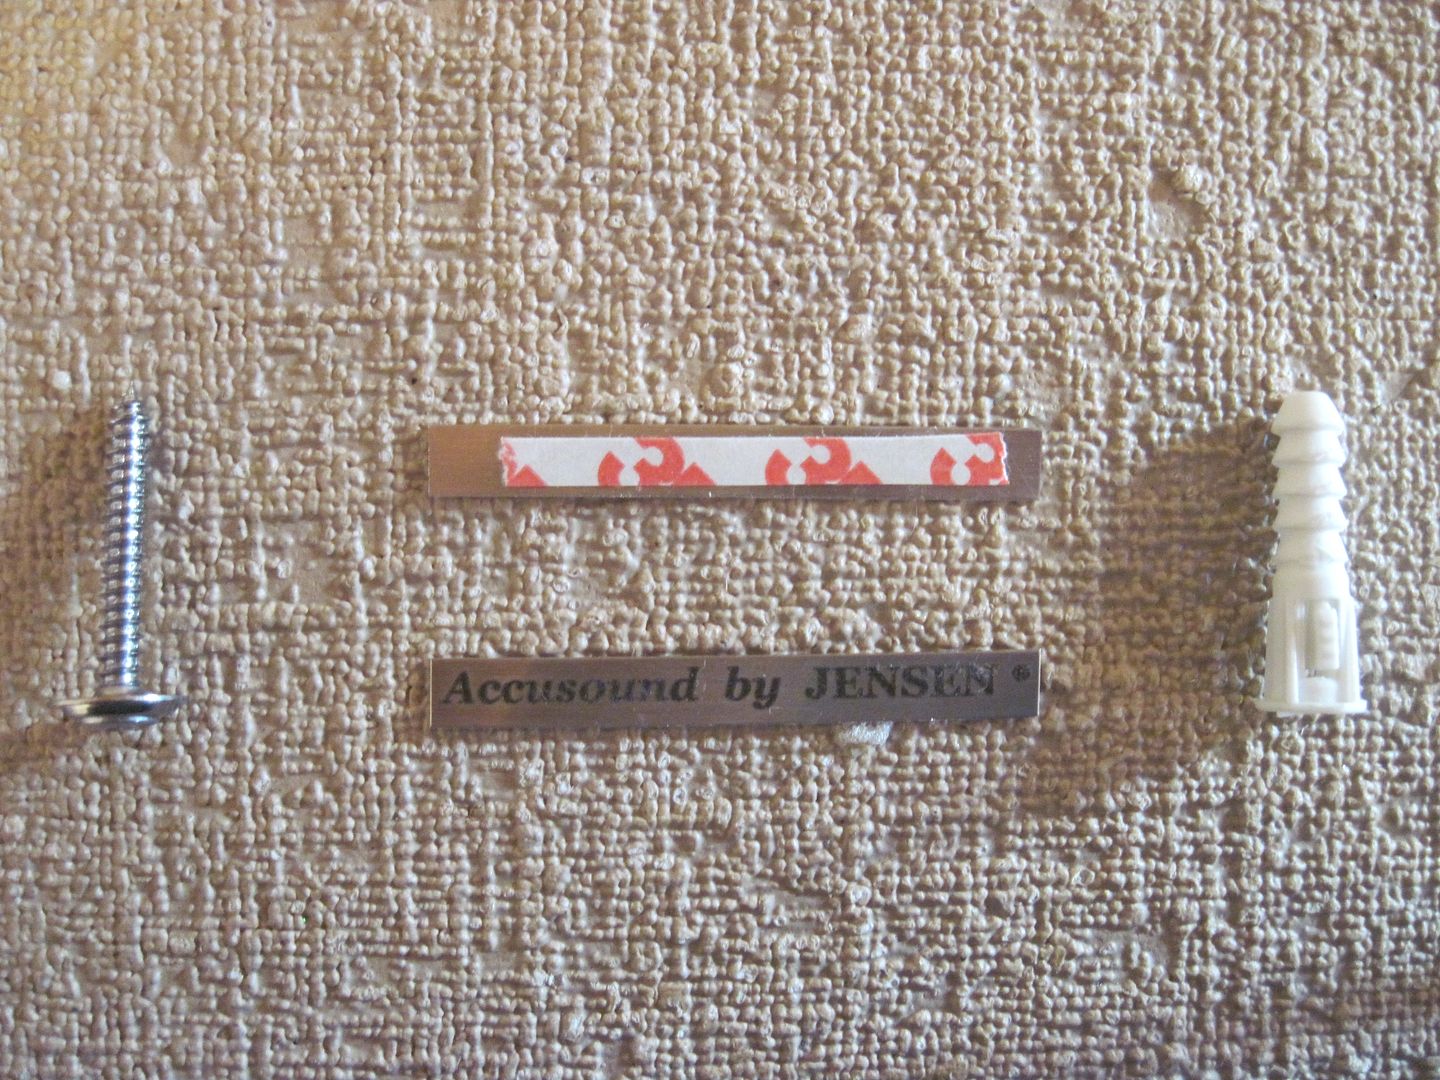
New "JENSEN" tags... I sent a sample to an online merchant who re-created them for me:
Hardware: Screws, "JENSEN" tags. And the plugs I inserted into the holes in the lift-gate to secure the screws:
Last edited by Crist Clapper; 02-26-2018 at 08:48 PM.
The Seats/Seat-covers are back from the Upholsterer. A reminder the skins were New-Old-Stock stored in a climate-controlled warehouse for the last 30-years. They were quite the subject of chat at the Upholstery-shop!
Excellent work here.
Crist whether you are working on your SJ (Ifsja build) or on your XJ it is absolutely beautiful work. You have won the "Prissy" award.
Do you have any more pictures (info) on the way you carpeted the rear cargo area panels, or on the rear tailgate panel?
I am getting ready to do mine, and if you don't mind I would love to copy some of your excellent ideas.
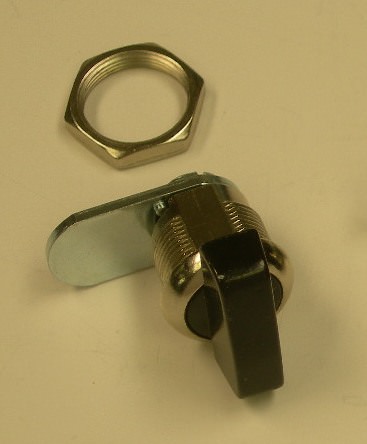
Also where did you get the latch for the rear storage?
Excellent work here.
Crist whether you are working on your SJ (Ifsja build) or on your XJ it is absolutely beautiful work. You have won the "Prissy" award.
Do you have any more pictures (info) on the way you carpeted the rear cargo area panels, or on the rear tailgate panel?
I am getting ready to do mine, and if you don't mind I would love to copy some of your excellent ideas.
Also where did you get the latch for the rear storage?
Thank you!
Dusty
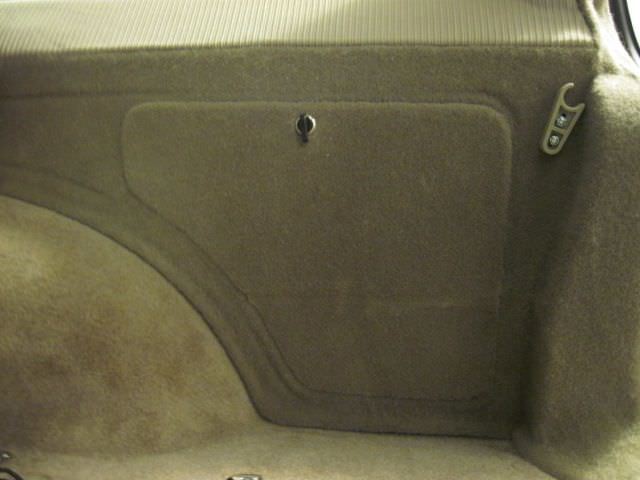
Some additional details... Here is the side-panel example again. A simple way to clean it up would be to just cover it with a flex-carpet. This stuff is wonderful! It will stretch into every nook and cranny!
The cover was a bit more work. I first cut a piece of wood to lay flush with the side-panel. Then cut midway and attached a spring-loaded hinge. When I covered the side-panel with the flex-carpet, I also covered the lower part.
Four flush-head bolts hold it in place. If you drill close to the outside... They are not visible from the inside.
Then strategically drilled a hole for a quarter-turn latch; Then strategically mounted a catch inside the door. A surface-mount latch would have been way easier! Note: The latch was an eBay purchase; But they are available all over the internet.
Last edited by Crist Clapper; 04-07-2018 at 08:00 PM.
What I forgot to take a picture of was the frame under the lift-gate panel.
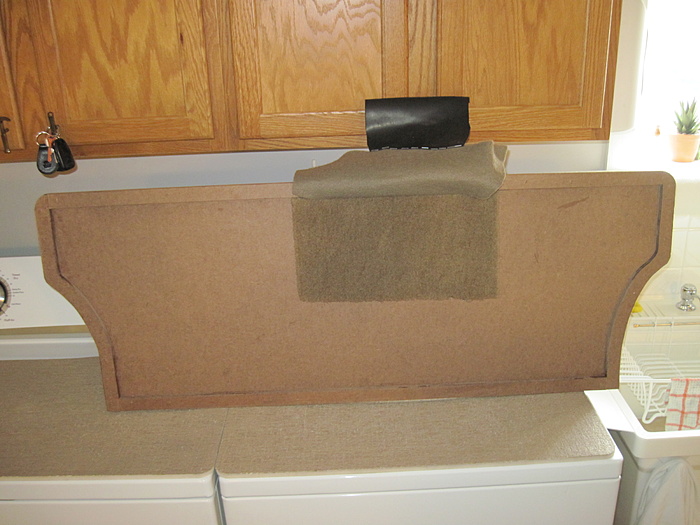
Here is the underlayment of the back of the rear-seat ready for the upholsterer. Which is similar to the underlayment of the lift-gate panel.
I cut Masonite 2-inches wide and glued/nailed it to frame the panel. Next, wrapped flex-carpet over/around the Masonite. Cut and butt the carpet up to the flex-carpet. The end result is the flex-carpet and the carpet are now the same height. And as I stated before... Secured with screws and finishing-washers.
If you can... Visualize this finished panel with chrome skid-stripes on the back of rear-seat.
Note: The black material is simply to show the upholsterer where the vinyl needs to be sewed up to the flex-carpet.
I had one edge of a piece of fabric bound with matching vinyl. Then attached with 3M double-face tape and wrapped around.
Last edited by Crist Clapper; 04-07-2018 at 08:50 PM.
Thank you so much Crist!
I loved watching the build on your SJ when you were doing that over at IFSJA. I still have not posted a build thread on my waggy over there yet, but I will start a thread soon on my "new to me" 93 Cherokee here.
Thanks again!


 01-14-2018, 08:31 PM