When you click on links to various merchants on this site and make a purchase, this can result in this site earning a commission. Affiliate programs and affiliations include, but are not limited to, the eBay Partner Network.
This is the hawse fairlead I'll be using...Here's another pic of the process fitting,cutting,filing...You get the idea it's not a quick ordeal...Anyhow the fairlead opening will get somewhat boxed for bumper strength around the opening...
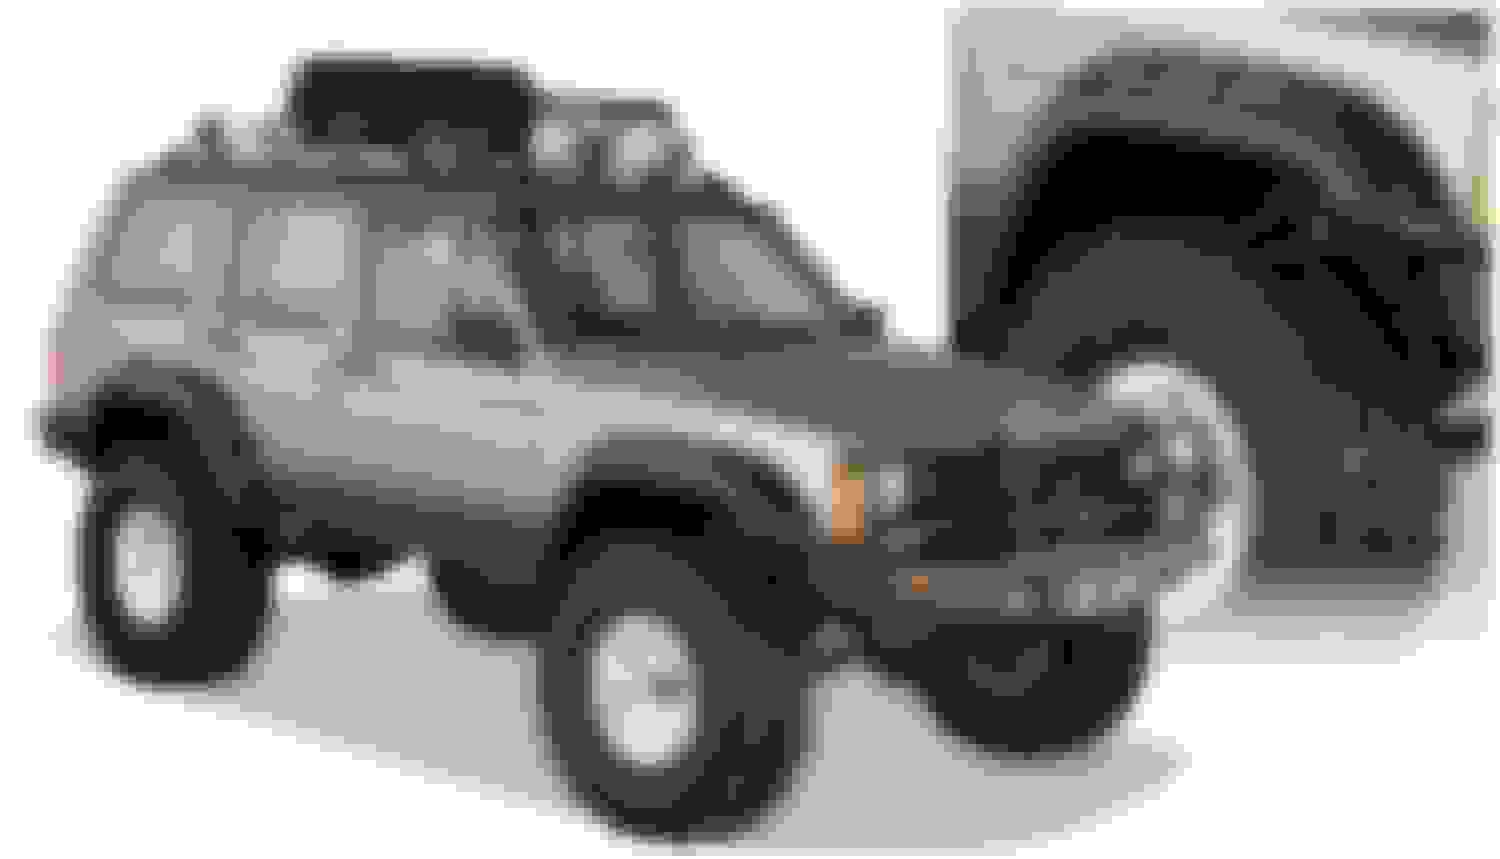
But before I go any further is there any chance the plastic end caps will fit ??? I couldn't wait to see so I jumped on the end caps to see if it's even possible to make it happen... I haven't bent any bumper metal simply some choice cuts so how far off am I ?? Here's what I had to do...First up was cutting the foam so the D ring mounts will fit inside the 5 MPH impact area...And there's still plenty of foam left so mabe it will withstand a 4.75 MPH impact with no damage...lol...
Then another process if fitting,cutting, etc... For the side profile..Remember the profile for the bumper hasn't changed just the bottom tray area...
So the quick answer is yes...The end caps are going to fit the bumper !! What a relief...Here's two pics of me sneaking up on the perfect fit...
The winch mound does push down on the spoiler area under the mount but nothing the fasteners in the factory locations won't take care of... Here's a pic with the end caps in place with no fasteners...They'll fit nicely when attached properly
... I'm already thinking about making up a quick detach kit for these end caps/center air dam to quickly pull them for trail use....
And now for the snowball effect... I wanted to cut the end caps but in order to do that I need to trim the fenders for the bushwacker pocket flares I'm installing...I started with the front fenders and trimmed as the new and improved{?} instructions want you to...
I also massaged the seam and laid it over instead of trimming like the instructions wanted.. I finished up the cuts/seam and bottom of the fender with Eastwood's platinum rust encapsulator for protection
Now, I wasn't thrilled about cutting the fenders/quarters on a 67,000 mile vehicle but I wanted the flares..Not to mention that here in Pa. it won't pass inspection without some type of covering over the tires..But I drew the line when the instructions had you cutting the quarters then smearing sealer over the gaps between the inner and outer sheet metal.. Yeah, I know that's how most do it but I just can't go that route.. So I took it to the next level...First I cut the actual line only through the outer sheet metal..Then dropped down and cut completely through both layers..What that did is give me some metal to work with on the inner layer...
A little grinder activity and it's a done deal.. NO open gaps and looks great... Now I feel better about the whole process...I covered the area again with Eastwood's platinum rust encapsulator until I get to the paint stage of the body...
I really enjoyed your detailed pictures and build thread.
When I cut my rear fenders for pocket flares, I welded the inner and outer like you did.
I then pulled the cargo area side trim panels to give me access to the inside of the wheel wells.
I brushed, poured, dumped primer then paint down into the wheel wells, even though my welds looked great, paint did seep out.
I repeated the paint process until it was sealed up. after the paint cured for a week, I sprayed the inside with Fluid film.
You bring up a good point..After I finished up for the day I was thinking I should have used some weld through primer but it always does more harm than good with weld contamination when it comes to thin sheet metal.. I'm going to pull the carpet and run some wiring for the stereo so I think I'll get in there at that point and get something in there for the backside..
If I ever have to / want to cut the fenders on my Jeep, this is exactly what I will do. You may have modified it, but it looks fantastic, and most people probably would not be able to tell.
If I ever win the lottery, I will build a truck almost exactly like this.
I've got the Bushwacker pocket flares..I know the flat flares are popular as well but I just like the look of pocket flares better... I've installed the flares on the rear drivers side for fitment and have taken them back off...And forgot to get a pic with them on..... But I'm working on the passenger side now and will be sure to get pics..The rear flare install seems way harder than I though it would be..
I'm a perfectionist and they need to be:
A} level.. I can't believe how many of these 4dr two piece pocket flares are installed crooked and misaligned from each other..
B}Symmetrical ... I've already transferred some reference lines from one side to the other to make sure they are exact from side to side..
After starting the installation I see some of the appeal of the flat flares might be they're easier to install..
I would pull the cargo area side panels and treat the inside if the inner/outer joint with paint then an oil based rust inhibitor. --- Sooner than later,, the welding removed all factory primer/paint withing a few inches of the seam.
New rust will start withing a few days,, and once it starts in there,, no way to remove it.
Originally Posted by Corky
You bring up a good point..After I finished up for the day I was thinking I should have used some weld through primer but it always does more harm than good with weld contamination when it comes to thin sheet metal.. I'm going to pull the carpet and run some wiring for the stereo so I think I'll get in there at that point and get something in there for the backside..

 06-17-2021 | 01:56 PM


 .. But I'm working on the passenger side now and will be sure to get pics..The rear flare install seems way harder than I though it would be..