When you click on links to various merchants on this site and make a purchase, this can result in this site earning a commission. Affiliate programs and affiliations include, but are not limited to, the eBay Partner Network.
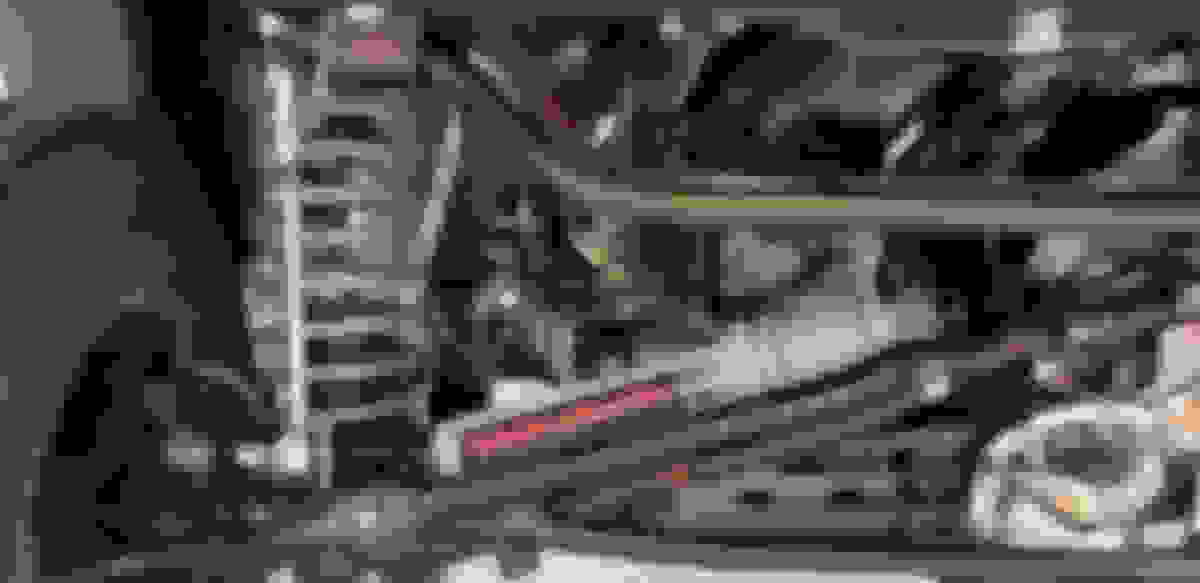
They come included with the better quality brake pad sets.. I've found them also at Rockauto with some individual caliper components.. Not only do they keep the pads from knocking/clicking during rotor rotation by taking up the free play,they also keep the pads from wearing that groove in the knuckle slider by spreading the load..
I even used feeler gauge on my shims. I rebuilt the calipers and painted mine red. Same black hat painted rotors with Okobano pads. Awesome build, I'm working on mine too. Be following along !
Last edited by Curtis Lambert Jr; 07-20-2021 at 07:55 AM.
Hi Curtis..I'm in deep !! I wasn't going to go this far with it but once I started I just couldn't stop...Heck I'm almost done with the suspension now so I might as well keep going..
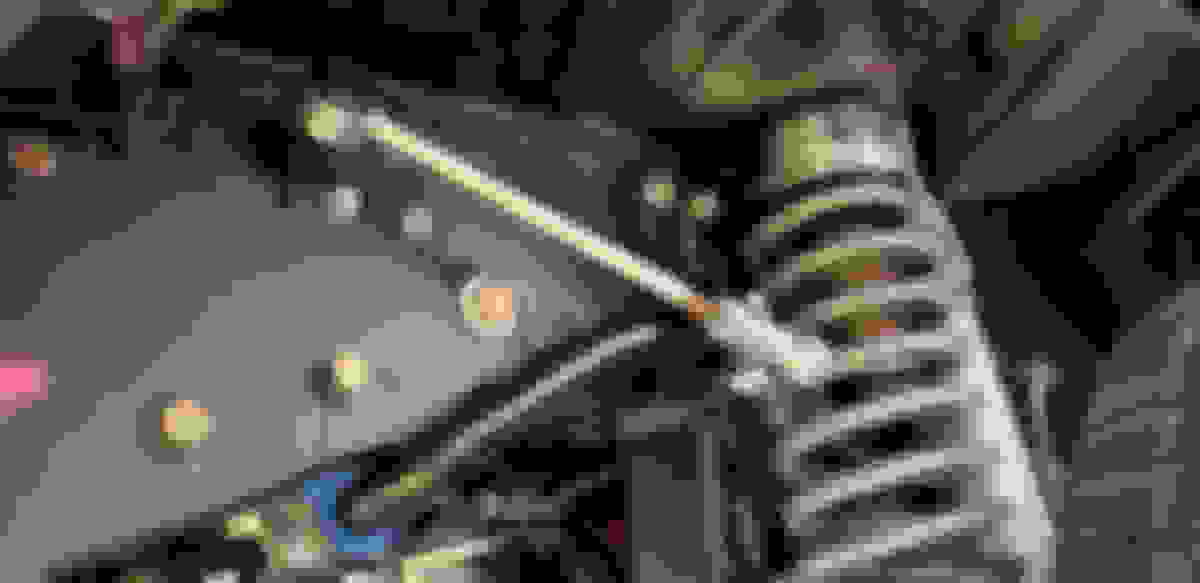
One of the last suspension mods needed is this :
A trained eye will see I'm using the factory length shackles and the shackle relocation kit... Which doesn't work together and binds with travel.. So I've done what others have done and trimmed the rear portion of the bracket so the shackle can now move freely...I'm already at the height I wanted to be and didn't want added height through the shackle.. So this was the solution... Nice, smooth radiuses and still plenty of steel for strength... And the shackle would have to go completely flat to hit the bracket now.. I had the wife and I jumping on the back trying to fold the shackle up and couldn't get it even close so I'm confident it's good to go...
Hi Curtis..I'm in deep !! I wasn't going to go this far with it but once I started I just couldn't stop...Heck I'm almost done with the suspension now so I might as well keep going..
One of the last suspension mods needed is this :
A trained eye will see I'm using the factory length shackles and the shackle relocation kit... Which doesn't work together and binds with travel.. So I've done what others have done and trimmed the rear portion of the bracket so the shackle can now move freely...I'm already at the height I wanted to be and didn't want added height through the shackle.. So this was the solution... Nice, smooth radiuses and still plenty of steel for strength... And the shackle would have to go completely flat to hit the bracket now.. I had the wife and I jumping on the back trying to fold the shackle up and couldn't get it even close so I'm confident it's good to go...
That angle looks steep. Be better in the middle position. I have a different relocation bracket. I'm gonna see what the the shackle angle is before I decide to cut the old pockets out. I'm using JKS Boomerang Shackles. Anyone with a Jeep is in DEEP !!!
No bumper, no fuel, and new springs...The angle will get better with all the weight and the break -in...
My bad, just saw there wasn't a bumper. I was thinking it was done.
I dropped my axle and pulled the springs out today. Got my tank out too. Laying there looking up at all the room and ease of access,,, and decided to POR15 it ! I'm gonna rough it up, knock the loose stuff off with a wire wheel and cover it up ! Now's the time to do it ! Thx for the inspiration !
Last edited by Curtis Lambert Jr; 07-21-2021 at 08:20 PM.
OK time for a follow up and show the finished exhaust..
Even though the mandrel bent 2 1/2" pipe was aluminum coated I still painted the muffler and pipe with an exhaust coating.. I've used Eastwoods exhaust paint on numerous systems and it holds up great.. So that's what was used here as well.. The stainless muffler got the coating even though it's a "stainless" piece.. I've had too many "stainless" exhaust parts not hold up/rust and I want this to last.. Speaking of mufflers the inner pipe has a slight bend peering in there but you can still see right through it.. I used stainless band clamps for the system...Even the rear tailpipe hanger is stainless..
The tail pipe was tight between the skid plate and the rear spring shackles.. So.... I took a page from all the new performance vehicles and "flattened" the pipe to give better clearance but still retains the 2 1/2 inch overall opening....Now it fits like a glove and is above the skid plate the whole length instead of resorting to a " turn down" and ruining the purpose of the pipe's routing...
Big fan of those types of band clamps. Used that type on my '00 for the muffler/tailpipe side.
My muffler has a lifetime warranty and the logic was that since it won't crush pipes like a traditional muffler clamp does
if I ever have to warranty the muffler maybe I will be able to separate it and save the tailpipe. Maybe. LOL.
I don't know why but really like what you did to the tailpipe.
How did you manage that? Just crush it in a vice? LOL.
Hey Ralph, Much simpler than that... I used two 2x6 s and sandwiched the pipe then gave it a few whacks with the sledge hammer until it was the perfect oval...No tube marring and a cushion to spread the hit..
I agree, You'll never go back to a normal clamp after using those band clamps..Seals much better as well..
Your Killin me smalls ! Now I'm gonna have to do this ! I love the look ! See, I'm thinking a fuel tank skid plate will make it even tighter ! Did you roughen up the pipes before painting ? Wipem down with acetone or anything ? I've already bought the old style clamps in SSTL ,,,
The web site is performance curve .. LINK It's 2.5 I welded the adapter to the catalytic convertor{converting from 2.25 to 2.5} a few posts up..Muffler and mandrel pipe is 2.5... I actually bought the adapter from them as well... Snagged the stainless band clamps of Ebay..
I wipe down the pipe with solvent{lacquer thinner this time} then run a scotchbrite pad over it before the coating...
Time for an update.. Seeing how I've rebuilt the whole suspension, transfer case, brake upgrades, exhaust, engine gaskets, and electrical system including the tune-up I figured now would be a good time to see how my work turned out to this point.. I don't want to get too far out and find something that needs attention way back at the beginning steps..
So in went the battery... After checking over all electrical wires and grounds to make sure nothing was missed I started down the list of simple stuff like lights,windows, etc... After those checked out the big event of cranking it over was next.. I turned the key and it fired right up like it was run yesterday !!! I hadn't run this thing since last fall when it went in the garage I was shocked how quickly it fired..
Anyhow I went for a few laps around the property just to see how everything is...I'm extremely happy with everything.. Brakes work great, electrical system is charging fine , no engine gasket leaks, and no harsh ride !! I nailed it !!
What a load off my mind knowing everything is good to this point..
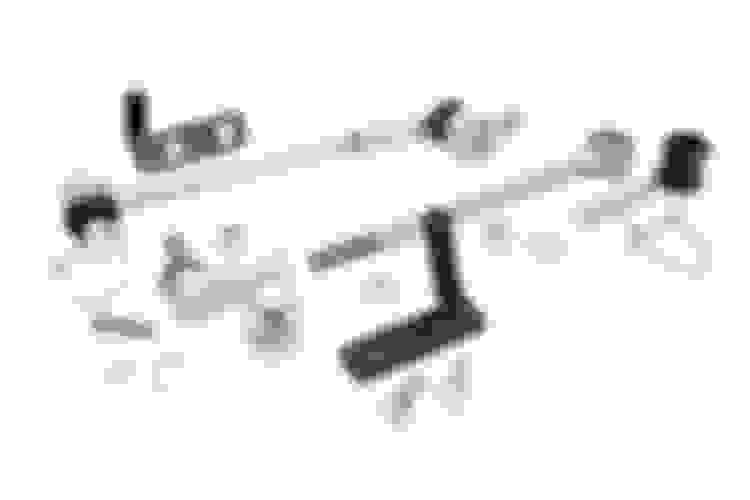
I'm finishing up the suspension with the retorque of various components and installing the steering stabilizer and sway bar... Got the adjustable end links and quick disconnects in place...And that's the last major suspension parts !! It was fun but I'm glad its together...LOL..
That's rough country's version of the quick disconnect.. Simple but effective... I hear you on it being too clean.. I might have to take it to a few car shows here in the area to represent the XJ when its done before the mud flies...

 07-20-2021 | 07:53 AM

 I wasn't going to go this far with it but once I started I just couldn't stop...Heck I'm almost done with the suspension now so I might as well keep going..