
My Waggie Build...
 08-10-2008, 10:07 AM
#16
CF Veteran
Thread Starter
Join Date: Apr 2008
Location: Smiths Station, Al
Posts: 7,661
Likes: 0
Received 13 Likes
on
10 Posts
Year: 87
Model: Wagoneer
Engine: 4.0 I6
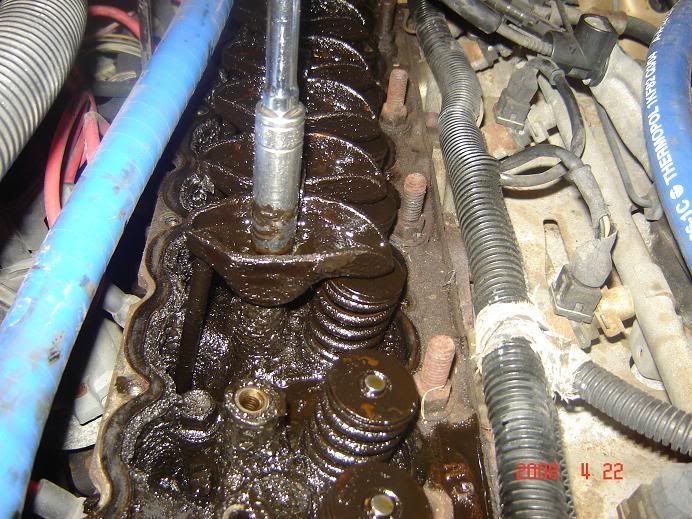
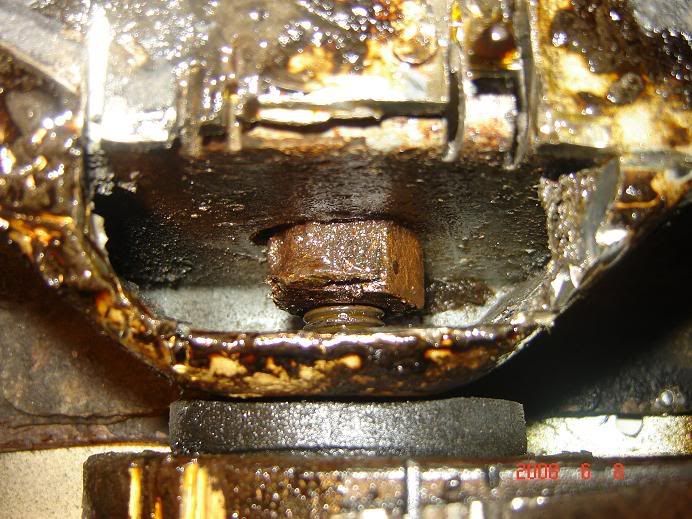
I have been noticing thati wasnt running about 20 PSI on the oil pressure guage and had me concerned. So I decided to remove the Valve cover and have a look.
You have to pop off the Cruise control thinga-ma-jigger.
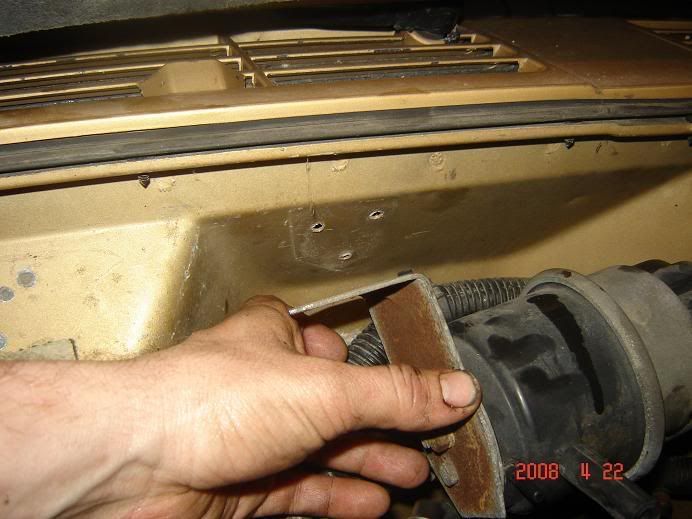
Then take out the 25 or so Bolts holding the valve cover on then lift and reveal
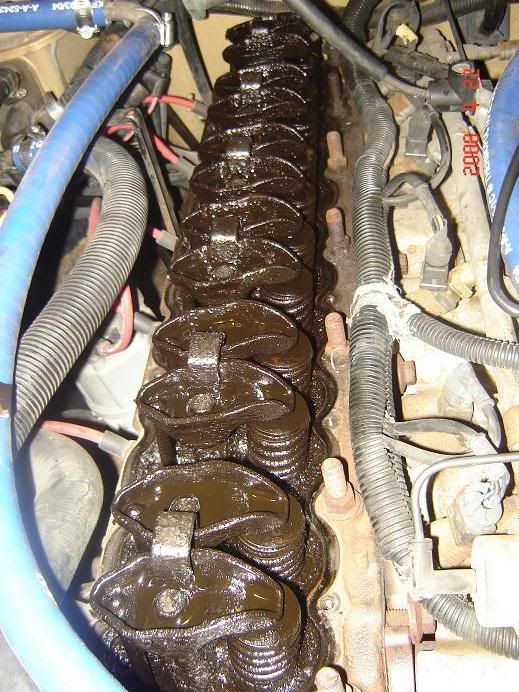
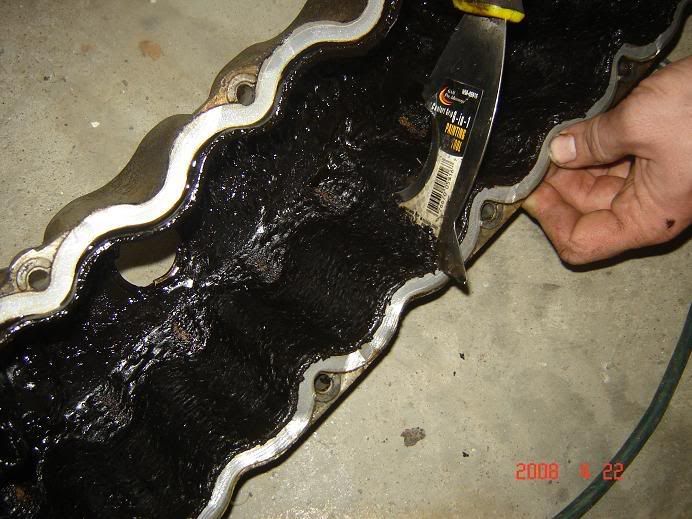
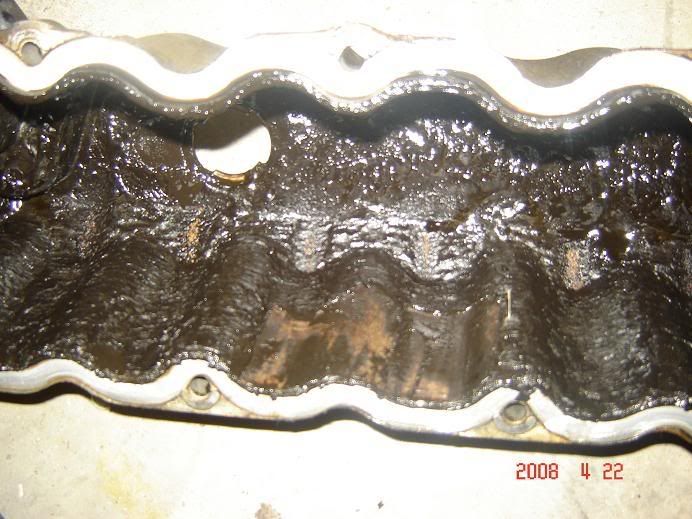
This sucker is caked with oil. I am sure the whole engine is sludged up like this.
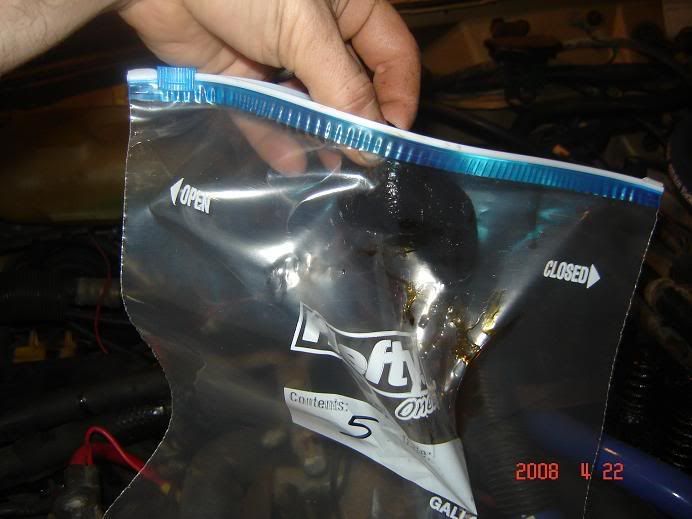
So I went a step further and removed all the Rockers and down tubes. To soak in a solvent tank. Removed them one by one and bagged the parts in individual bags and numbered them 1 to 12.

Then I cleaned it all up. I used a Shopvac and degreaser and scraper on the valves and springs themselves. No pic too messy. Cleaned the inside of the VC
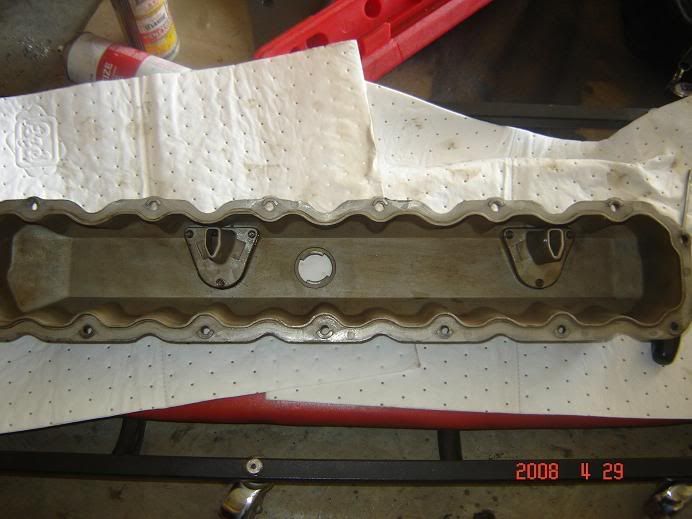
Repainted and installed I had a buddy at work who is also a member here do my valve cover for 20 bucks. Handel is Kwitcher*****in he drives a GC.
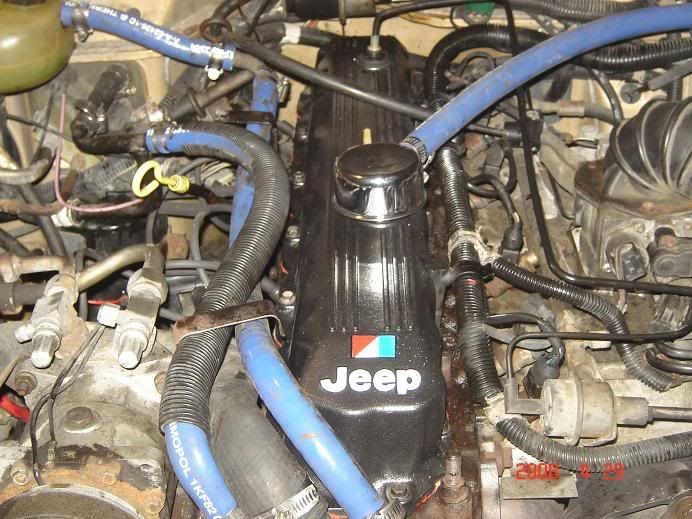
This was a pretty big project It didnt help my PSI any I will have to drop the oil pan at some point and clean out the oil pump. Just not now.
You have to pop off the Cruise control thinga-ma-jigger.
Then take out the 25 or so Bolts holding the valve cover on then lift and reveal
This sucker is caked with oil. I am sure the whole engine is sludged up like this.
So I went a step further and removed all the Rockers and down tubes. To soak in a solvent tank. Removed them one by one and bagged the parts in individual bags and numbered them 1 to 12.
Then I cleaned it all up. I used a Shopvac and degreaser and scraper on the valves and springs themselves. No pic too messy. Cleaned the inside of the VC
Repainted and installed I had a buddy at work who is also a member here do my valve cover for 20 bucks. Handel is Kwitcher*****in he drives a GC.
This was a pretty big project It didnt help my PSI any I will have to drop the oil pan at some point and clean out the oil pump. Just not now.
 08-10-2008, 10:13 AM
#17
CF Veteran
Thread Starter
Join Date: Apr 2008
Location: Smiths Station, Al
Posts: 7,661
Likes: 0
Received 13 Likes
on
10 Posts
Year: 87
Model: Wagoneer
Engine: 4.0 I6
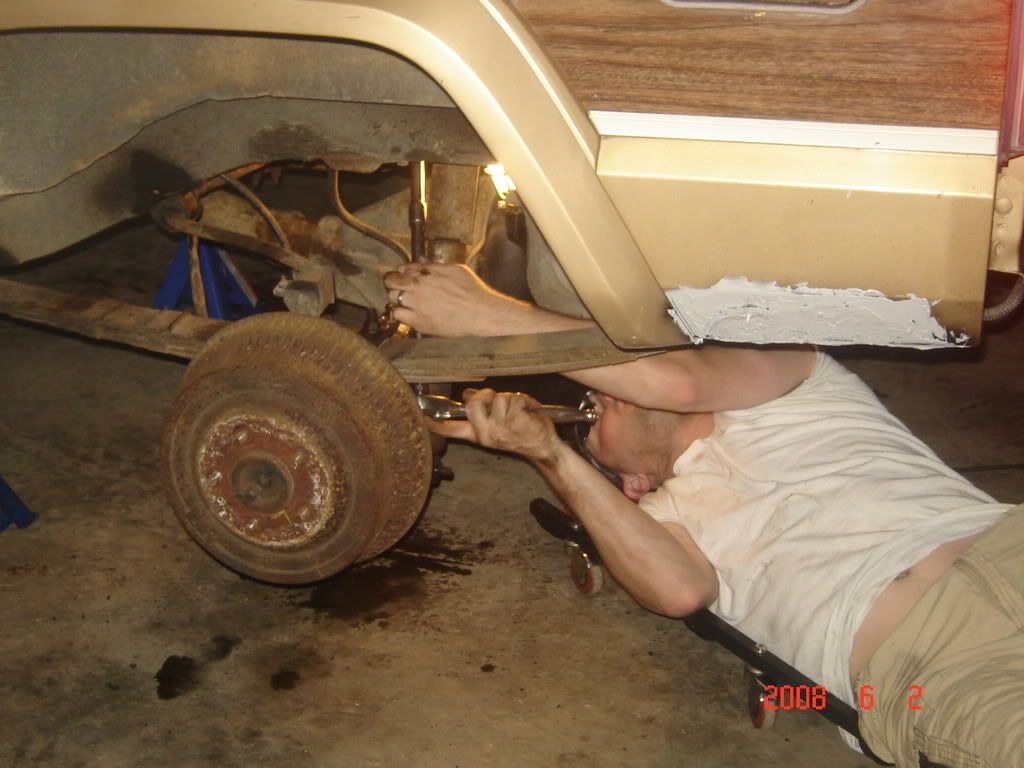
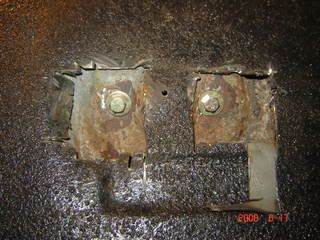
Next time to mess with MY nasty ROCKERS. Rusted through almost completly.
Grinded and painted some of the mess.

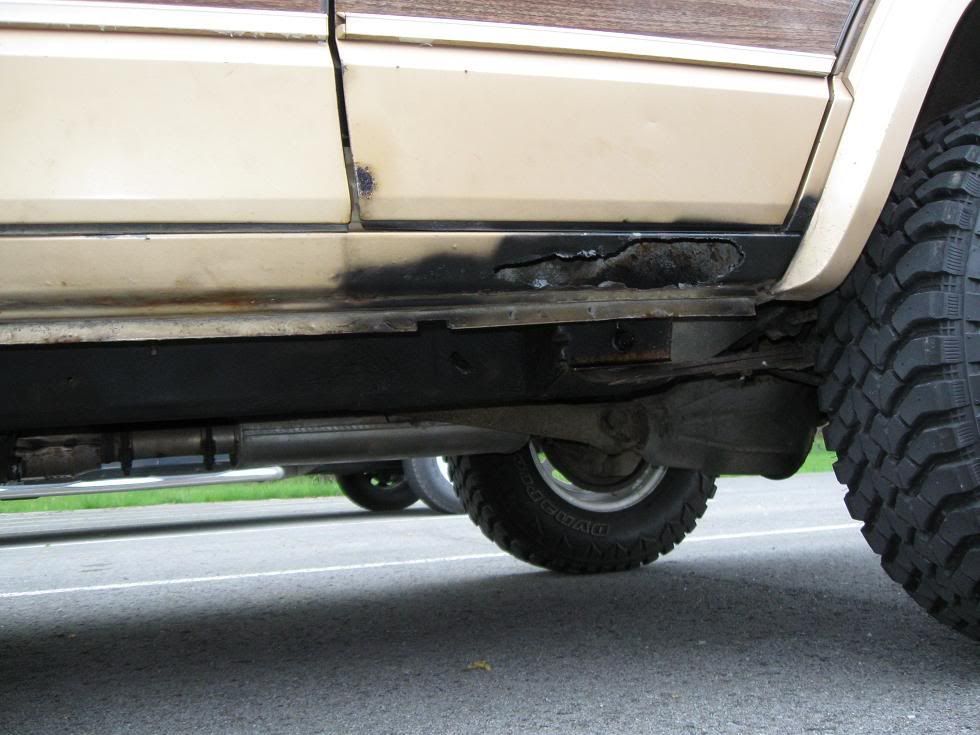
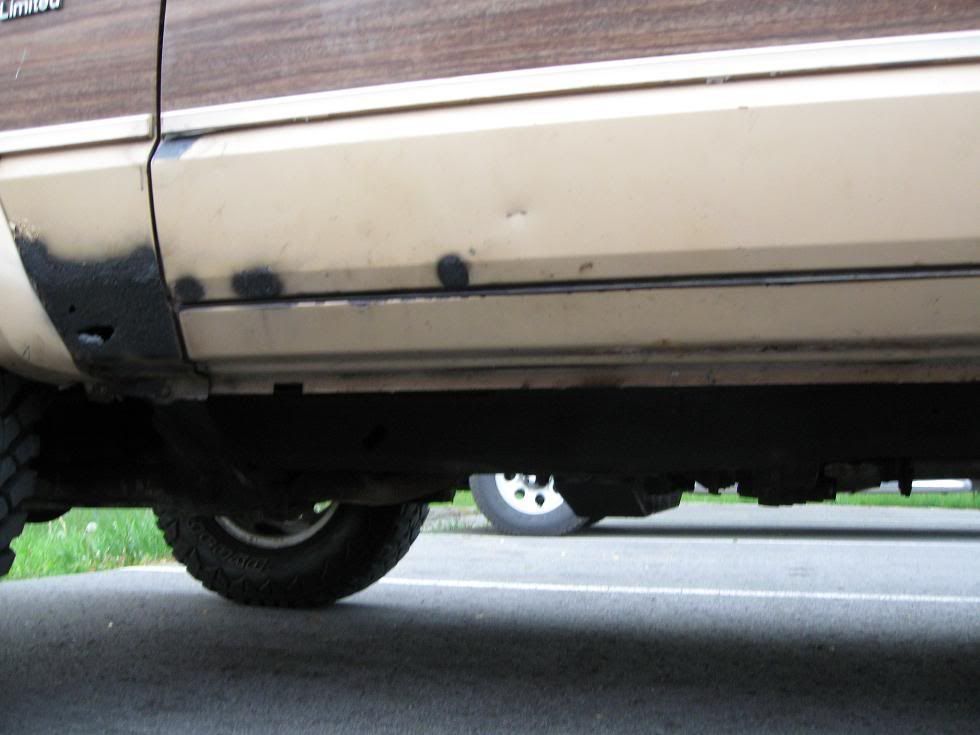
Sat like that for about a month then i had to cut and grind some more.
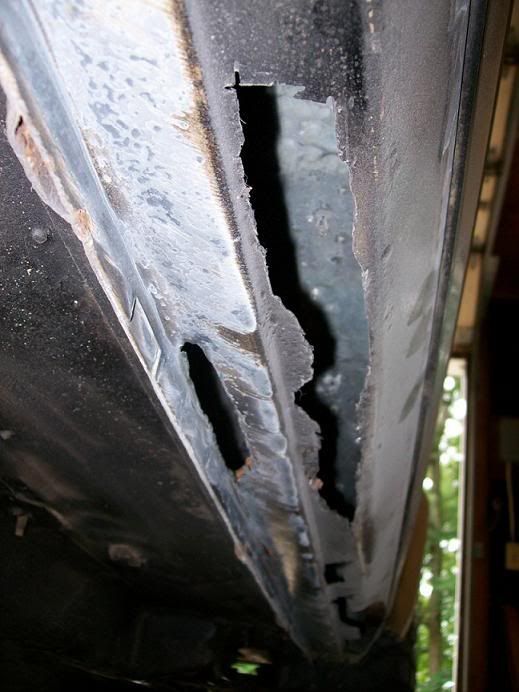
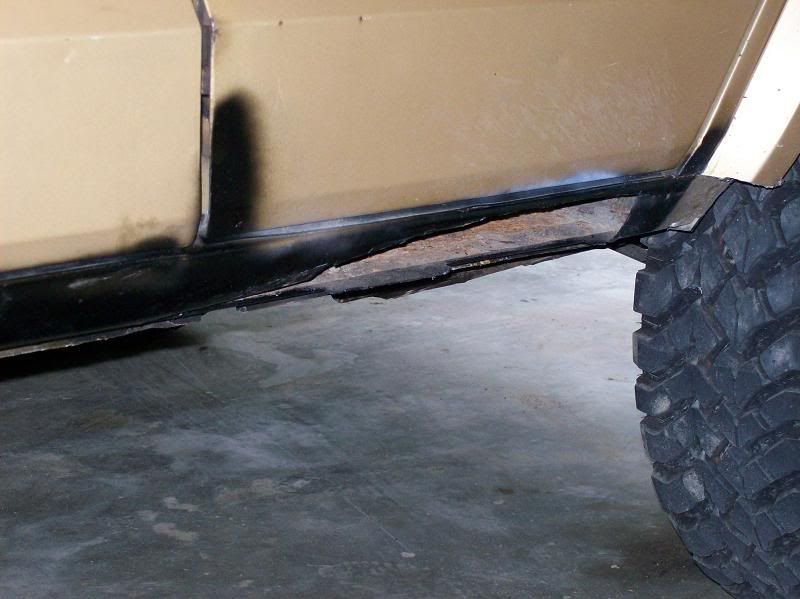
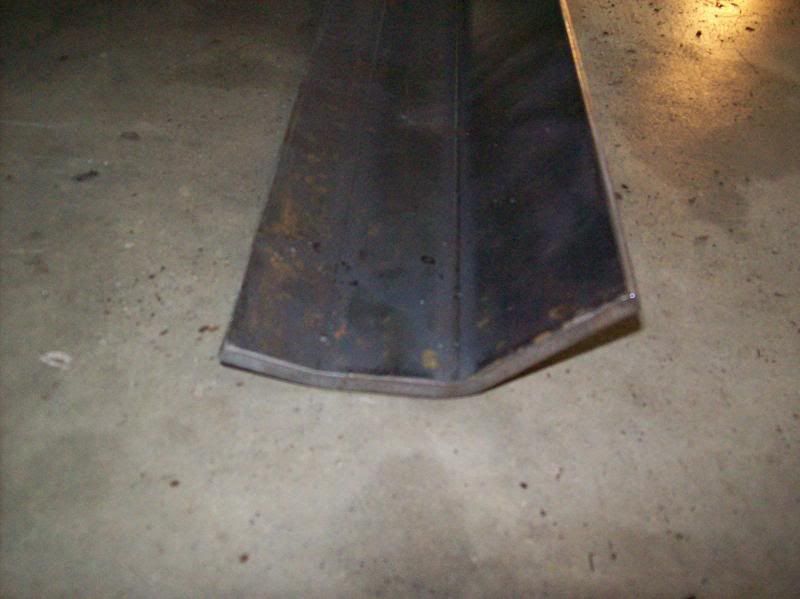
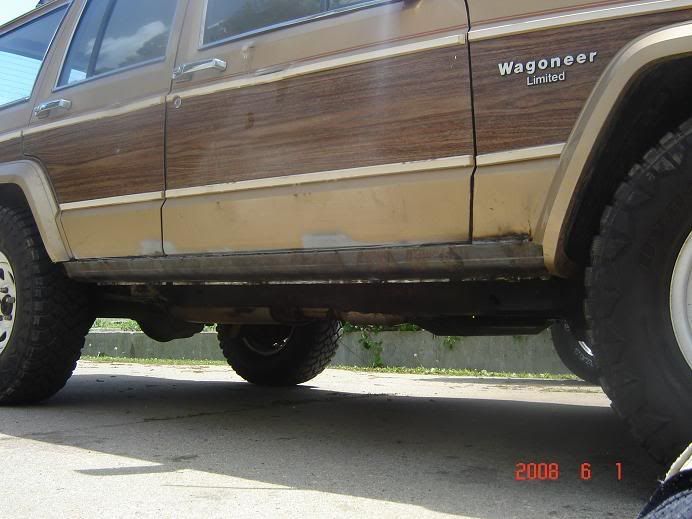
I had a Buddy from NAXJA fab some Rocker Skins using 1/4 inch steel. Heavy duty so they will also serve at Rock Sliders.

Grinded and painted some of the mess.
Sat like that for about a month then i had to cut and grind some more.
I had a Buddy from NAXJA fab some Rocker Skins using 1/4 inch steel. Heavy duty so they will also serve at Rock Sliders.
08-10-2008, 10:27 AM
#18
CF Veteran
Thread Starter
Join Date: Apr 2008
Location: Smiths Station, Al
Posts: 7,661
Likes: 0
Received 13 Likes
on
10 Posts
Year: 87
Model: Wagoneer
Engine: 4.0 I6
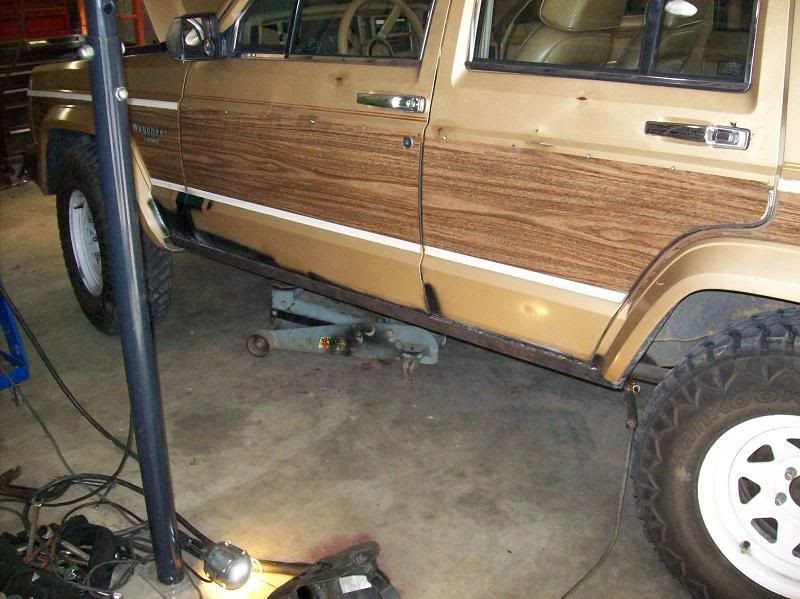
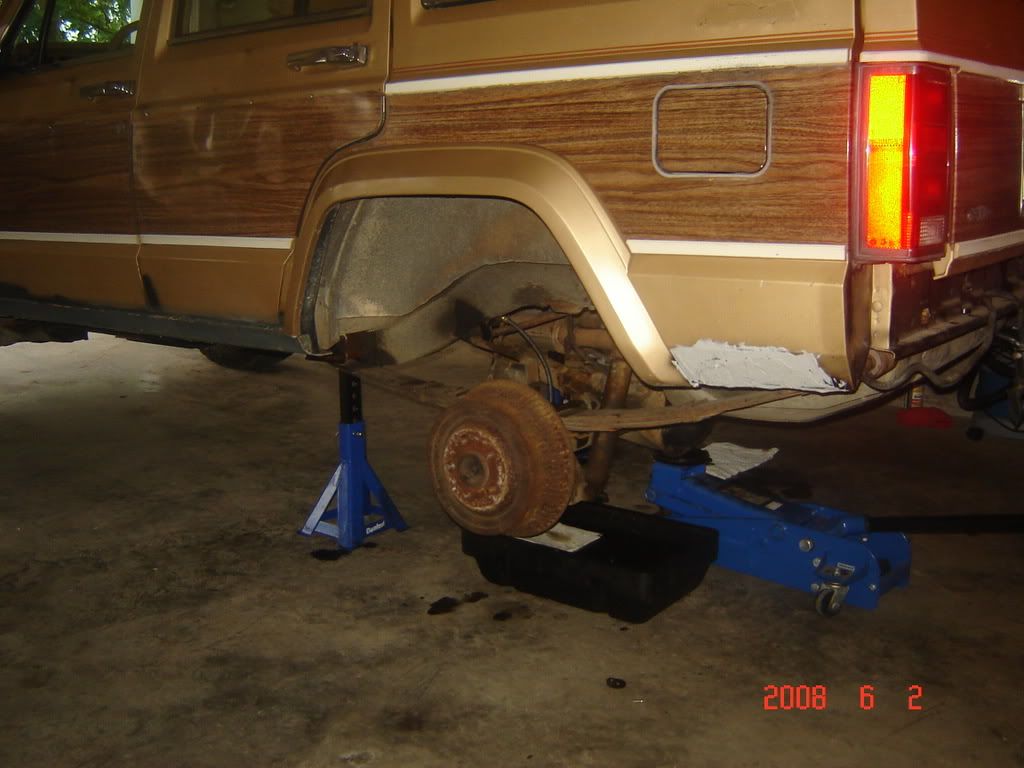
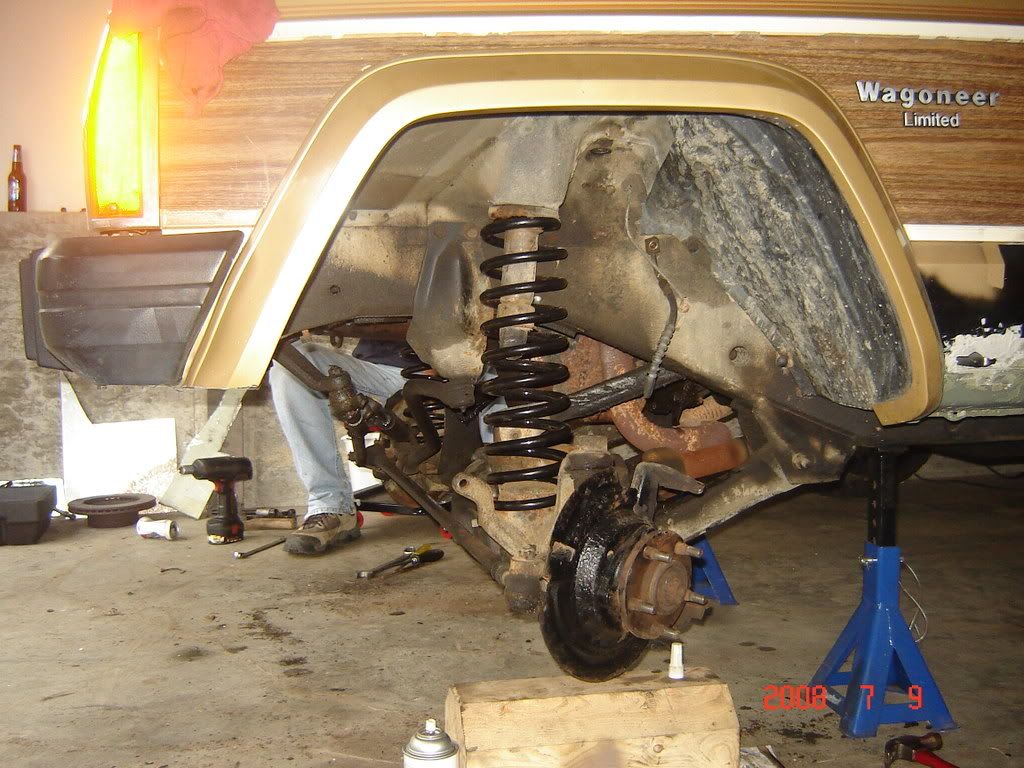
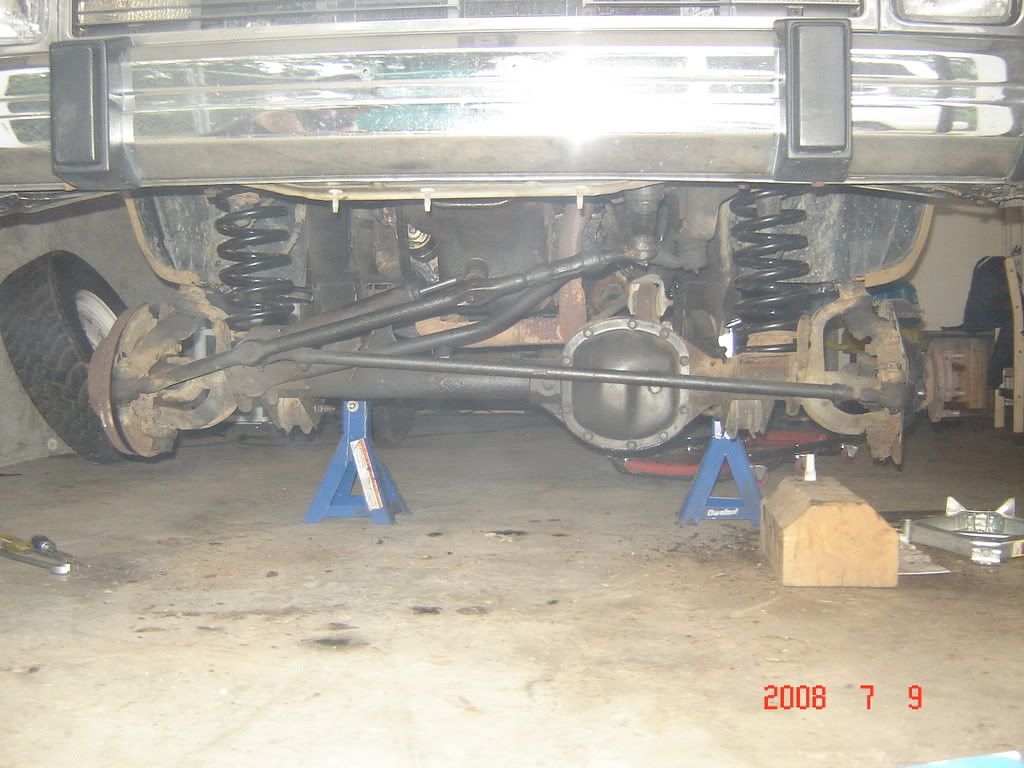
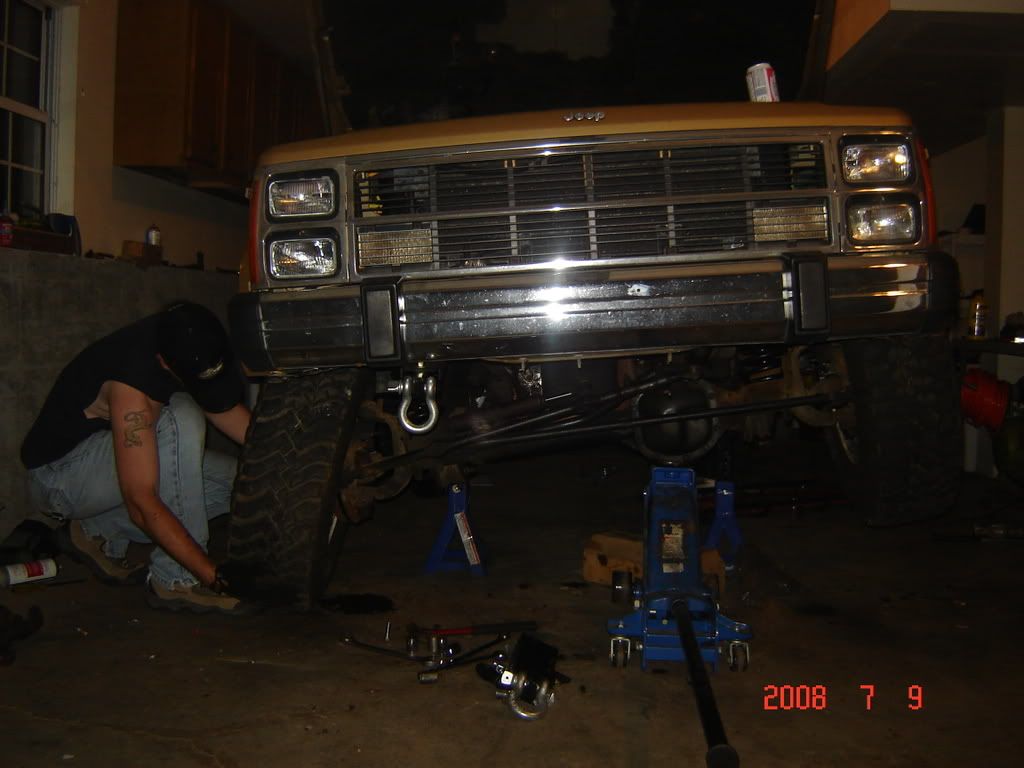
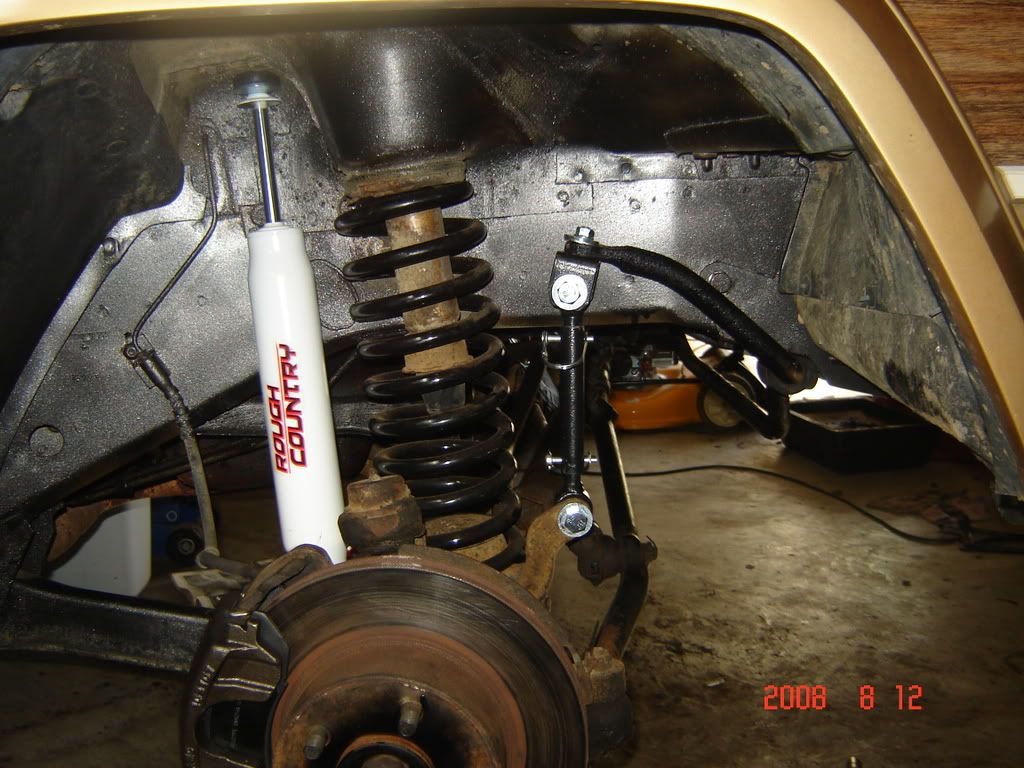
Started my Rough Country 3 in lift. This was not a smooth easy Job to do by yourself. I figured I would start with the back since I knew it would be the hardest with all the Rust.
I immediately broke all 4 shock bolts. Rust is a biatch
My wife (XJ TESS) Helped remove the rear sway bar. It's not going back on.
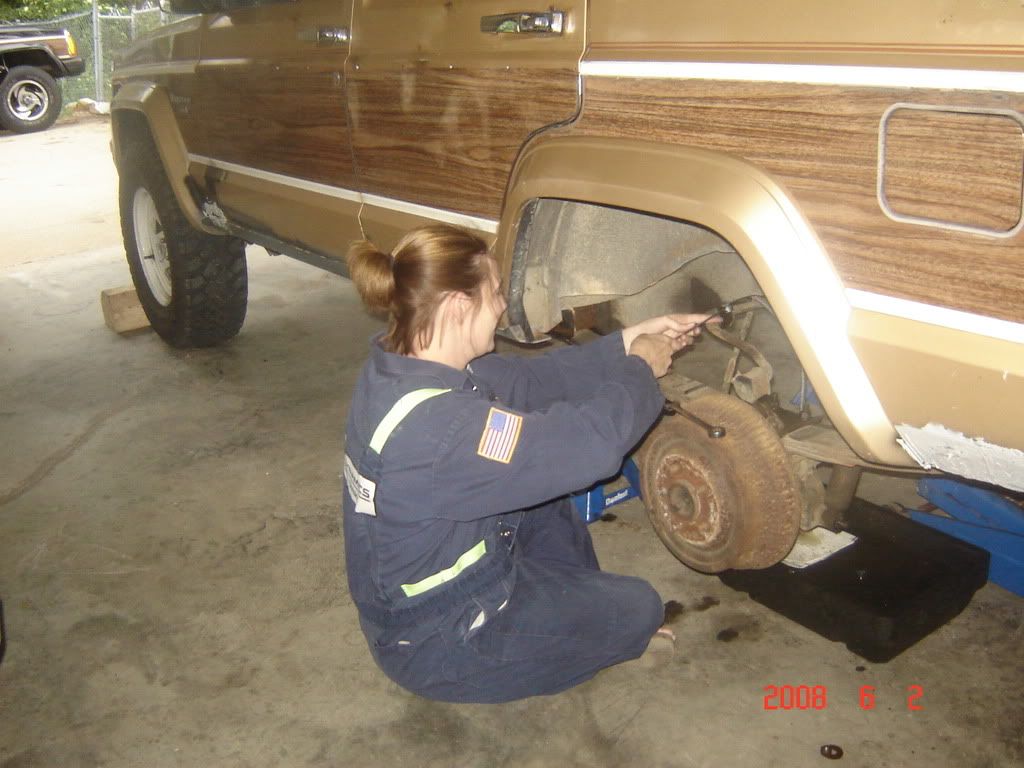
Drivers side spring bolt came out easy. Thinking this aint gonna be so bad.

Passenger side not so much. This one is seized to the bushing will not budge.
The bolt was seized so bad that when i tried to remove it it broke the weld nut. I didnt know that at first. So I had to cut holes to get to the weld nut.
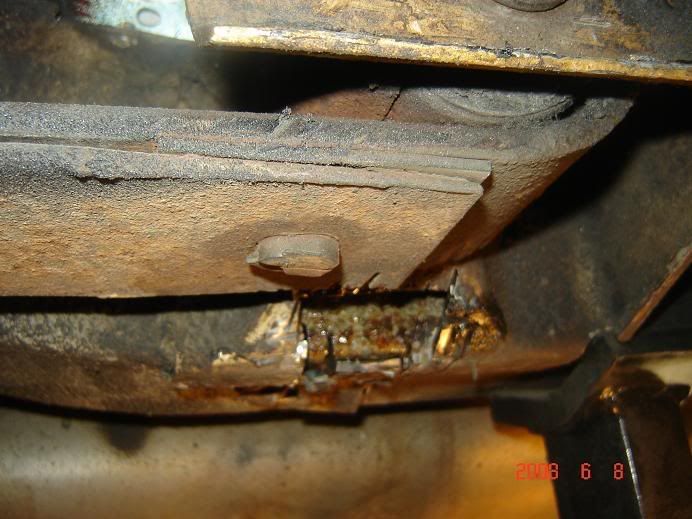
Put a wrench on it and started reefing it out.
Once i got it too where I could tell the nut was not holding it on I figured it was seized and proceeded to start cutting the bolt out.

Cut on each side of the spring pack with a 4 1/2 angle grinder. I cut the back first cause with a 4 1/2 you can't get all the way through the bolt only a lil so you have to use the bolt head to turn it a lil to cut all the way around it. Once done you can give it a lil shock with a chisel and a hammer and it will break pretty easily. Did to each side.
I immediately broke all 4 shock bolts. Rust is a biatch
My wife (XJ TESS) Helped remove the rear sway bar. It's not going back on.
Drivers side spring bolt came out easy. Thinking this aint gonna be so bad.
Passenger side not so much. This one is seized to the bushing will not budge.
The bolt was seized so bad that when i tried to remove it it broke the weld nut. I didnt know that at first. So I had to cut holes to get to the weld nut.
Put a wrench on it and started reefing it out.
Once i got it too where I could tell the nut was not holding it on I figured it was seized and proceeded to start cutting the bolt out.
Cut on each side of the spring pack with a 4 1/2 angle grinder. I cut the back first cause with a 4 1/2 you can't get all the way through the bolt only a lil so you have to use the bolt head to turn it a lil to cut all the way around it. Once done you can give it a lil shock with a chisel and a hammer and it will break pretty easily. Did to each side.
08-10-2008, 10:32 AM
#19
CF Veteran
Thread Starter
Join Date: Apr 2008
Location: Smiths Station, Al
Posts: 7,661
Likes: 0
Received 13 Likes
on
10 Posts
Year: 87
Model: Wagoneer
Engine: 4.0 I6
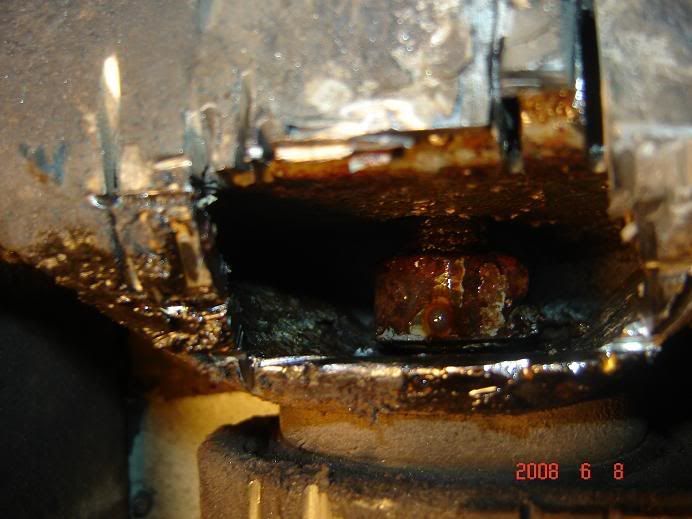
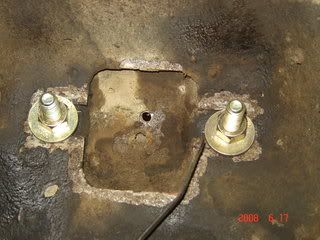
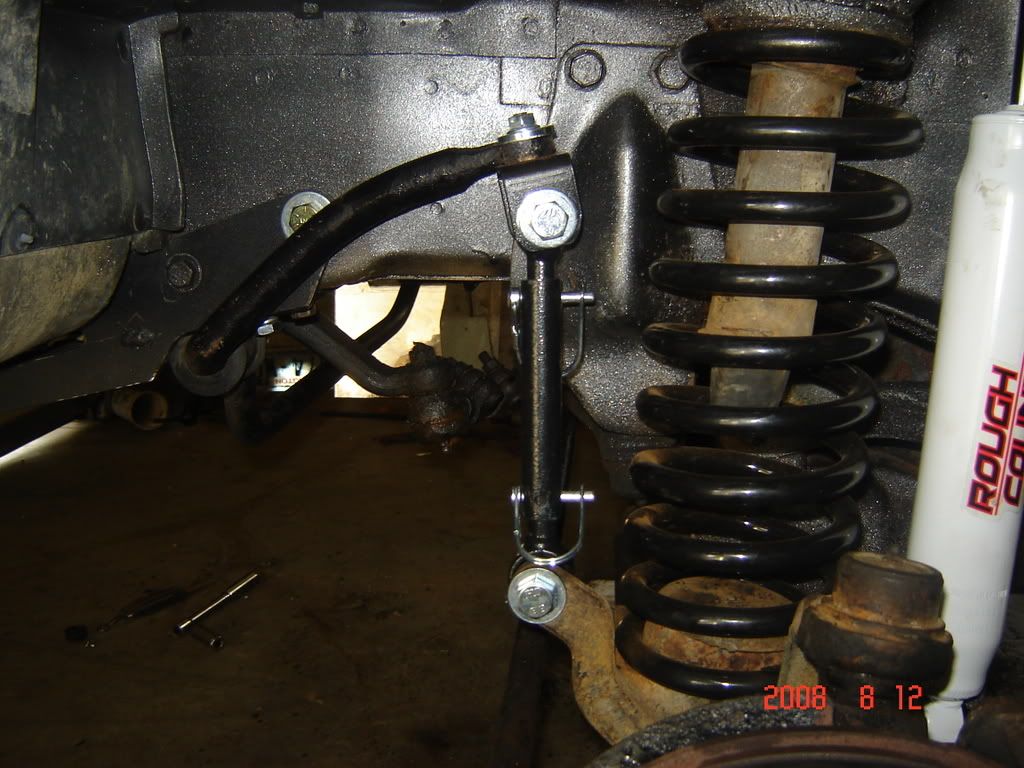
Next had to deal with extracting the shock bolts. Word of advice if you own an 87 covered with rust just forget about trying to extract they won't...
Ended up havint to cut holes through my perfect rhino lined floor so I could reef on the weld nuts.


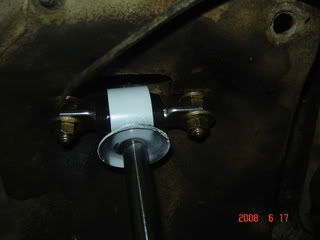
Once I broke the Weld nuts loose I just popped some more bolts in there and mounted up the Shocks. I did a two nut system place the shocks between the two so Once i cover the top holes I can just hold the middle nut and unscrew the bottom one for spring replacment.
Shock Mounted
Ended up havint to cut holes through my perfect rhino lined floor so I could reef on the weld nuts.
Once I broke the Weld nuts loose I just popped some more bolts in there and mounted up the Shocks. I did a two nut system place the shocks between the two so Once i cover the top holes I can just hold the middle nut and unscrew the bottom one for spring replacment.
Shock Mounted
08-10-2008, 10:34 AM
#20
CF Veteran
Thread Starter
Join Date: Apr 2008
Location: Smiths Station, Al
Posts: 7,661
Likes: 0
Received 13 Likes
on
10 Posts
Year: 87
Model: Wagoneer
Engine: 4.0 I6
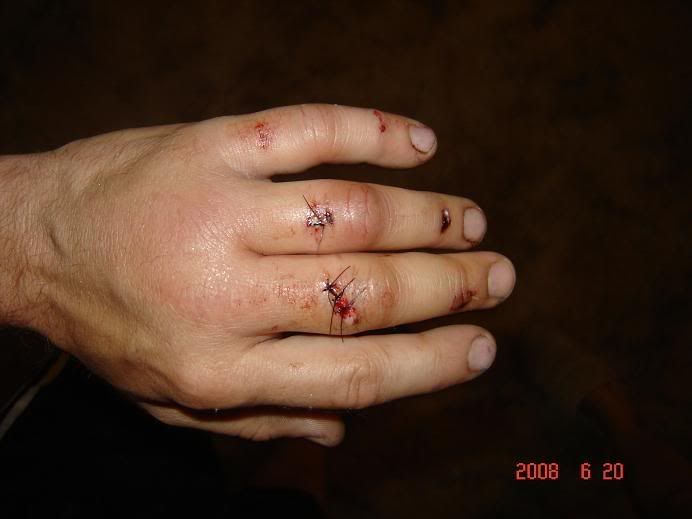
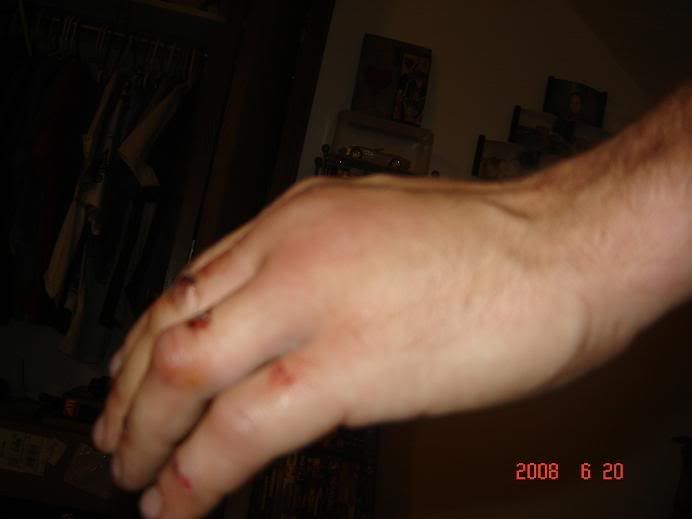
Then I broke three fingers so work has been slow going for several weeks.
Finally to where i can start doing stuff agian so progress should start back up.
Finally to where i can start doing stuff agian so progress should start back up.
08-10-2008, 11:09 AM
#21
CF Veteran
Thread Starter
Join Date: Apr 2008
Location: Smiths Station, Al
Posts: 7,661
Likes: 0
Received 13 Likes
on
10 Posts
Year: 87
Model: Wagoneer
Engine: 4.0 I6
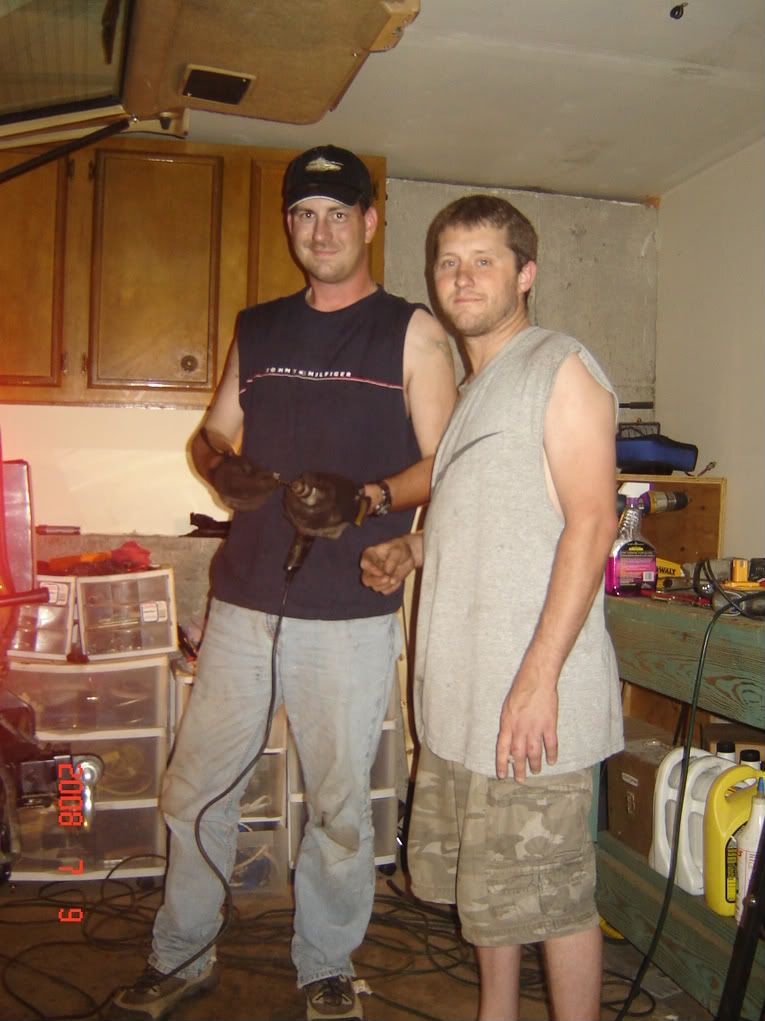
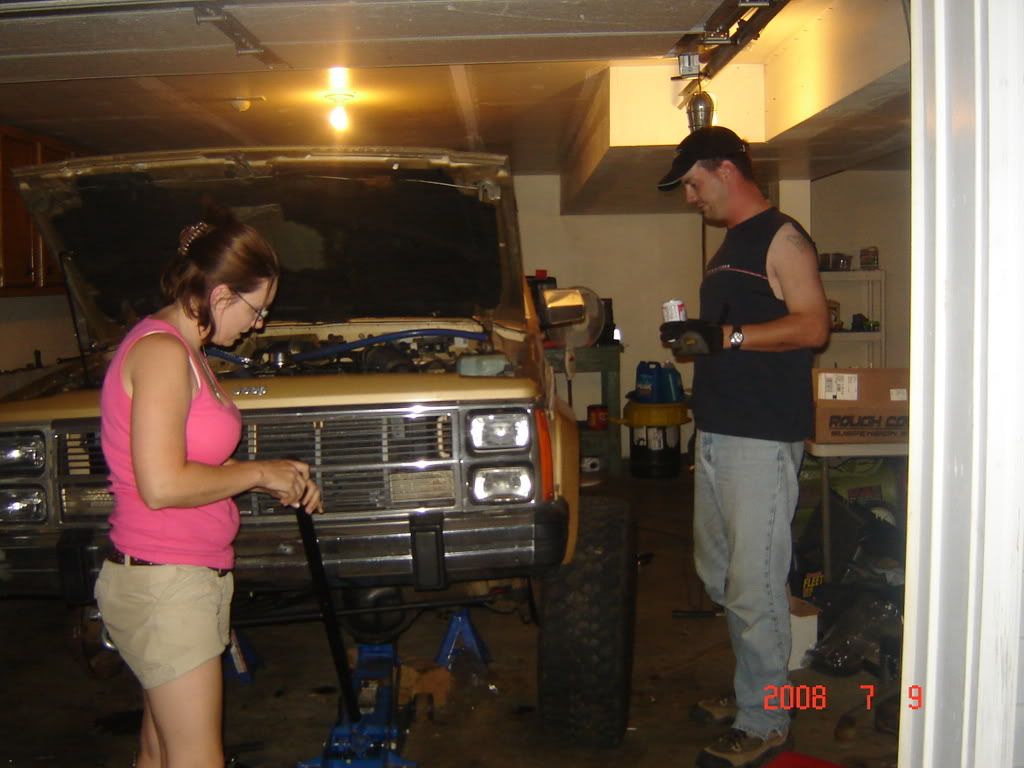
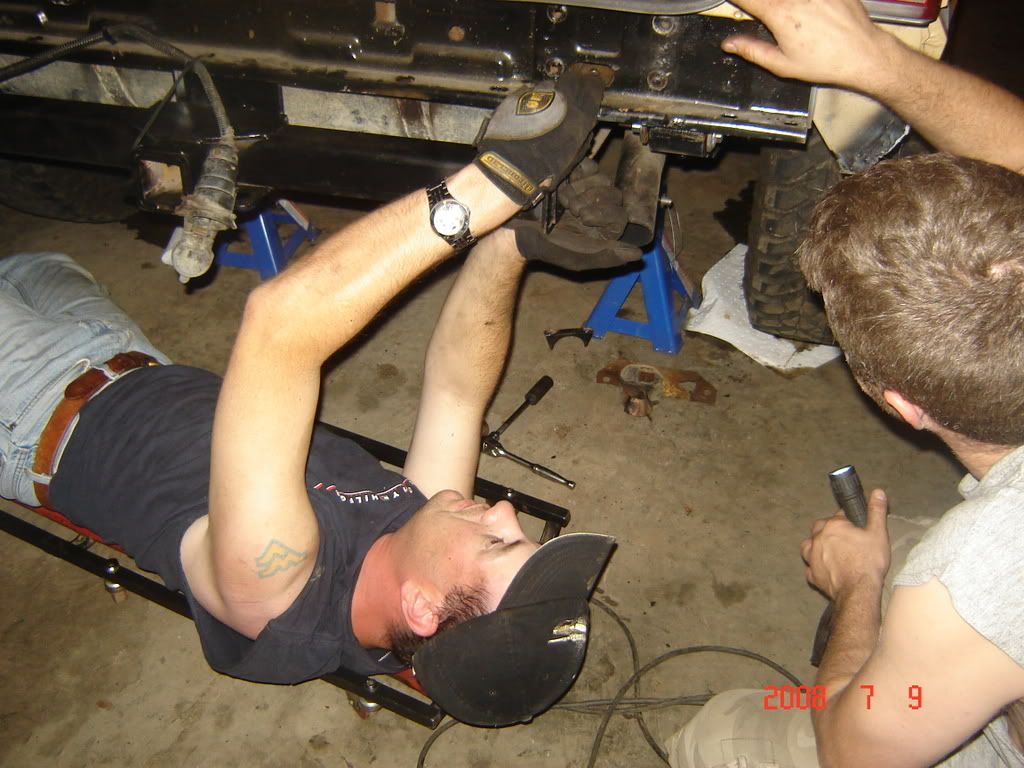
So then sometime in July My buddy from MD Andy (87 Waggy on here). Came to Ft. Knox to help out with some Strykers and I offered him a set of RC 3in AAL's to hlep me finish my lift.
He was a Big help I got the lift 90% percent done when he left. We would have finished it but need a few nuts and bolts and stuff and Autozone was closed.
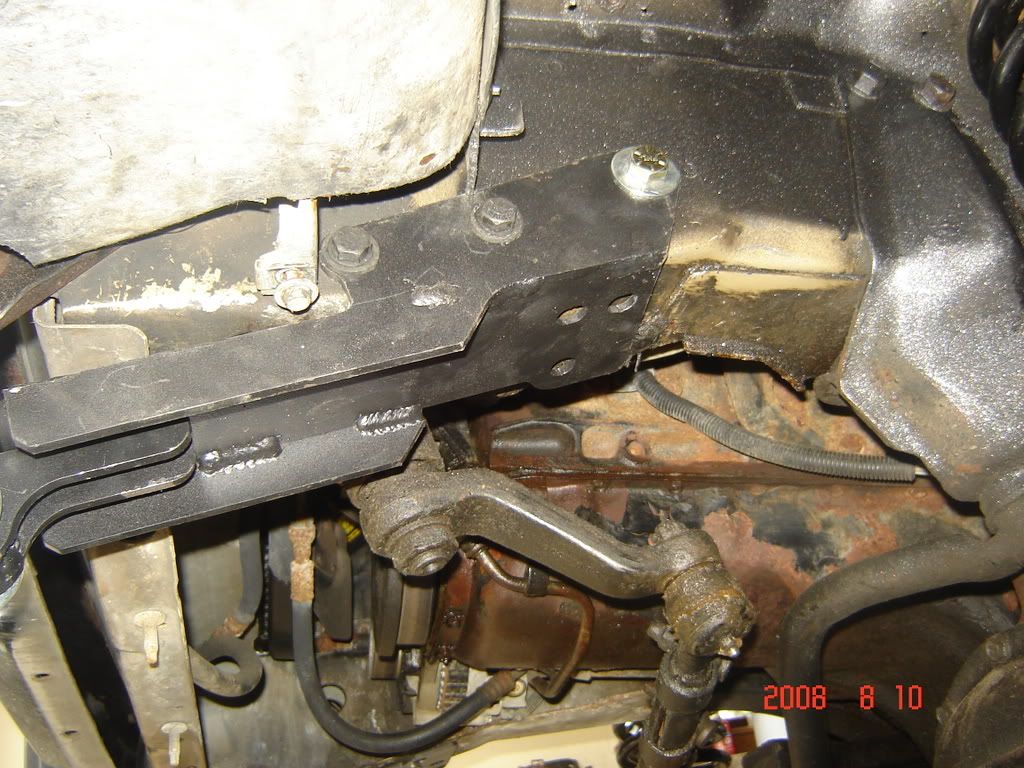
He hooked up one of the tow points for me in the front.
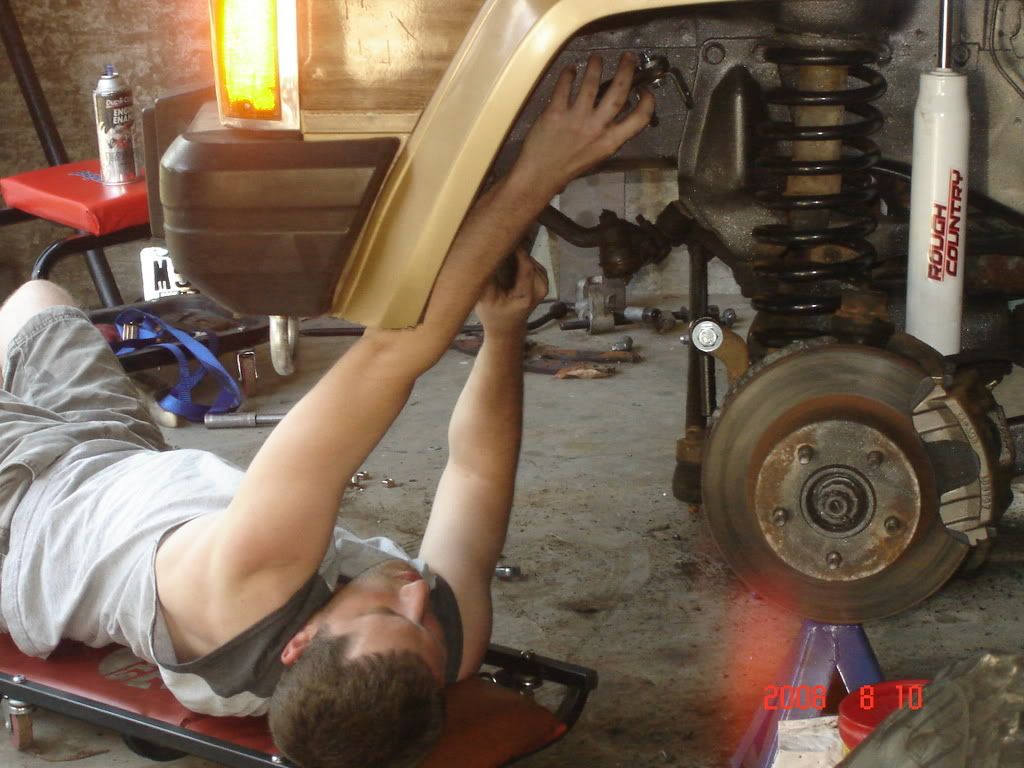
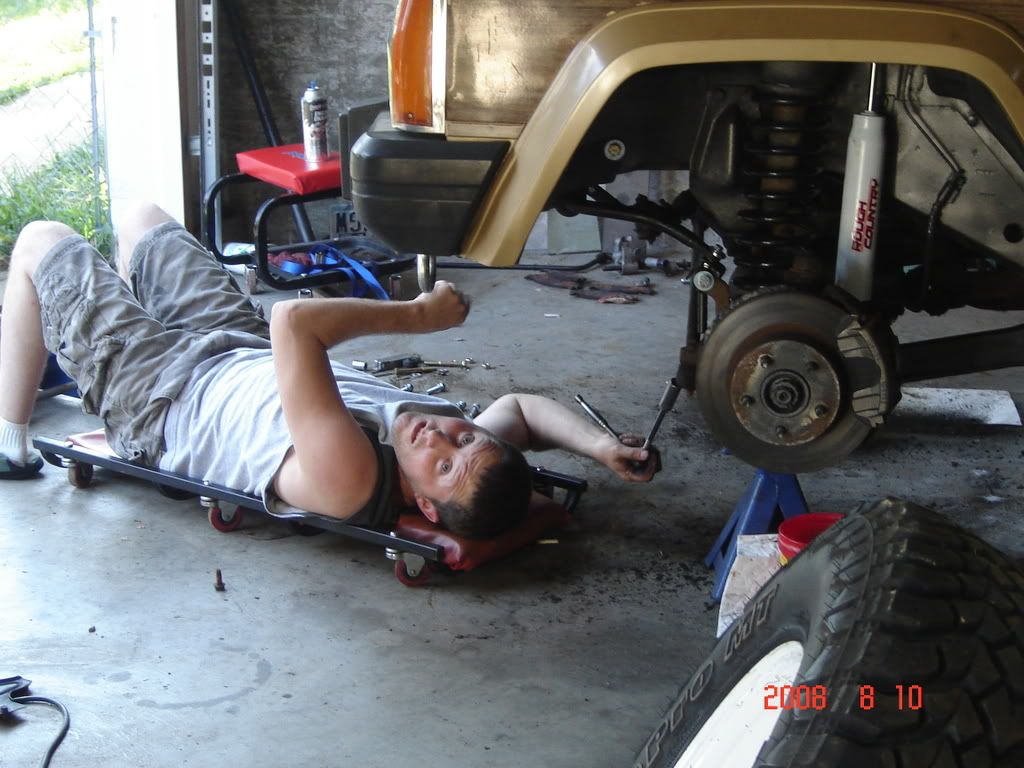
Had some problems bleeding the front brakes so we had to take the wheel back off and have a look.
Baically the crush washer on the line is not sealing it to the caliper I removed the crush washer and now it appears to not leak more testing will be done of course.
He was a Big help I got the lift 90% percent done when he left. We would have finished it but need a few nuts and bolts and stuff and Autozone was closed.
He hooked up one of the tow points for me in the front.
Had some problems bleeding the front brakes so we had to take the wheel back off and have a look.
Baically the crush washer on the line is not sealing it to the caliper I removed the crush washer and now it appears to not leak more testing will be done of course.
Last edited by XJ Stryker; 09-23-2008 at 10:55 AM.
08-10-2008, 11:13 AM
#22
CF Veteran
Thread Starter
Join Date: Apr 2008
Location: Smiths Station, Al
Posts: 7,661
Likes: 0
Received 13 Likes
on
10 Posts
Year: 87
Model: Wagoneer
Engine: 4.0 I6
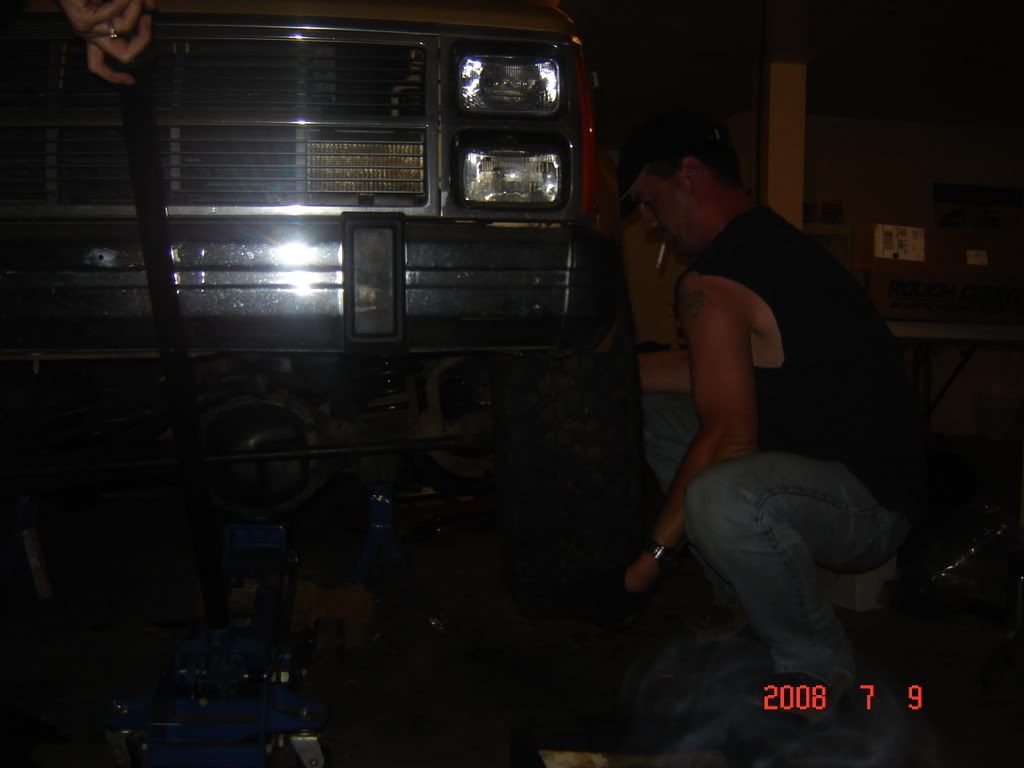
Before he left I got him to install my new hitch for me too. Pretty easy install
After he left i been kinda just healing waiting to be able to hold a wrench again.
Still can't hold a wrench too well but have gotten alot better and my addiction won't keep me on the couch any longer.
I have new pics loaded on the camera just have to find the cord, Oh and taking the kids and dogs to the lake today so maybe tonight. Later.
08-10-2008, 04:04 PM
#23
CF Veteran
Thread Starter
Join Date: Apr 2008
Location: Smiths Station, Al
Posts: 7,661
Likes: 0
Received 13 Likes
on
10 Posts
Year: 87
Model: Wagoneer
Engine: 4.0 I6
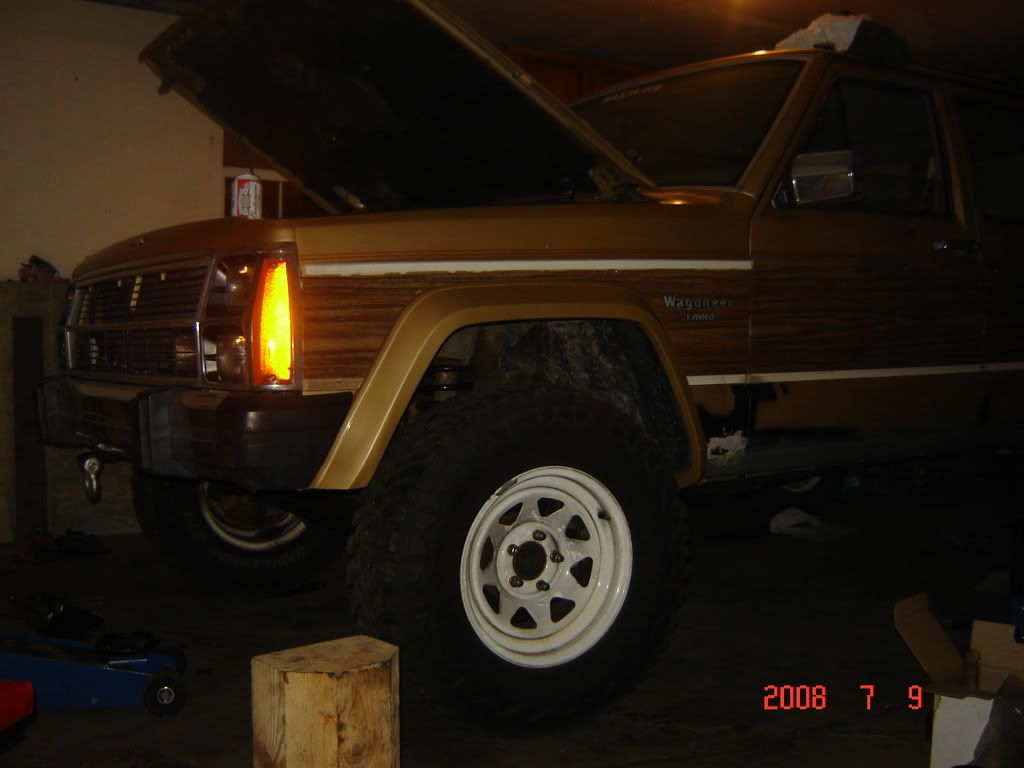
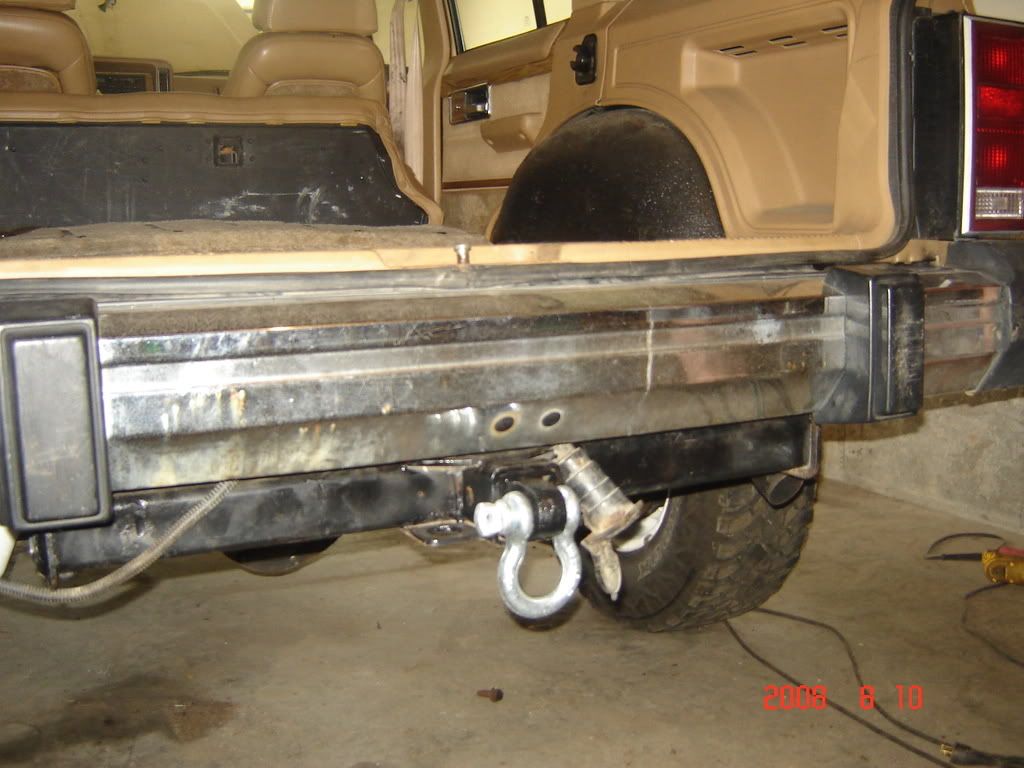
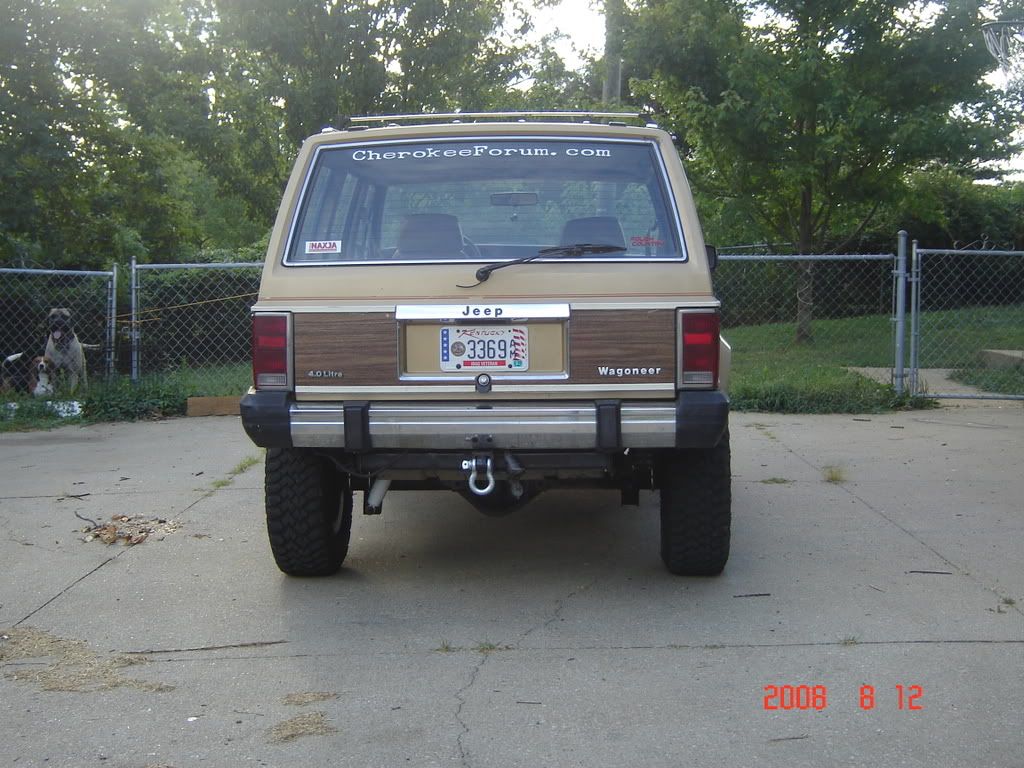
Ok Last night I was finally able to mount most of my Bumper till the squito's ran me off. This morning I finished buttoning it up and got a picture.
I got a Rear Tow Point and a Bumper now! She is coming along
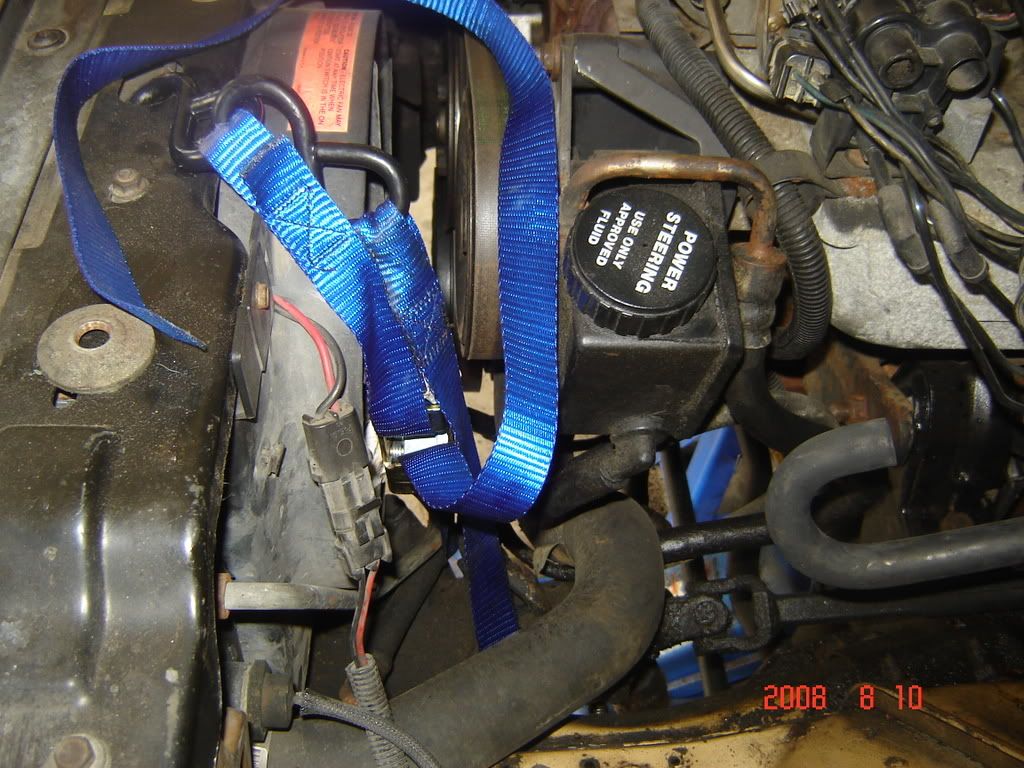
Okay I pulled both bolts out of the steering box today and attached this strap to the top to support it if it did fall. It didnt Budge finally something going right.
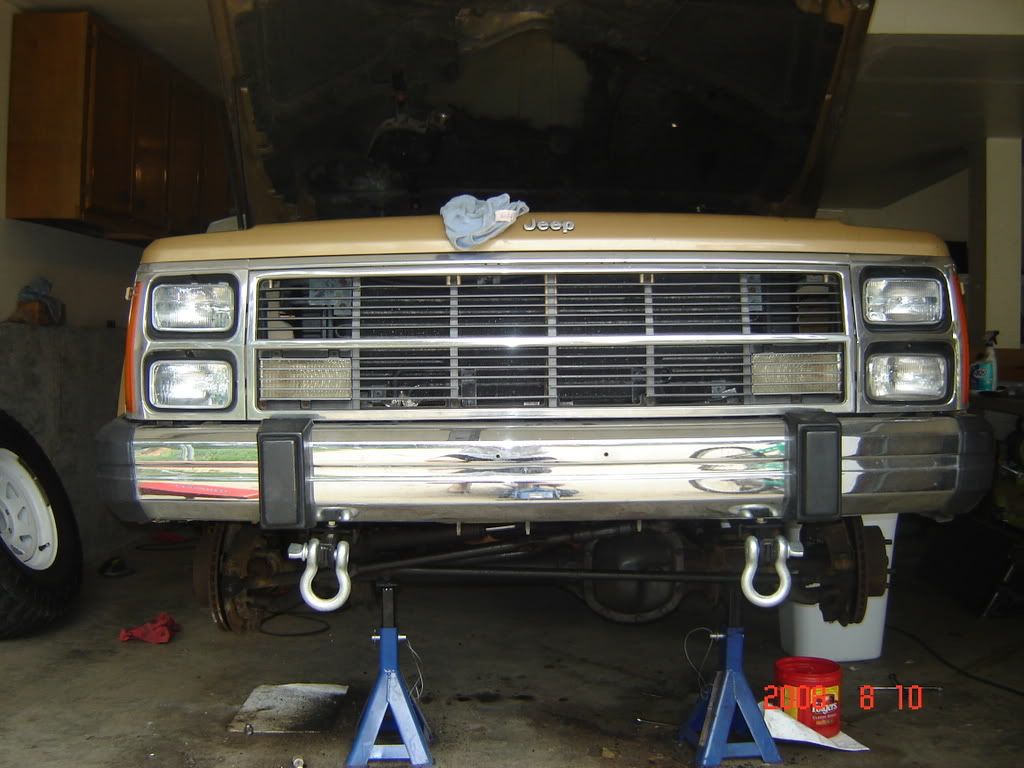
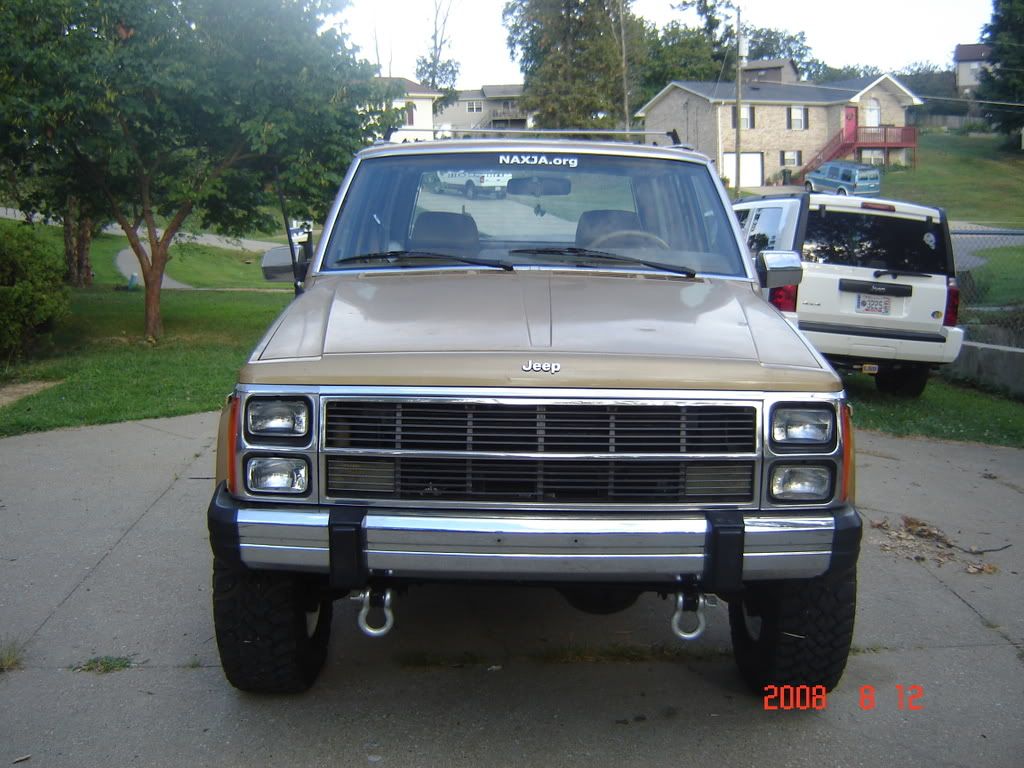
Finished up the Front tow points and here it is. The new front of my Jeep!
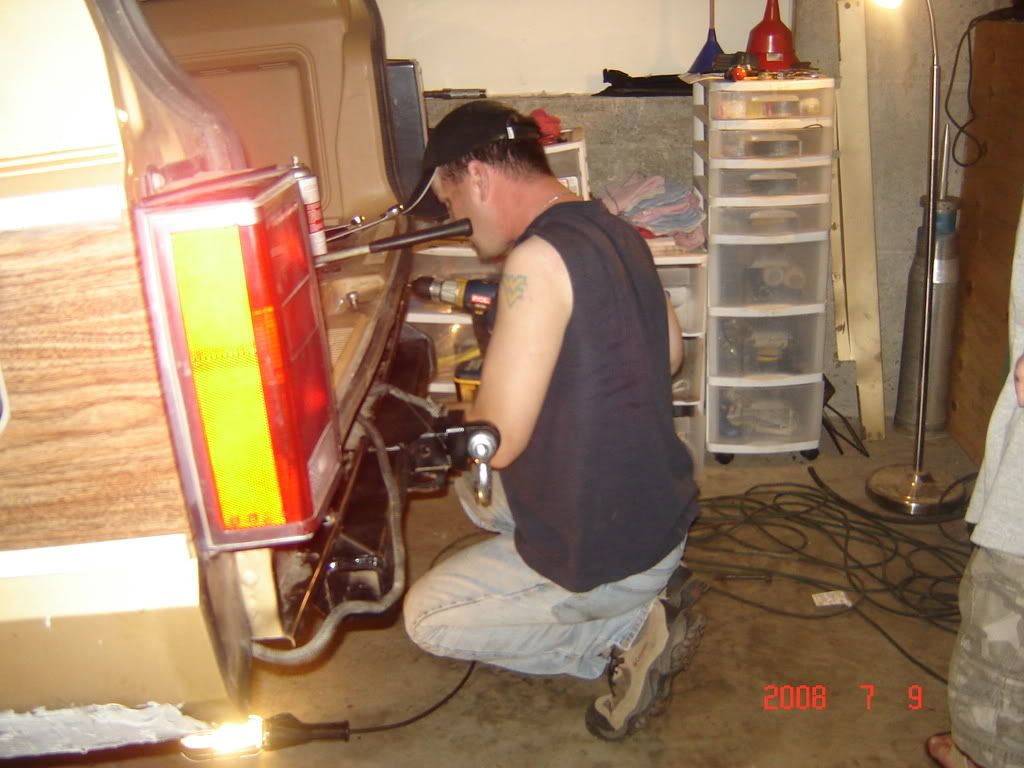
Cleaned the rust off my sway bar ends today. I have to take the disco's to work tomorrow since i have better tools for modding them there (Chop saw, drill press).
I got a Rear Tow Point and a Bumper now! She is coming along
Okay I pulled both bolts out of the steering box today and attached this strap to the top to support it if it did fall. It didnt Budge finally something going right.
Finished up the Front tow points and here it is. The new front of my Jeep!
Cleaned the rust off my sway bar ends today. I have to take the disco's to work tomorrow since i have better tools for modding them there (Chop saw, drill press).
08-12-2008, 06:19 PM
#24
CF Veteran
Thread Starter
Join Date: Apr 2008
Location: Smiths Station, Al
Posts: 7,661
Likes: 0
Received 13 Likes
on
10 Posts
Year: 87
Model: Wagoneer
Engine: 4.0 I6
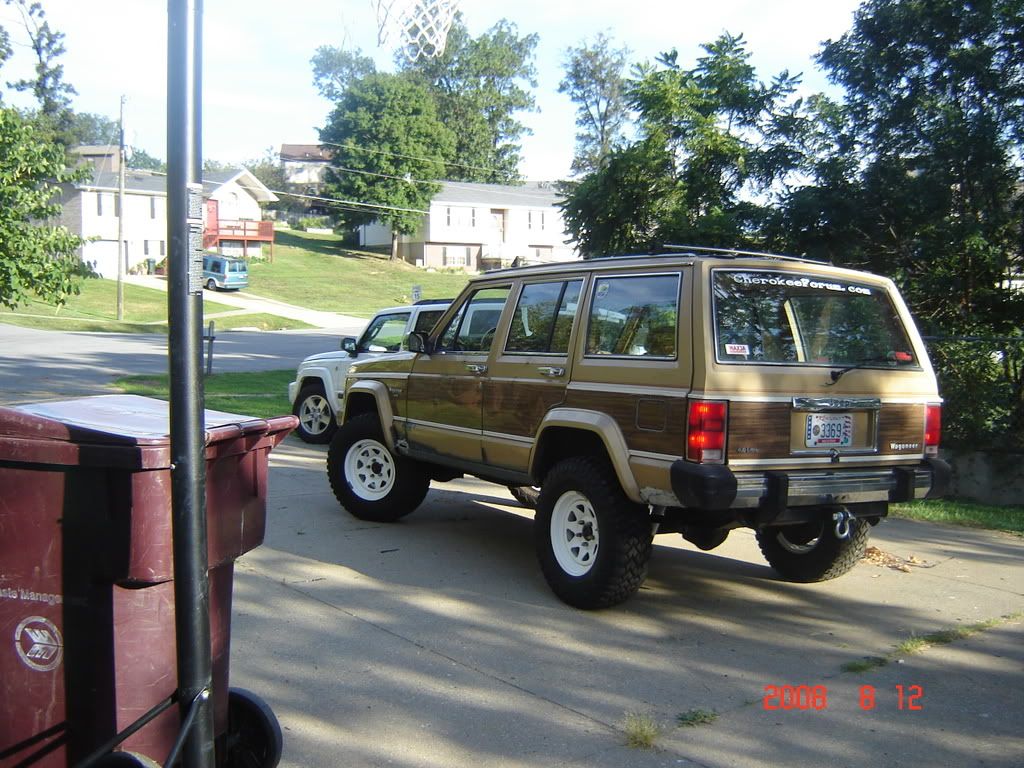
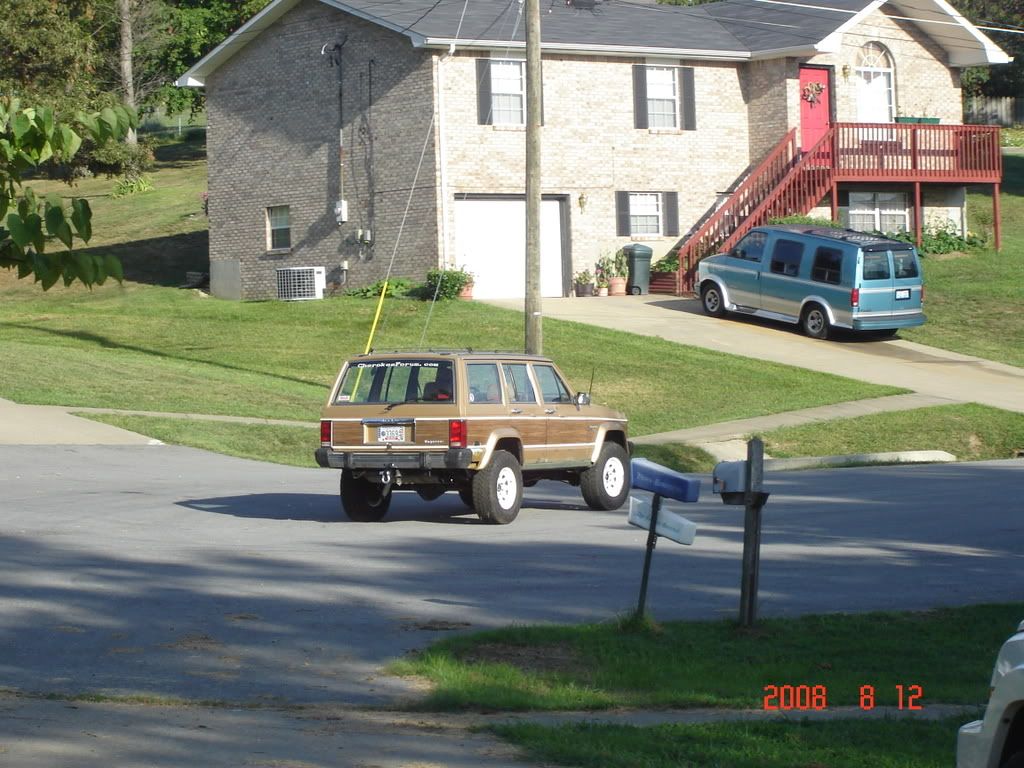
I drove it today WOO HOO
OKay I finished up everything today.
Installed Sway bar with Disco's I cut two inches off of the 4in rough country Discos. Still looks like it is too High but I will try them here
Lil Cherokee forum love.
And Finally a completed 3in RC lift
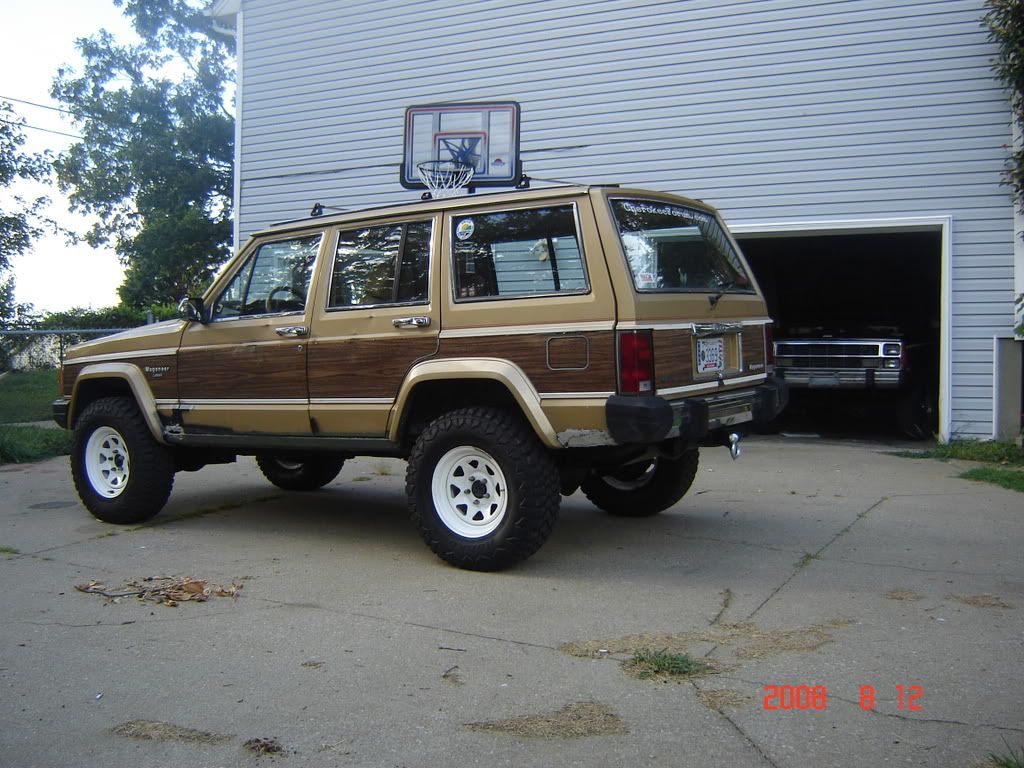
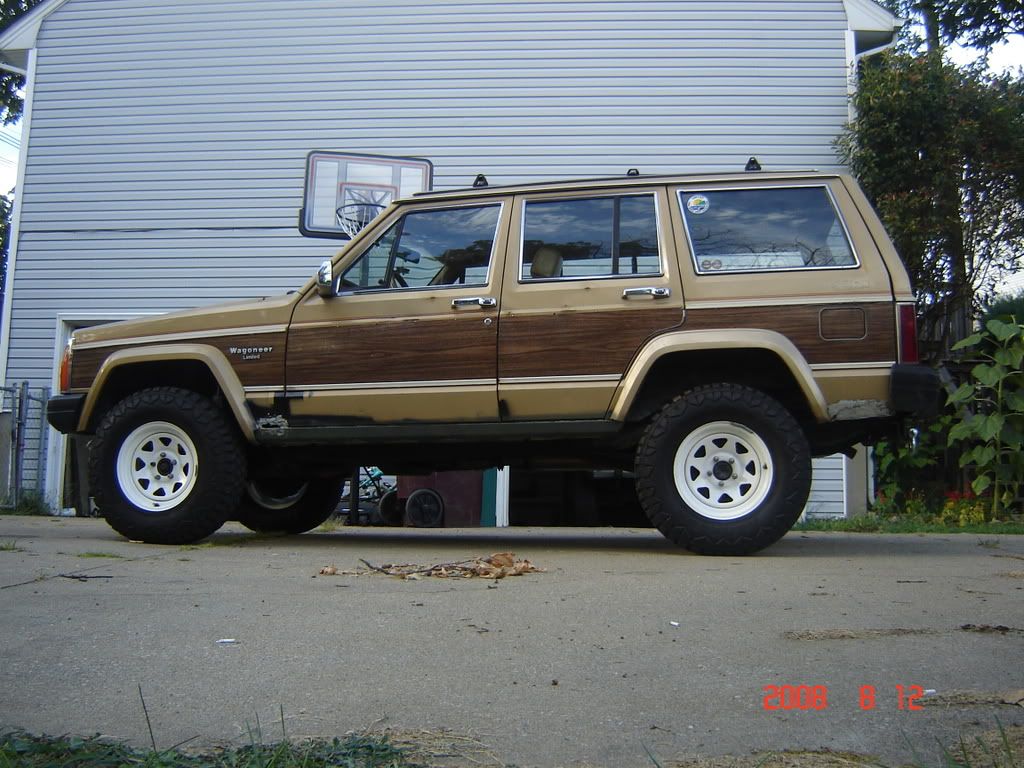

Test drove great
OKay I finished up everything today.
Installed Sway bar with Disco's I cut two inches off of the 4in rough country Discos. Still looks like it is too High but I will try them here
Lil Cherokee forum love.
And Finally a completed 3in RC lift
Test drove great
 08-13-2008, 06:28 AM
#29
CF Veteran
Thread Starter
Join Date: Apr 2008
Location: Smiths Station, Al
Posts: 7,661
Likes: 0
Received 13 Likes
on
10 Posts
Year: 87
Model: Wagoneer
Engine: 4.0 I6
