
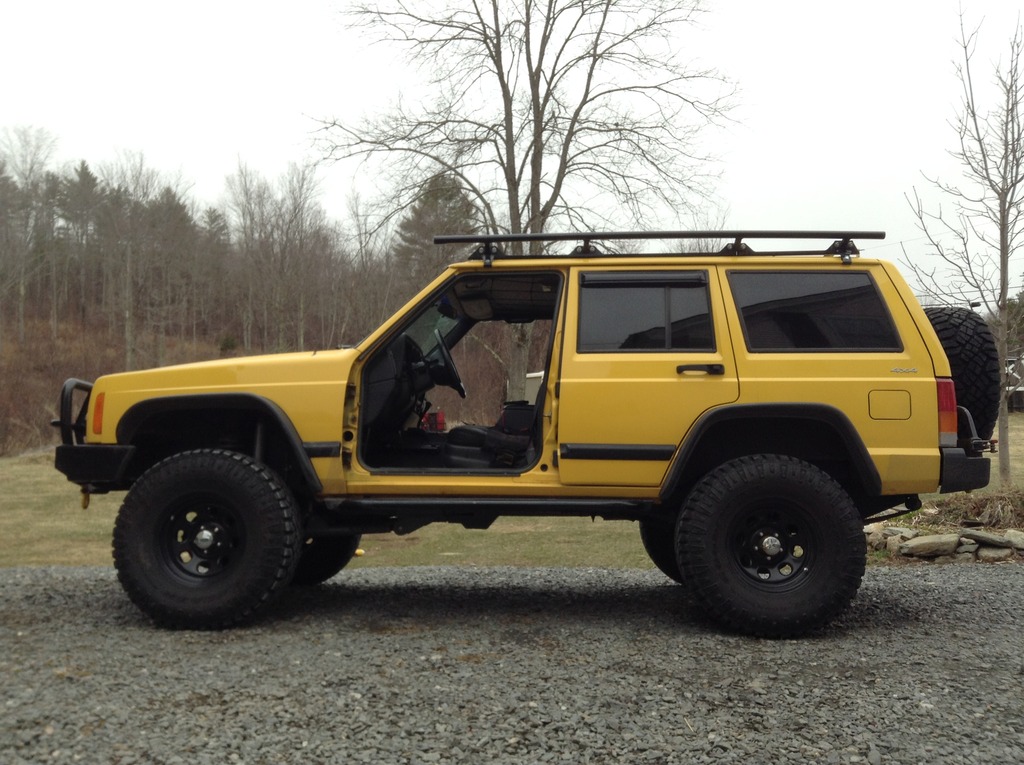
Overland Build: Yellow Jeep XJ
 12-19-2015, 05:34 PM
#61
CF Veteran
 12-19-2015, 07:26 PM
#62
Junior Member
Thread Starter

Join Date: Nov 2015
Location: New Hampshire
Posts: 70
Likes: 0
Received 0 Likes
on
0 Posts
Year: 2001
Model: Cherokee
Engine: 242 CID 4.0 Inline 6 Chrysler MPI "High Output"
Yes, the sliders were originally intended to be flipped down.
But due to a bend in the sliders themselves the curve went opposite of the roof's body-line.
So aesthetically speaking, it didn't look good.
Two slight curves going the opposite directions
So until I could get them bent the proper direction we simply flipped them temporarily. It actually matched the roof line perfectly, so I kept it.
Still protect the Jeep, and gave it a unique look.
12-29-2015, 05:09 PM
#63
CF Veteran
Join Date: Dec 2015
Location: Broward county
Posts: 1,323
Likes: 0
Received 5 Likes
on
5 Posts
Model: Cherokee
Maximize Space in Cargo Area Removed the back seat to maximize use of space. Kept the back rest and flipped down to use as platform for crates, as well as store a few things under it. Recovery gear is kept under seat backing for easy access. (jack, ****** block, straps etc) We now have enough space to sleep in cargo area of vehicle if conditions are not optimum for camping. All expedition gear will be organized in cases and containers. Room still available for cooler and personal gear. Cargo area consists of 4 Plano crates, 1 bug out bag and MOLLE gear on passenger side rear. Space still available for various items. Cases are heavy duty, impact and water resistant. All containers will be marked for easy identification. Automotive, Camp, Food and Sleep supplies all have corresponding numbers. Gear will be kept pre-packed in containers at all times. All that is needed to pack for a trip is to load containers, 1 personal gear bag, and cooler. Vehicle can be loaded, turn key and out of driveway in minutes; with enough gear and non perishable food to sustain 2 people for weeks. Bench Seat Removed Small Plano Hardcase for sensitive equipment Large Plano crates for expedition equipment and gear Gear Loaded mock up Number Designation Update: We ran this setup on a month long road trip on both roads and trails. Stress tested this hard on some rugged trails, as well as stop and go city driving. No issues with shifting gear whatsoever. There was even an incident in Centralia where the Jeep got airborn. Girlfriend wasn't impressed, but the gear was fine. Pros: Organized, secure, rugged, water/dust resistant, removable storage system, light weight. Cons: Decreased driving visibility, decreased quick accessibility to bottom row crates, increased weight when overpacked, Drawback: blindspots. This setup does hamper side/rear visibility to an extant. Rearview mirror becomes useless, and visibility looking to the side/back to check blind spots in windows is decreased. Must rely solely on side mirrors and side windows. Not so much an issue on trails, but merging in traffic on cities and interstates requires more caution than normal. Drawback: Weight. Weight is a double edged sword. These Plano Crates weigh next to nothing, so it is far lighter than an integrated rack or platform system. But having crates can lead to filling them with more equipment, essentially overpacking and adding more weight in the process. In the future I may build a floor rack platform with drawers no more than 6" in height, and downsize from four rear crates to two. Gear would then be level with windows, keeping visibility. This would also promote the need to prioritize gear for the sake of weight reduction, thus reducing the probability of overpacking.
04-22-2016, 08:01 AM
#64
Junior Member
Thread Starter
Join Date: Nov 2015
Location: New Hampshire
Posts: 70
Likes: 0
Received 0 Likes
on
0 Posts
Year: 2001
Model: Cherokee
Engine: 242 CID 4.0 Inline 6 Chrysler MPI "High Output"
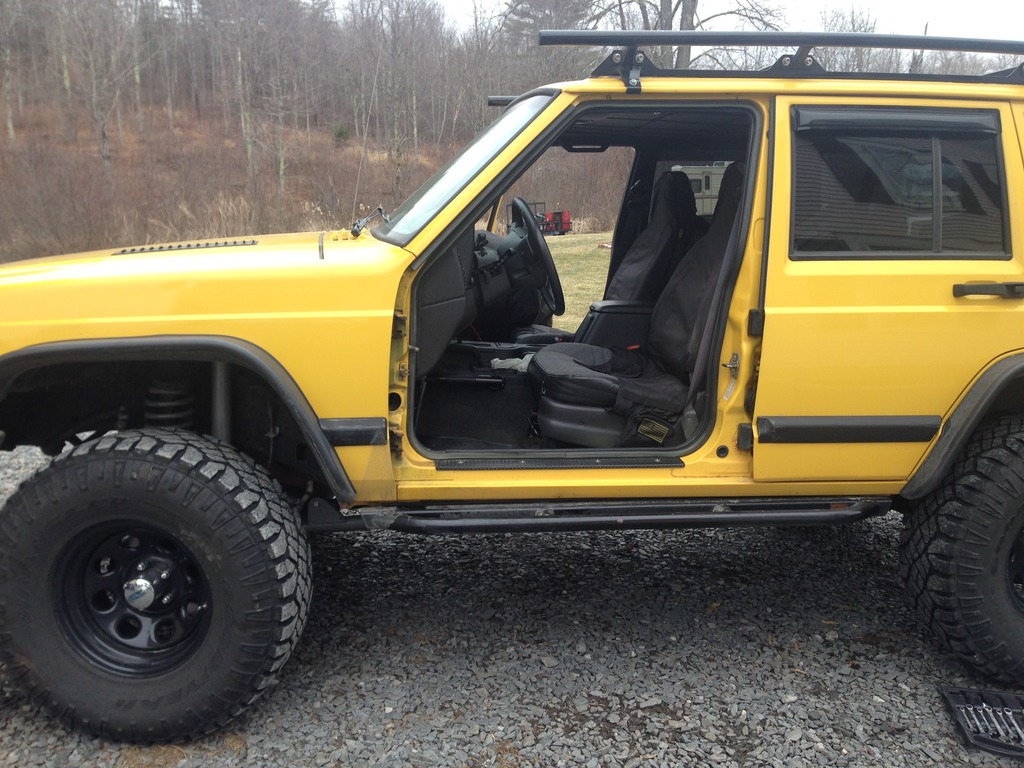
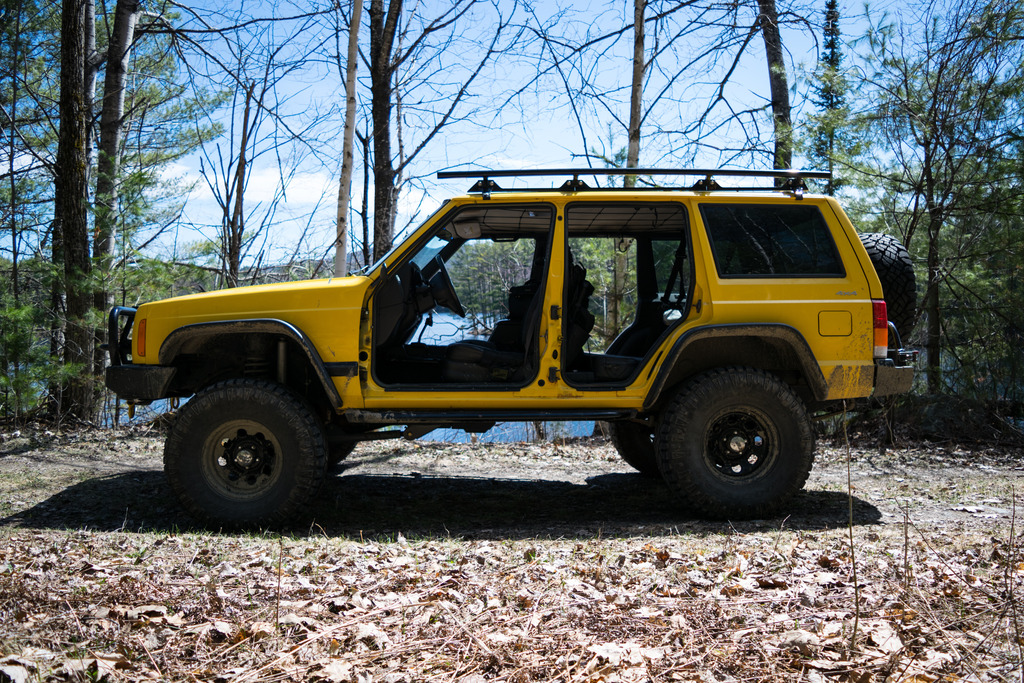
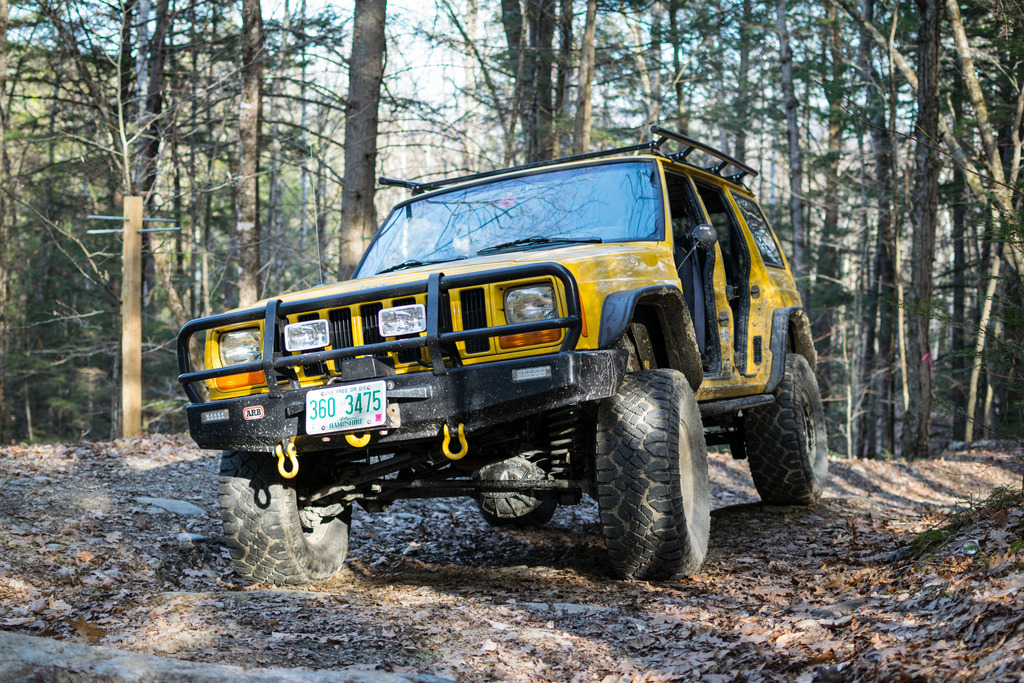
Removable Door Mod
Decided to go doorless. I won't go into too much detail, as this mod has been covered in depth on other threads. I took fast64's approach, which in turn was inspired by Sharpie's. Definitely a good read if you are interested in doing this mod, look them up if you haven't already. Just the front doors today, it was cold and started to snow. I will remove the rear doors soon.
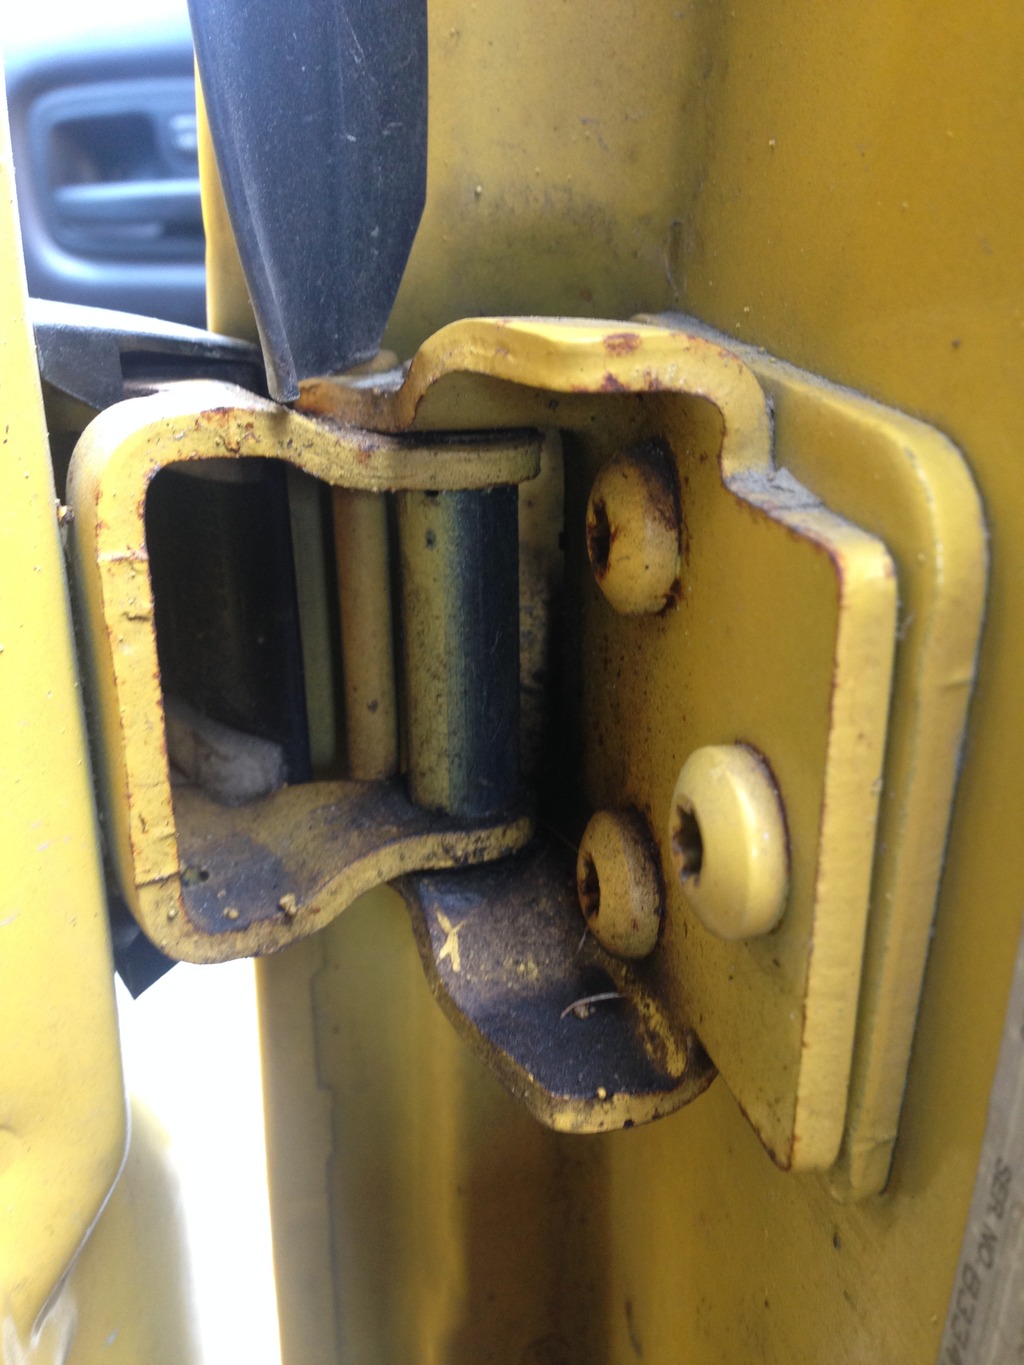
Note:
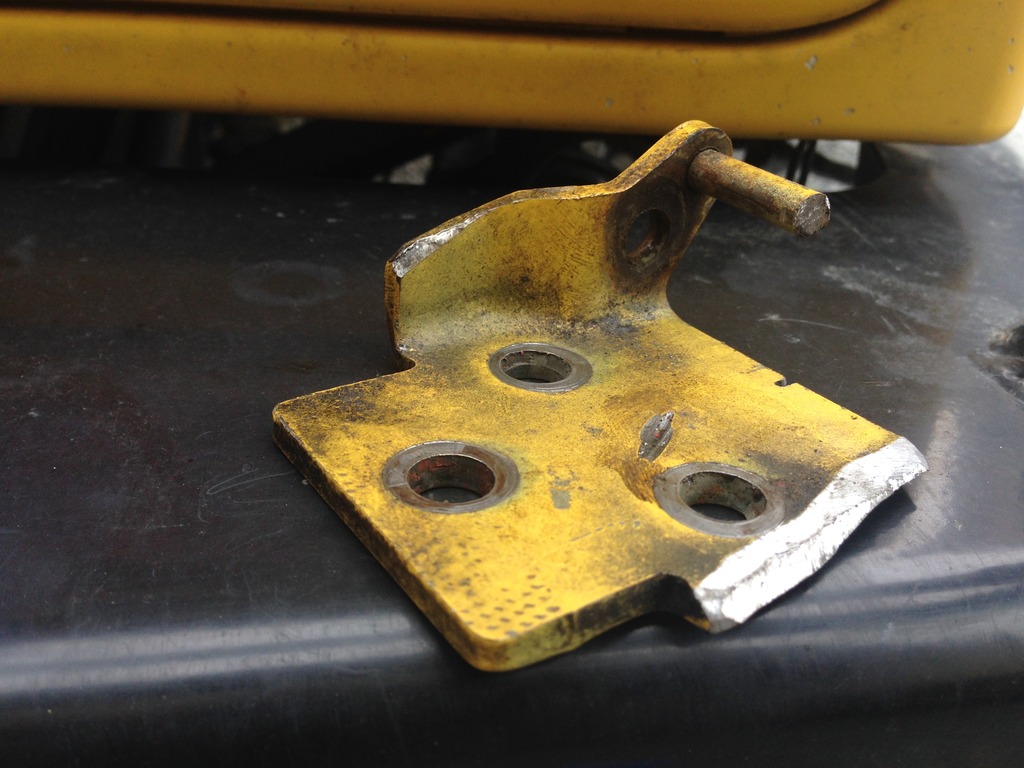
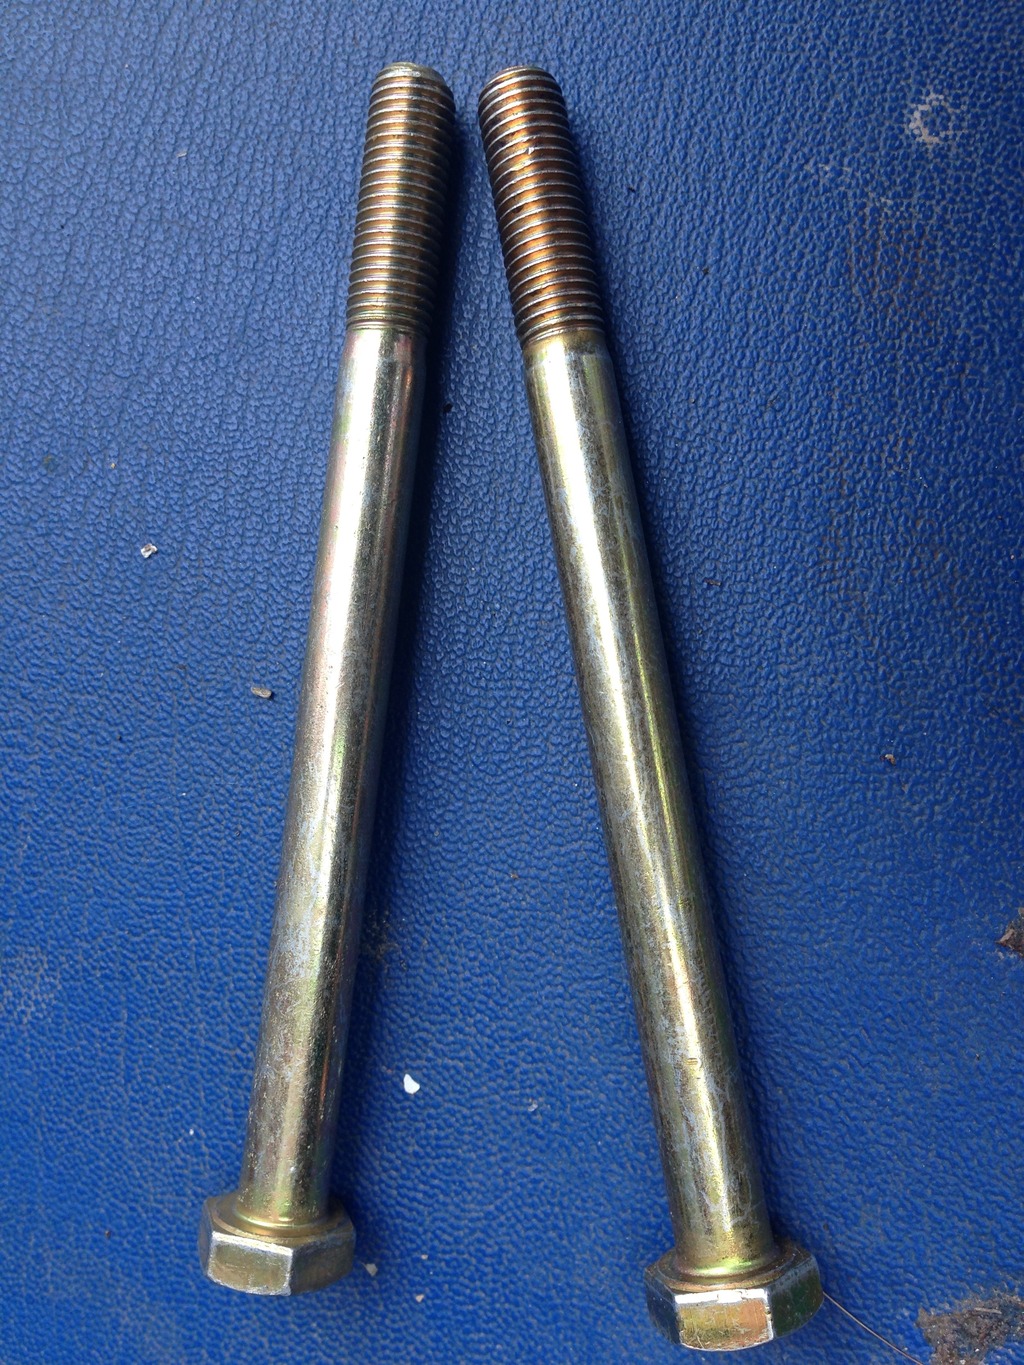
The grommets in the hinges on the body were pretty worn out. This is causing a slight sag when I open the door. This is causing some grinding of the lower portion of the door onto the fender. Not happy about it, so I may modify the top pin with a 3/8 bolt and brass bearing, rather than the 5/16 bolt on the front doors. I will most likely test this out first before posting.
Decided to go doorless. I won't go into too much detail, as this mod has been covered in depth on other threads. I took fast64's approach, which in turn was inspired by Sharpie's. Definitely a good read if you are interested in doing this mod, look them up if you haven't already. Just the front doors today, it was cold and started to snow. I will remove the rear doors soon.
Note:
The grommets in the hinges on the body were pretty worn out. This is causing a slight sag when I open the door. This is causing some grinding of the lower portion of the door onto the fender. Not happy about it, so I may modify the top pin with a 3/8 bolt and brass bearing, rather than the 5/16 bolt on the front doors. I will most likely test this out first before posting.
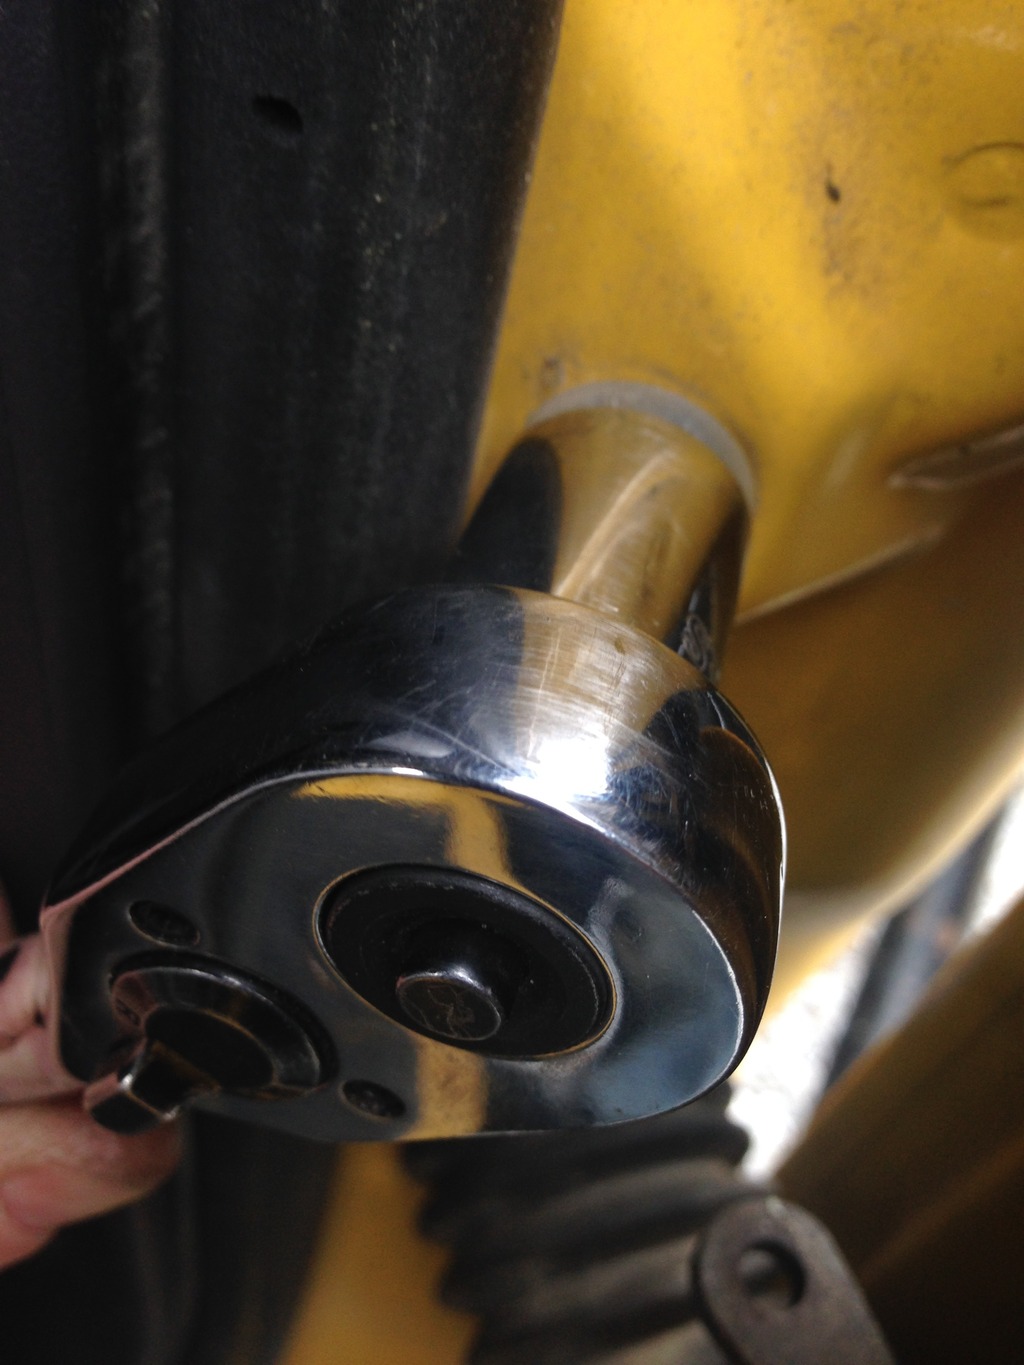
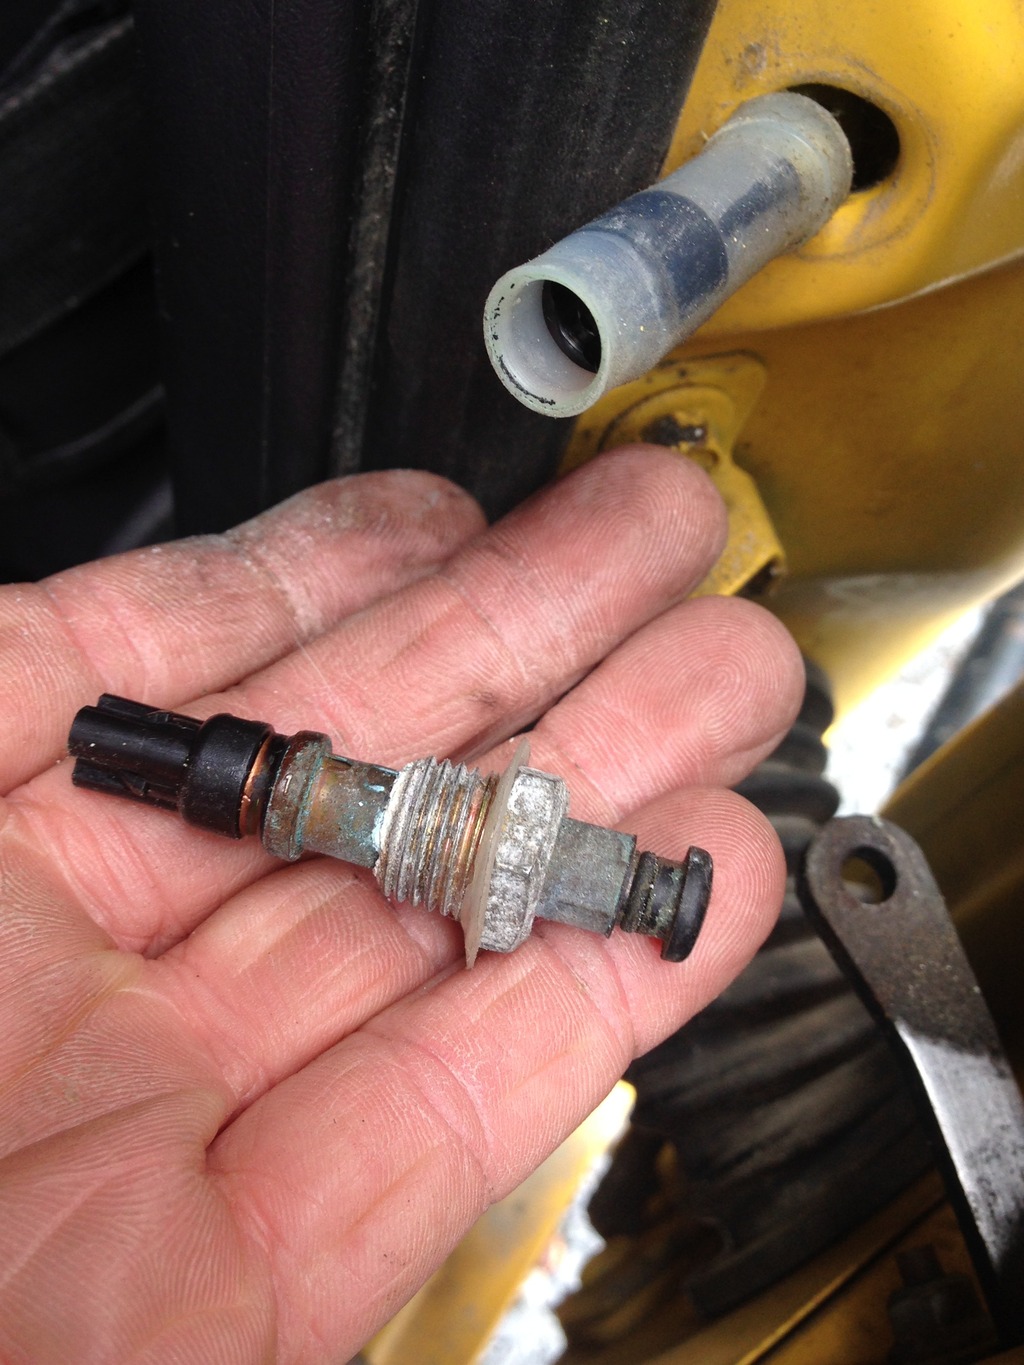
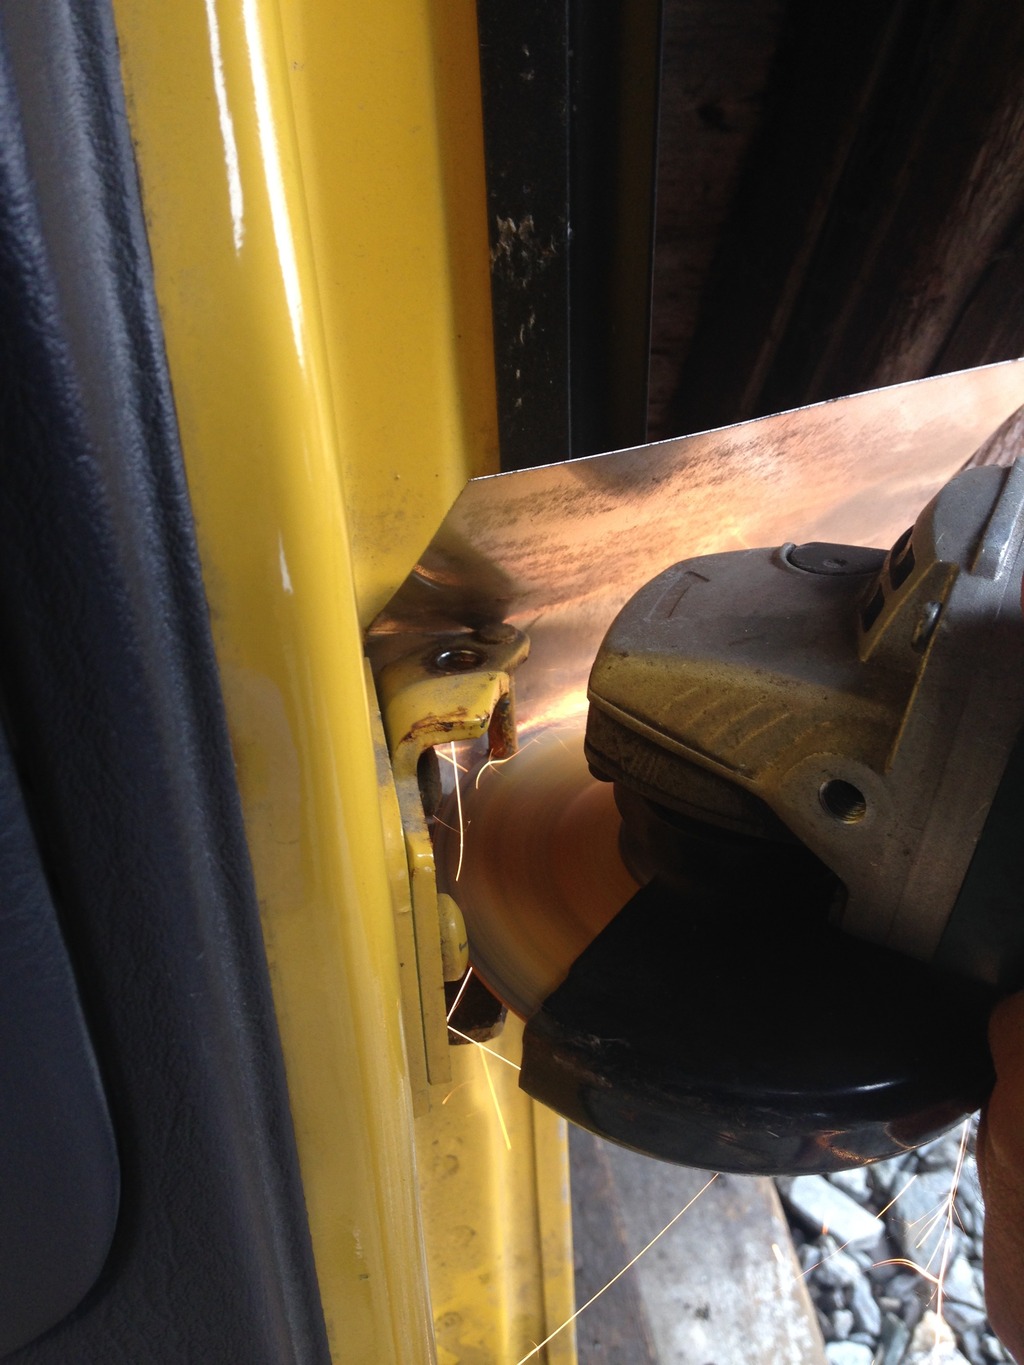
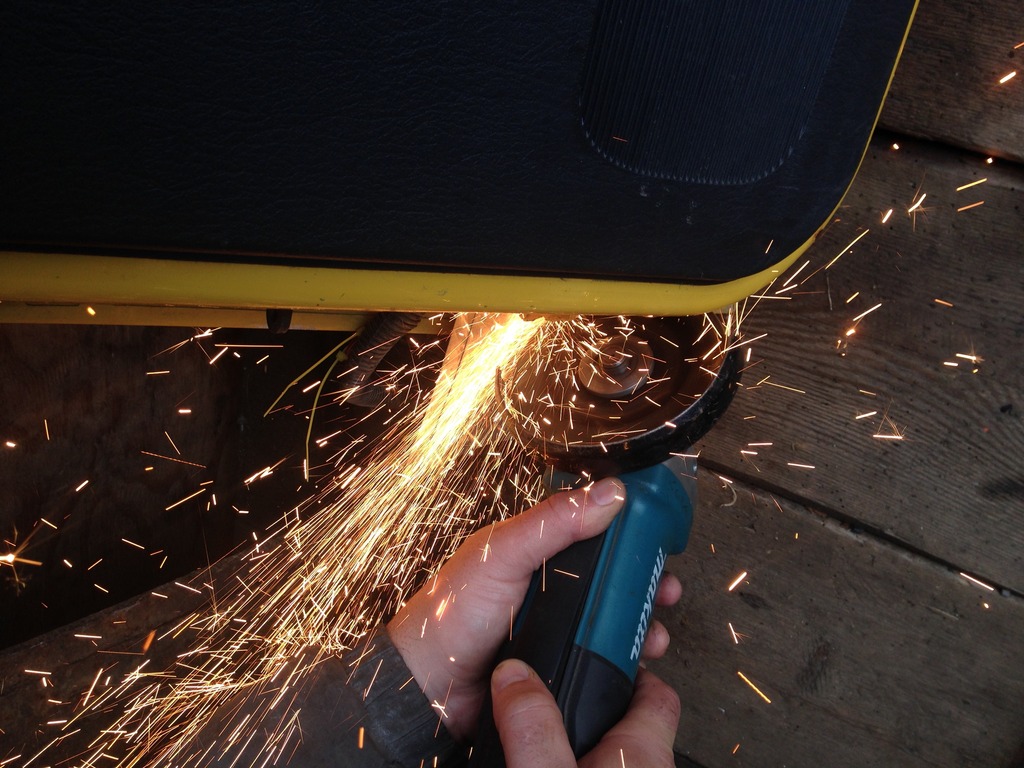
Remove Doors:
Disconnect Pressure Switch for Lights
Modifying the Hinge
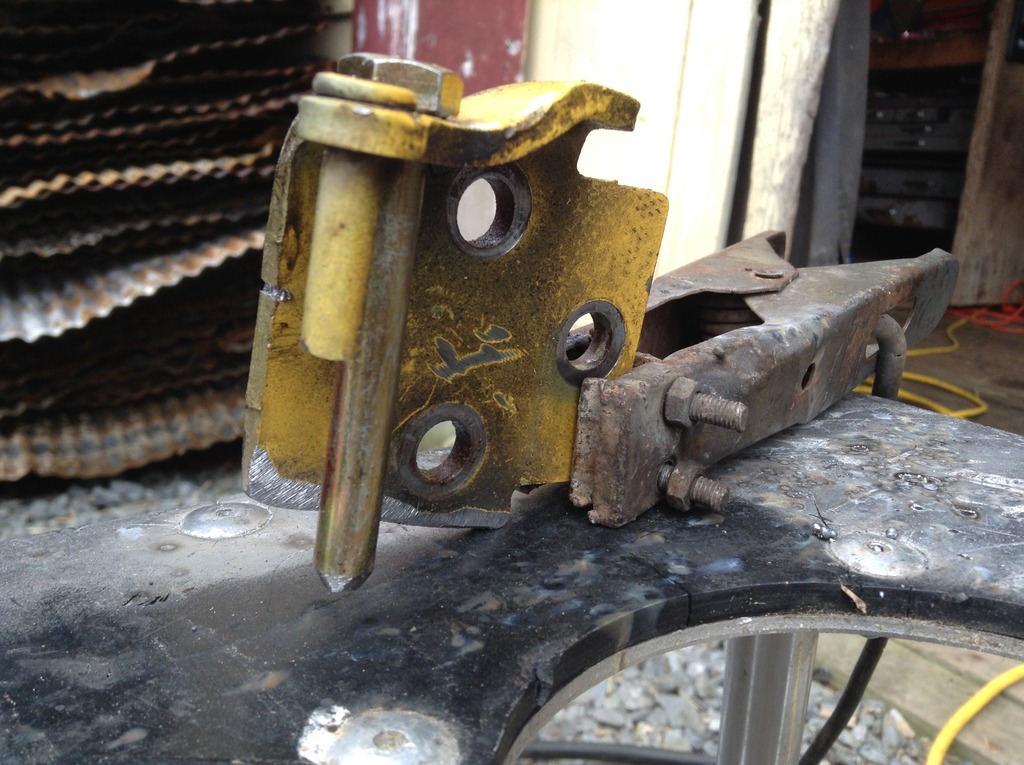
End result:
Rear Doors
Disconnect Pressure Switch for Lights
Modifying the Hinge
End result:
Rear Doors
Repeated the process for the back doors. The bottom bolts on the hinges were seized. So rather than break them off in the door, we simply cut the hinges while they were still on the door. Used a little heat shield to avoid overheating and paint blistering.
Modifying the Hinge
End result:

End result:
05-02-2016, 07:46 AM
#65
Junior Member
Thread Starter
Join Date: Nov 2015
Location: New Hampshire
Posts: 70
Likes: 0
Received 0 Likes
on
0 Posts
Year: 2001
Model: Cherokee
Engine: 242 CID 4.0 Inline 6 Chrysler MPI "High Output"
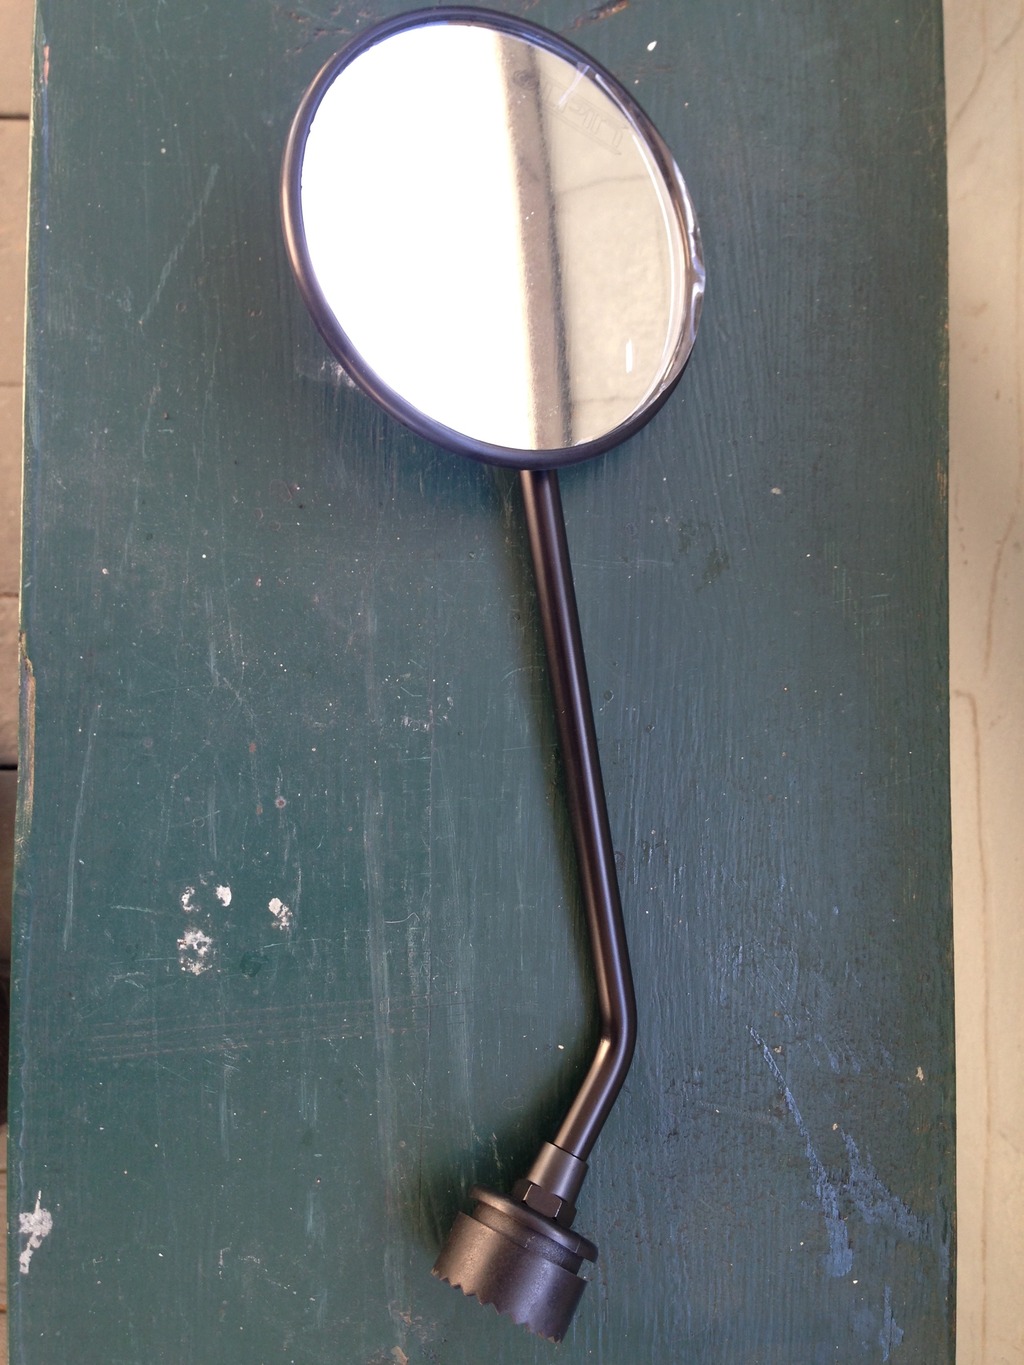
Side Mirrors for Removable Door Mod
When I decided to go doorless, I knew at some point I would need side mirrors. First and foremost, my XJ is my daily driver. Secondly, I drive my XJ to the trails, rather than tow it on a trailer. So balancing offroad capabilities, road manors, and modifications while remaining street legal is a necessity in this build. Also since we travel through various states, I need to cover all the bases of different State laws. So basically, I need two side mirrors while doorless to avoid any possible issues.
I was looking for something that would slide into the door hinge and bolt on. Easy on, easy off. I did not like what I saw at the auto part stores, and had no luck with local salvage yards finding YJ or TJ mirrors. So I went to an ATV Shop. I picked up 2 Kolpin 97200 Atv Mirrors. They are universal, so you can use the for both the drivers side and passenger side. And they are black, so they go with the color scheme.
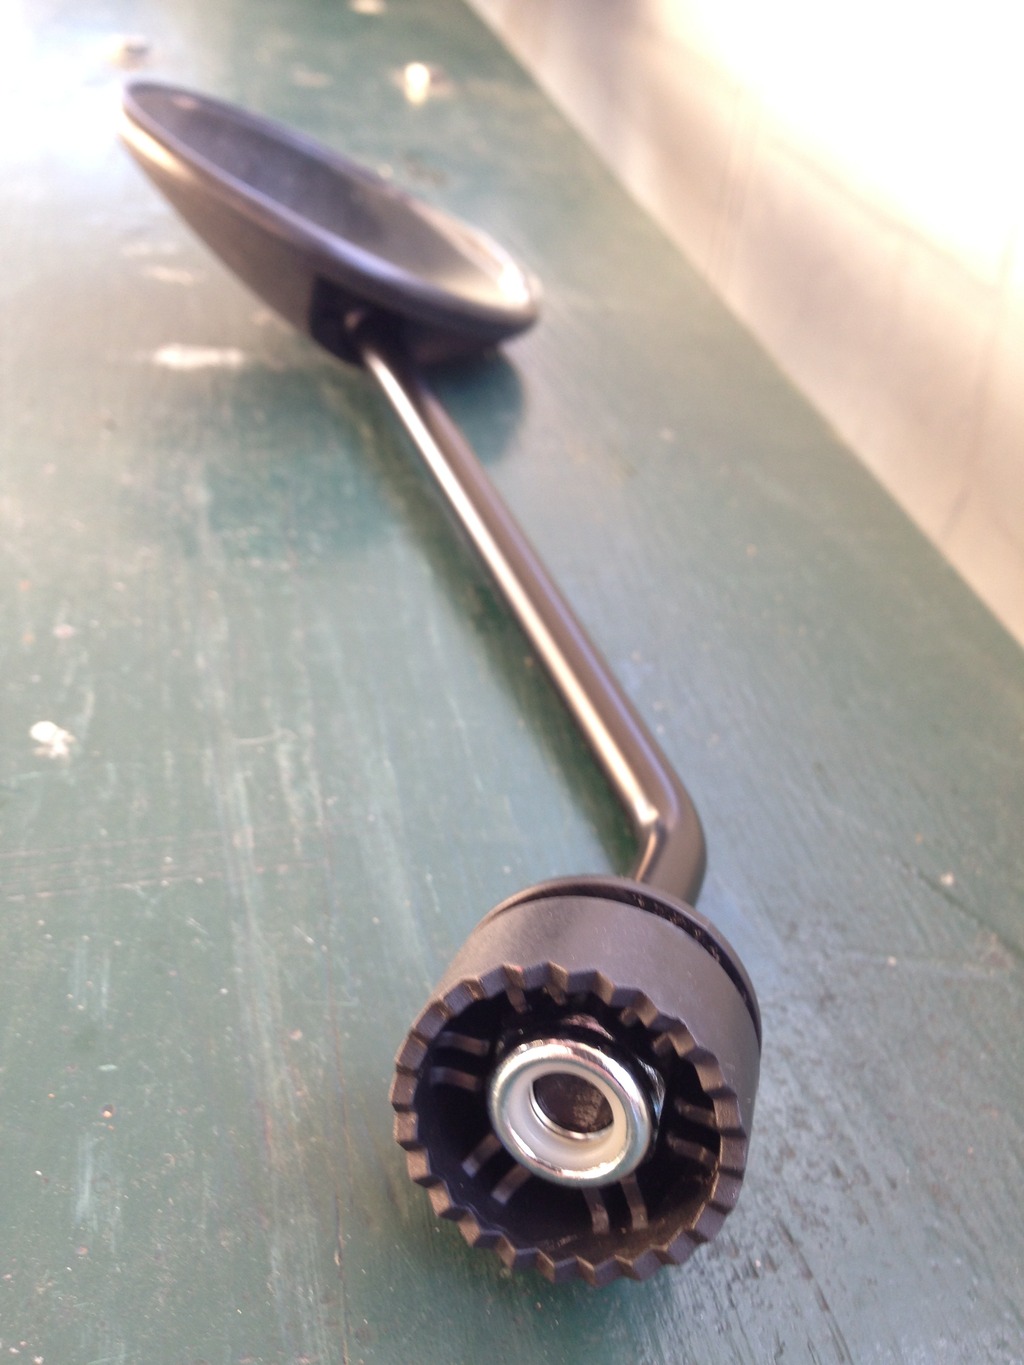
Once I got it, I removed the plastic bracket. The stock grommets on my door hinge are long gone, so the bolt on the side mirror slide in with room to spare. Tighten, and good to go. Takes 5 minutes tops to take my doors off and bolt on the side mirrors.
When I decided to go doorless, I knew at some point I would need side mirrors. First and foremost, my XJ is my daily driver. Secondly, I drive my XJ to the trails, rather than tow it on a trailer. So balancing offroad capabilities, road manors, and modifications while remaining street legal is a necessity in this build. Also since we travel through various states, I need to cover all the bases of different State laws. So basically, I need two side mirrors while doorless to avoid any possible issues.
I was looking for something that would slide into the door hinge and bolt on. Easy on, easy off. I did not like what I saw at the auto part stores, and had no luck with local salvage yards finding YJ or TJ mirrors. So I went to an ATV Shop. I picked up 2 Kolpin 97200 Atv Mirrors. They are universal, so you can use the for both the drivers side and passenger side. And they are black, so they go with the color scheme.
Once I got it, I removed the plastic bracket. The stock grommets on my door hinge are long gone, so the bolt on the side mirror slide in with room to spare. Tighten, and good to go. Takes 5 minutes tops to take my doors off and bolt on the side mirrors.
Side Mirrors for Doors XJ's:
Kolpin 97200 Atv Mirror
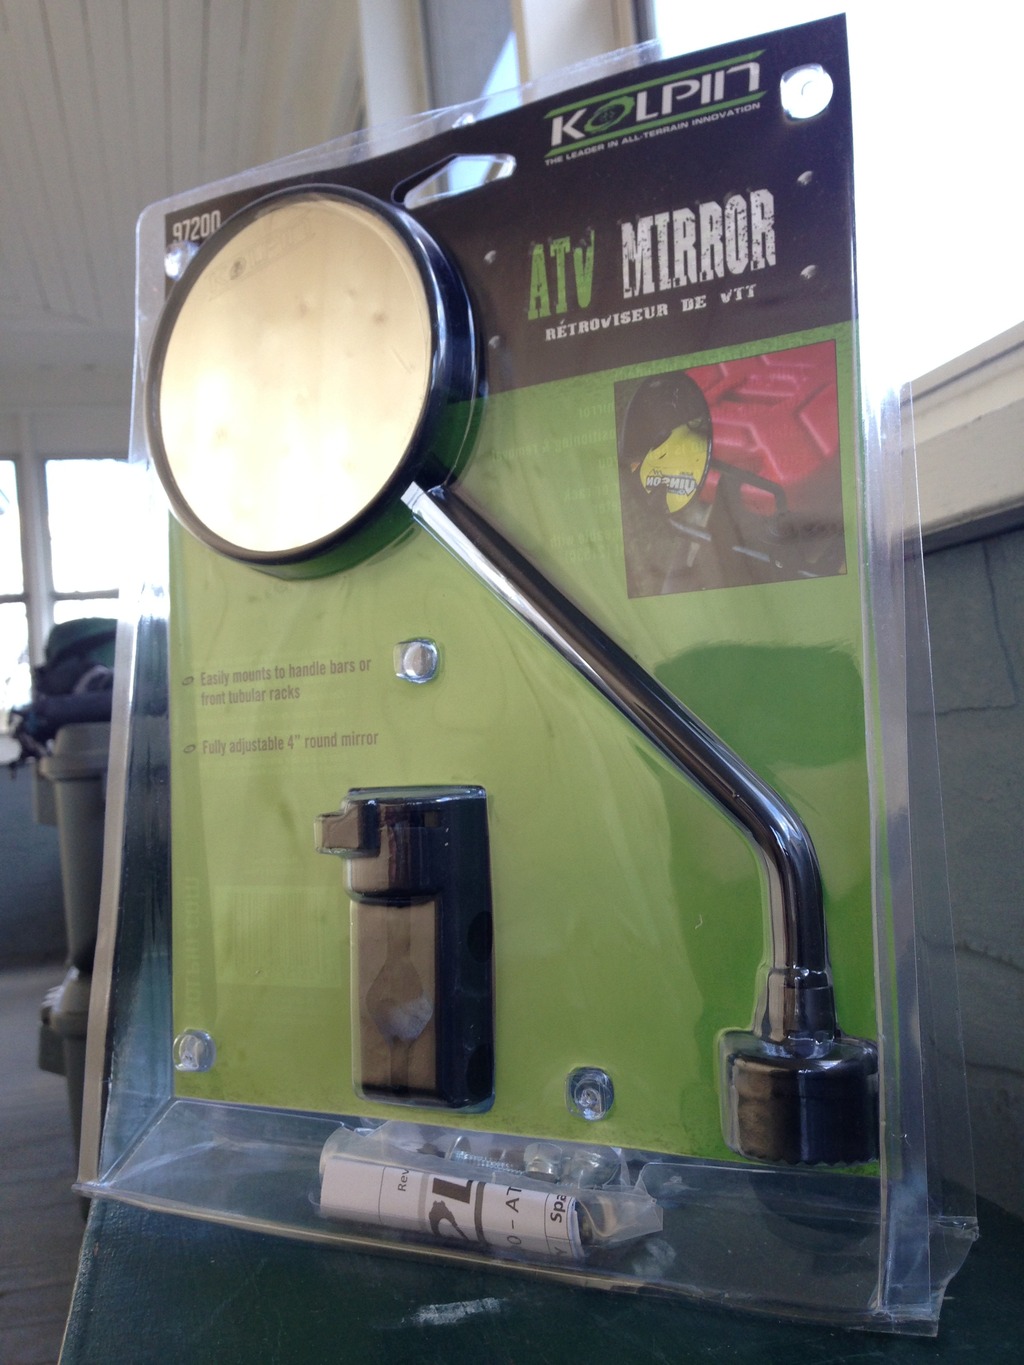
Remove bracket Mounting hardware
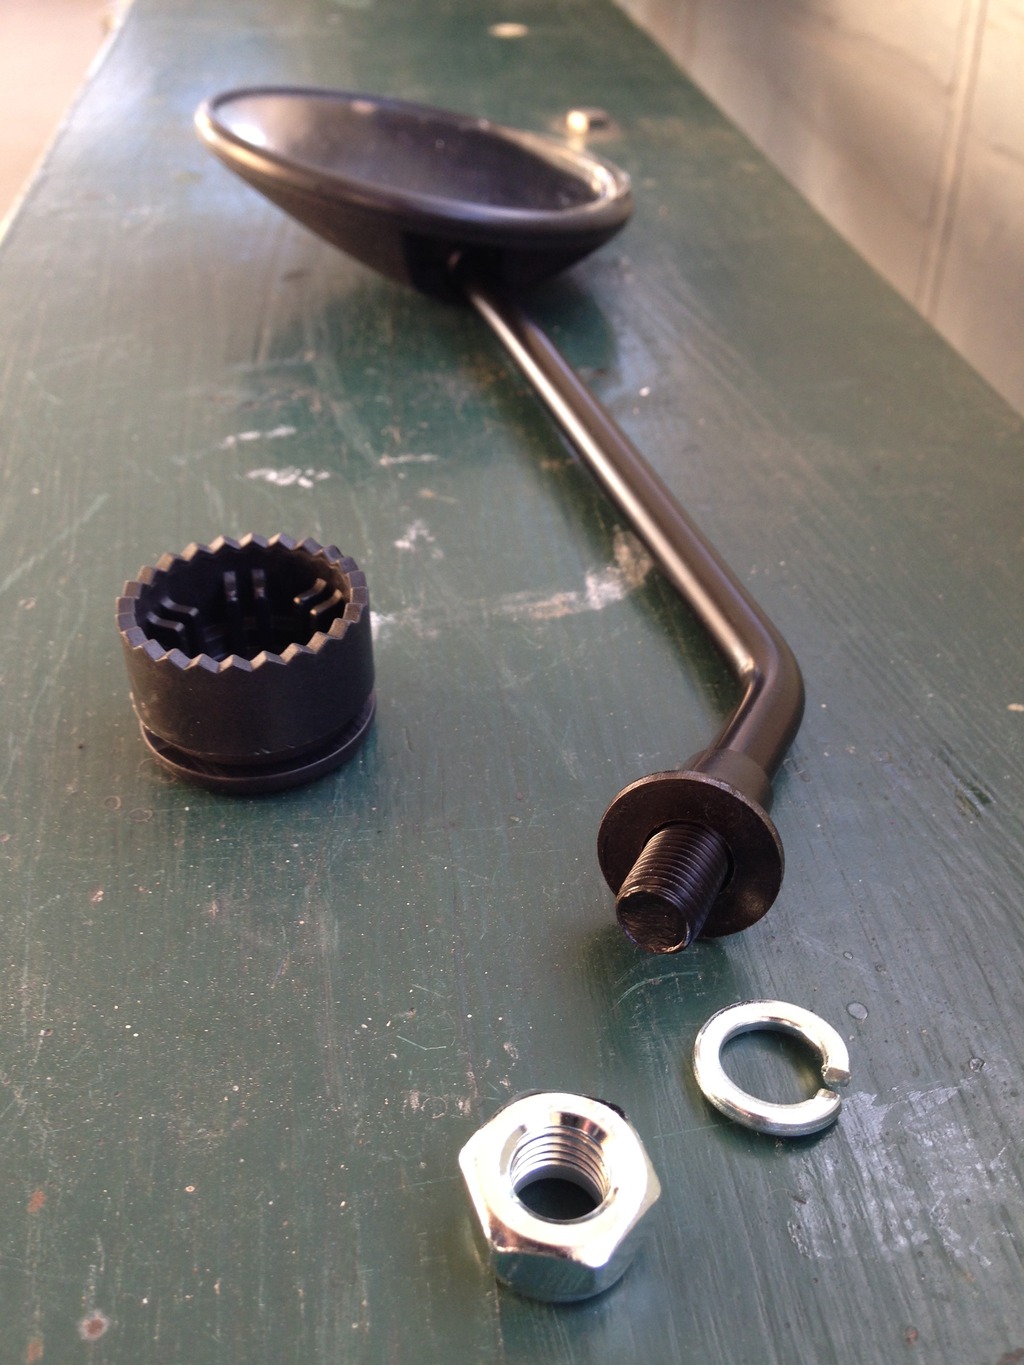
Mount Mirror to door hinge with provided lock washer, washer and lock nut
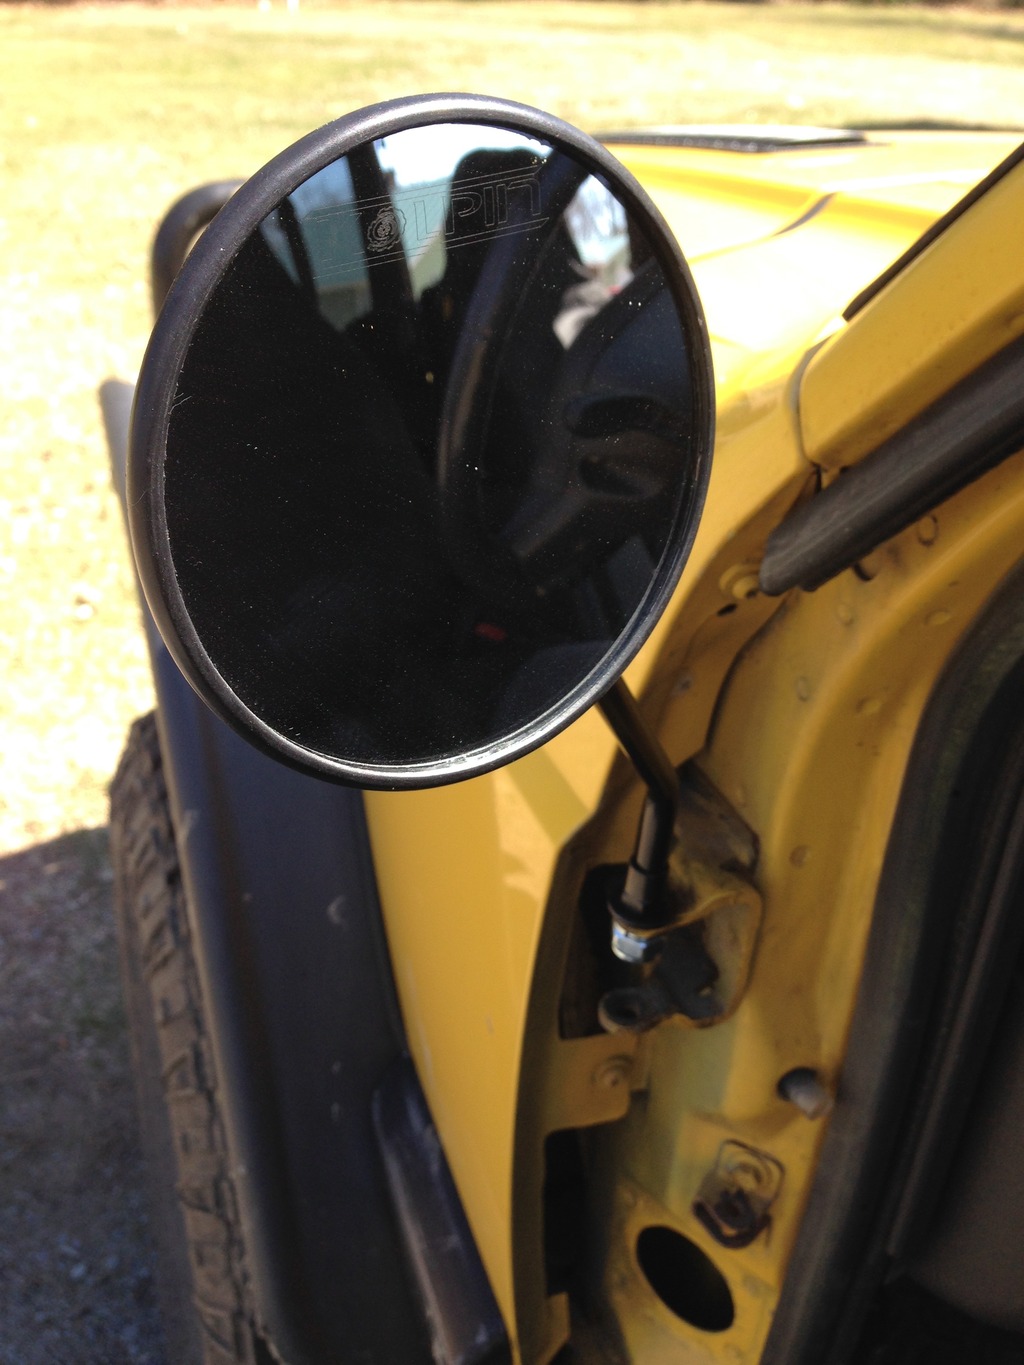
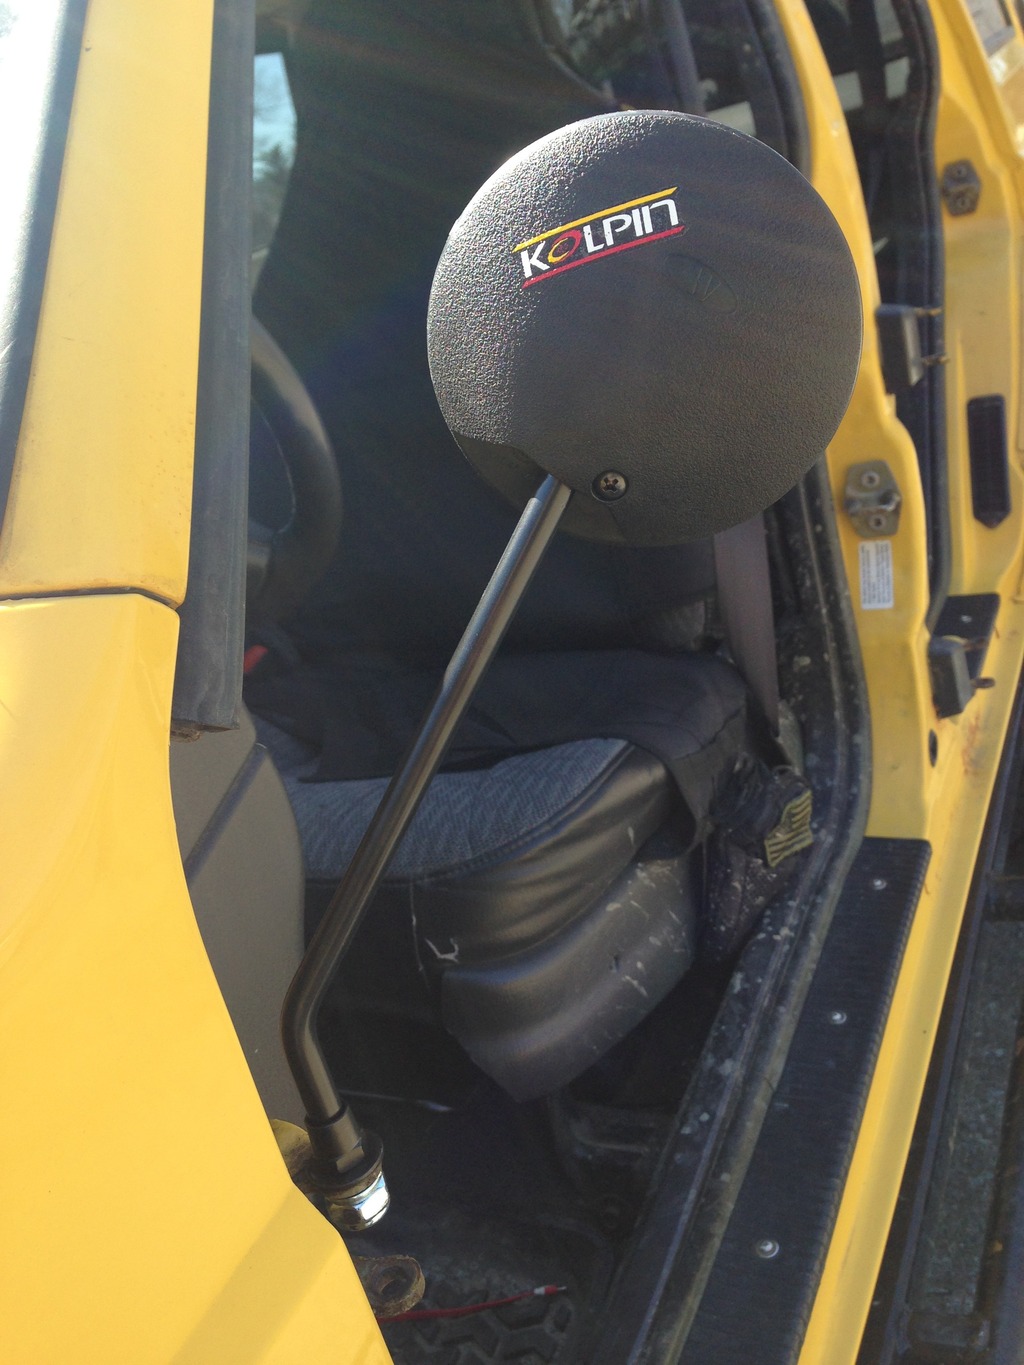
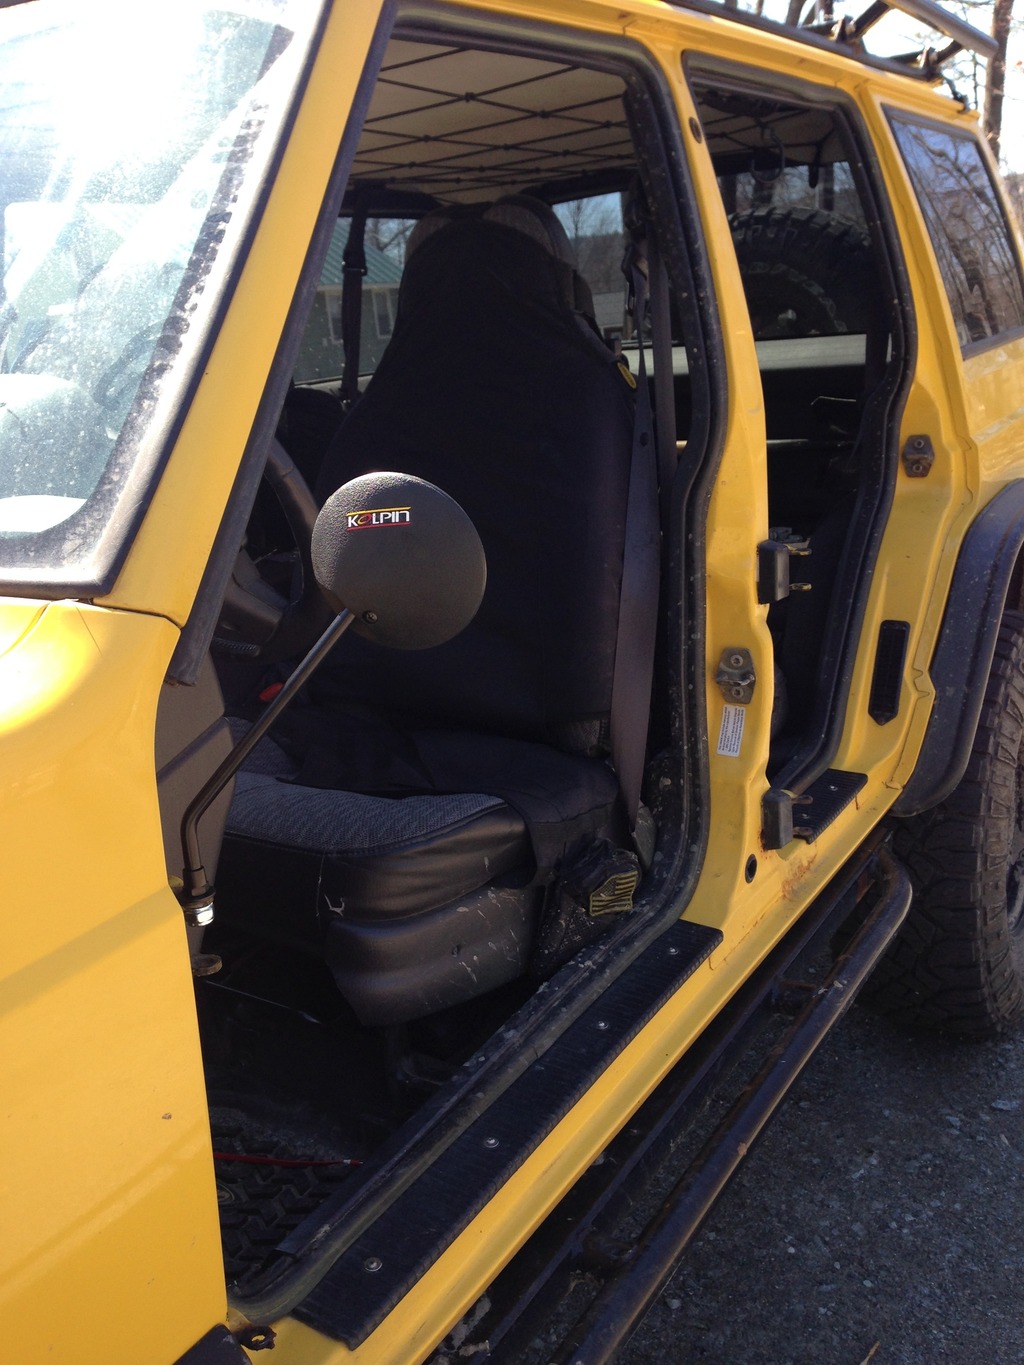
End result:
Kolpin 97200 Atv Mirror
Remove bracket Mounting hardware
Mount Mirror to door hinge with provided lock washer, washer and lock nut
End result:
05-03-2016, 06:04 AM
#67
Junior Member
Thread Starter
Join Date: Nov 2015
Location: New Hampshire
Posts: 70
Likes: 0
Received 0 Likes
on
0 Posts
Year: 2001
Model: Cherokee
Engine: 242 CID 4.0 Inline 6 Chrysler MPI "High Output"
Thanks man. To be honest a lot of these ideas are gathered from forums, but I'm glad you dig it. I'm sure whatever mod we make on an XJ, has already been done somewhere by someone before. But I'm a fan of quick and easy mods with minor modifications required, as I don't have a shop nor the welding skills to do major mods. 90% of this build is just done in driveways, after a little research online.
05-03-2016, 06:49 AM
#68
Junior Member
Thread Starter
Join Date: Nov 2015
Location: New Hampshire
Posts: 70
Likes: 0
Received 0 Likes
on
0 Posts
Year: 2001
Model: Cherokee
Engine: 242 CID 4.0 Inline 6 Chrysler MPI "High Output"
Pros: you can store stuff up there in a pinch, and hang things such as lights/camp lanterns anywhere in the rig.
Cons: not for tall people. It cuts off a couple of inches of headroom. I'm not tall so it doesn't bother me, but it drives any of my tall friends nuts as their head sticks through the cargo webbing.
05-03-2016, 09:29 AM
#69
Junior Member
Thread Starter
Join Date: Nov 2015
Location: New Hampshire
Posts: 70
Likes: 0
Received 0 Likes
on
0 Posts
Year: 2001
Model: Cherokee
Engine: 242 CID 4.0 Inline 6 Chrysler MPI "High Output"
Rear Axle Breather Hose Extension
Reasoning:
Axles need to breath. Axles have gear oil, and air in the differential and housing. Axles can heat up under load. Air expands and contracts depending on temperature. When axles get hot, gases need to escape. When it cools, air needs to breath back in. Axles have seals. These seals would be sucked in or blown out due to pressure of interior axle gases. So there is a breather on the top of the axle housing that allows air flow. When the differential is hot, air expands and the breather is breathing gases out. Now when the hot axle hits water it can cool rapidly, causing the axle to breath in.
Now if both the breather and axles air under water, it may suck in water through the breather and axle seals. So I wan to extend my rear axle breather to a much higher elevation to avoid this.
I run into a lot of water crossings on trails, some of them deep. While I am not trying to recreate "The Yellow Submarine", or make a habit of fording rivers, sometimes water happens. Sometimes it gets a lot higher on the way back then from when you first cross it as well. One trail I have had water up to the bottom of my headlights. Granted that was with a steady bow wave while crossing, but you get the point.
Now since I have recently re-geared my axles last fall and changed the diff fluid a few times while breaking in the gears, I don't feel like doing it again for awhile. Nor do I feel like blowing out my axle seals, or cleaning out mud and water from my diff.
So I decided to look into extending my rear axle breather hose.
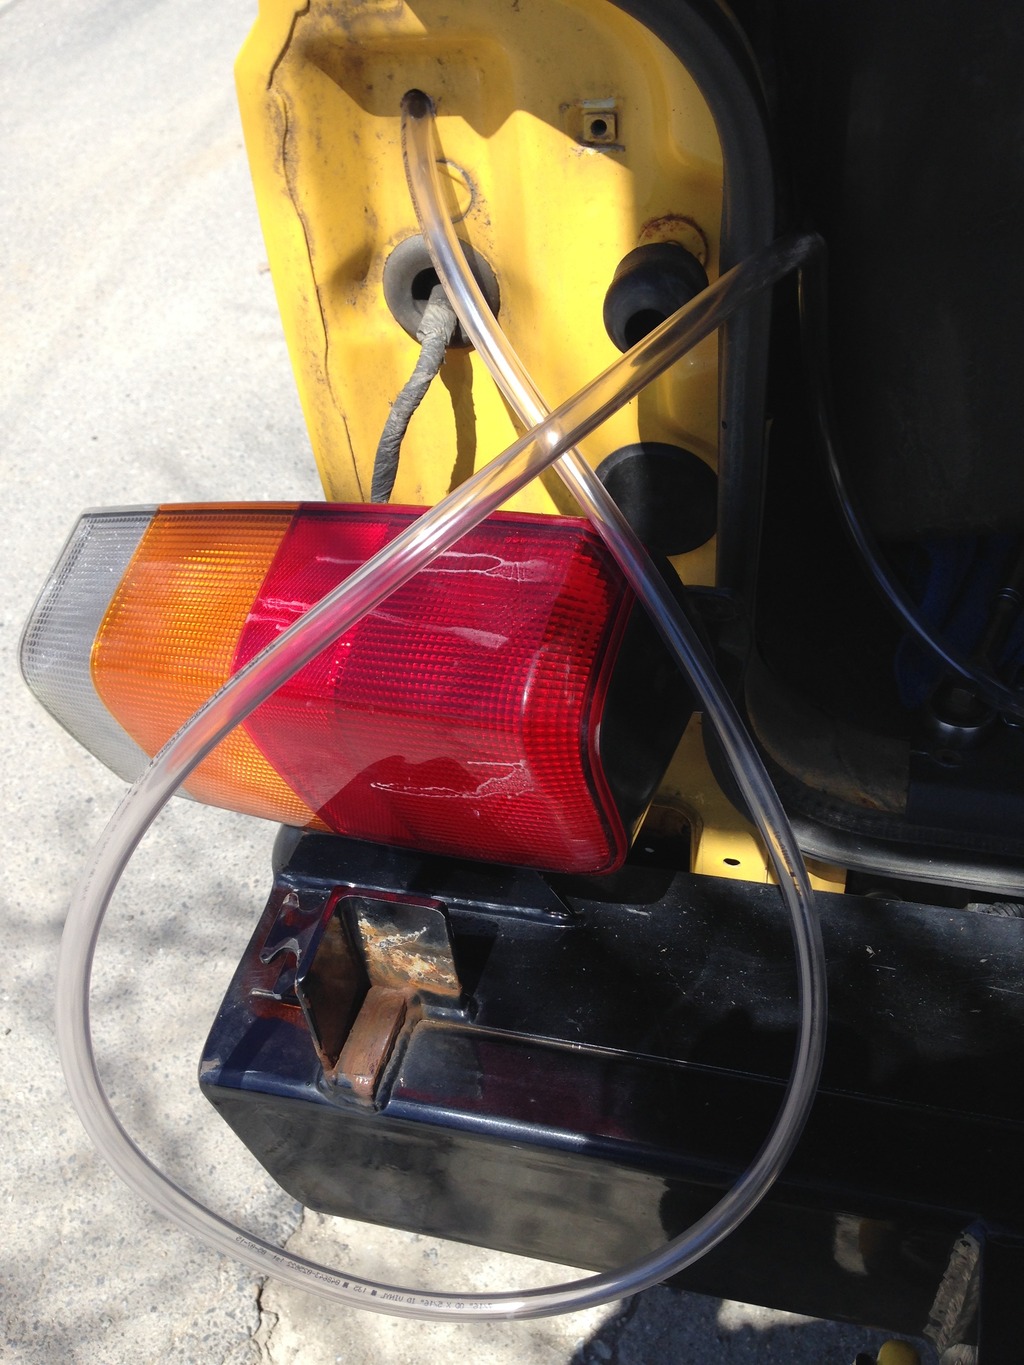
I read a few write ups, and decided I liked the simple idea of the breather hose behind my tail light for now. May change it later.
Side Note:
This also got me thinking about later possibly using a similar set up for a gravity fed water supply, and some sort of water spigot. Mount water high (roof), have spigot lower on outside of vehicle (rear bumper or maybe even the hatch) with easy access. Something to consider for a later project.
Supplies:
3/16 inner - 5/16 outer clear tubing from Fogg's Hardware .69 cents a foot.
3/16 elbow coupling $1.29
Hose clamp
Drill
Quick and easy mod that provides some assurance.
Reasoning:
Axles need to breath. Axles have gear oil, and air in the differential and housing. Axles can heat up under load. Air expands and contracts depending on temperature. When axles get hot, gases need to escape. When it cools, air needs to breath back in. Axles have seals. These seals would be sucked in or blown out due to pressure of interior axle gases. So there is a breather on the top of the axle housing that allows air flow. When the differential is hot, air expands and the breather is breathing gases out. Now when the hot axle hits water it can cool rapidly, causing the axle to breath in.
Now if both the breather and axles air under water, it may suck in water through the breather and axle seals. So I wan to extend my rear axle breather to a much higher elevation to avoid this.
I run into a lot of water crossings on trails, some of them deep. While I am not trying to recreate "The Yellow Submarine", or make a habit of fording rivers, sometimes water happens. Sometimes it gets a lot higher on the way back then from when you first cross it as well. One trail I have had water up to the bottom of my headlights. Granted that was with a steady bow wave while crossing, but you get the point.
Now since I have recently re-geared my axles last fall and changed the diff fluid a few times while breaking in the gears, I don't feel like doing it again for awhile. Nor do I feel like blowing out my axle seals, or cleaning out mud and water from my diff.
So I decided to look into extending my rear axle breather hose.
I read a few write ups, and decided I liked the simple idea of the breather hose behind my tail light for now. May change it later.
Side Note:
This also got me thinking about later possibly using a similar set up for a gravity fed water supply, and some sort of water spigot. Mount water high (roof), have spigot lower on outside of vehicle (rear bumper or maybe even the hatch) with easy access. Something to consider for a later project.
Supplies:
3/16 inner - 5/16 outer clear tubing from Fogg's Hardware .69 cents a foot.
3/16 elbow coupling $1.29
Hose clamp
Drill
Quick and easy mod that provides some assurance.
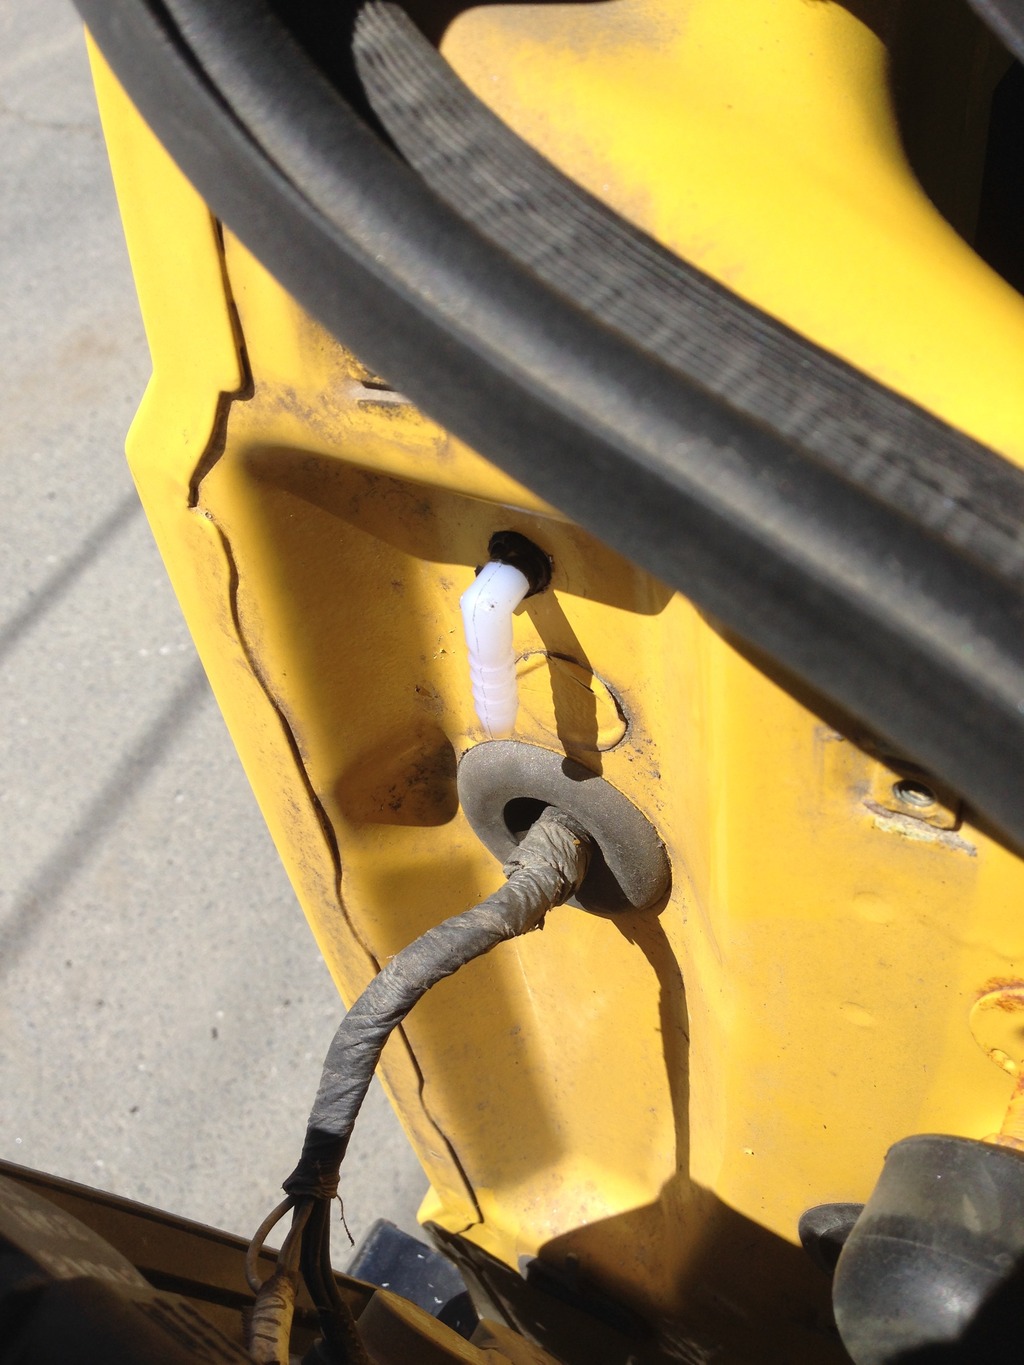
Remove Drivers Side Tail Light and Drill Hole
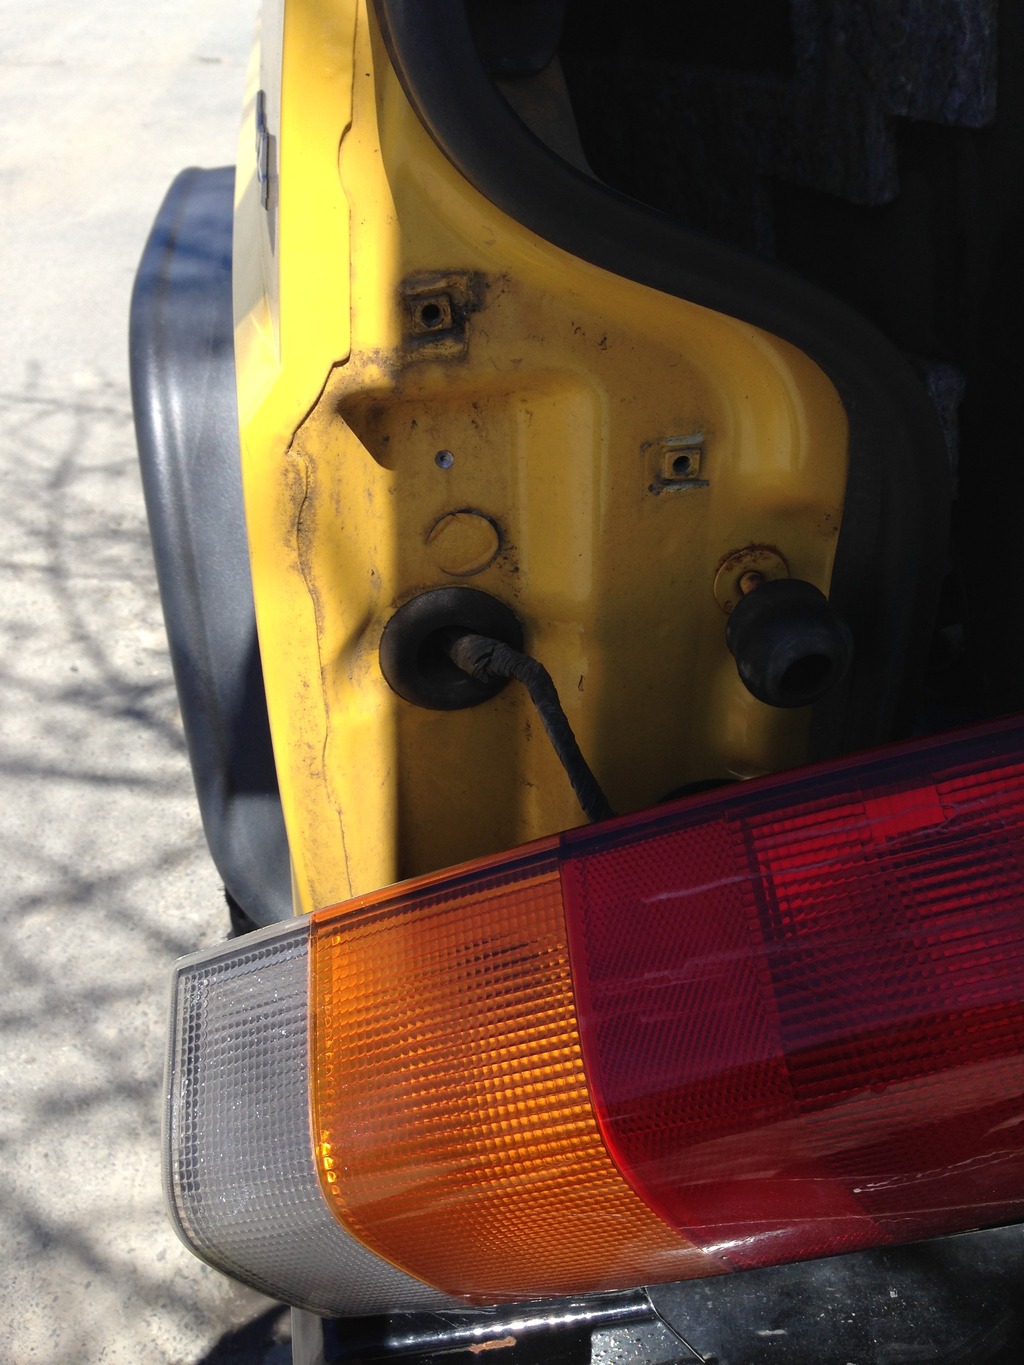
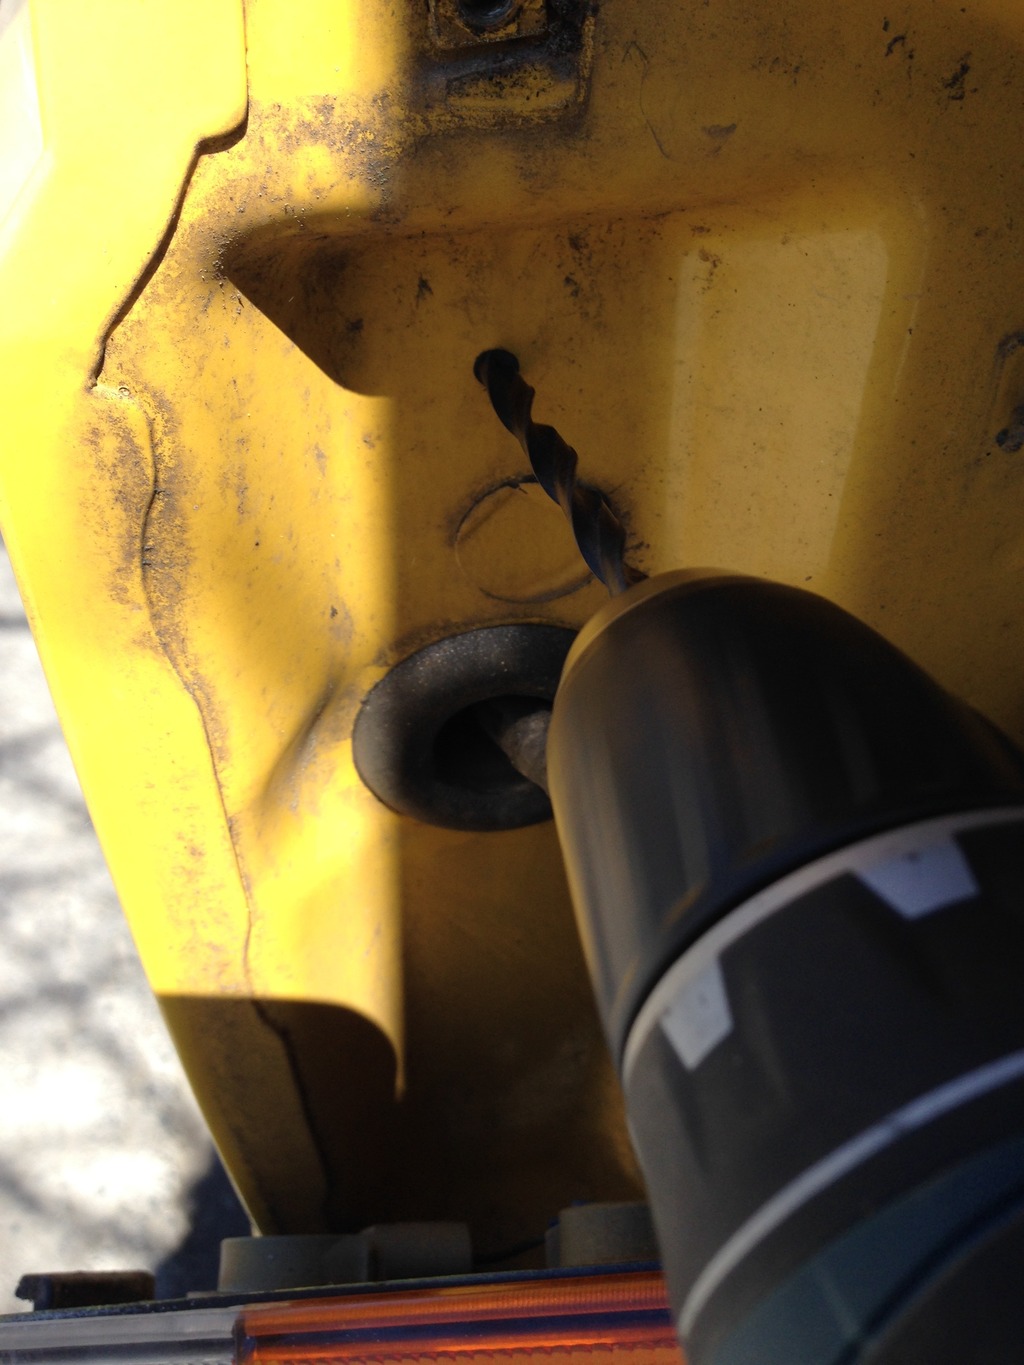
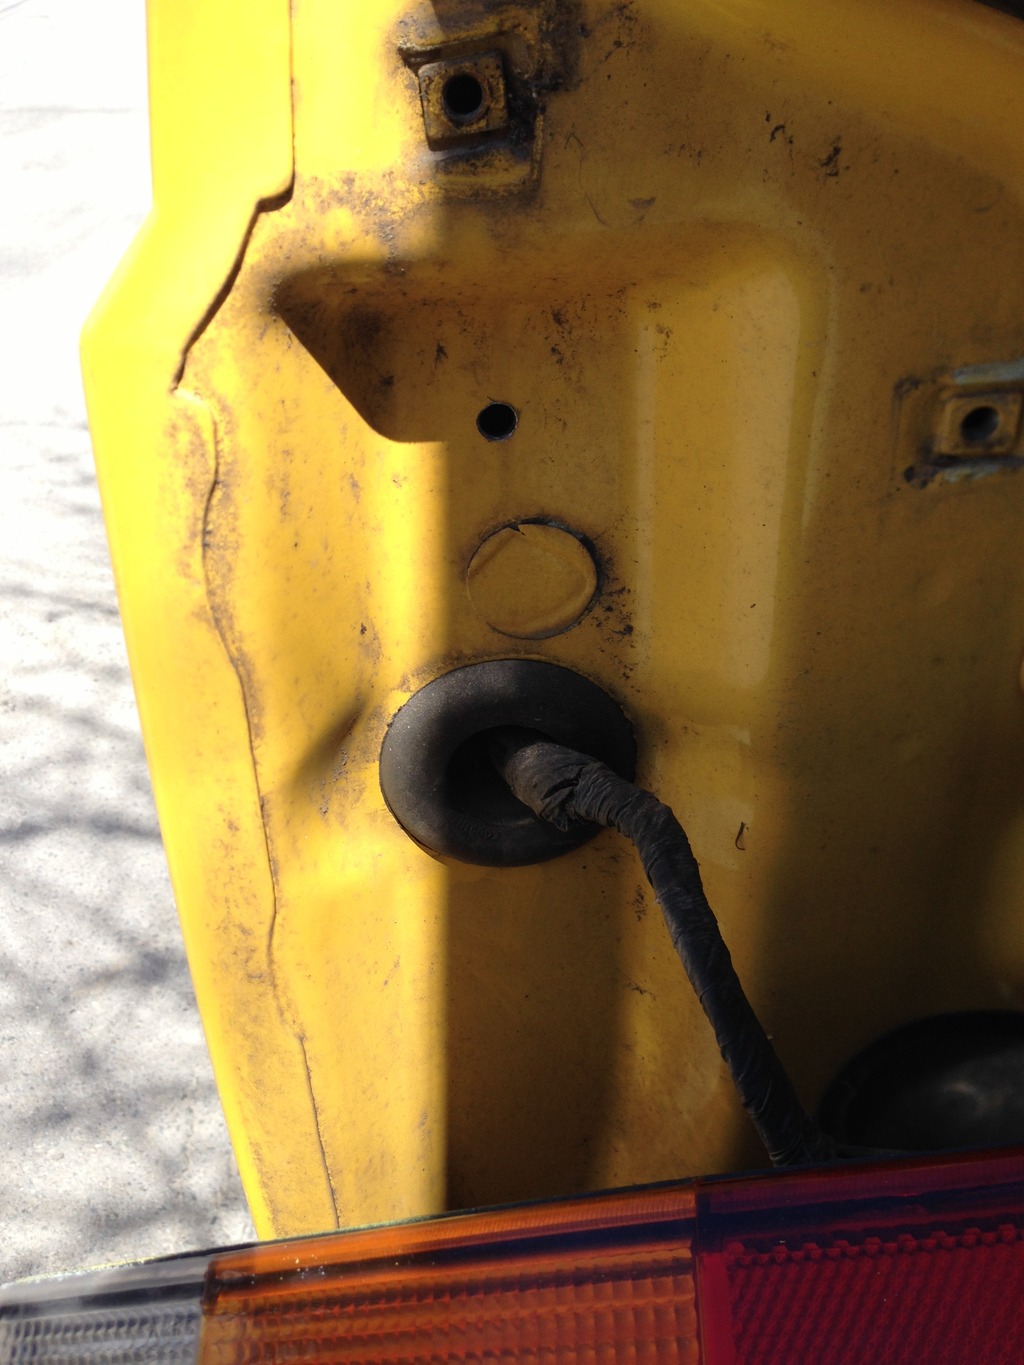
Feed Hose through Hole
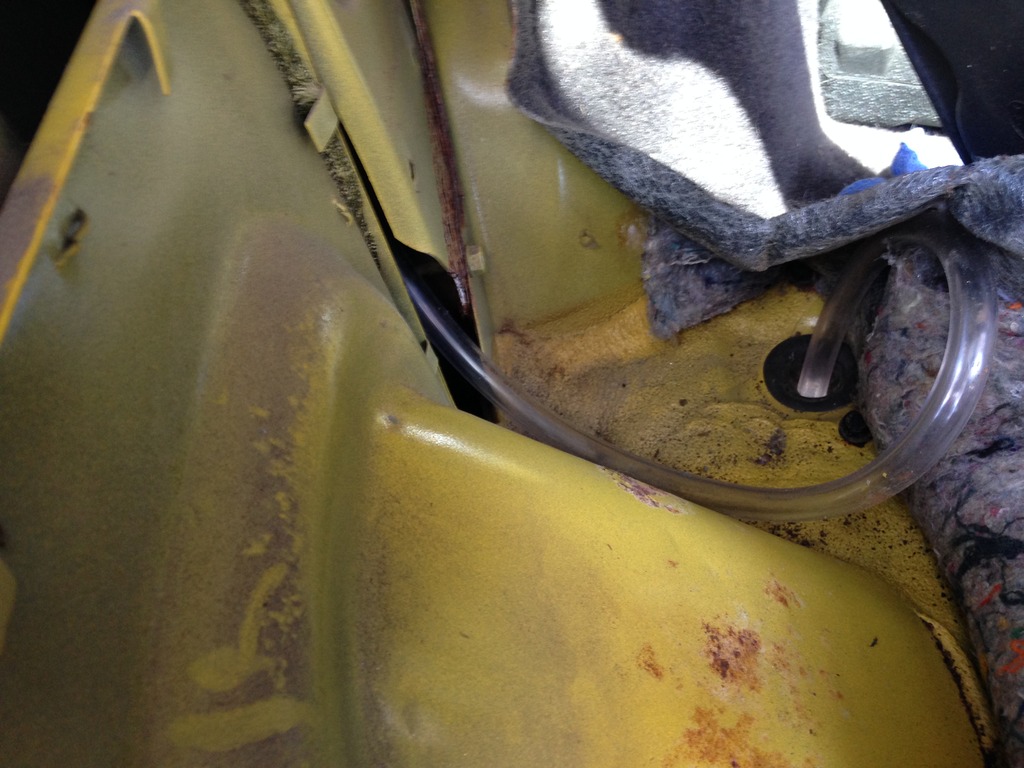
Remove drivers side rear quarter interior Trim, Pull back carpet, drill Hole in Rubber Plug in Cargo area, and feed hose through
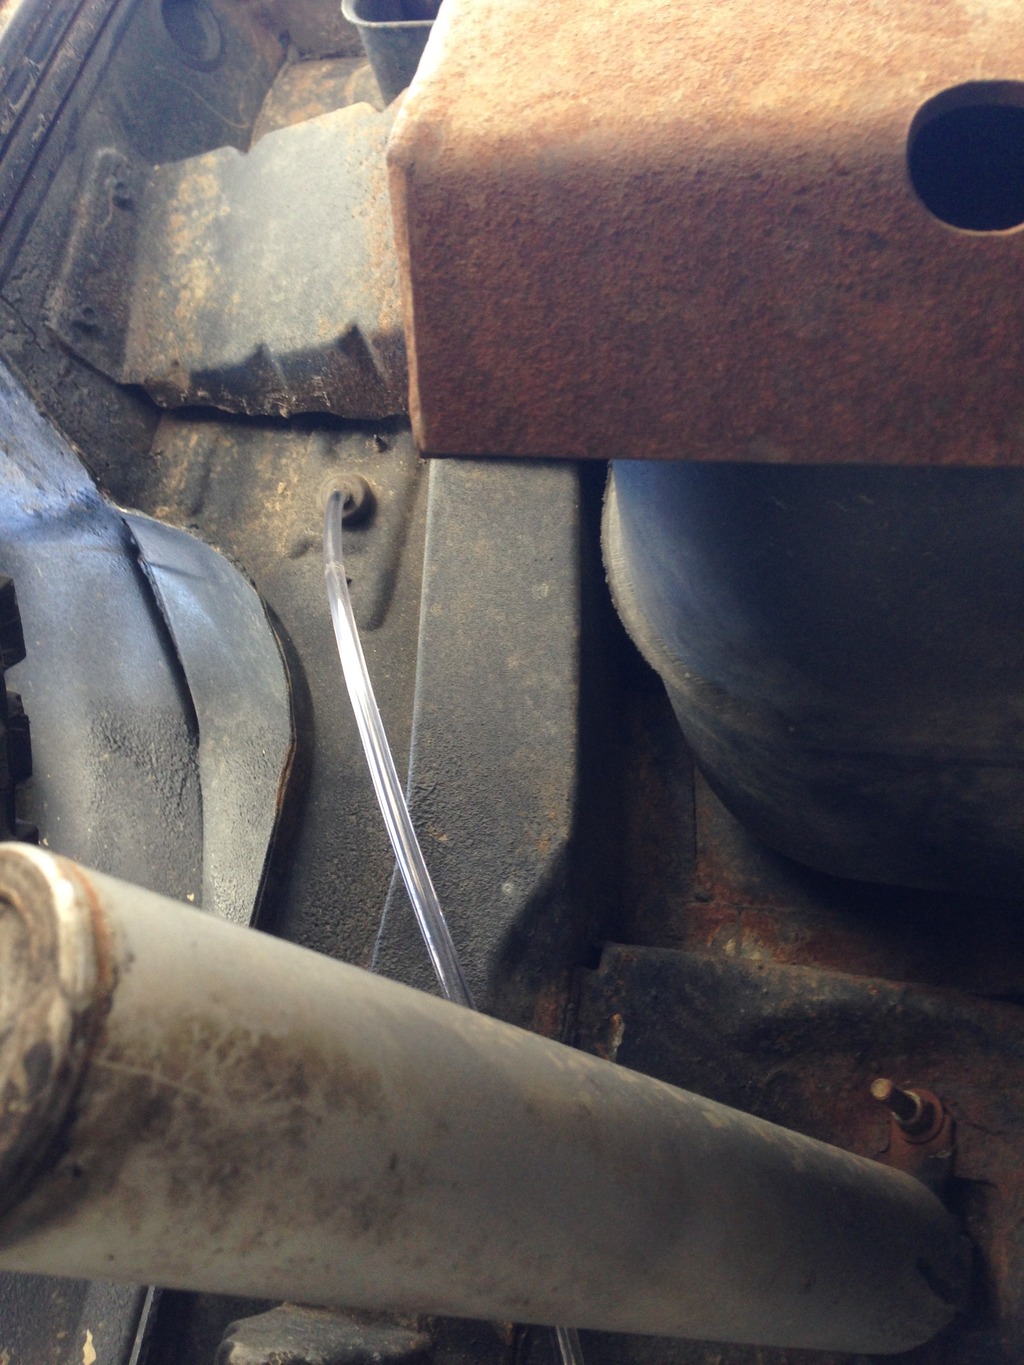
Attach to Axle, make sure to have slack for flex, route it so it does not get snagged or pinched.
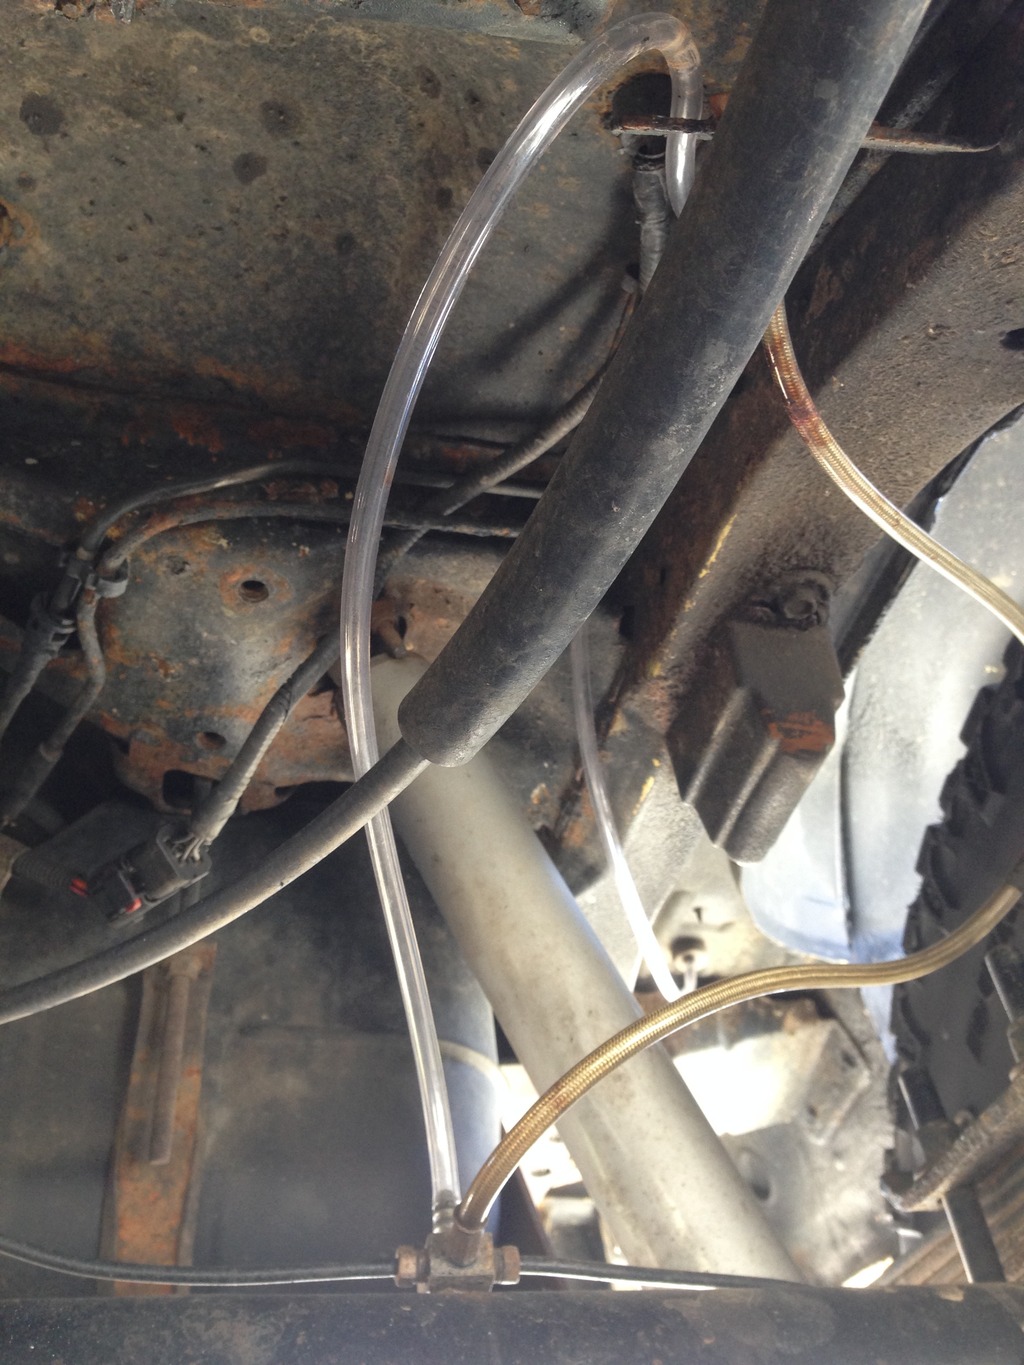
Attach fitting and secure hose
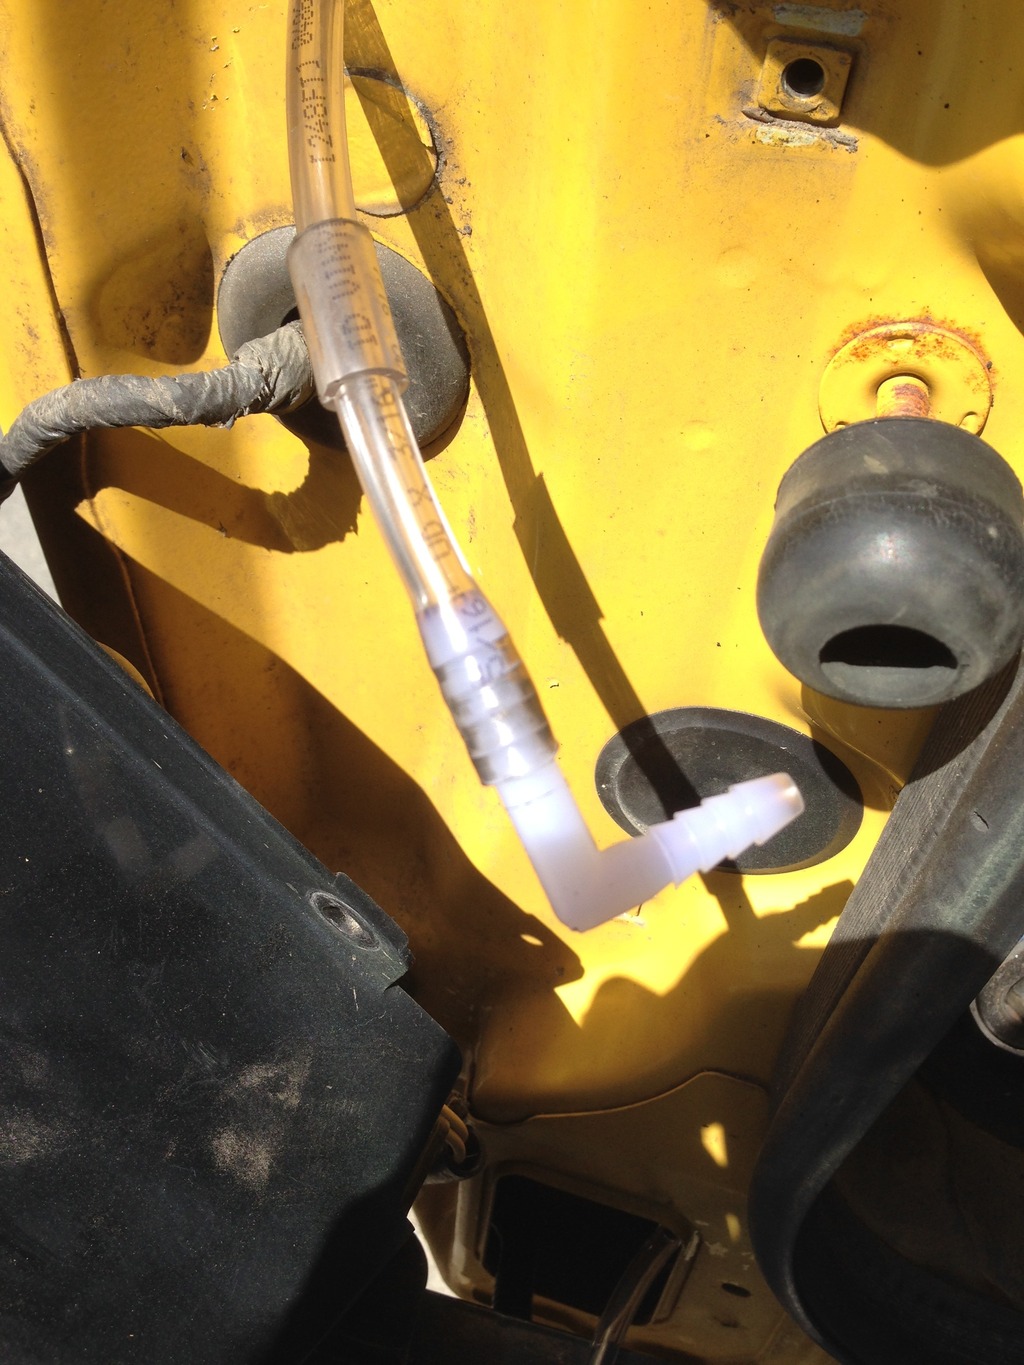
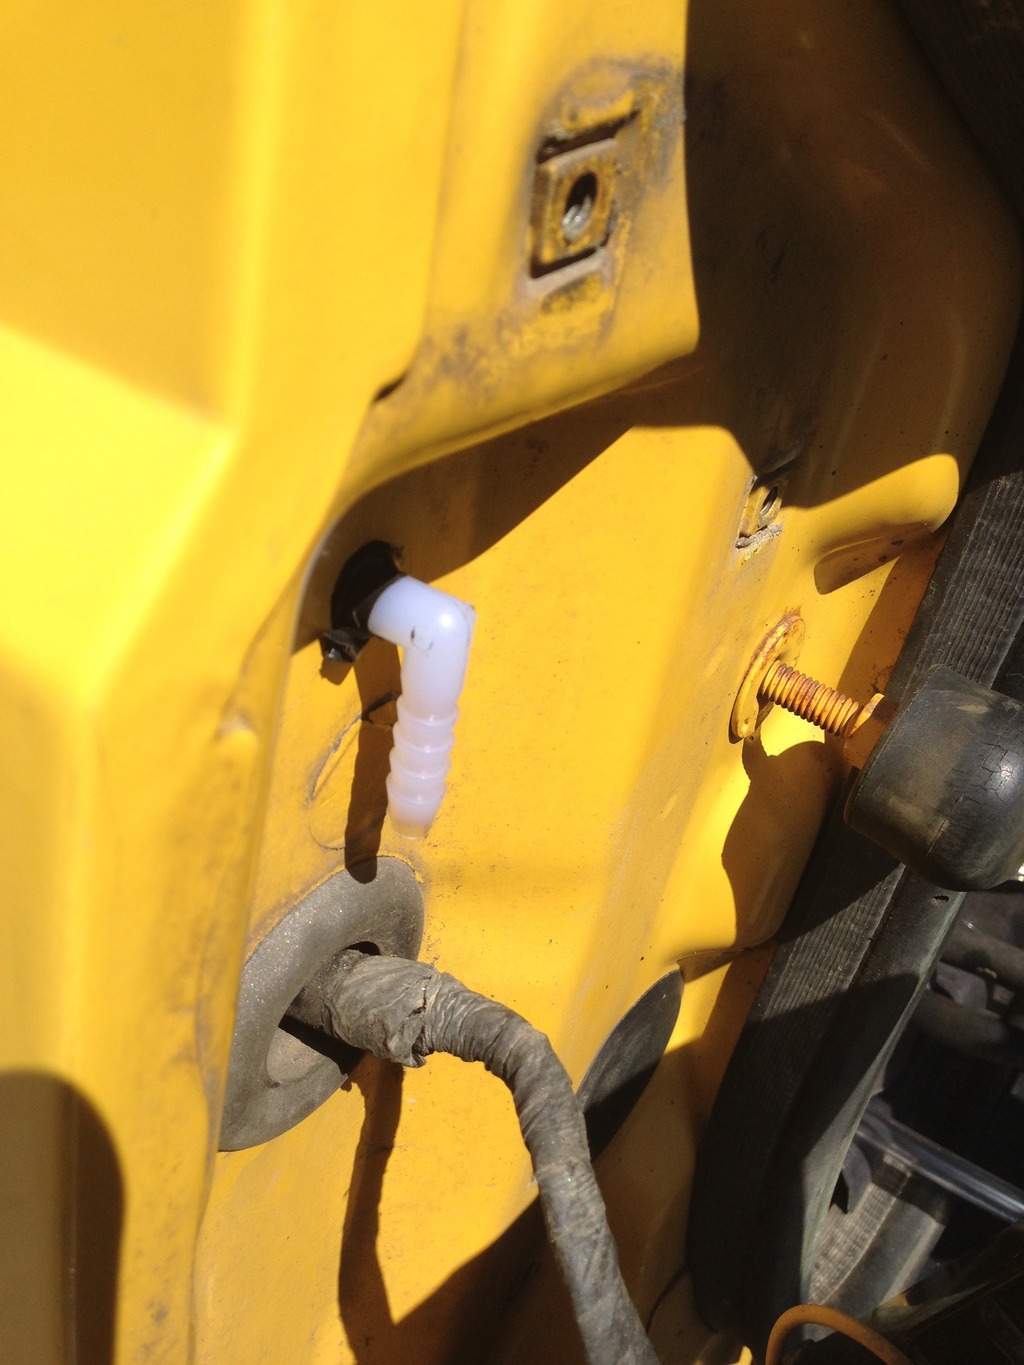
Feed Hose through Hole
Remove drivers side rear quarter interior Trim, Pull back carpet, drill Hole in Rubber Plug in Cargo area, and feed hose through
Attach to Axle, make sure to have slack for flex, route it so it does not get snagged or pinched.
Attach fitting and secure hose
Last edited by TheF.N.G.; 01-18-2017 at 06:29 AM.
 05-24-2016, 12:30 AM
#71
No, I don't lick fish.
Ok... got to page two so far and probably 90% of the pics AREN'T WORKING!!!! Help a brother out, man! I wanna SEE 'em!
05-24-2016, 07:05 AM
#73
Junior Member
Thread Starter
Join Date: Nov 2015
Location: New Hampshire
Posts: 70
Likes: 0
Received 0 Likes
on
0 Posts
Year: 2001
Model: Cherokee
Engine: 242 CID 4.0 Inline 6 Chrysler MPI "High Output"
I just took a look at it. looked fine on the PC, only some of the images weren't centered for some reason. But some of the images didn't seem to show up on mobile devices such as my iPad. So I worked on the code, and it seems good to go now. Let me know if you still have any issues seeing the Build Thread. Sorry about that, and thanks for letting me know.
05-25-2016, 12:01 AM
#74
No, I don't lick fish.
I just took a look at it. looked fine on the PC, only some of the images weren't centered for some reason. But some of the images didn't seem to show up on mobile devices such as my iPad. So I worked on the code, and it seems good to go now. Let me know if you still have any issues seeing the Build Thread. Sorry about that, and thanks for letting me know.
Quite the build, man!
 10-31-2016, 09:59 AM
#75
Junior Member
Thread Starter
Join Date: Nov 2015
Location: New Hampshire
Posts: 70
Likes: 0
Received 0 Likes
on
0 Posts
Year: 2001
Model: Cherokee
Engine: 242 CID 4.0 Inline 6 Chrysler MPI "High Output"
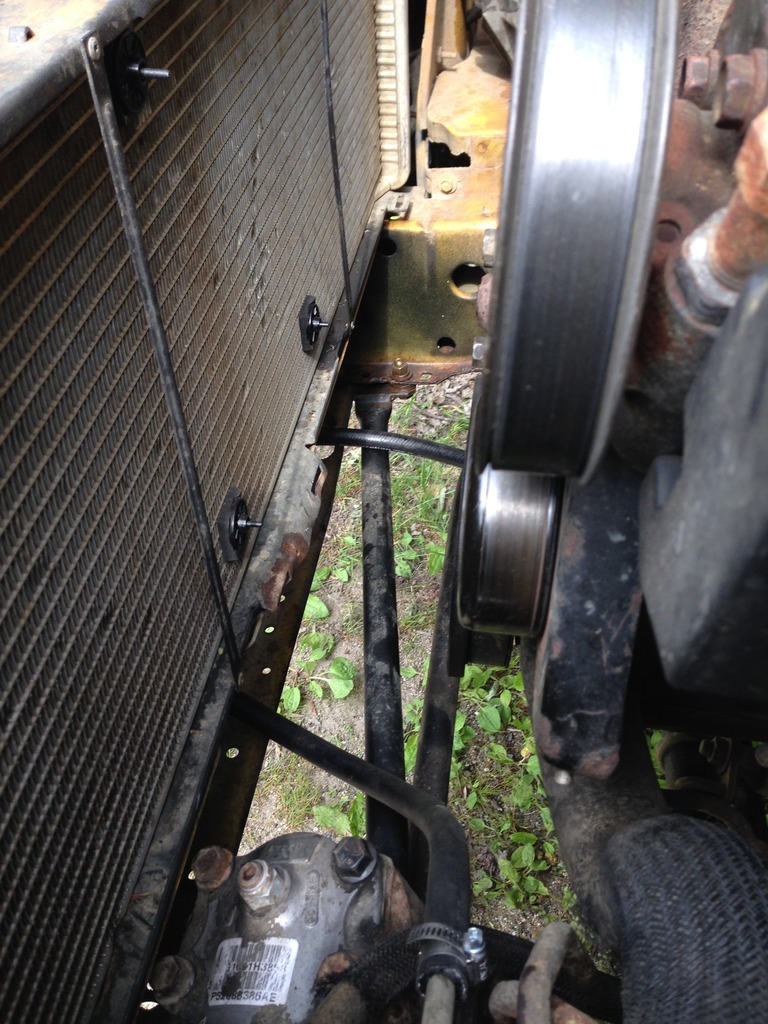
Transmission Cooler Install
I have been working on upgrading the Cherokee to a more efficient cooling system. This upgrade is obviously intended with the Transmission in mind.
The Transmission fluid goes through its dedicated section in the radiator, warmed by the surrounding engine coolant. My understanding to the thought process behind this setup is that since the engine warms up quicker than the transmission, this setup will help the transmission get up to operating temp faster. The problem is that this setup keeps the transmission fluid at a higher temp than needed once up to temp.
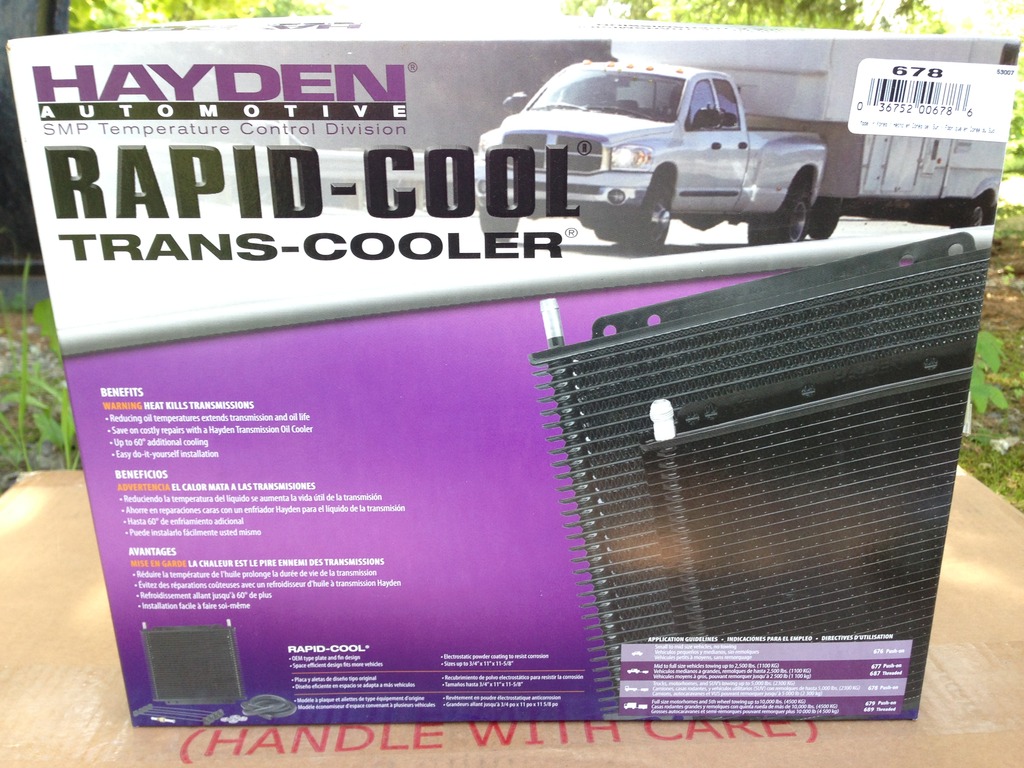
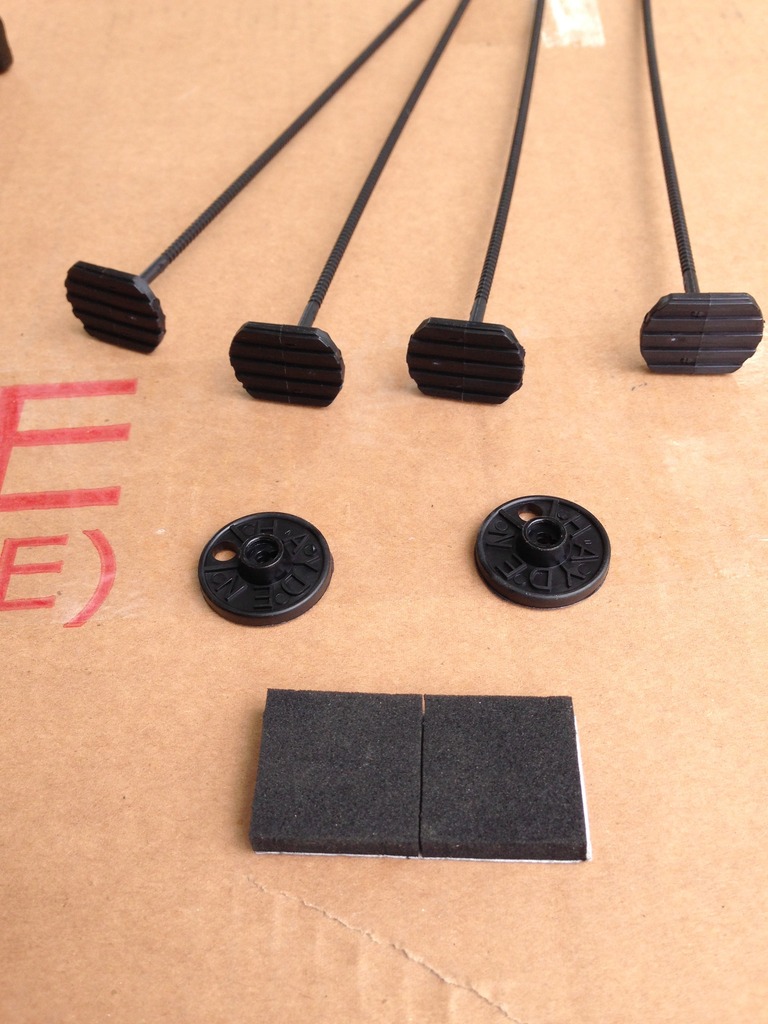
So I bought a Hayden Automotive 678 Transmission Cooler, and installed it running from the return line. This way it is cooling the warm trany fluid returning from the radiators warming process to the transmission, thereby helping cool the transmission when it is being overworked.
- Side Note:
I have done a bunch of little mods/upgrades over the course of this summer. Just getting to posting some of them now. I am usually in a rush as I work on the Jeep in my yard on my days off, and my rig is my Daily Driver. As such I need to get each project finished and the Jeep back together so that I can make it to work the next day. So I often to forget to take pics consistently throughout each project from start to finish.
These next few installs may have limited pics and info.
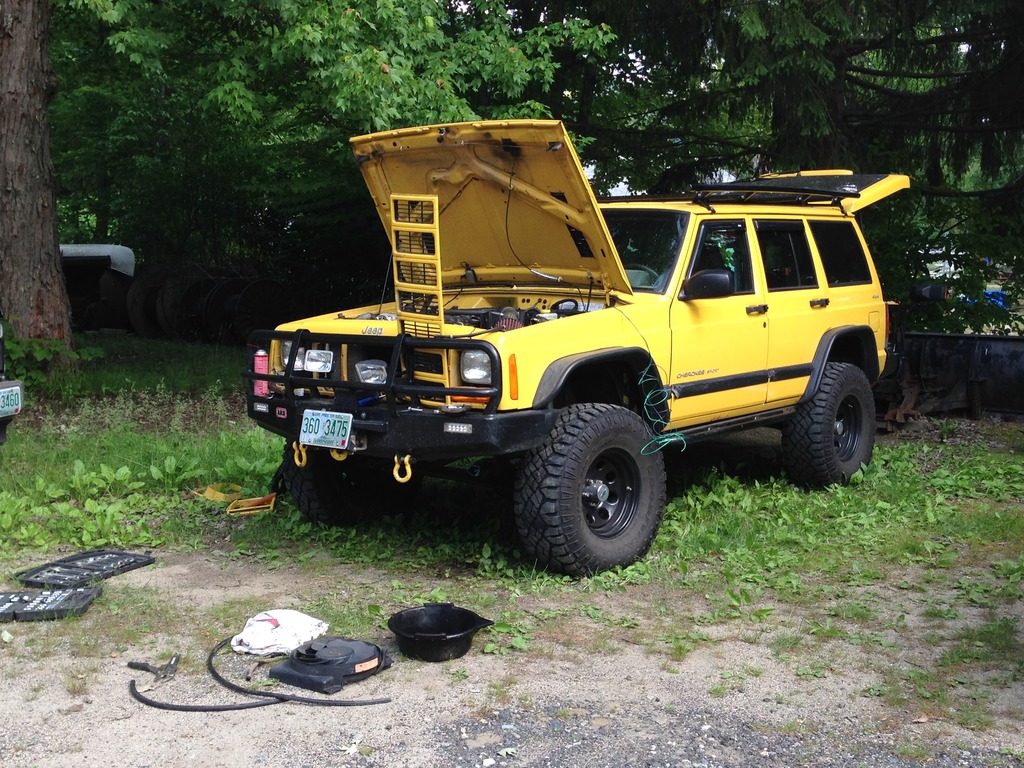
My Workspace:
I have been working on upgrading the Cherokee to a more efficient cooling system. This upgrade is obviously intended with the Transmission in mind.
The Transmission fluid goes through its dedicated section in the radiator, warmed by the surrounding engine coolant. My understanding to the thought process behind this setup is that since the engine warms up quicker than the transmission, this setup will help the transmission get up to operating temp faster. The problem is that this setup keeps the transmission fluid at a higher temp than needed once up to temp.
So I bought a Hayden Automotive 678 Transmission Cooler, and installed it running from the return line. This way it is cooling the warm trany fluid returning from the radiators warming process to the transmission, thereby helping cool the transmission when it is being overworked.
- Side Note:
I have done a bunch of little mods/upgrades over the course of this summer. Just getting to posting some of them now. I am usually in a rush as I work on the Jeep in my yard on my days off, and my rig is my Daily Driver. As such I need to get each project finished and the Jeep back together so that I can make it to work the next day. So I often to forget to take pics consistently throughout each project from start to finish.
These next few installs may have limited pics and info.
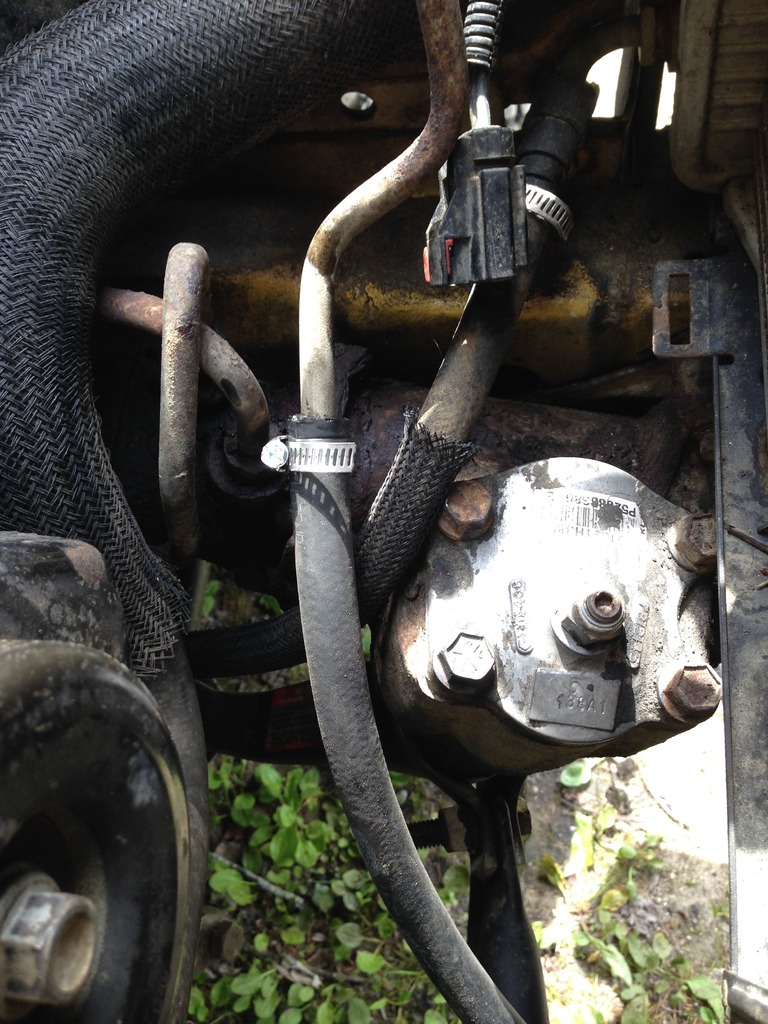
Stock Transmission Return Line
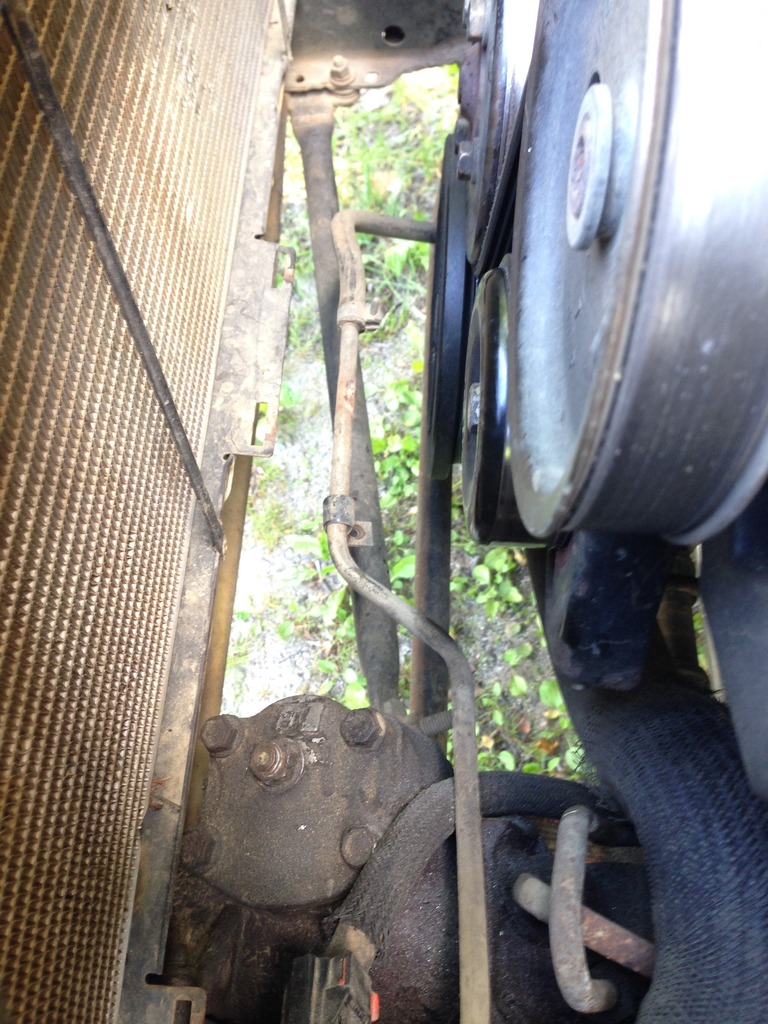
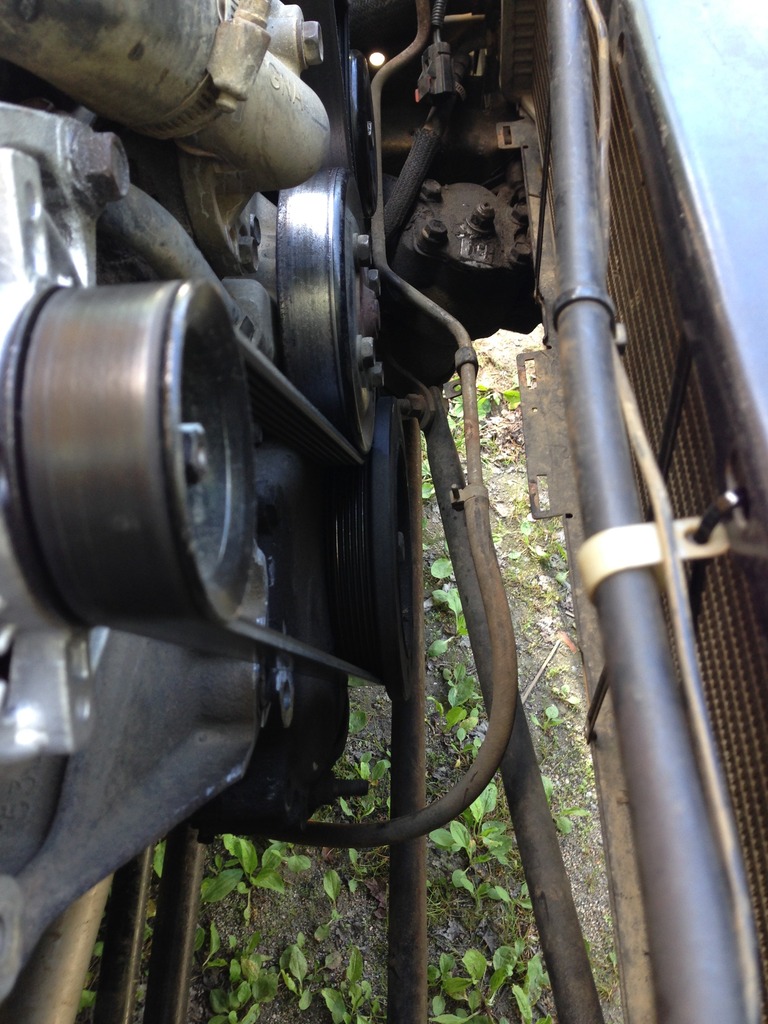
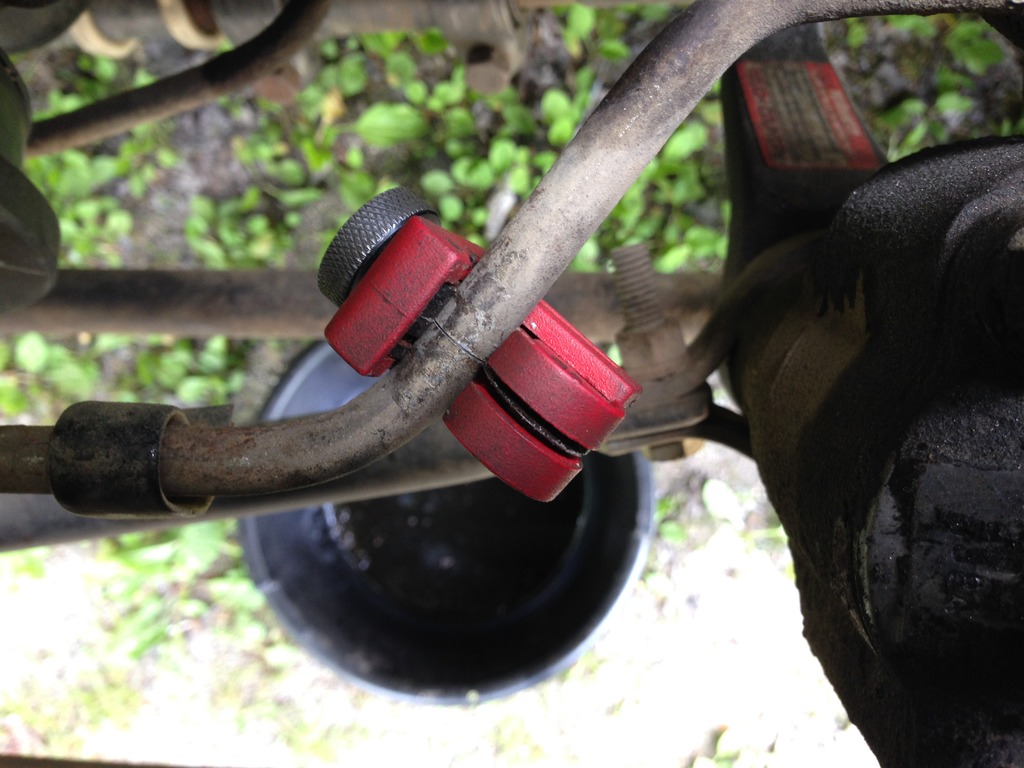
Cut the Return Line
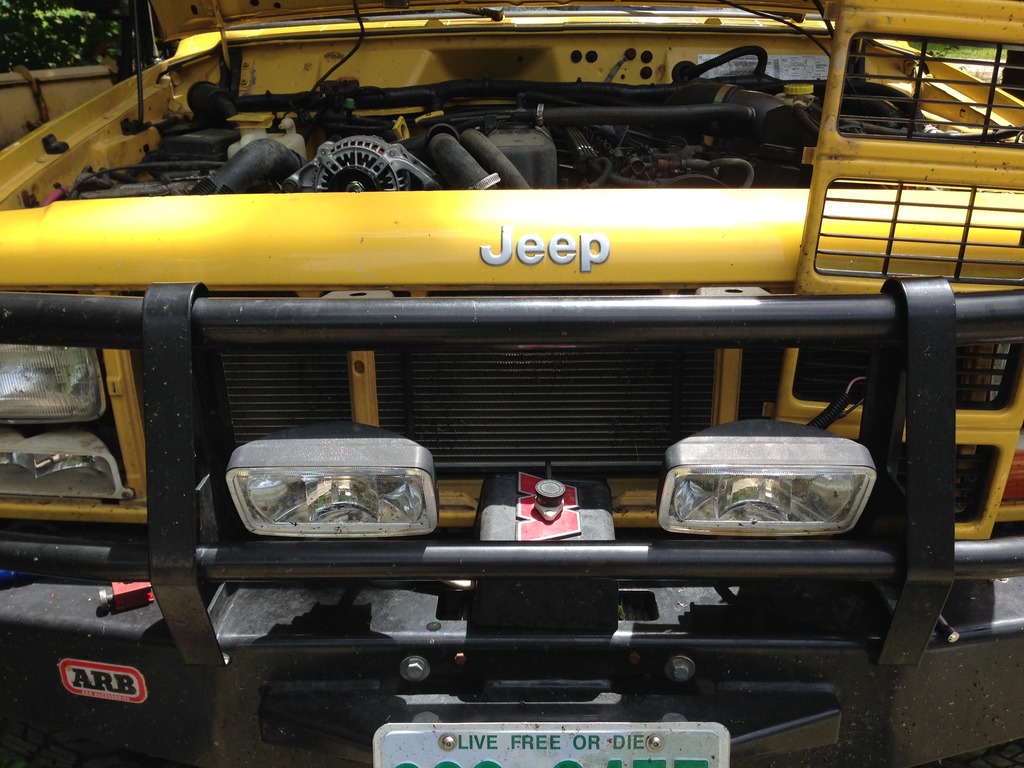
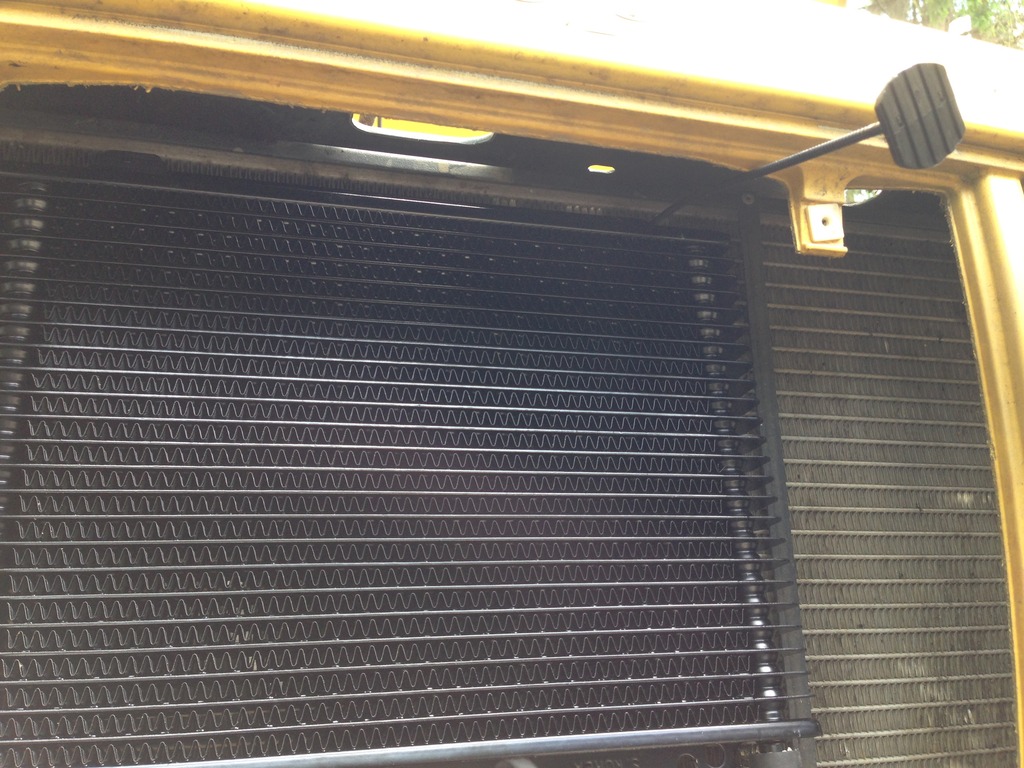
Take off the Grill
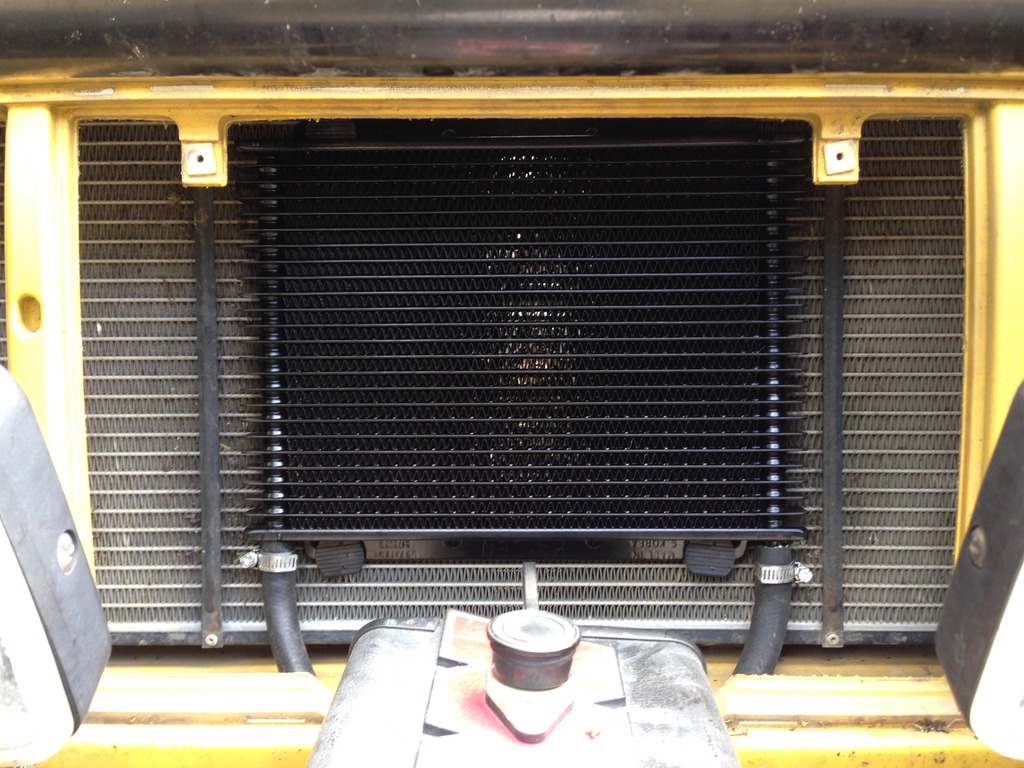
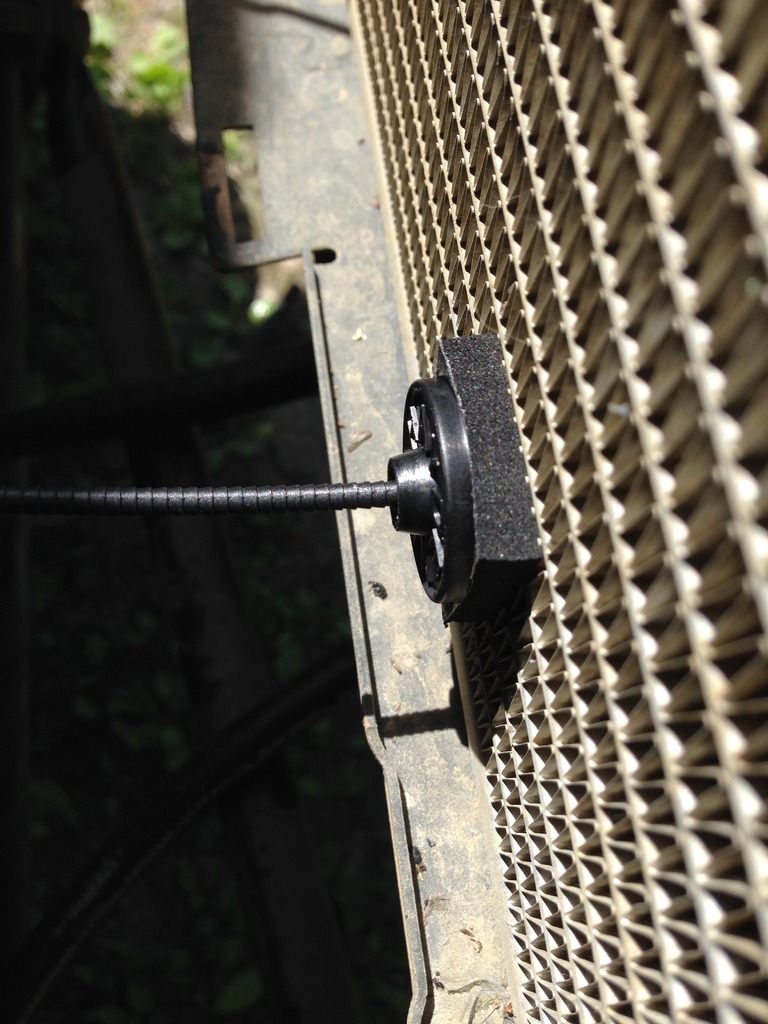
Install Transmission Cooler

Connect Return Transmission Line
Finished Product:
Cut the Return Line
Take off the Grill
Install Transmission Cooler
Connect Return Transmission Line
Finished Product:
My Workspace:
Last edited by TheF.N.G.; 10-31-2016 at 10:05 AM.