
Project Do work - 2001 XJ Build (Pic intensive)
 06-19-2010, 01:39 AM
#1
Seasoned Member
Thread Starter
Join Date: May 2010
Location: Columbus, OH
Posts: 415
Likes: 0
Received 0 Likes
on
0 Posts
Year: 2001
Model: Cherokee
Engine: 4.0 I6
Hey guys, been doing some work on the XJ recently and wanted to start the build thread before I got too deep into it. I am hoping the thread will chronicle the Jeep's progress while allowing me to share the build with the forum and get advice/opinions/suggestions, etc. along the way.
This is my first Jeep so I'm fairly new to the platform. I've learned a lot from the forum, done a little research and decided to tackle some modifications on my own. I have mild mechanical skill, but would like to save some cash and am up for the challenge. How else am I gonna learn?
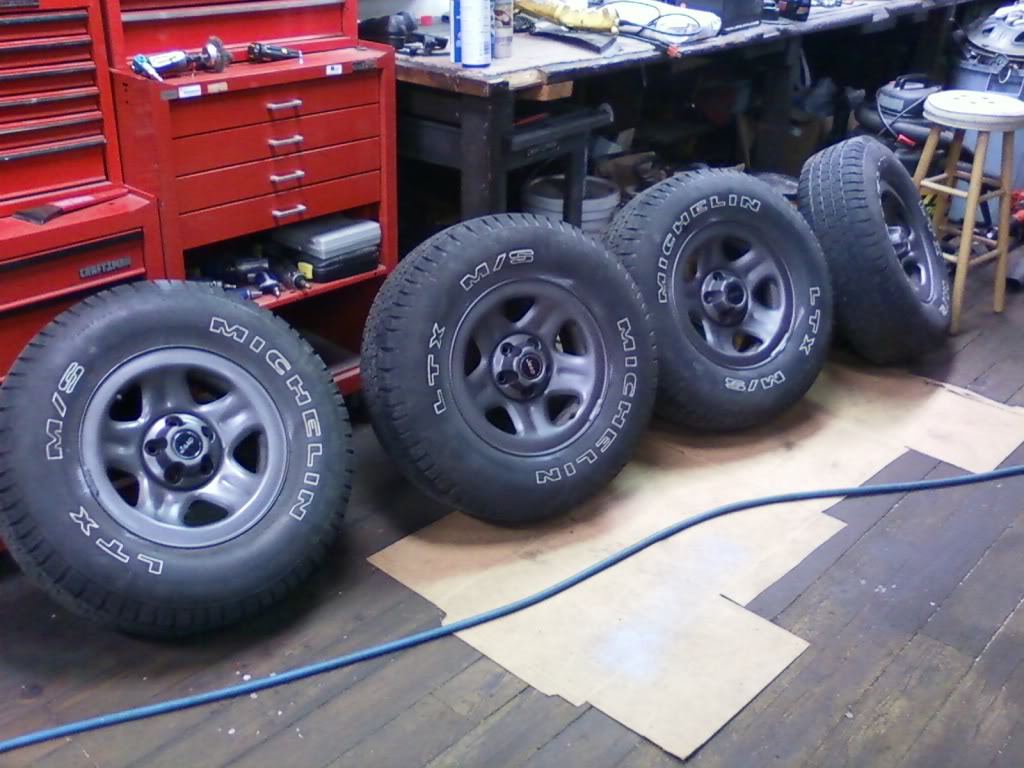
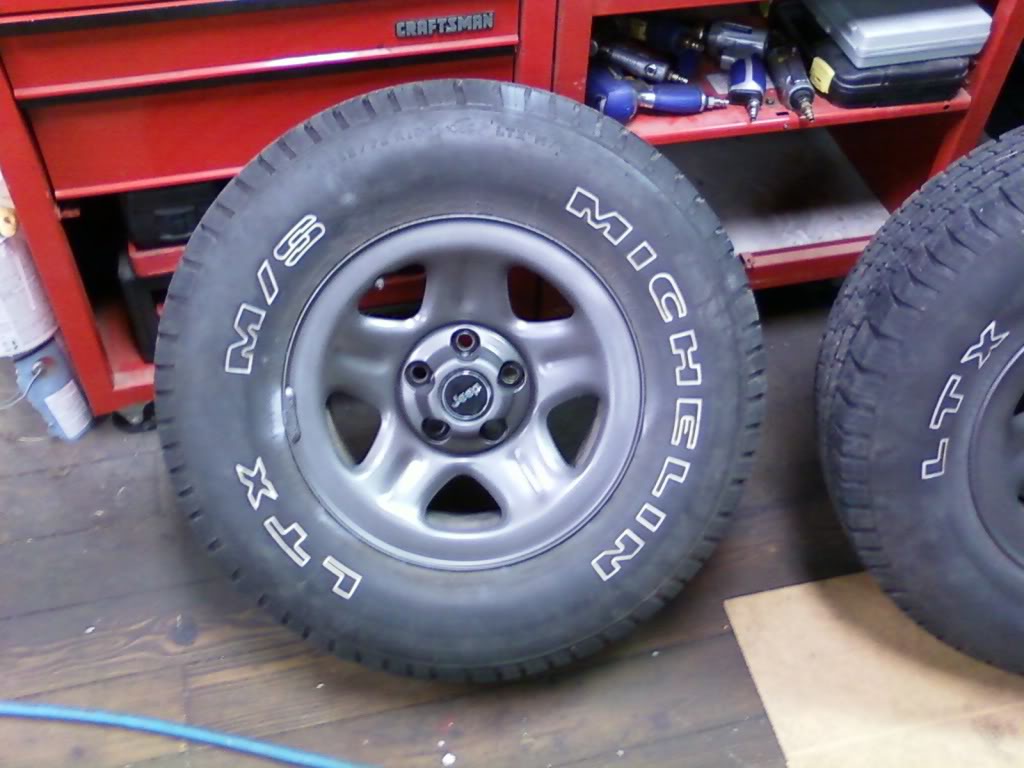
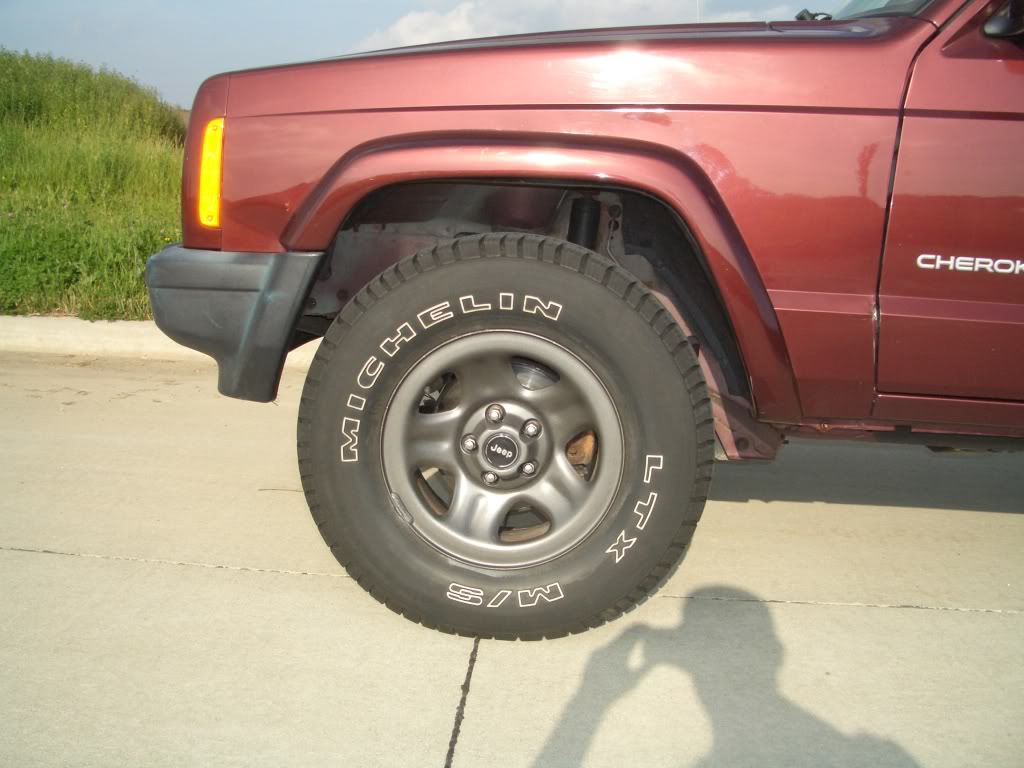
I picked up the Cherokee off Craigslist for $2000. It's a 2001 Sport, 150K miles, AW4, NP231, Dana 30/ Chrysler 8.25. It was totally stock when I received it.
Here's a couple phone pics the day I picked it up and after a quick run through the car wash.
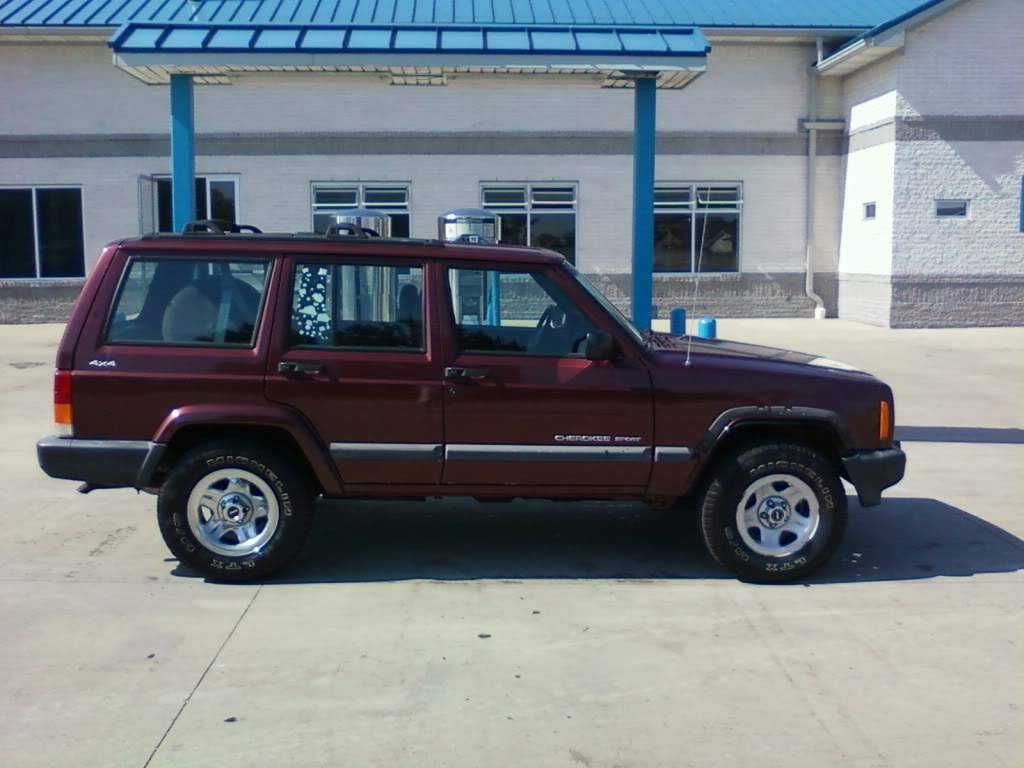
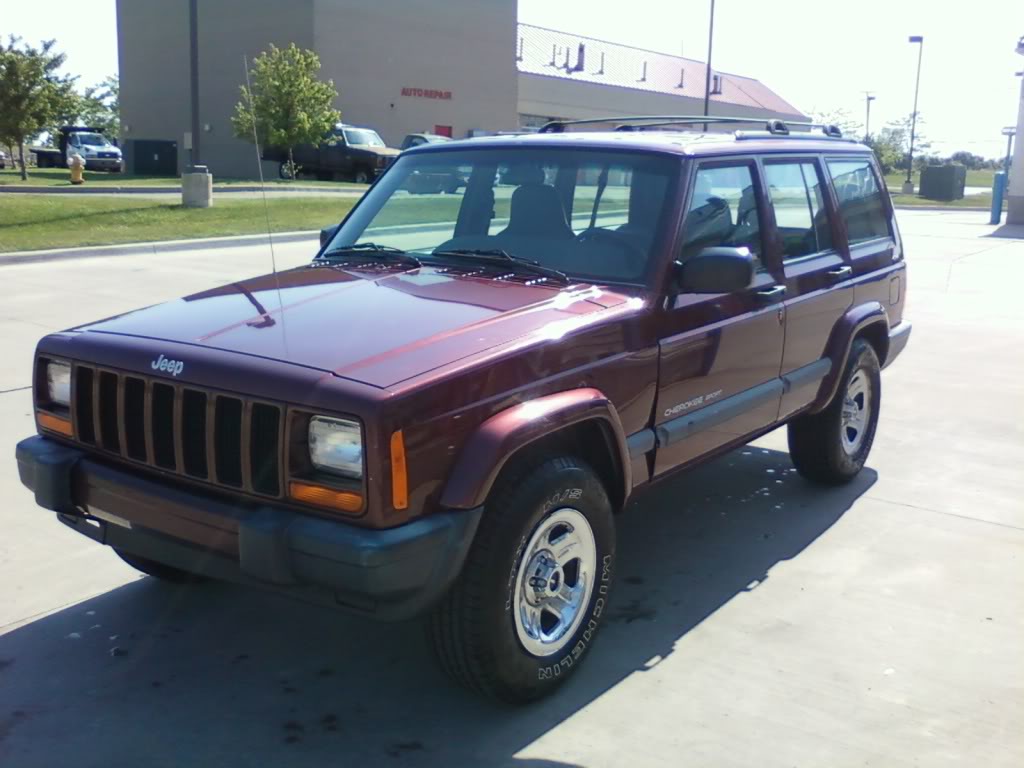
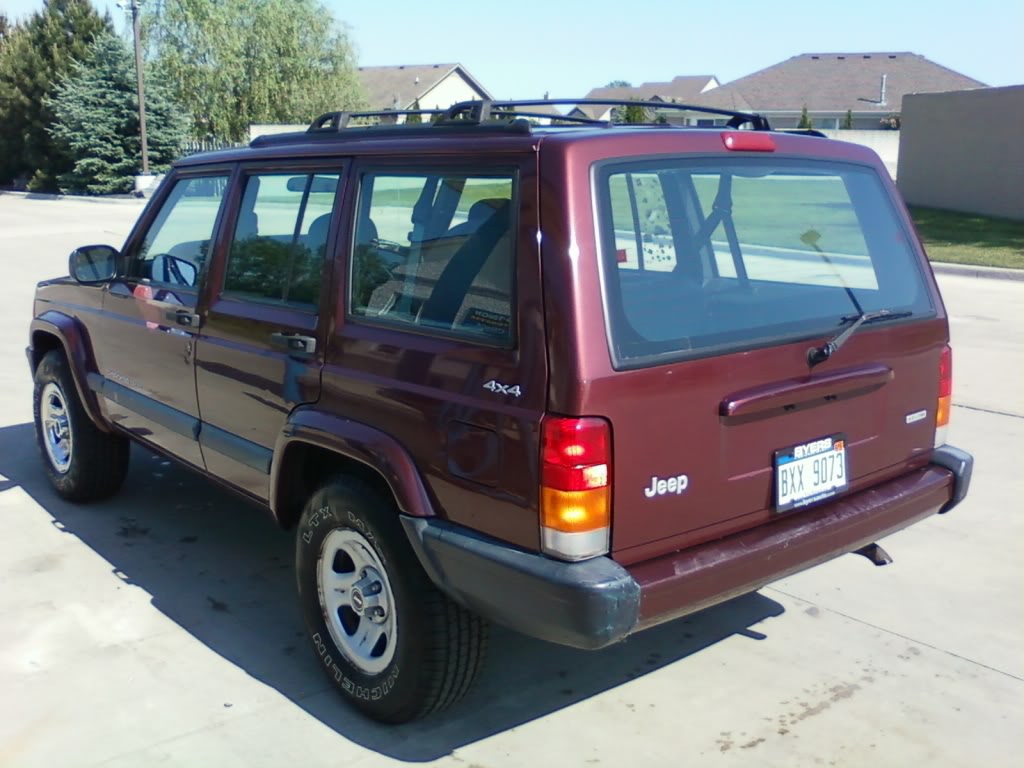
It's missing a fender flair and a couple hubcaps, has a few dents (most notably in the driver fender) and the driver door lock has a hole punched in it. But, the 4-wheel drive works, she drives great, and is virtually rust-free.
As far as plans for the rig are concerned, I'm looking to build something capable of some mild weekend wheeling while still maintaining some daily drivability. I don't think I'm gonna be crawling any huge rocks, but the occasional trail ride and off road excursion are reasonable expectations.
A little basic maintenance, a few cosmetic upgrades, and then onto the lift and tires.
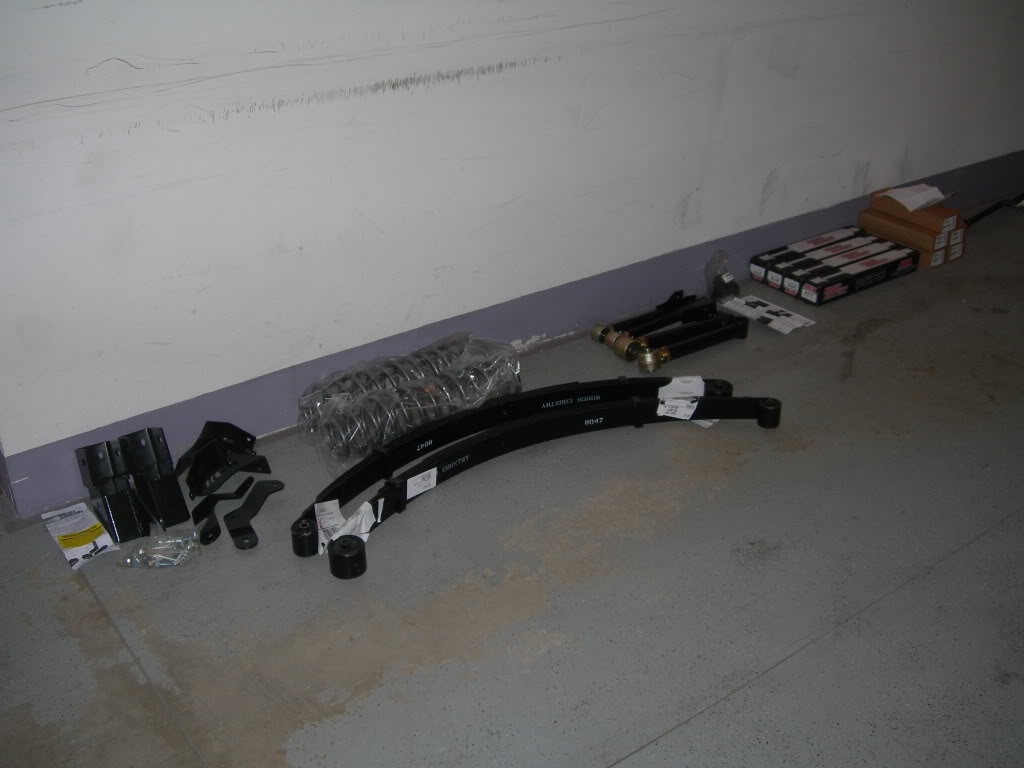
I've decided to go with Rough Country's 4.5" X-flex lift: http://roughcountry.com/jeep_xj_4x.html
and the control arm drop kit:
http://roughcountry.com/jeep_xj_control_arm_drop.html
I also ordered Terra Flex's rear disc brake conversion kit:
http://www.teraflex.biz/products/rea...ng-pocket.html
I'm just not happy with the brake performance, probably due to the rear drums needing serviced. Plus, a rear disc conversion will be really helpful once I have larger tires. Disc brakes are easier to service and self cleaning too.
This is my first Jeep so I'm fairly new to the platform. I've learned a lot from the forum, done a little research and decided to tackle some modifications on my own. I have mild mechanical skill, but would like to save some cash and am up for the challenge. How else am I gonna learn?
I picked up the Cherokee off Craigslist for $2000. It's a 2001 Sport, 150K miles, AW4, NP231, Dana 30/ Chrysler 8.25. It was totally stock when I received it.
Here's a couple phone pics the day I picked it up and after a quick run through the car wash.
It's missing a fender flair and a couple hubcaps, has a few dents (most notably in the driver fender) and the driver door lock has a hole punched in it. But, the 4-wheel drive works, she drives great, and is virtually rust-free.
As far as plans for the rig are concerned, I'm looking to build something capable of some mild weekend wheeling while still maintaining some daily drivability. I don't think I'm gonna be crawling any huge rocks, but the occasional trail ride and off road excursion are reasonable expectations.
A little basic maintenance, a few cosmetic upgrades, and then onto the lift and tires.
I've decided to go with Rough Country's 4.5" X-flex lift: http://roughcountry.com/jeep_xj_4x.html
and the control arm drop kit:
http://roughcountry.com/jeep_xj_control_arm_drop.html
I also ordered Terra Flex's rear disc brake conversion kit:
http://www.teraflex.biz/products/rea...ng-pocket.html
I'm just not happy with the brake performance, probably due to the rear drums needing serviced. Plus, a rear disc conversion will be really helpful once I have larger tires. Disc brakes are easier to service and self cleaning too.
 06-19-2010, 01:51 AM
#3
Seasoned Member
Thread Starter
Join Date: May 2010
Location: Columbus, OH
Posts: 415
Likes: 0
Received 0 Likes
on
0 Posts
Year: 2001
Model: Cherokee
Engine: 4.0 I6
First things first, side molding has got to go. I really think the removal of the molding makes for a nice clean look and shows the nice style lines of the doors. A little elbow grease, WD-40, a heat gun and some patience help in pulling these things off.
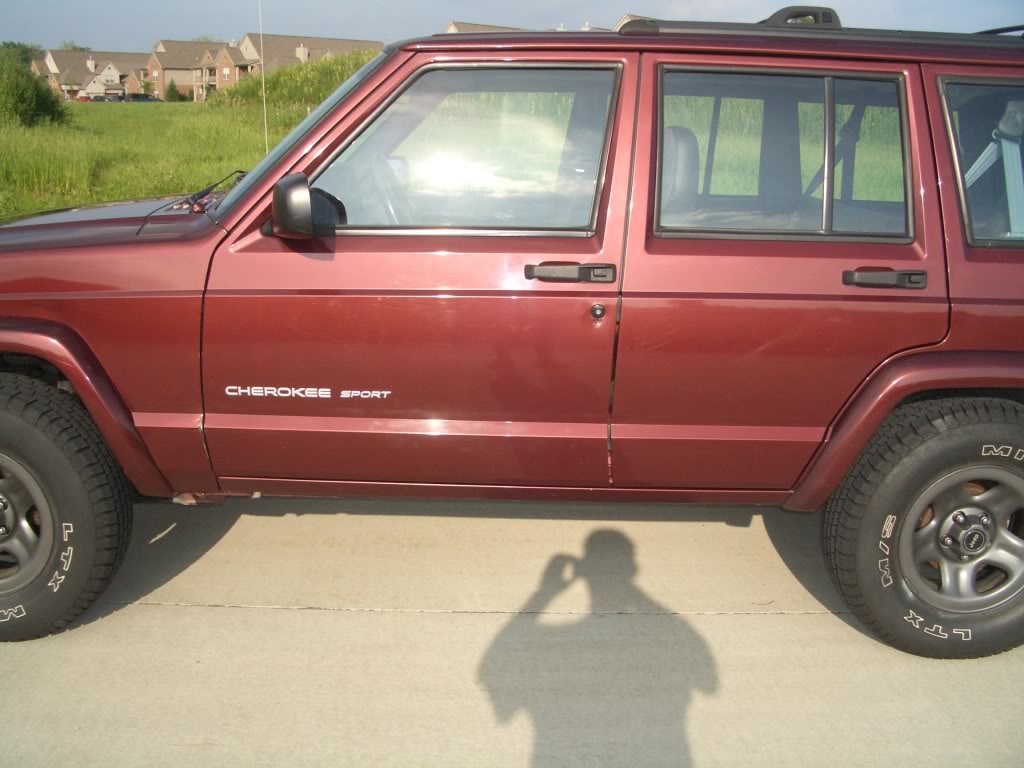
There's still a little adhesive residue left, but it may not be visible in the pics. I'll get to that eventually.
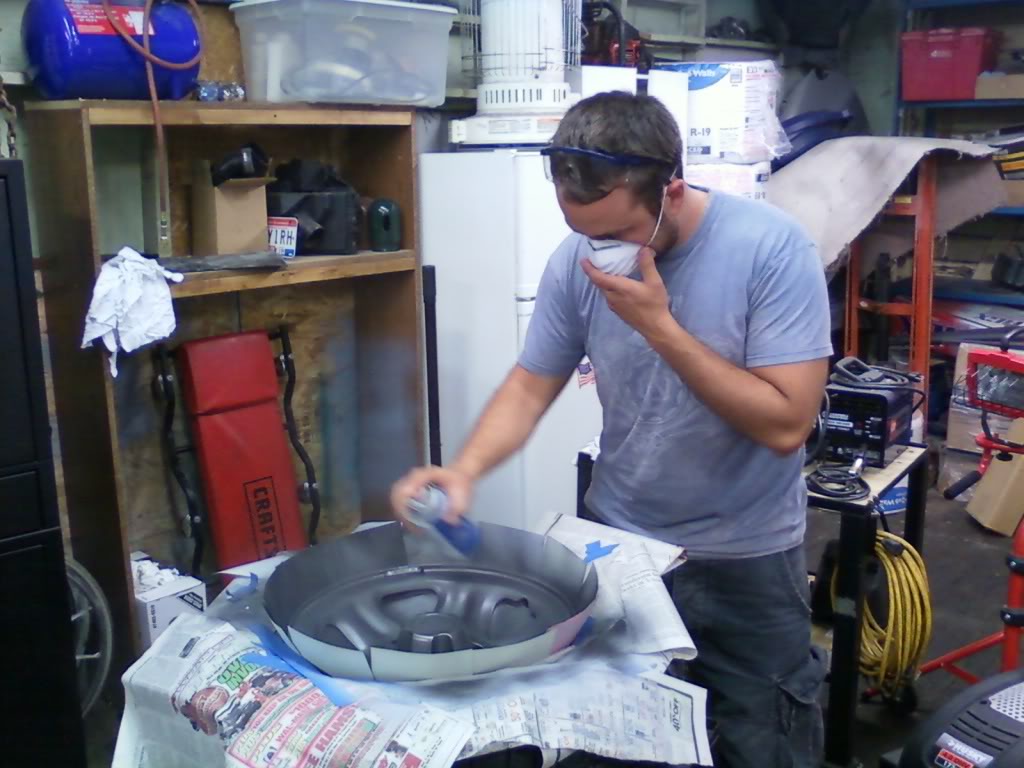
While I was at it, me and my buddy decided to paint the wheels. I trashed the 2 hubcaps I had, sanded the wheels down to remove rust and blemishes, primered them and painted them with some Dupli-color wheel coating in a nice graphite finish.
It was our first time painting, but they turned out really well. However, we did get a little overspray on the tires.
Our masterpieces:
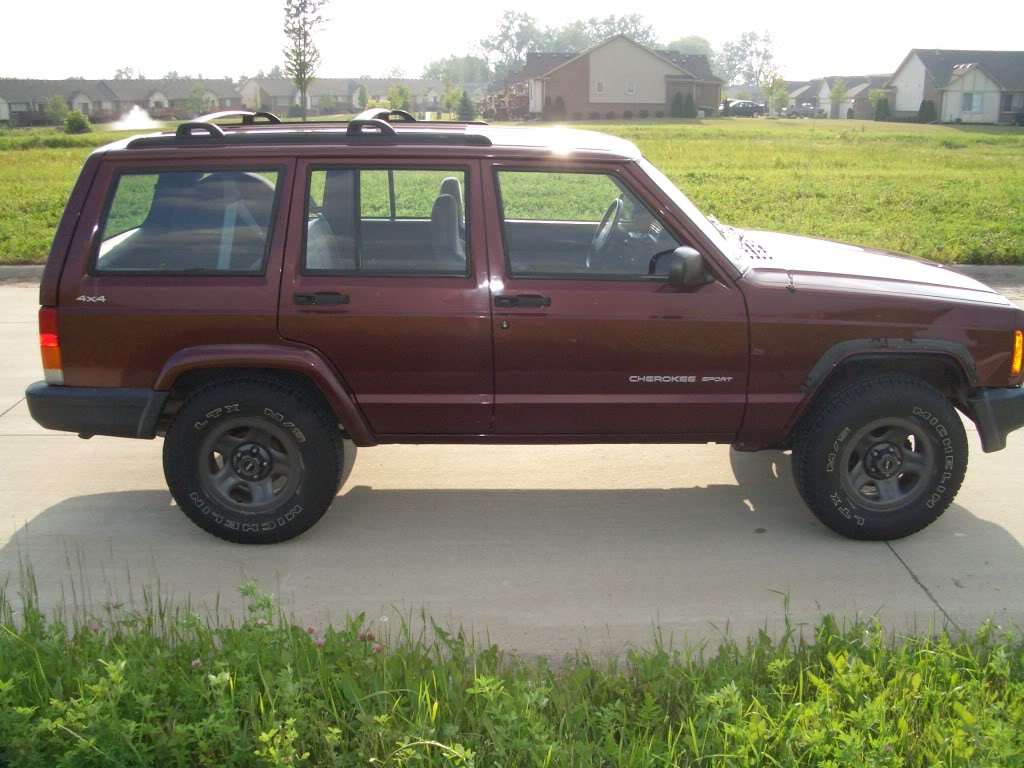

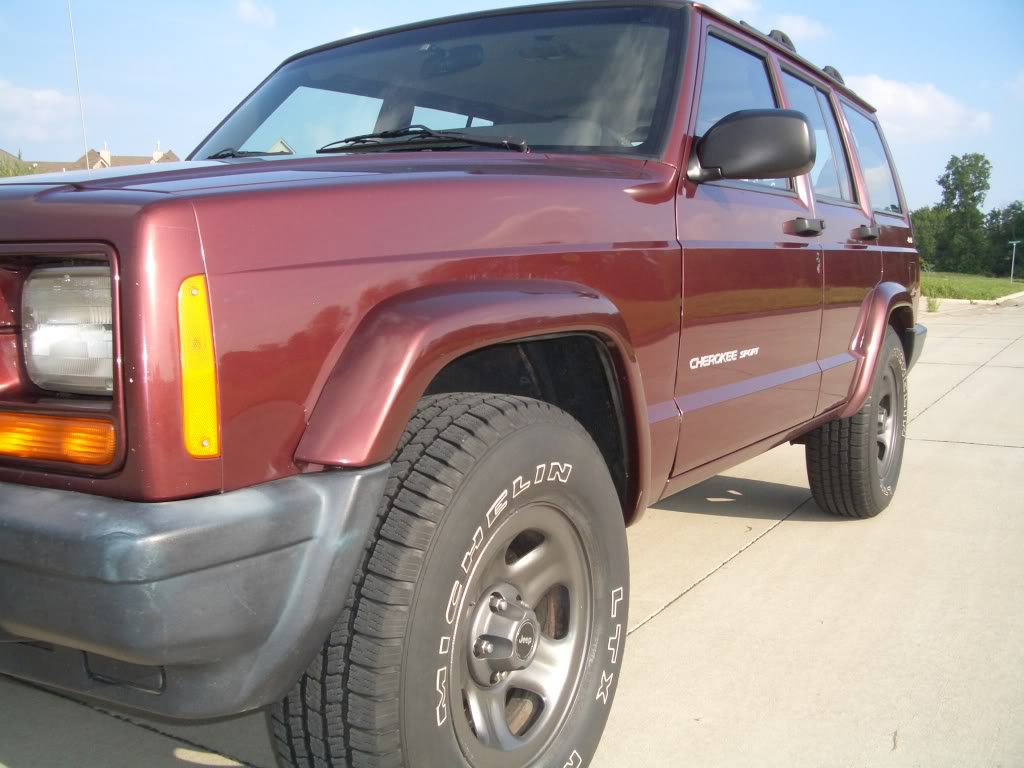
We also straightened out the driver fender which was preventing the driver door from opening fully. Now I don't have to strafe into the seat like I'm playing Call of Duty MW2.
There's still a little adhesive residue left, but it may not be visible in the pics. I'll get to that eventually.
While I was at it, me and my buddy decided to paint the wheels. I trashed the 2 hubcaps I had, sanded the wheels down to remove rust and blemishes, primered them and painted them with some Dupli-color wheel coating in a nice graphite finish.
It was our first time painting, but they turned out really well. However, we did get a little overspray on the tires.
Our masterpieces:
We also straightened out the driver fender which was preventing the driver door from opening fully. Now I don't have to strafe into the seat like I'm playing Call of Duty MW2.
06-19-2010, 01:59 AM
#4
Seasoned Member
Thread Starter
Join Date: May 2010
Location: Columbus, OH
Posts: 415
Likes: 0
Received 0 Likes
on
0 Posts
Year: 2001
Model: Cherokee
Engine: 4.0 I6
You're probably right.
But I'm not resourceful enough to find the parts I would need. I'd also have to remove the parts in the salvage yard which takes time and I've never been known for being speedy with the wrench. I'd rather not have to take the whole rear end/axle either.
It's kind of convenient to know you have everything you need in a complete kit. Also, I didn't purchase from the manufacturer so I got a little better deal than that.
06-19-2010, 02:02 AM
#5
Registered Users

Join Date: Dec 2009
Location: Everett, WA
Posts: 1,859
Likes: 0
Received 0 Likes
on
0 Posts
Year: 1992
Model: Cherokee
Engine: 4.0
You're probably right.
But I'm not resourceful enough to find the parts I would need. I'd also have to remove the parts in the salvage yard which takes time and I've never been known for being speedy with the wrench. I'd rather not have to take the whole rear end/axle either.
It's kind of convenient to know you have everything you need in a complete kit. Also, I didn't purchase from the manufacturer so I got a little better deal than that.
But I'm not resourceful enough to find the parts I would need. I'd also have to remove the parts in the salvage yard which takes time and I've never been known for being speedy with the wrench. I'd rather not have to take the whole rear end/axle either.
It's kind of convenient to know you have everything you need in a complete kit. Also, I didn't purchase from the manufacturer so I got a little better deal than that.

you could buy all the parts needed at a auto parts store. besides that looks like a great start!
06-19-2010, 02:09 AM
#6
Seasoned Member
Thread Starter
Join Date: May 2010
Location: Columbus, OH
Posts: 415
Likes: 0
Received 0 Likes
on
0 Posts
Year: 2001
Model: Cherokee
Engine: 4.0 I6
Ordered the kit from Rough Country on Sat, it shipped Mon and a big brown truck dropped this stuff at my door on Wed. Pretty impressed with customer service and expeditious shipping.

Unpacked a little:
Unpacked a little:
06-19-2010, 02:29 AM
#7
Seasoned Member
Thread Starter
Join Date: May 2010
Location: Columbus, OH
Posts: 415
Likes: 0
Received 0 Likes
on
0 Posts
Year: 2001
Model: Cherokee
Engine: 4.0 I6
Lift accomplished! Well, not by a suspension kit, rather a hydraulic jack. Just want to reiterate, this is my first jeep and the first issue I ran in to was jacking the vehicle high enough to get the tires off the ground and place jack stands under the unibody.
My little craftsman floor jack couldn't even get the tires off the ground on a stock Jeep! So, I went to Lowes and bought some cinder blocks for $.98/piece. Problem solved.
I wanted to buy some wood blocks, but the guy at Lowe's wouldn't cut them for me?!!?!?! And I don't own any type of powered saw so I had to settle for the blocks.

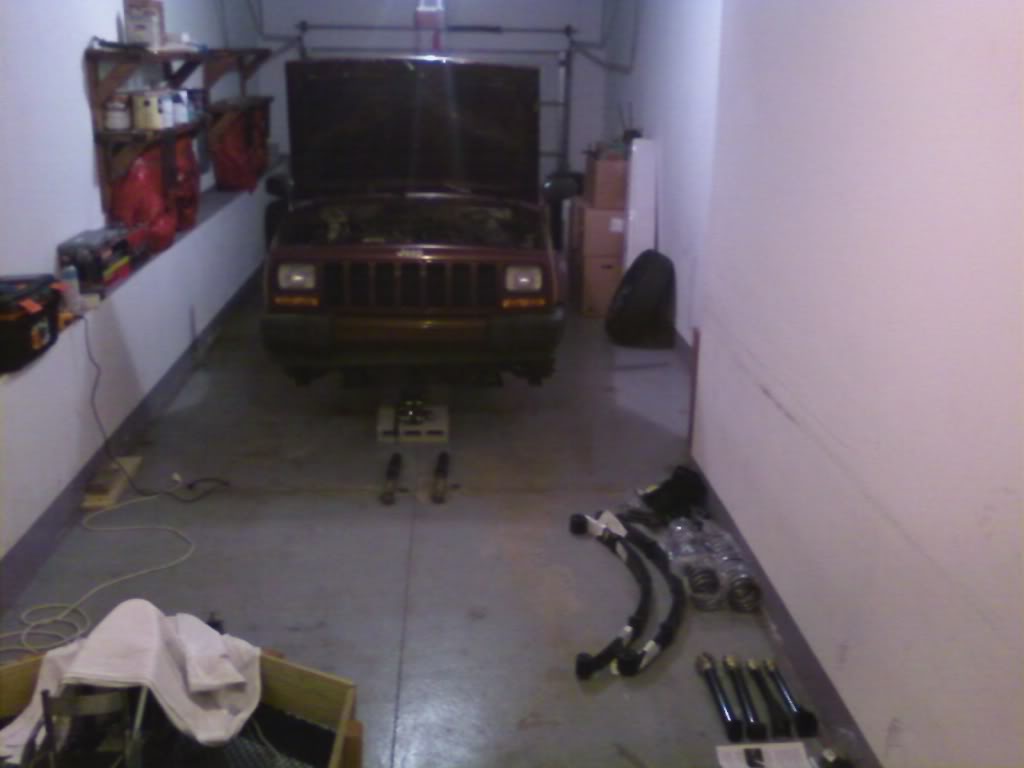
Also, I'm not lucky enough to have a nice air compressor set up. Instead, I opted for the electric impact wrench.
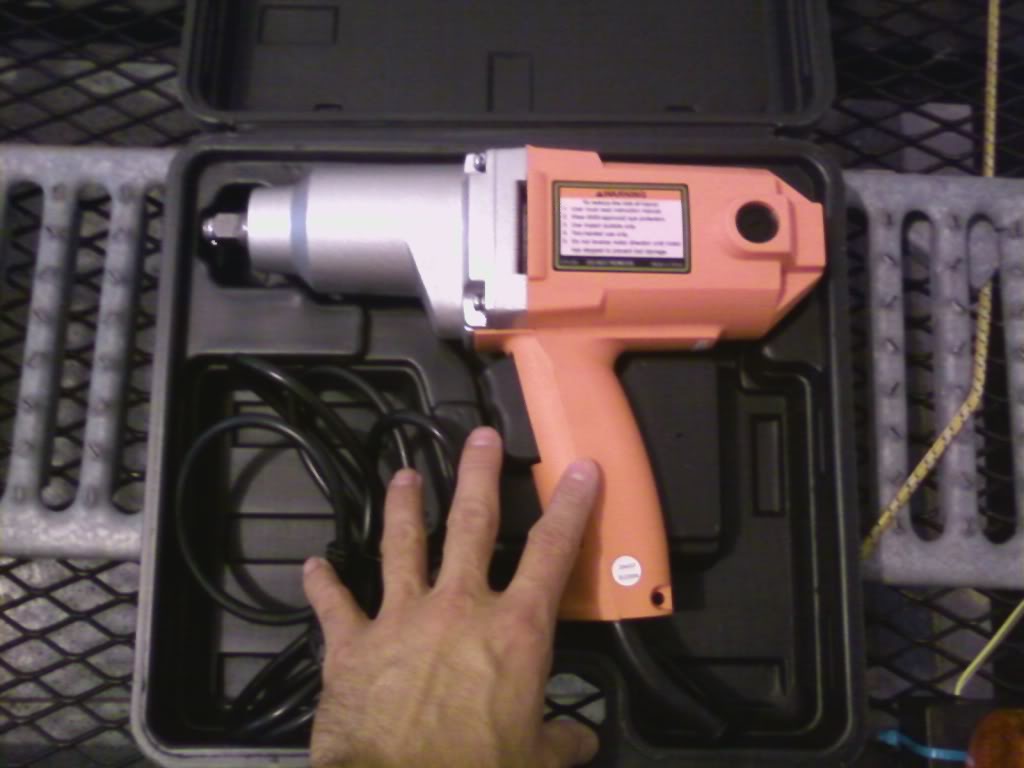
Found one at a local Harbor Freight, http://www.harborfreight.com/1-2-hal...nch-45252.html
Now, it might not perform quite as well as it's air-powered cousin, but this thing is still worth it's weight in gold compared to trying to break some of these suspension nuts/bolts by hand. And at only $50 bucks you can't go wrong. I'm really happy with it.
My little craftsman floor jack couldn't even get the tires off the ground on a stock Jeep! So, I went to Lowes and bought some cinder blocks for $.98/piece. Problem solved.
I wanted to buy some wood blocks, but the guy at Lowe's wouldn't cut them for me?!!?!?! And I don't own any type of powered saw so I had to settle for the blocks.
Also, I'm not lucky enough to have a nice air compressor set up. Instead, I opted for the electric impact wrench.
Found one at a local Harbor Freight, http://www.harborfreight.com/1-2-hal...nch-45252.html
Now, it might not perform quite as well as it's air-powered cousin, but this thing is still worth it's weight in gold compared to trying to break some of these suspension nuts/bolts by hand. And at only $50 bucks you can't go wrong. I'm really happy with it.
Trending Topics
06-19-2010, 02:52 AM
#8
Seasoned Member
Thread Starter
Join Date: May 2010
Location: Columbus, OH
Posts: 415
Likes: 0
Received 0 Likes
on
0 Posts
Year: 2001
Model: Cherokee
Engine: 4.0 I6
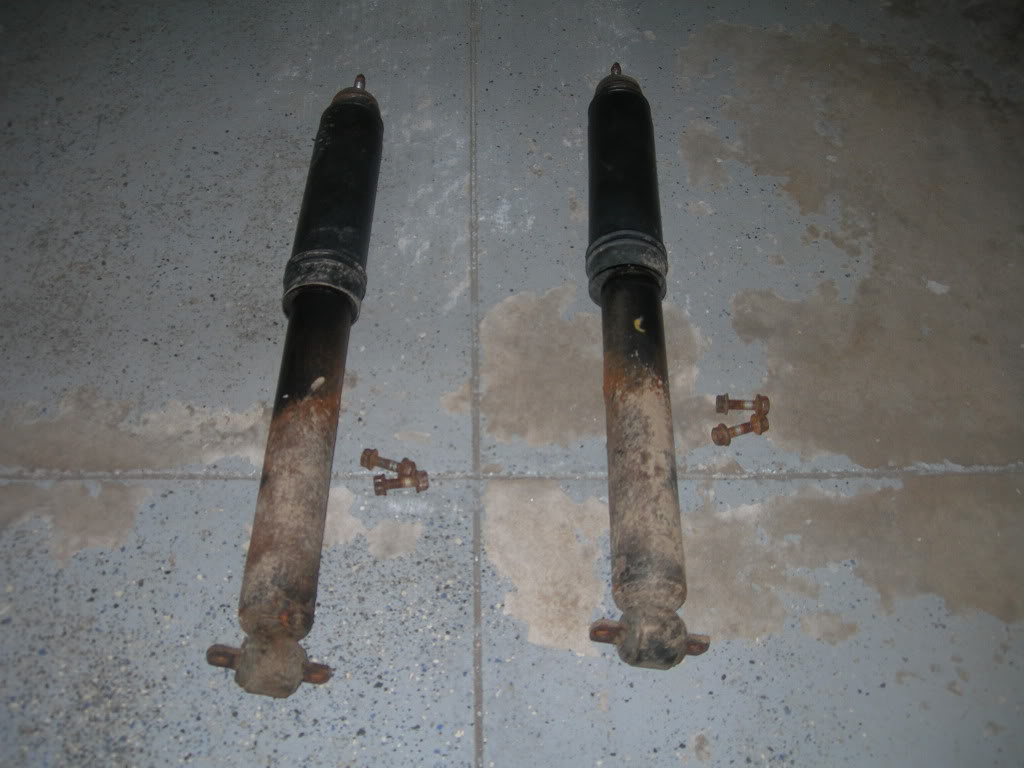
Anybody else hate trying to torque on the nut on top of a shock when the shaft starts to spin? Yeah, me too.
Passenger side shock came off nice and clean with the impact wrench. But the brake booster/master cylinder prevented me from fitting the wrench on the driver's side. I tried the conventional method with an open-faced wrench and some vise grips to no avail. Poured Freeze-off and WD-40 all over the place to no avail. I don't own a torch or saw so I was basically out of solutions.
Quick internet search with Google = solution = nut splittler. $3.99 @ Harbor Freight, http://www.harborfreight.com/5-8-eig...ter-66547.html
I was finally able to bust that nut! I mean, split that nut.
Here it is in action:
And the aftermath of what happens when some nut screws around with me:
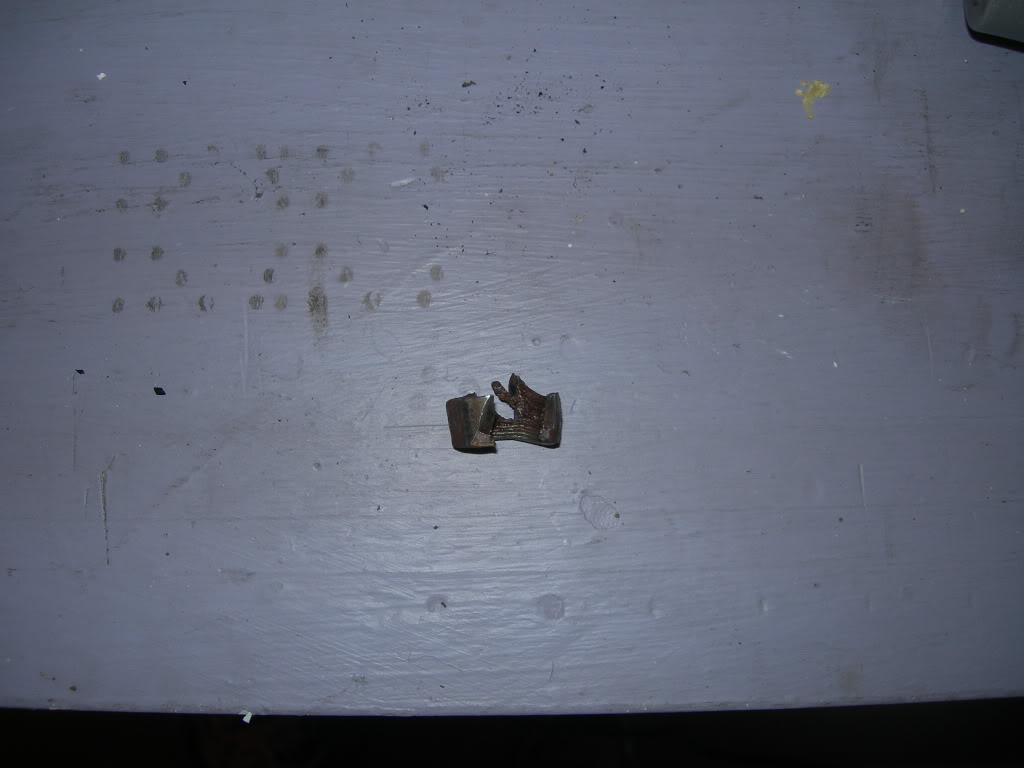
Passenger side shock came off nice and clean with the impact wrench. But the brake booster/master cylinder prevented me from fitting the wrench on the driver's side. I tried the conventional method with an open-faced wrench and some vise grips to no avail. Poured Freeze-off and WD-40 all over the place to no avail. I don't own a torch or saw so I was basically out of solutions.
Quick internet search with Google = solution = nut splittler. $3.99 @ Harbor Freight, http://www.harborfreight.com/5-8-eig...ter-66547.html
I was finally able to bust that nut!
I mean, split that nut. Here it is in action:
And the aftermath of what happens when some nut screws around with me:
 06-19-2010, 01:27 PM
#10
Junior Member
Join Date: Dec 2009
Location: Detroit,Michigan
Posts: 69
Likes: 0
Received 0 Likes
on
0 Posts
Year: 2000
Model: Cherokee
Engine: 4.0
Looks good so far! Just FYI, upper rear shock bolts are a pain if they break, soak those babies in PB blaster or something like that for days if you are able!
06-19-2010, 01:58 PM
#11
Junior Member

Join Date: Oct 2009
Location: Newfoundland
Posts: 46
Likes: 0
Received 0 Likes
on
0 Posts
Year: 1997
Model: Cherokee
Engine: 4.0
If you do bust off you rear shock bolts and dont want to cut a hole in your floor, you can use a punch and knock out the nut inside... then used the access holes to put new nuts up... only thing is that its hard to get a wrench in there with your hand... but it did work for me when i broke off mine...
06-19-2010, 09:36 PM
#12
Seasoned Member
Thread Starter
Join Date: May 2010
Location: Columbus, OH
Posts: 415
Likes: 0
Received 0 Likes
on
0 Posts
Year: 2001
Model: Cherokee
Engine: 4.0 I6
If you do bust off you rear shock bolts and dont want to cut a hole in your floor, you can use a punch and knock out the nut inside... then used the access holes to put new nuts up... only thing is that its hard to get a wrench in there with your hand... but it did work for me when i broke off mine...
Got some good work done today on the front, I'll have a full update with lots of pictures tonight. Just need to refuel with some dinner first.
06-19-2010, 11:02 PM
#13
Seasoned Member
Thread Starter
Join Date: May 2010
Location: Columbus, OH
Posts: 415
Likes: 0
Received 0 Likes
on
0 Posts
Year: 2001
Model: Cherokee
Engine: 4.0 I6
Anti-sway bar was kind of a PITA. The top nut came off with out a fight, allowing me to temporarily relocate the bar:
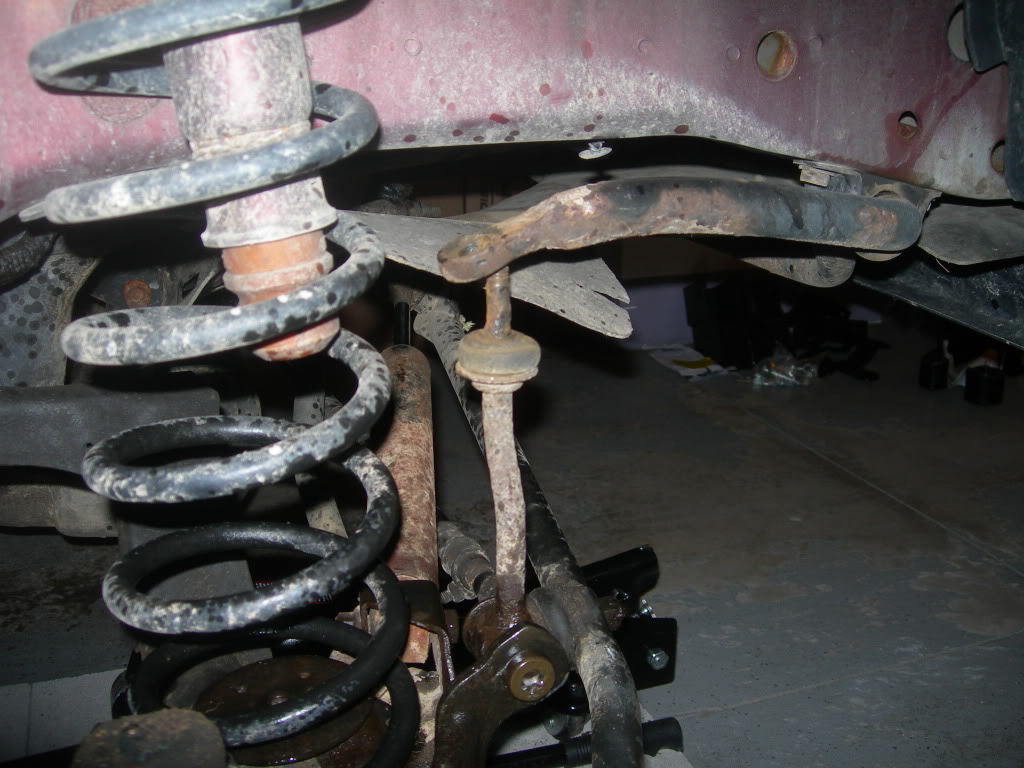
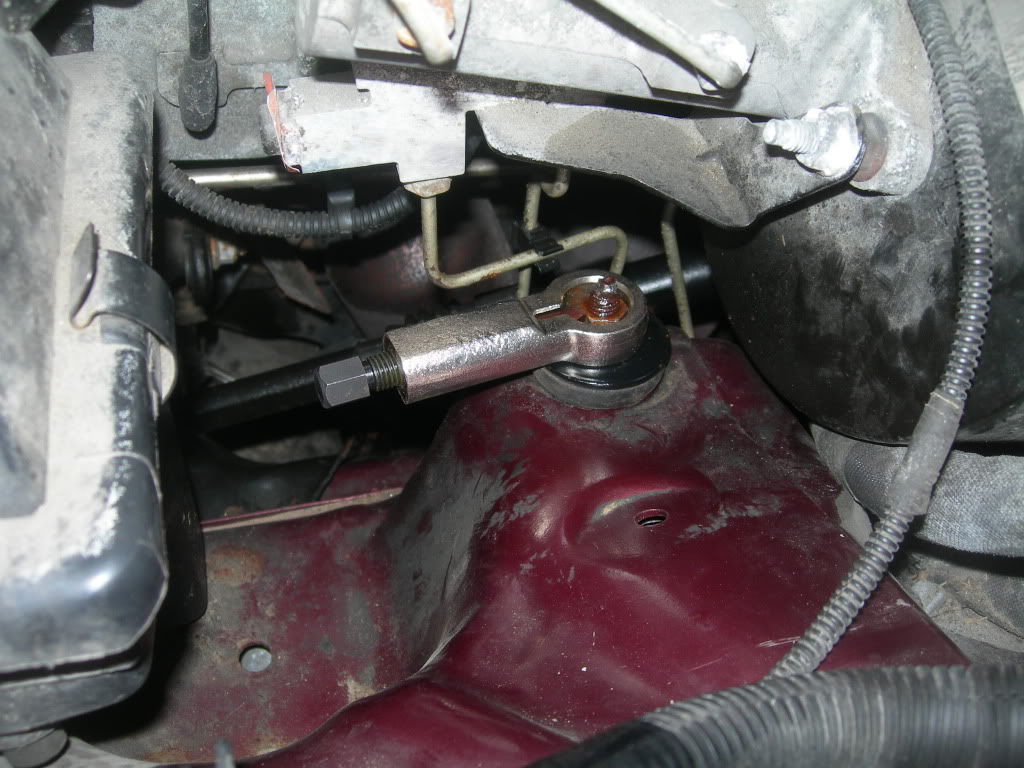
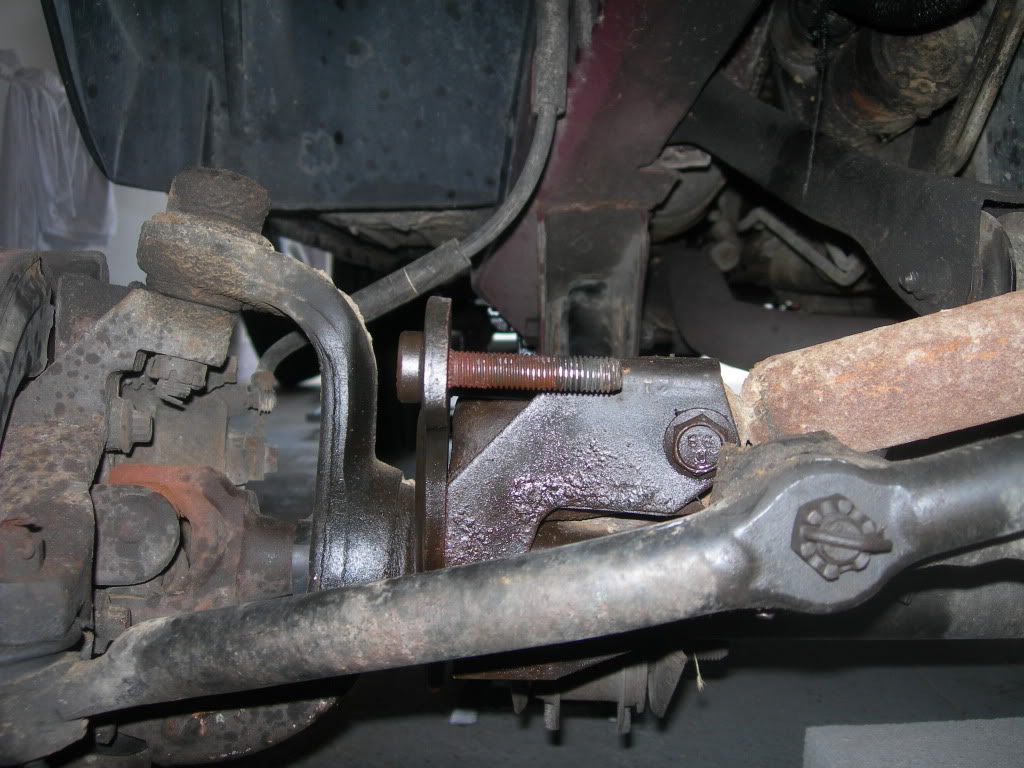
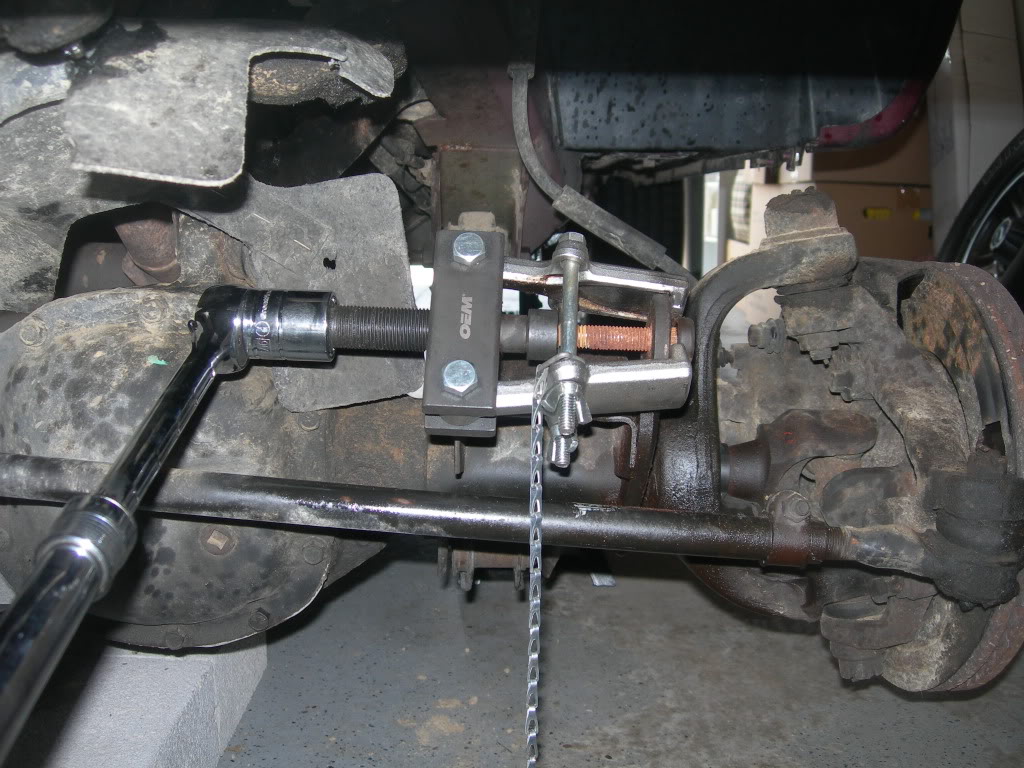
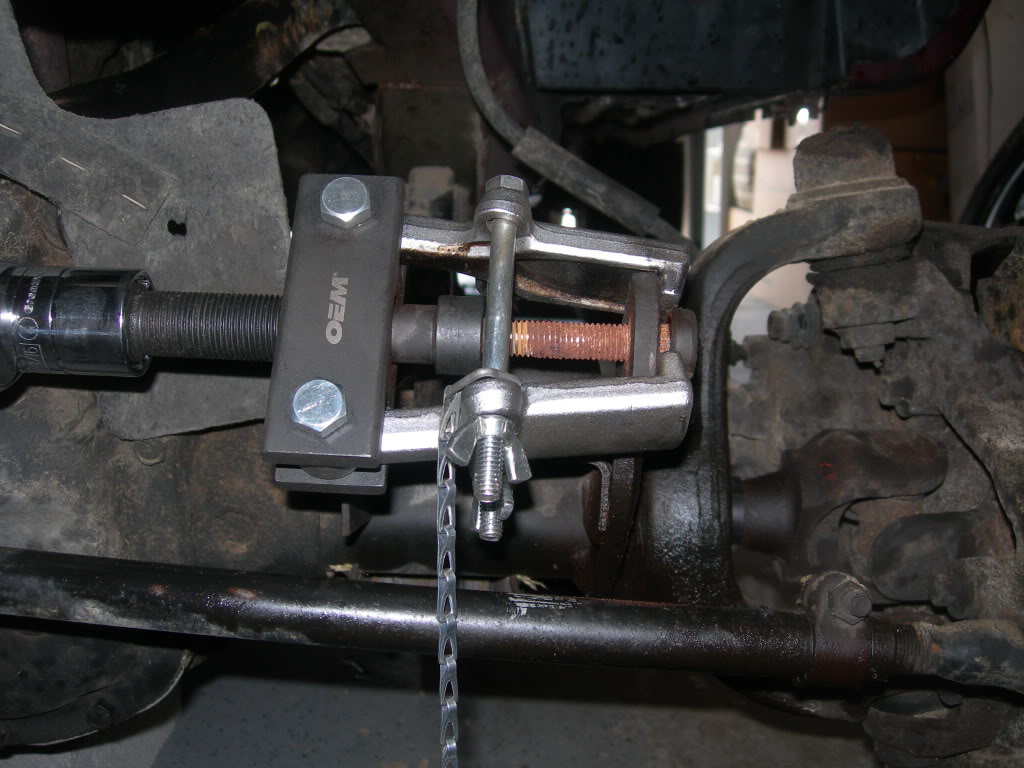
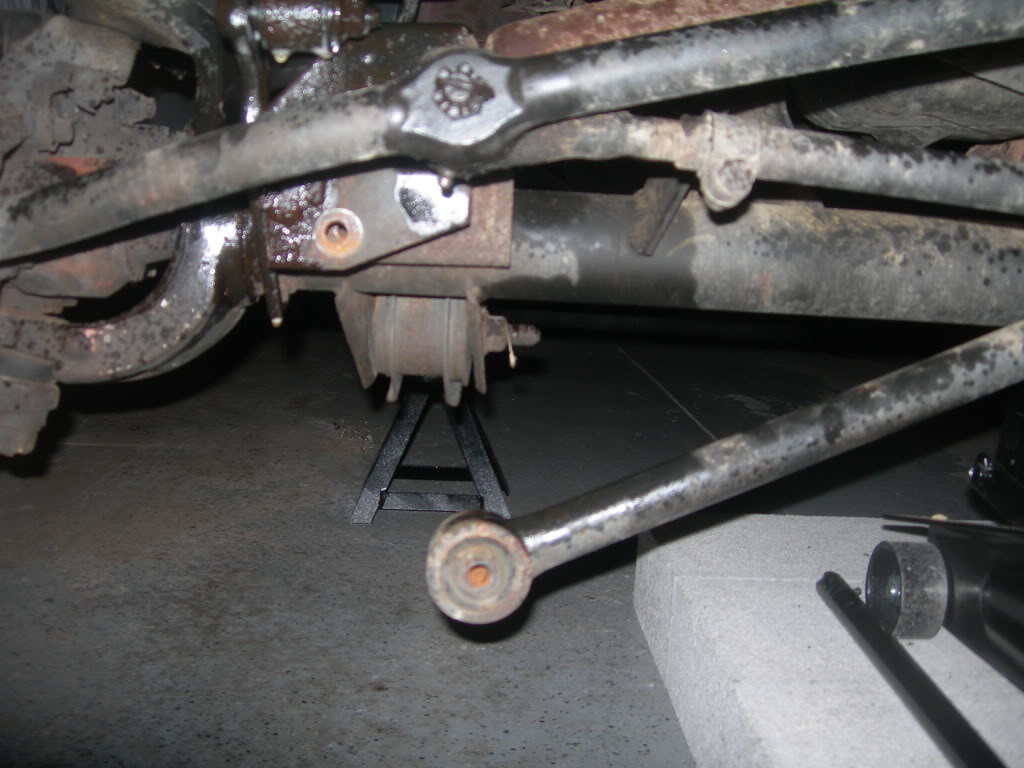
However, the lower mounting assembly which connected the swaybar endlink to the axle gave me a lot of trouble. I was able to remove the nut after a lot of wrenching which allowed me to remove the endlinks. But the pin/bolt wasn't ready to give up that easy. It has a torx bit head, which I assumed meant it could be screwed out. Nope. Only after referencing separate instructions for the sway bar quick discos did I realize that it has to be hammered out. Unfortunately, that didn't work for me either. So I resorted to google, which led me to a write-up here on the forum that showed how you could use a pitman arm puller to persuade the bolt out. Off to Autozone to rent one. It worked like a charm!
The enemy. This is passenger side, viewed from the front of the vehicle. Obviously, the endlink has been removed. I would've shown the removal of the pin/bolt on the passenger side except in order to get the puller in position I had to unbolt the steering stabilizer (easy), so by that time I just wanted to get it done and skipped the pictures.
The solution. This is the Pitman Arm Puller doing work on the driver side.
Removal of sway bar, endlinks and mounting hardware complete.
 06-19-2010, 11:09 PM
#15
Seasoned Member
Thread Starter
Join Date: May 2010
Location: Columbus, OH
Posts: 415
Likes: 0
Received 0 Likes
on
0 Posts
Year: 2001
Model: Cherokee
Engine: 4.0 I6
This is what happens when you ask a NON-impact socket adapter to do an IMPACT socket adapters job:
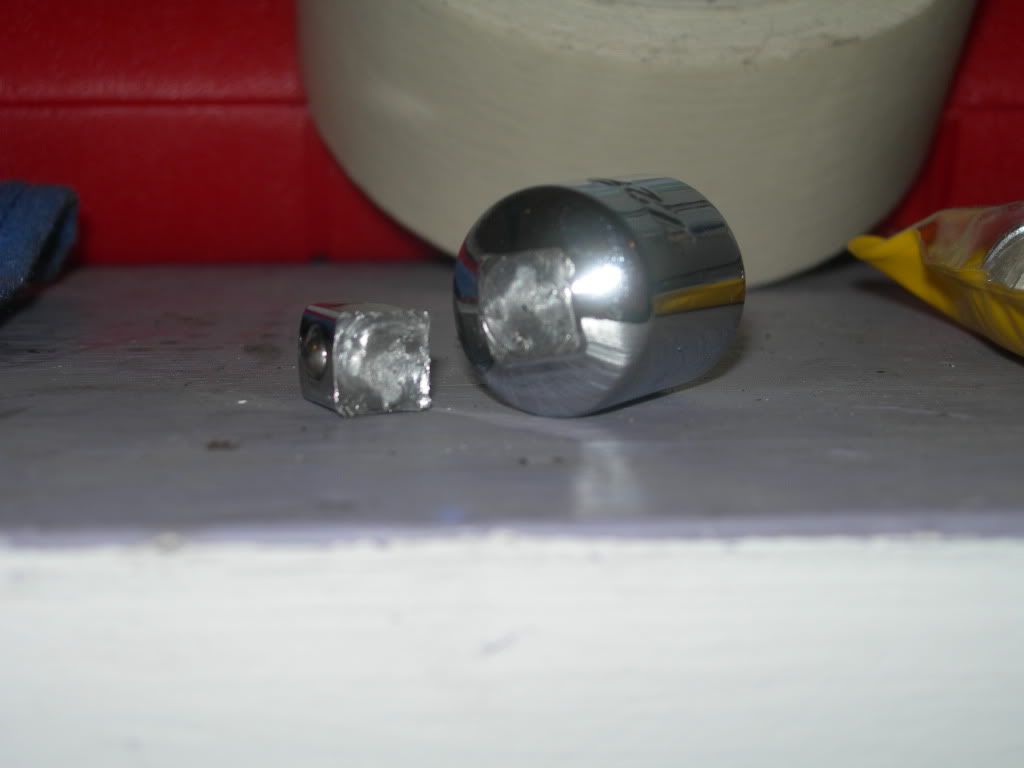
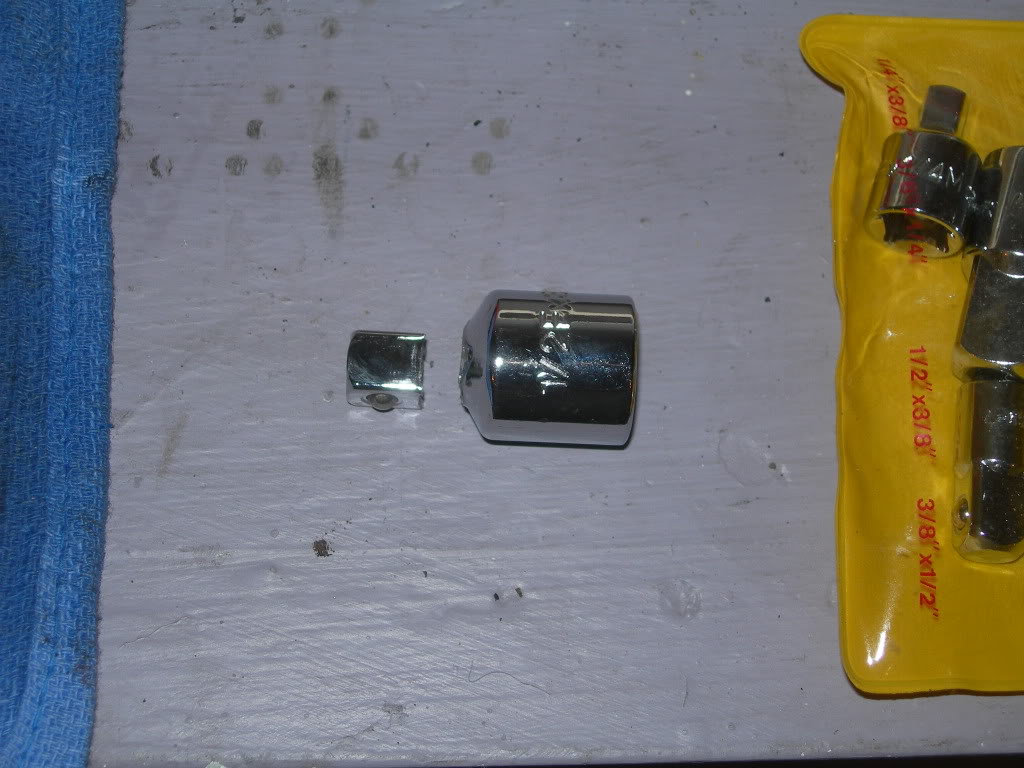
R.I.P. little non-impact socket adapter.
R.I.P. little non-impact socket adapter.