
Project Do work - 2001 XJ Build (Pic intensive)

 07-16-2010, 11:42 AM
#152
Seasoned Member
Thread Starter
Join Date: May 2010
Location: Columbus, OH
Posts: 415
Likes: 0
Received 0 Likes
on
0 Posts
Year: 2001
Model: Cherokee
Engine: 4.0 I6
Thanks.
Here's the manufacturer link:
http://www.rockhard4x4parts.com/XJ-frontbumper.html
Though, I ordered it from http://www.quadratec.com/products/72065_700.htm
Really impressed with customer service and shipping at Quadratec, it arrived in only a couple days.
When I was looking at front bumper options, I narrowed it down to the Rock Hard and JCR stage 3 ( http://www.jcroffroad.com/Merchant2/...egory_Code=XJB )
They are of similar style design. I like how they both wrap around the sides toward the fenders. JCR was quite a bit cheaper and I liked the idea of having the unibody tie-in brackets to reinforce the mounting. However, they build to order and wait time was like 3 weeks before it would arrive. I hate waiting.
I found the Rock Hard and decided to go with it. Though priced higher, I am happy that I went with it. I really like the beveled edge and slope at the bottom. Looks real clean. It comes finished, painted black (JCR is shipped unfinished). And even though it doesn't have "tie-in" brackets, they did extend the mounting brackets in their design to allow for more fasteners further down the frame rail and supply some grade 8 bolts for that purpose. These are in addition to the factory bolts. Quality and craftmanship are outstanding so far.
Additionally, the winch plate which is sold separately is straight BAD A$$. I love the design and how it incorporates the bumpers natural slope angle. That'll be a future mod though. But I really liked the idea of being able to easily upgrade to a winch in the future and the bumper comes with pre-drilled holes to accept it.
Hopefully, I'll have some pics of it installed later tonight after work.
07-16-2010, 12:20 PM
#153
Seasoned Member
Join Date: Apr 2010
Location: Colorado
Posts: 291
Likes: 0
Received 0 Likes
on
0 Posts
Year: 1996
Model: Cherokee
Engine: 4.0 HO I6
Awesome build thread! I just finished reading the whole thing and I can honestly say I learned some stuff. Thanks for being so thorough.
07-16-2010, 01:33 PM
#154
Seasoned Member
Thread Starter
Join Date: May 2010
Location: Columbus, OH
Posts: 415
Likes: 0
Received 0 Likes
on
0 Posts
Year: 2001
Model: Cherokee
Engine: 4.0 I6
I enjoy the feedback, comments and discussion so I will continue to post away. I'm still learning as I go so it's exciting to share the Jeep's progress.
07-16-2010, 01:47 PM
#155
Seasoned Member
Thread Starter
Join Date: May 2010
Location: Columbus, OH
Posts: 415
Likes: 0
Received 0 Likes
on
0 Posts
Year: 2001
Model: Cherokee
Engine: 4.0 I6
At work now, but had a few minutes to remove the front bumper real quick before leaving and figured I could update from work.
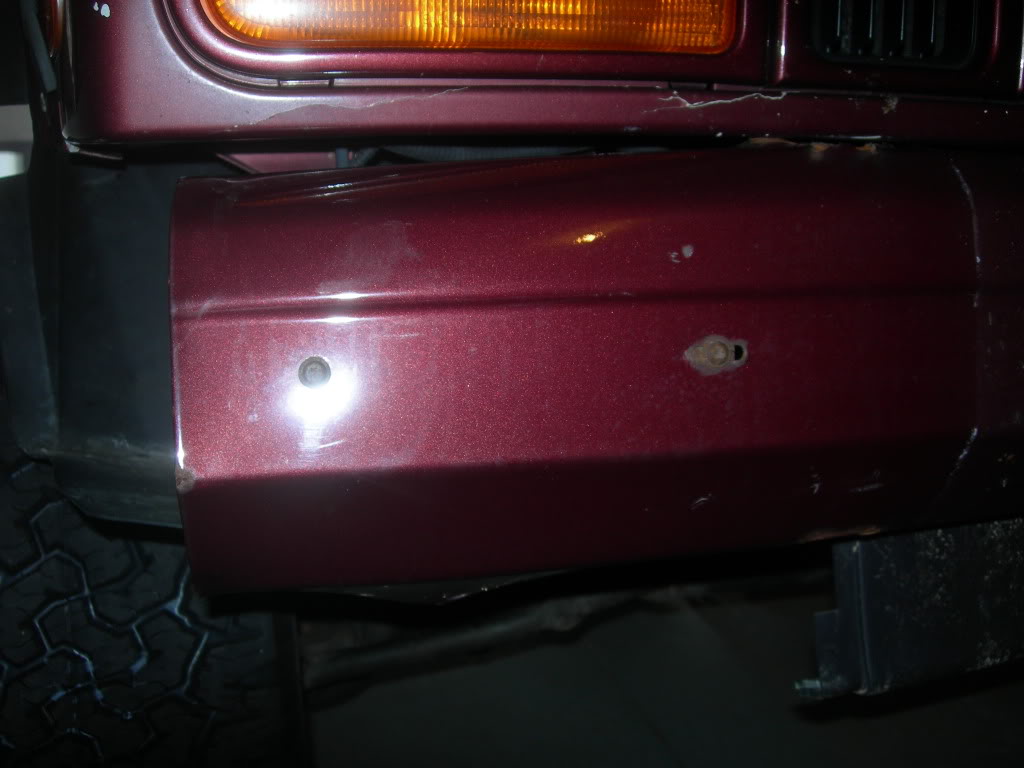
Since I had already removed the bumper endcaps, the 6 bolts which fasten the front bumper to the unibody were alredy exposed.
Looking down the bumper from the driver's side:
Same view as above, but from the passenger side:
Notice the vacuum canister, which is screwed to the bumper. It will need to be removed before the bumper itself can come down.
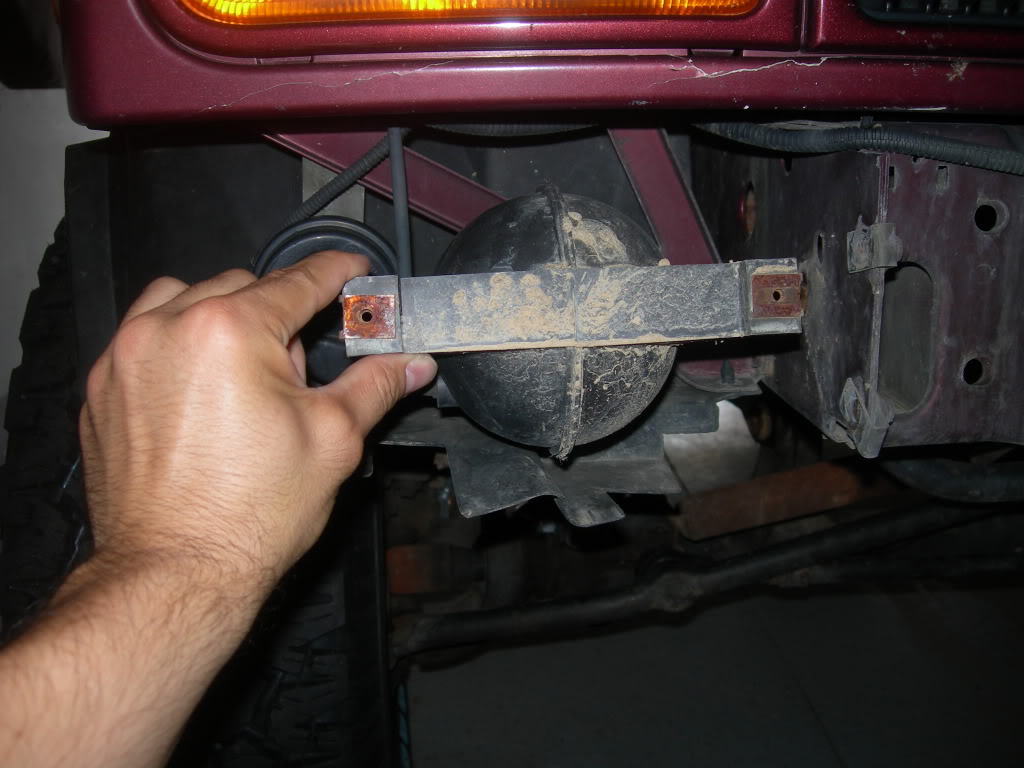
It's held in place by 2 small Torx screws which can be seen once the bumper endcap is removed:
After unattaching the vacuum canister, the bumper can be unbolted from the unibody. Take a look at how many extensions I had to use to reach the bolts. LOL.
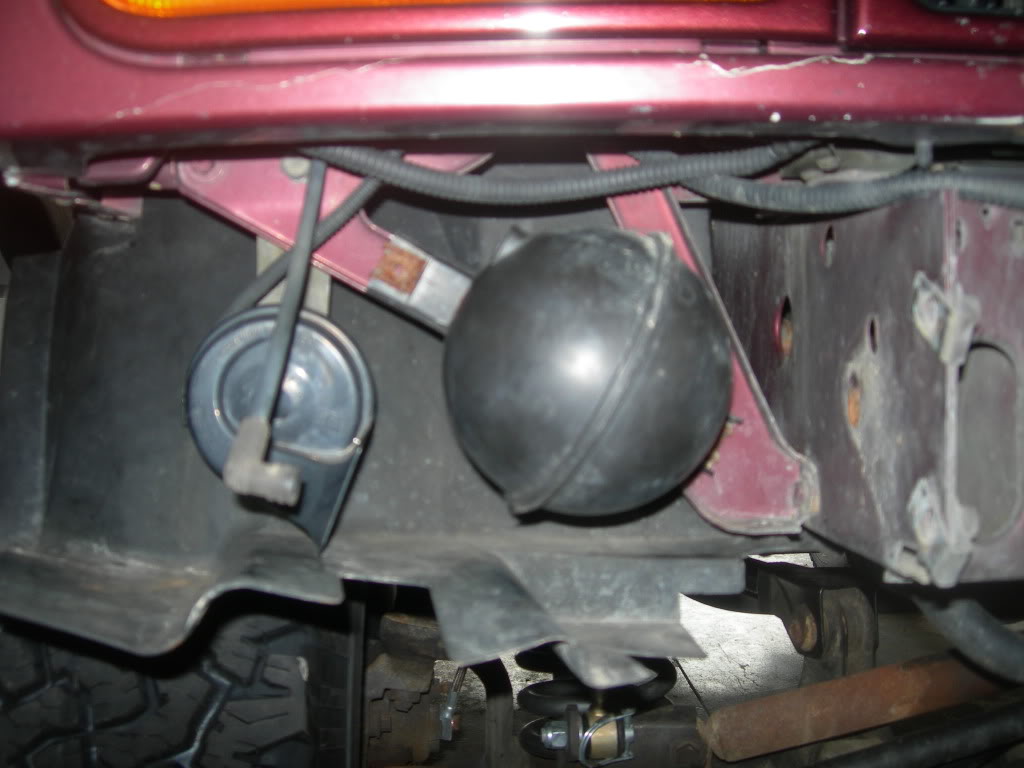
Looking at the vacuum canister from the front of the vehicle
I will be looking for a good relocation spot when I get home.
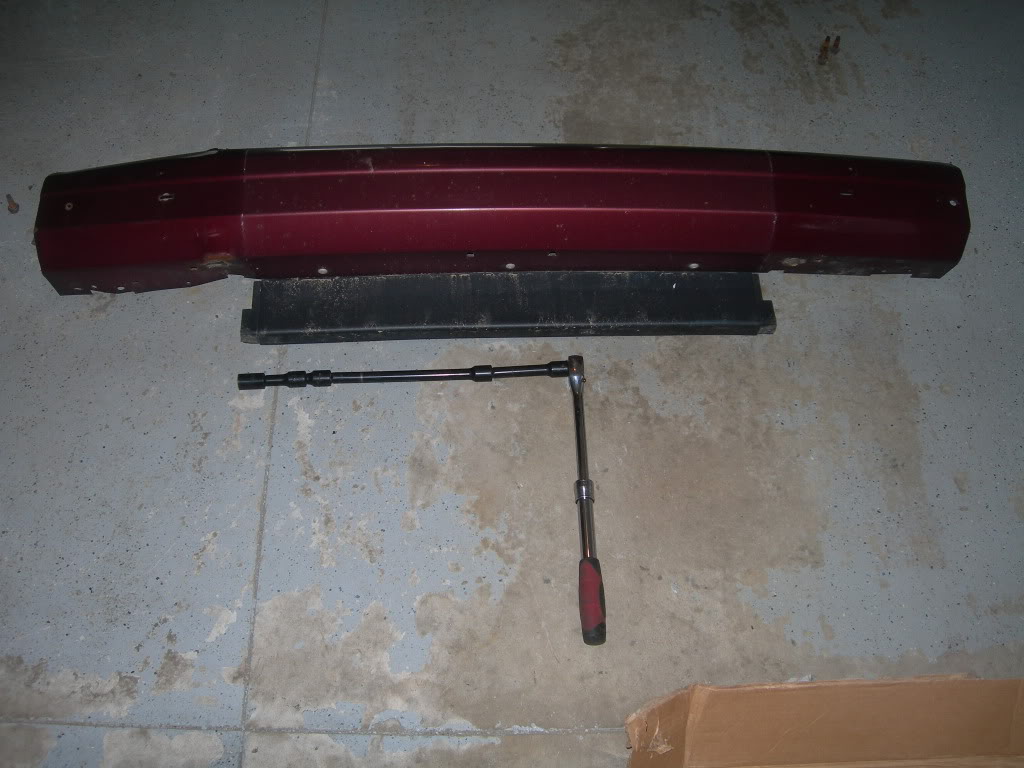
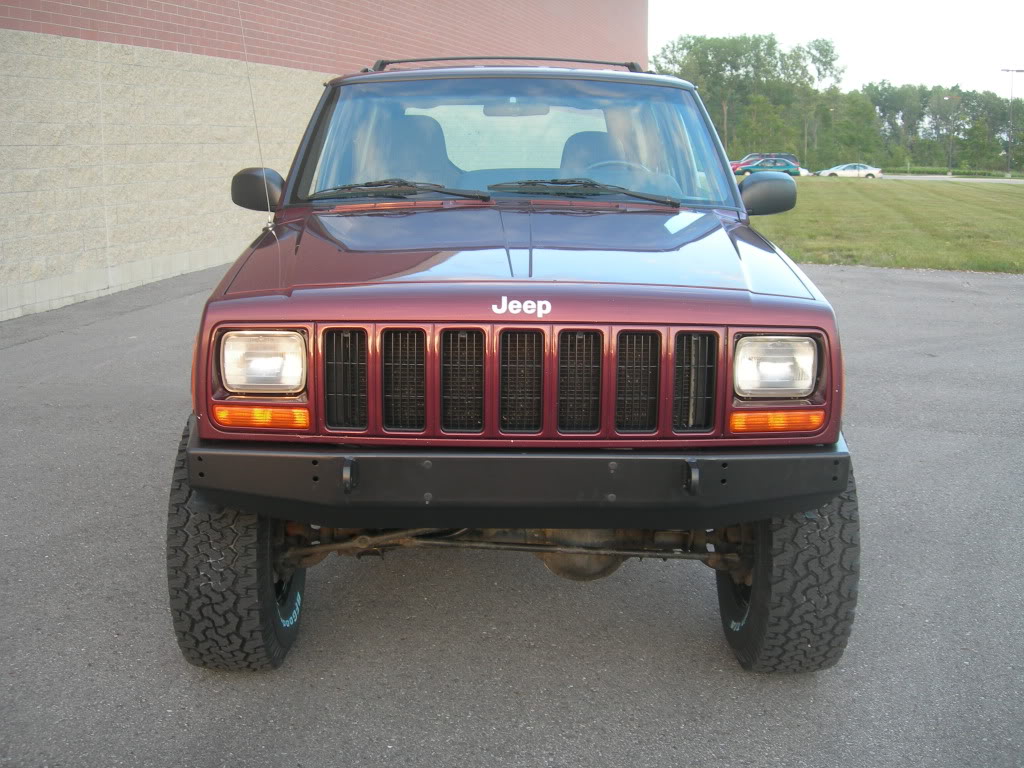
Peace out factory bumper!
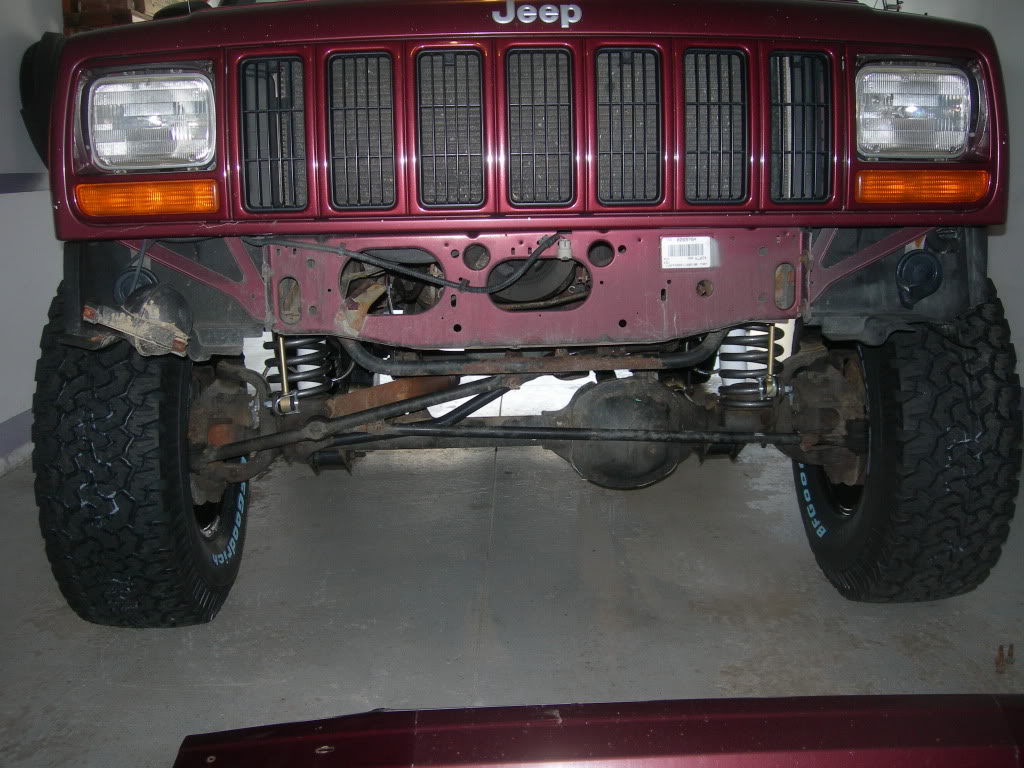
I wanted to drive it to work like this, but reminded myself that it's probably illegal.
Since I had already removed the bumper endcaps, the 6 bolts which fasten the front bumper to the unibody were alredy exposed.
Looking down the bumper from the driver's side:
Same view as above, but from the passenger side:
Notice the vacuum canister, which is screwed to the bumper. It will need to be removed before the bumper itself can come down.
It's held in place by 2 small Torx screws which can be seen once the bumper endcap is removed:
After unattaching the vacuum canister, the bumper can be unbolted from the unibody. Take a look at how many extensions I had to use to reach the bolts. LOL.
Looking at the vacuum canister from the front of the vehicle
I will be looking for a good relocation spot when I get home.
Peace out factory bumper!
I wanted to drive it to work like this, but reminded myself that it's probably illegal.
07-16-2010, 01:50 PM
#156
Honorary Moderator
Join Date: Mar 2010
Location: Gilbert AZ/Las Cruces NM
Posts: 8,135
Likes: 0
Received 14 Likes
on
12 Posts
Year: 1996
Model: Cherokee
Engine: 4.0 upgraded
it cant be that illegal! i drove across 2 states without mine on! it was on my hitch rack lol.
and now since i recently did a paint job i have no license plate on.... I would sport it! it looks good like that!!!
GREAT LOOKING BUILD!!!!!!
and now since i recently did a paint job i have no license plate on.... I would sport it! it looks good like that!!!
GREAT LOOKING BUILD!!!!!!
07-16-2010, 07:05 PM
#157
Seasoned Member
Thread Starter
Join Date: May 2010
Location: Columbus, OH
Posts: 415
Likes: 0
Received 0 Likes
on
0 Posts
Year: 2001
Model: Cherokee
Engine: 4.0 I6
"Officer, I DO have a front bumper.... check my hitch rack."
07-16-2010, 07:24 PM
#158
Seasoned Member
Thread Starter
Join Date: May 2010
Location: Columbus, OH
Posts: 415
Likes: 0
Received 0 Likes
on
0 Posts
Year: 2001
Model: Cherokee
Engine: 4.0 I6
Got home from work and immediately went to work in the garage.
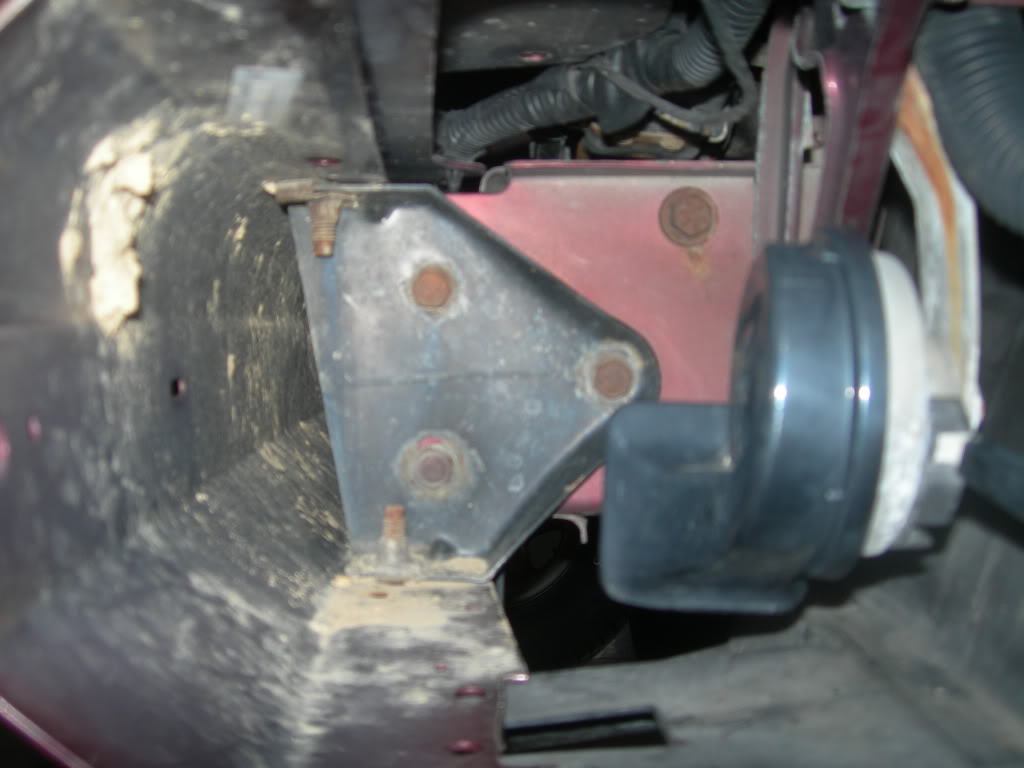
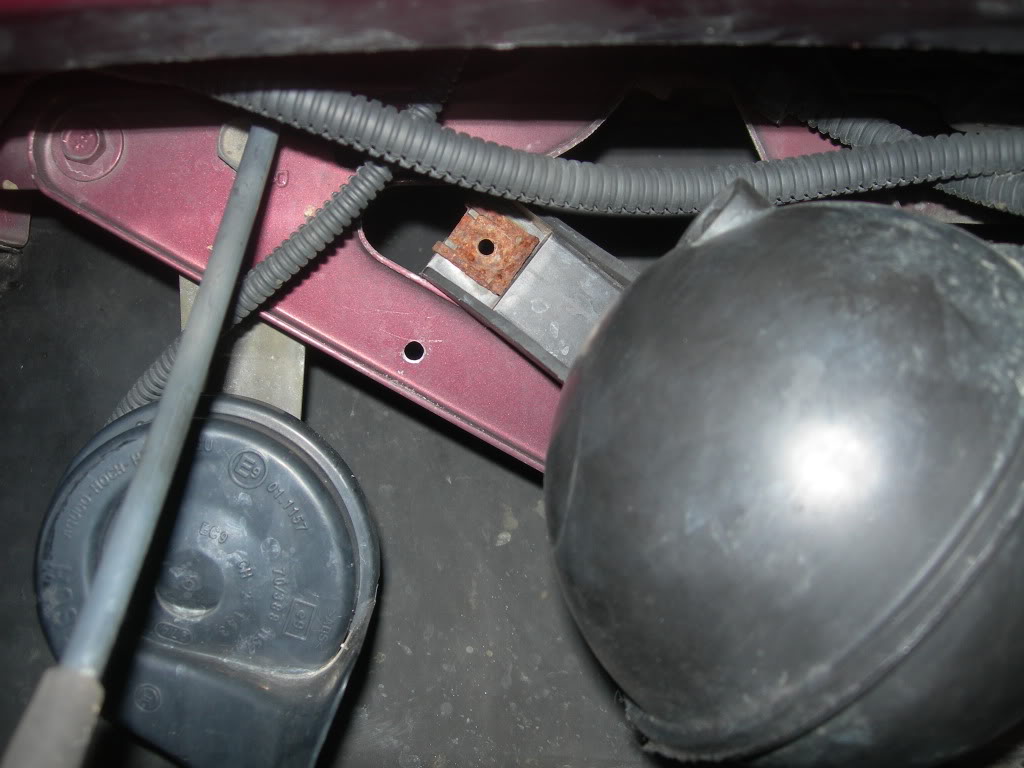
First thing to do, relocate the vacuum canister. I looked around in the engine compartment, but couldn't decide on a good spot. Then I noticed a small pre-drilled hole in the fender support bracket once I had removed the canister.
Little hole near the unibody frame rail on the triangular bracket...
So I mocked up the canister in this position to see if it would work..
Appeared to look like it would work, so I used the canister as a guide to mark the bracket and drilled for the other mounting screw. I think I used a 3/16'' bit.
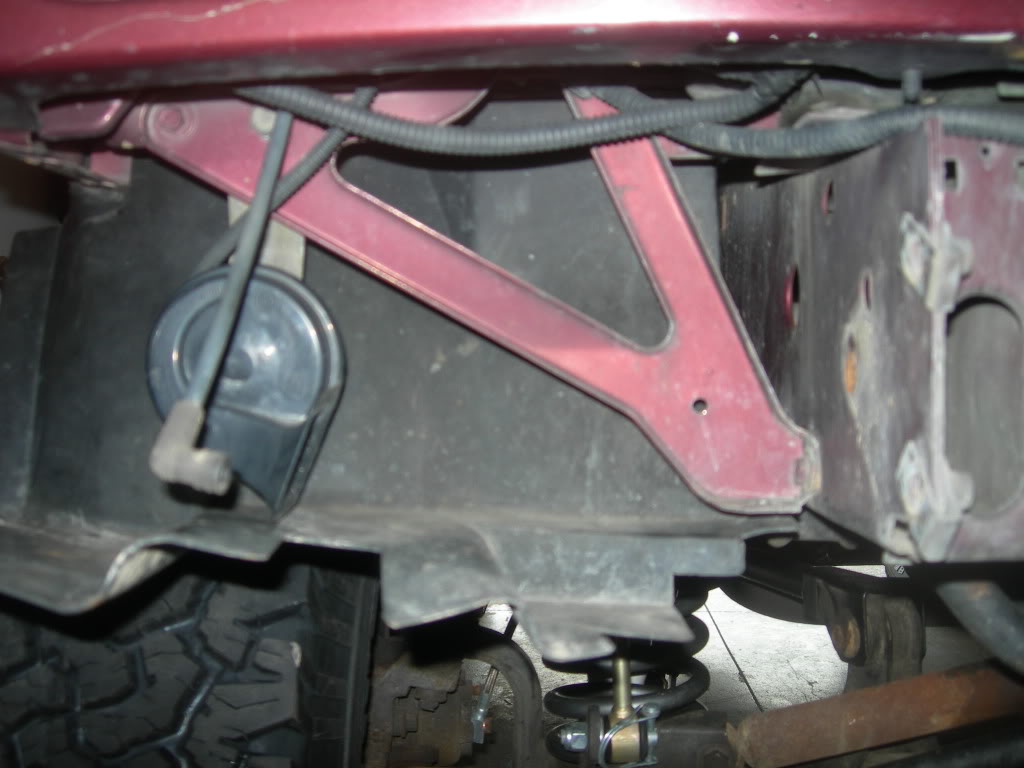
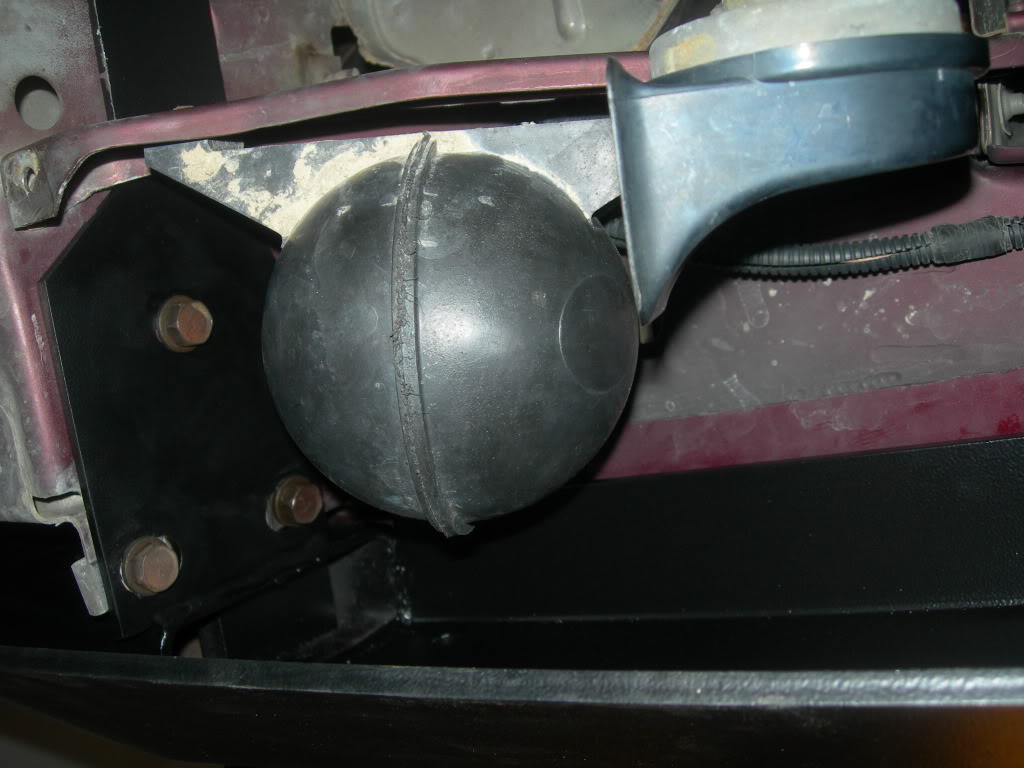
Here it is tightened down in place..
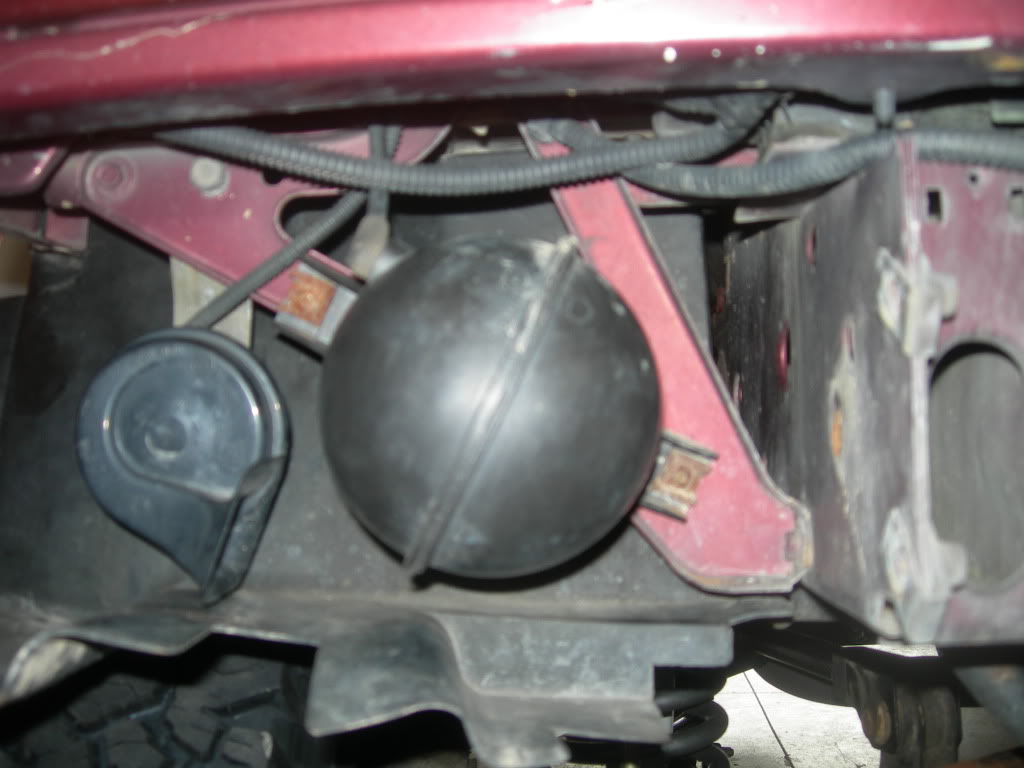
Side view after relocation...
You can see that it sits behind the bumper mounting points. I actually verified that it would not interfere with the bumper by mocking up the bumper as well. Better safe than sorry.
After the vacuum canister was taken care of, all that was left was to remount the new bumper using the factory hardware, 6 bolts up front and 2 additional supplied reinforcement bolts further down the frame rail.
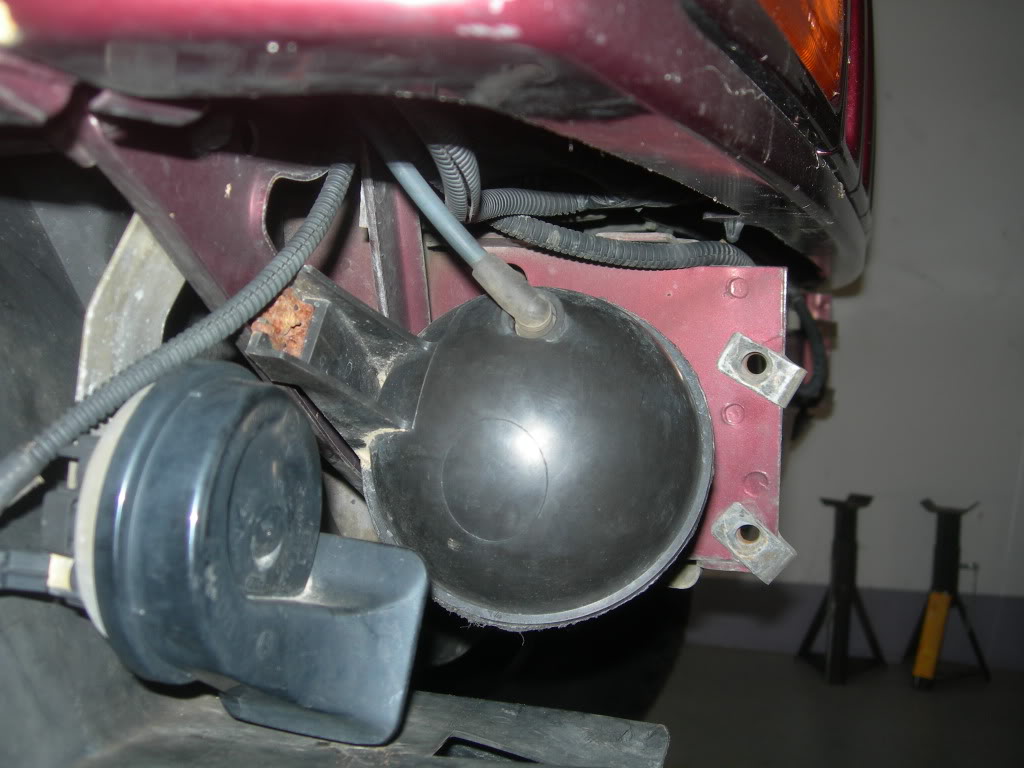
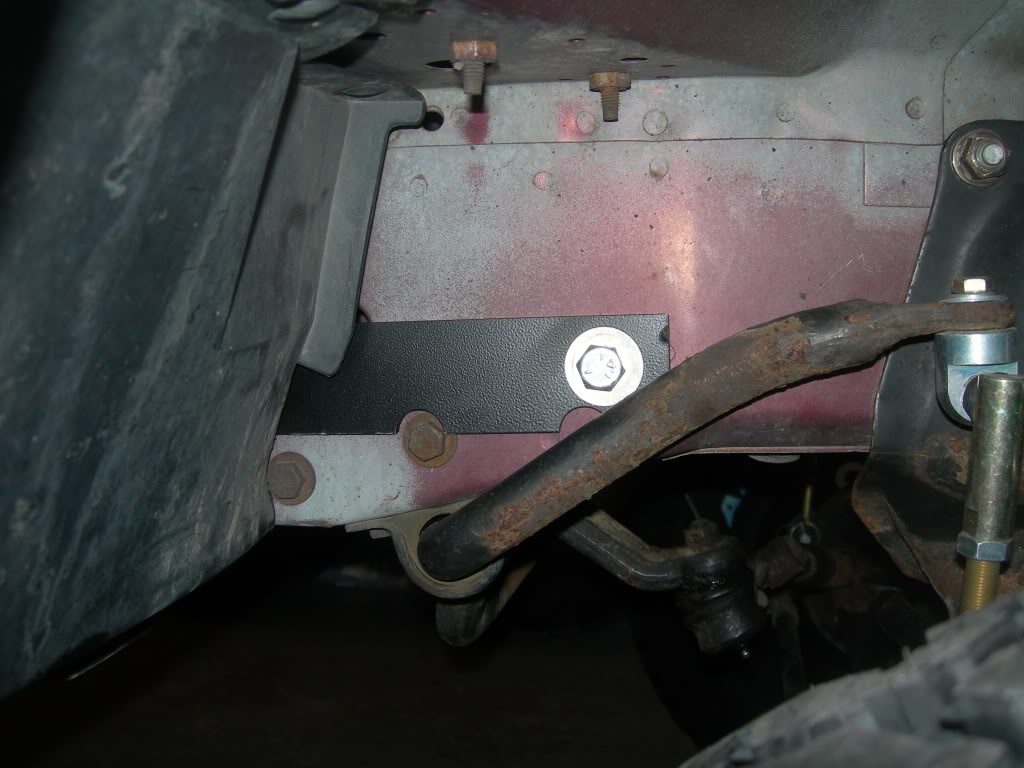
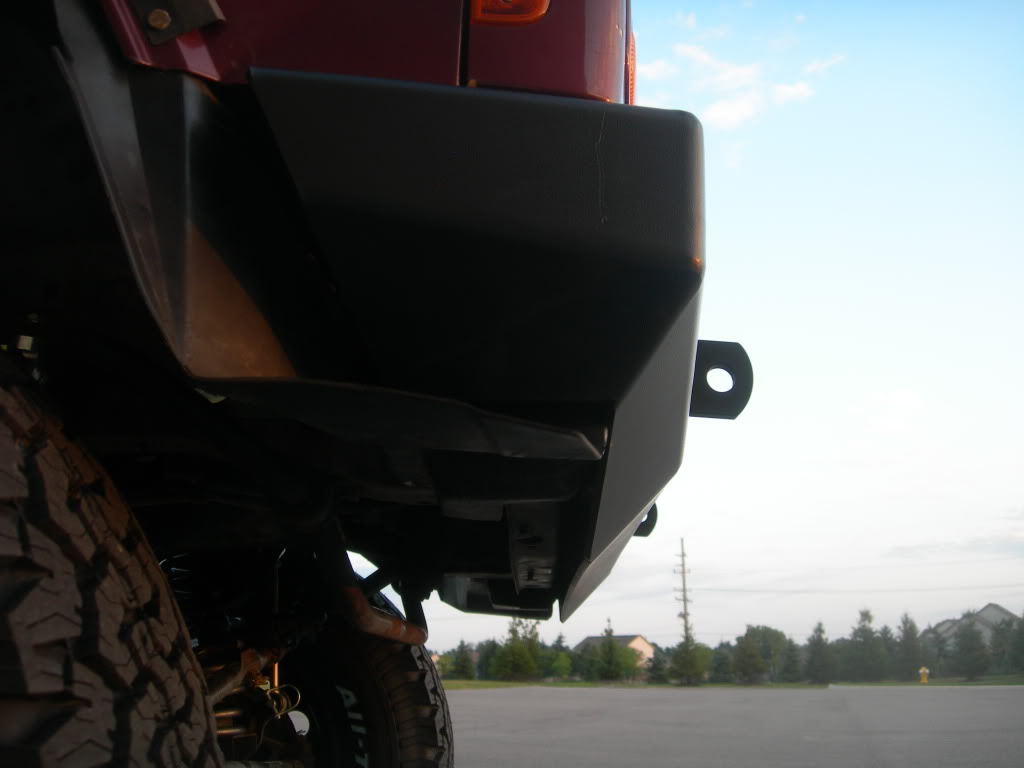
Here's a good view showing the bumper mounted in place. You can see the 3 factory bolts and the additional supplied reinforcement bolt. Also, you can see that the vacuum canister is not in contact with the bumper.
Just the driver side, showing the reinforcement bolt.
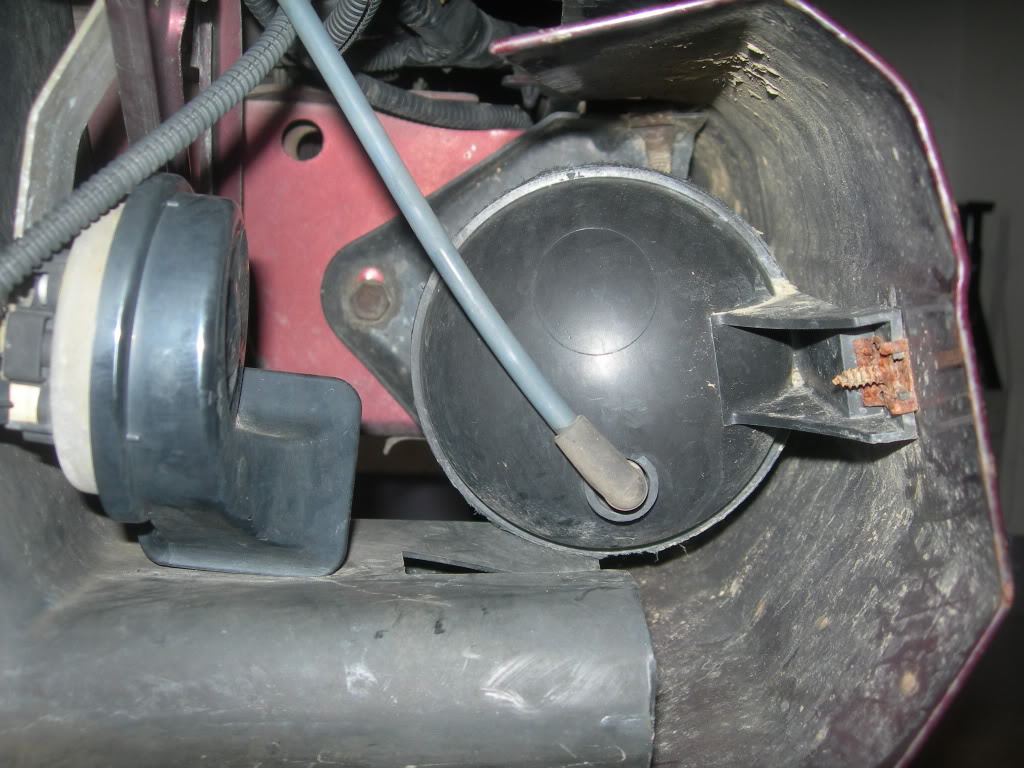
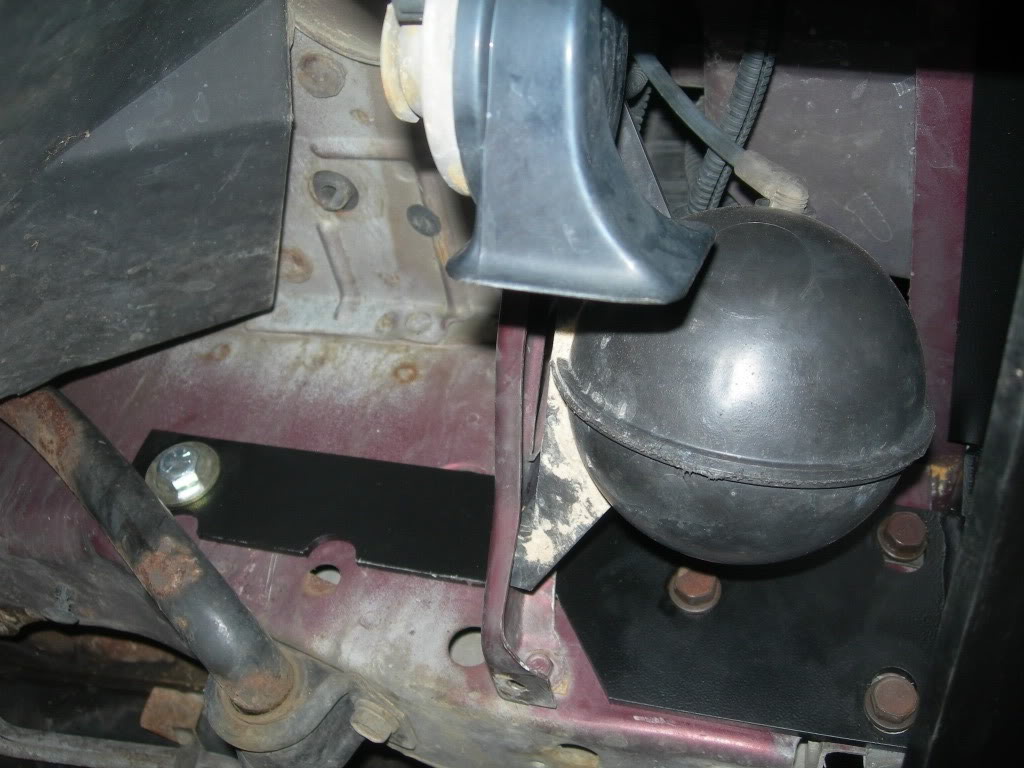
One last view from underneath the vehicle, looking up at the vacuum canister with the bumper mounted. Lots of room between the bumper and canister.... real happy with the relocation location..
Alright... just wanted to get a little update before I head out to run a couple errands. While I'm out, I'll snap a couple shots of the ACTUAL BUMPER haha.
First thing to do, relocate the vacuum canister. I looked around in the engine compartment, but couldn't decide on a good spot. Then I noticed a small pre-drilled hole in the fender support bracket once I had removed the canister.
Little hole near the unibody frame rail on the triangular bracket...
So I mocked up the canister in this position to see if it would work..
Appeared to look like it would work, so I used the canister as a guide to mark the bracket and drilled for the other mounting screw. I think I used a 3/16'' bit.
Here it is tightened down in place..
Side view after relocation...
You can see that it sits behind the bumper mounting points. I actually verified that it would not interfere with the bumper by mocking up the bumper as well. Better safe than sorry.
After the vacuum canister was taken care of, all that was left was to remount the new bumper using the factory hardware, 6 bolts up front and 2 additional supplied reinforcement bolts further down the frame rail.
Here's a good view showing the bumper mounted in place. You can see the 3 factory bolts and the additional supplied reinforcement bolt. Also, you can see that the vacuum canister is not in contact with the bumper.
Just the driver side, showing the reinforcement bolt.
One last view from underneath the vehicle, looking up at the vacuum canister with the bumper mounted. Lots of room between the bumper and canister.... real happy with the relocation location..
Alright... just wanted to get a little update before I head out to run a couple errands. While I'm out, I'll snap a couple shots of the ACTUAL BUMPER haha.
07-16-2010, 08:49 PM
#159
Seasoned Member
Thread Starter
Join Date: May 2010
Location: Columbus, OH
Posts: 415
Likes: 0
Received 0 Likes
on
0 Posts
Year: 2001
Model: Cherokee
Engine: 4.0 I6
Still need to smooth out those fenders and decide what I'm doing with the fender flares. Also, the inner fender well liner is hanging out all over the place, so disregard that. I will likely trim them, but that will depend on what I do with the flares.
Enjoy!
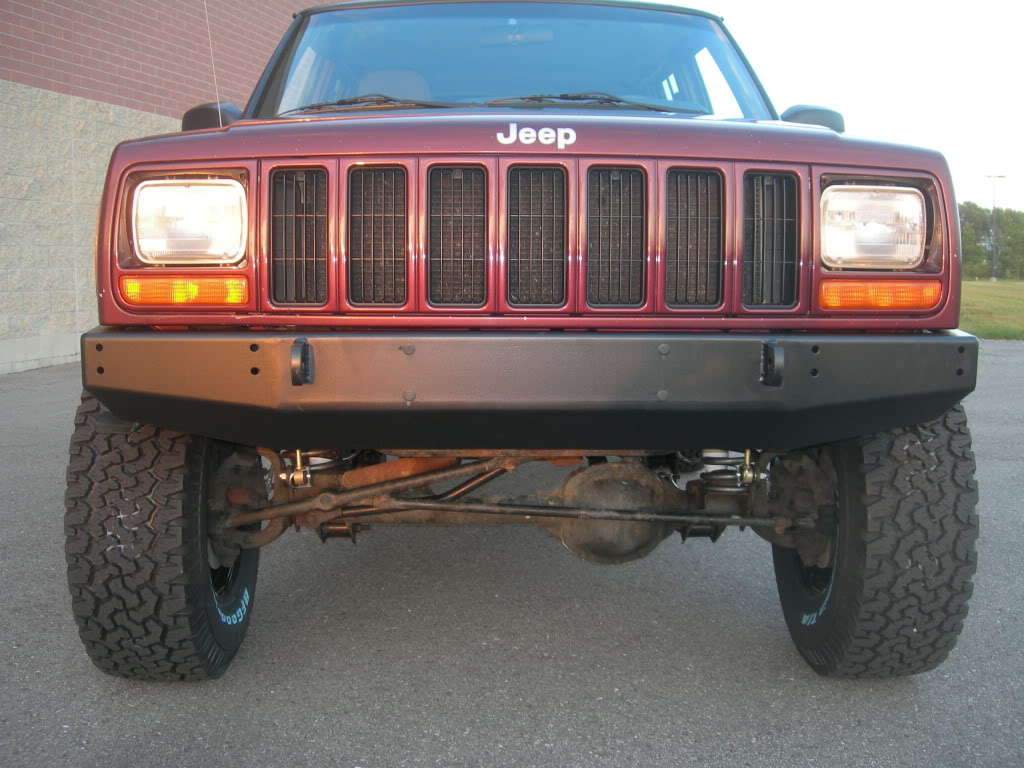
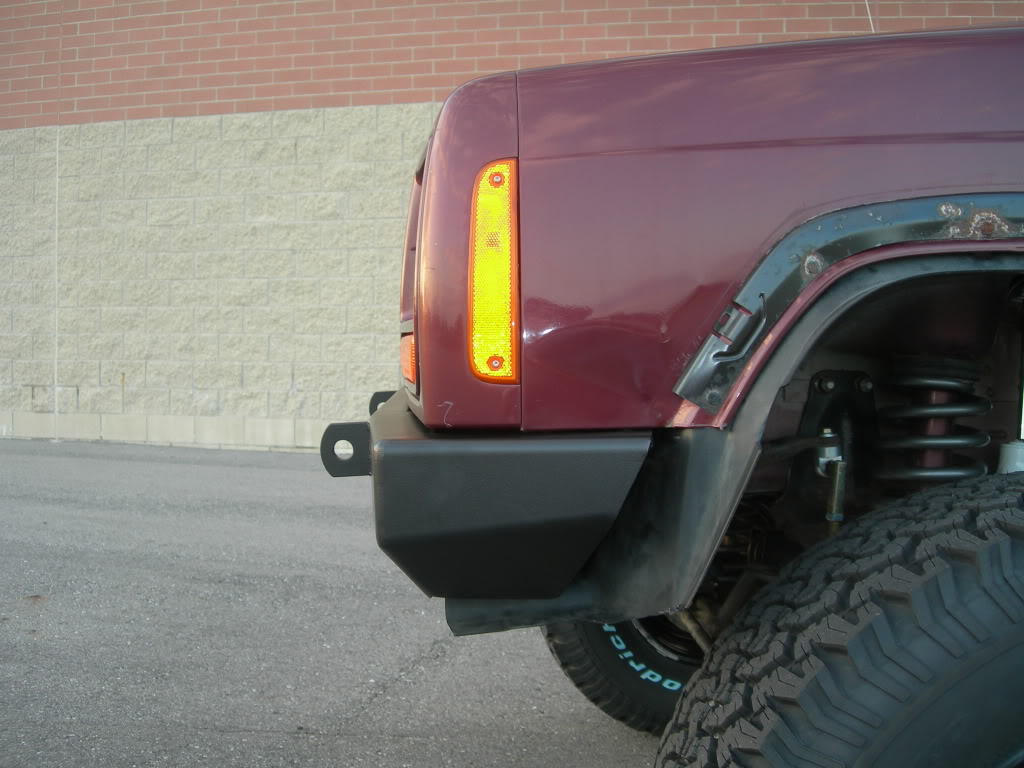
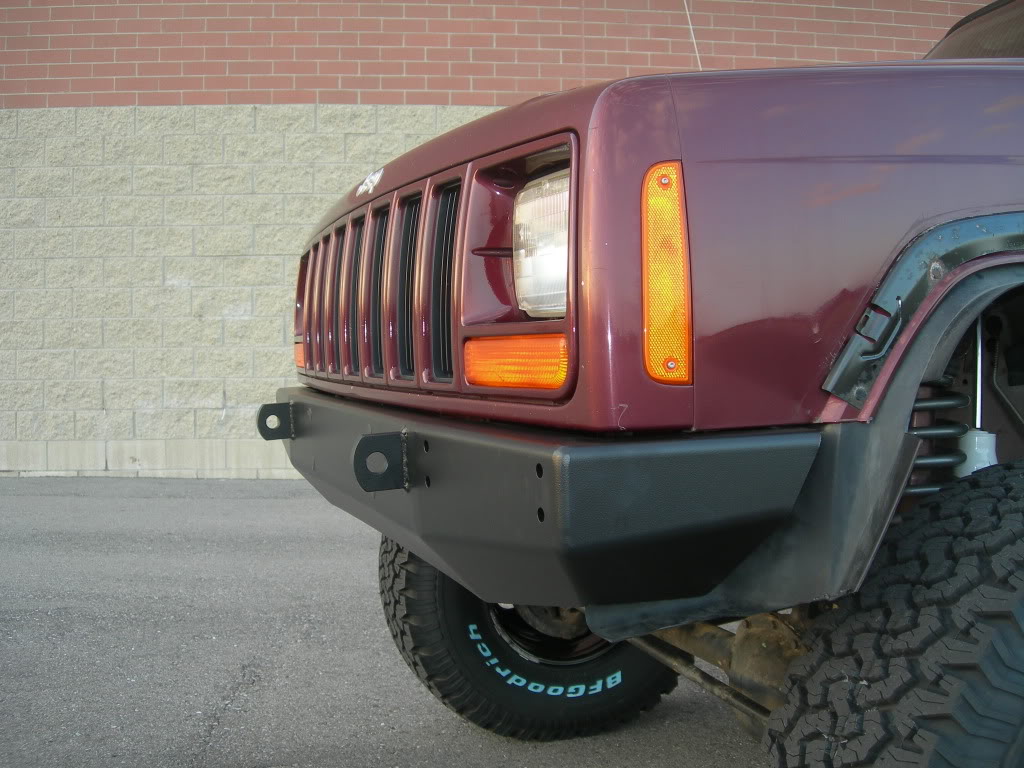

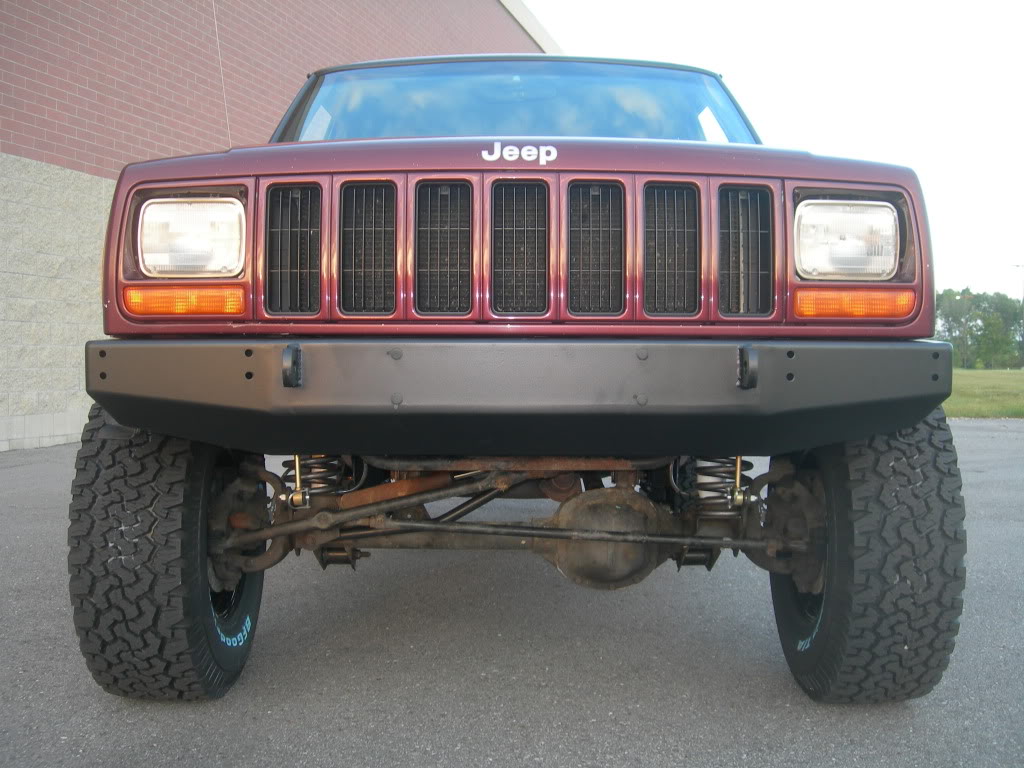
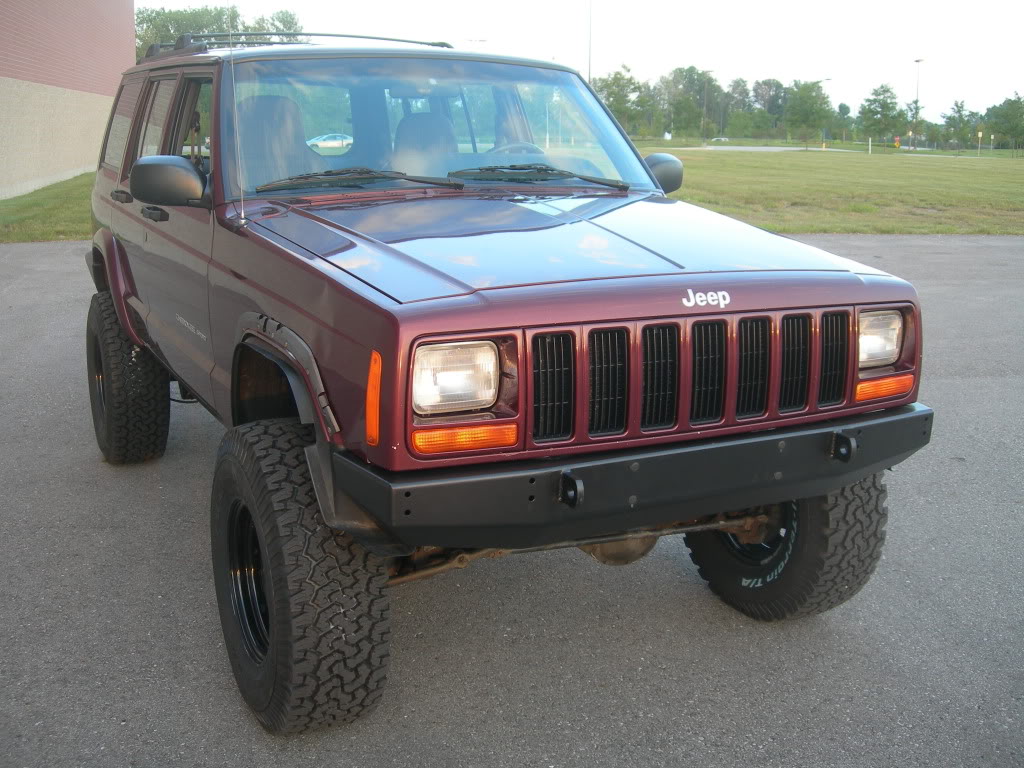
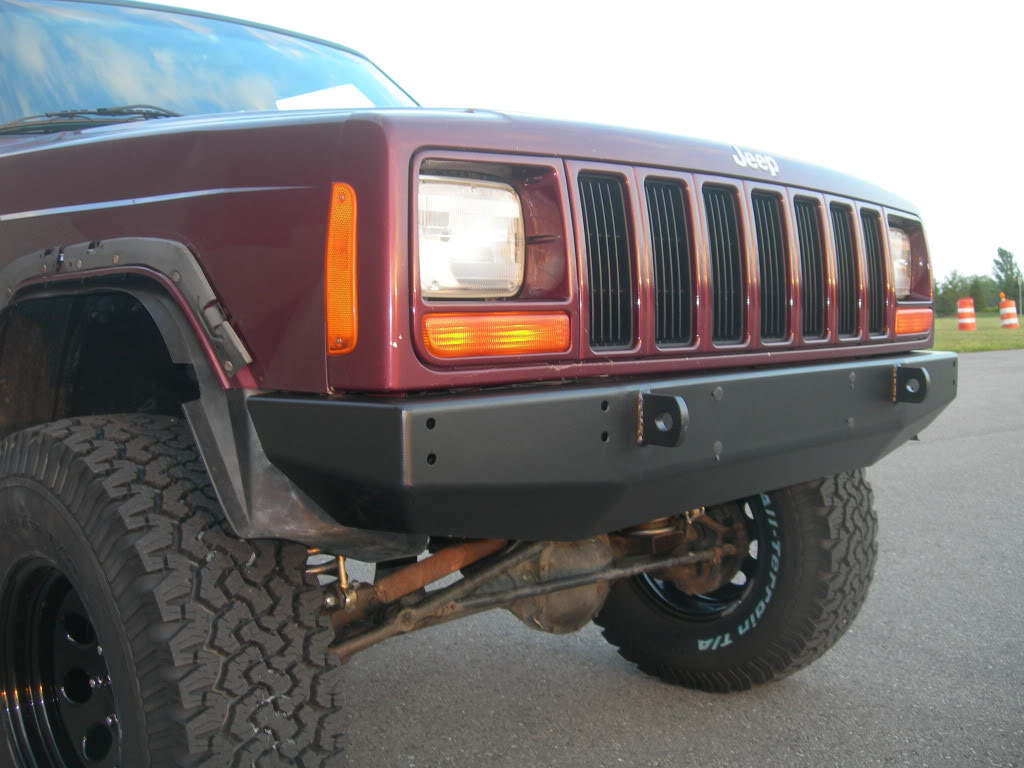
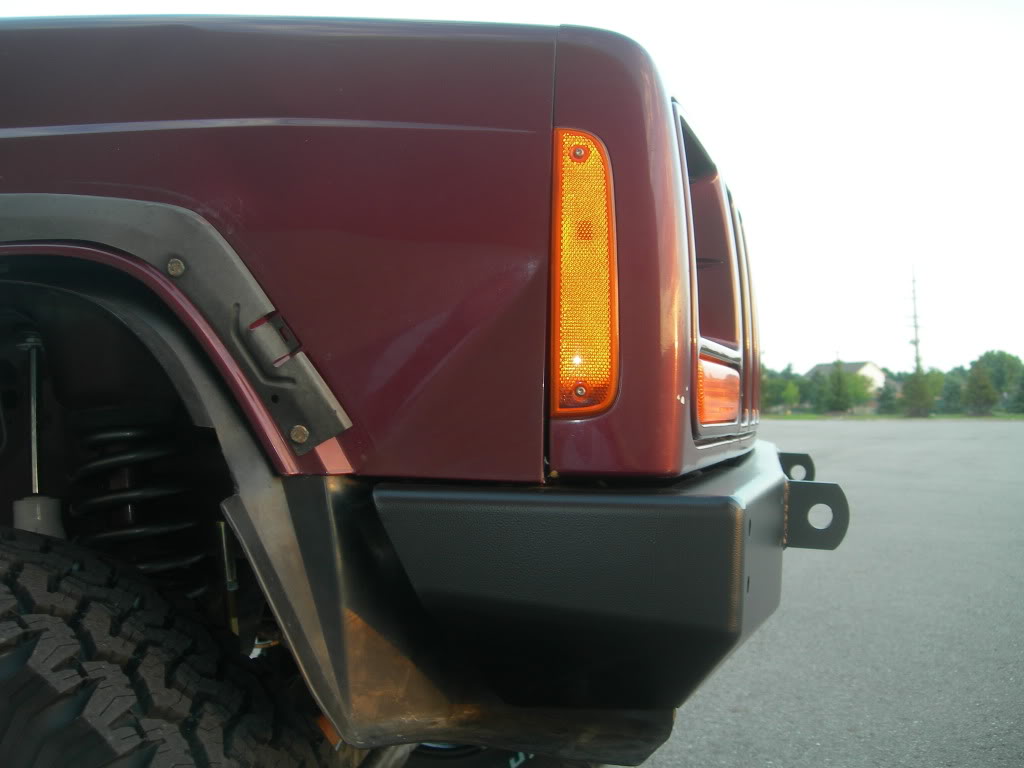
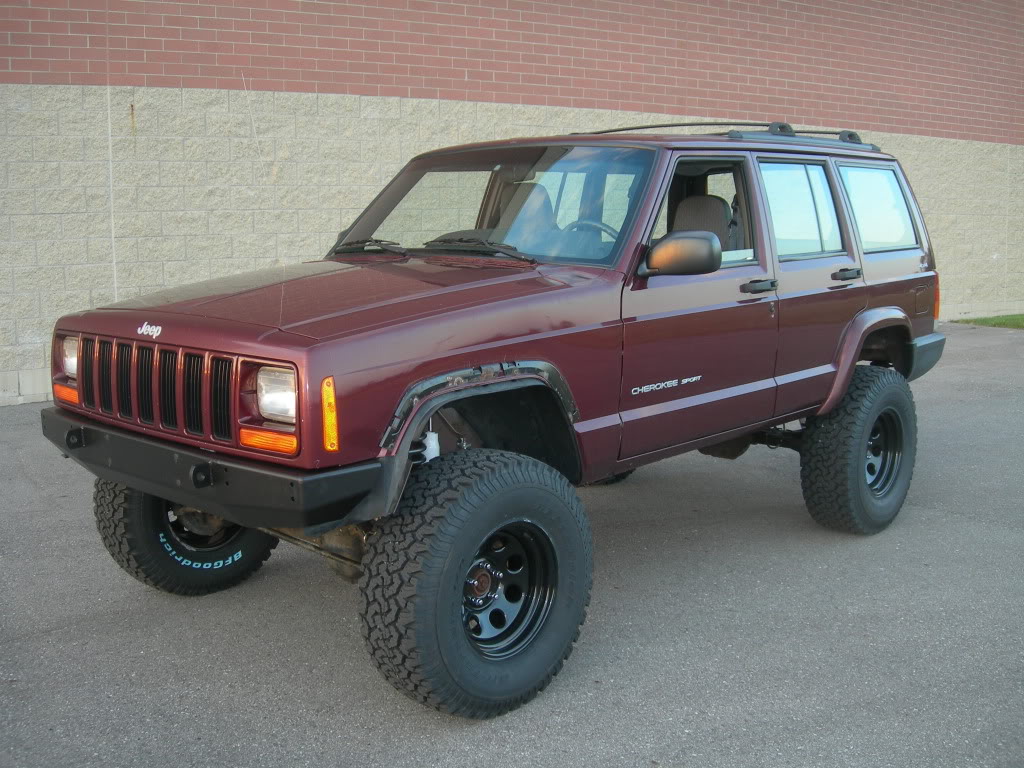
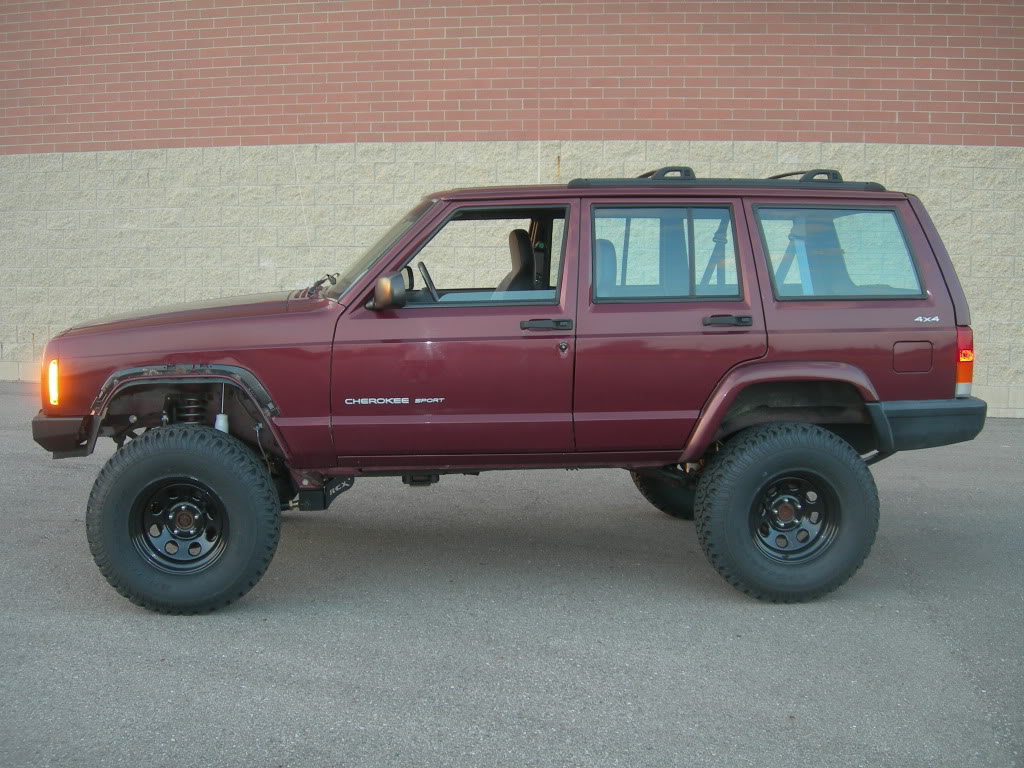
I'm really liking the simple, CLEAN look of the front end.
Enjoy!
I'm really liking the simple, CLEAN look of the front end.

 07-17-2010, 05:21 PM
#162
Seasoned Member
Thread Starter
Join Date: May 2010
Location: Columbus, OH
Posts: 415
Likes: 0
Received 0 Likes
on
0 Posts
Year: 2001
Model: Cherokee
Engine: 4.0 I6
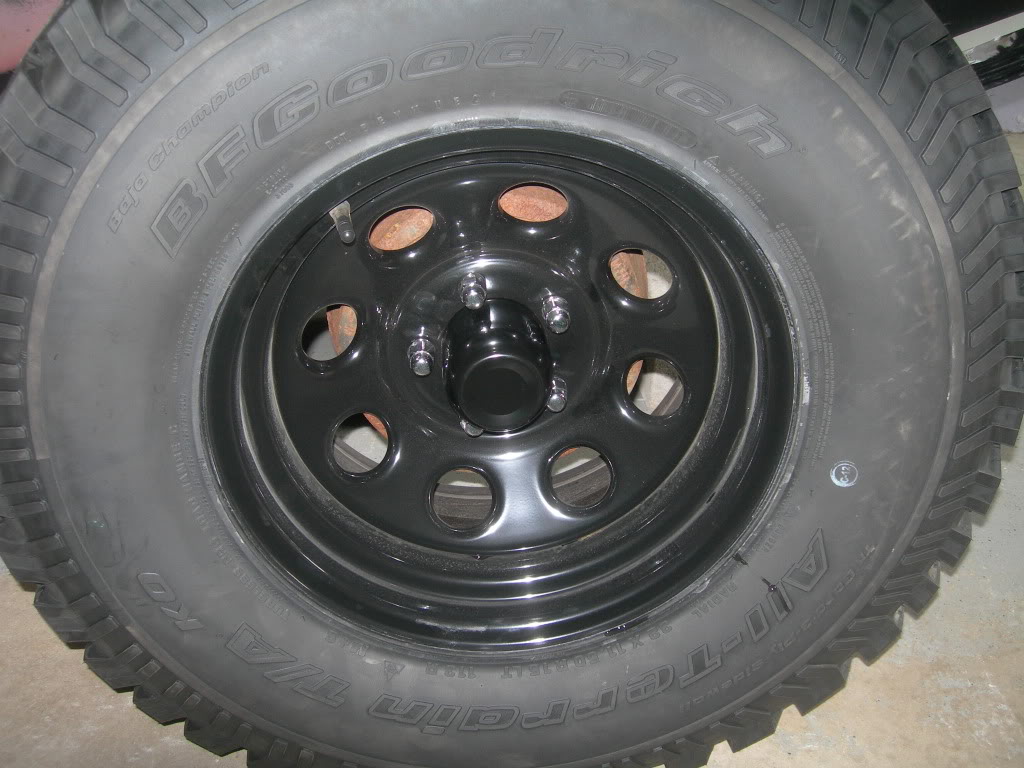
By the way, center caps came in for the wheels:
 07-22-2010, 12:09 AM
#164
Seasoned Member
Thread Starter
Join Date: May 2010
Location: Columbus, OH
Posts: 415
Likes: 0
Received 0 Likes
on
0 Posts
Year: 2001
Model: Cherokee
Engine: 4.0 I6
Well.... been a few days since an update so I decided to start the rear disc brake conversion tonight. I've kind of just been enjoying the fruits of my labor recently, but I need to get the brakes done in preparation for a wheeling trip in August. Me and a couple friends, both drive Wranglers, are headed out to Rock Run Recreation park in Patton, PA. It'll be my first wheeling trip and were all excited.
Anyway... on to the brakes... So, I wasn't real happy with the brake performance of the Jeep when I bought it. I also hate drum brakes, they are more difficult to service, subpar performers and overall just don't look cool. I decided to convert them from drum to disc and purchased the Teraflex conversion kit.
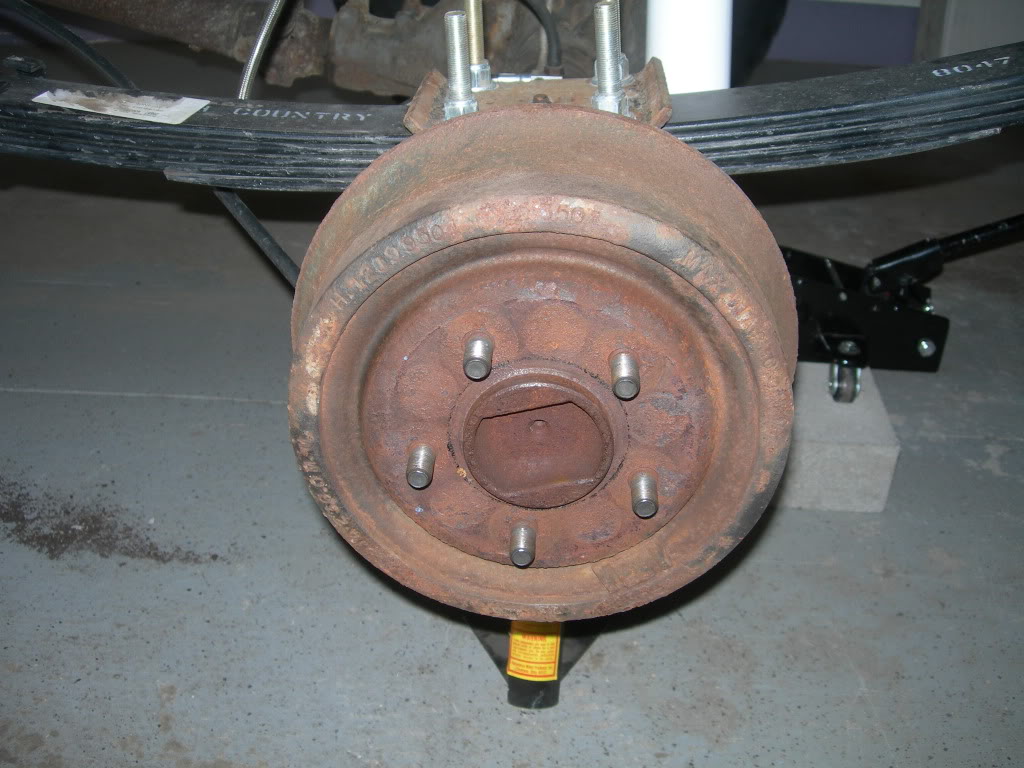
First thing I did was remove the brake drum, NOT AN EASY TASK. In fact, my little 2 lbs. hammer basically couldn't even budge them. They were really seized on there. I submitted and sought the help of a local garage. They busted them off at no charge. I tossed the guy a $10 spot for his trouble though. He said they had to bust out "big Bertha", I assume that's a huge hammer/sledge.
Anyway, I drove it back to my garage and went to work. Here's the brake drum:
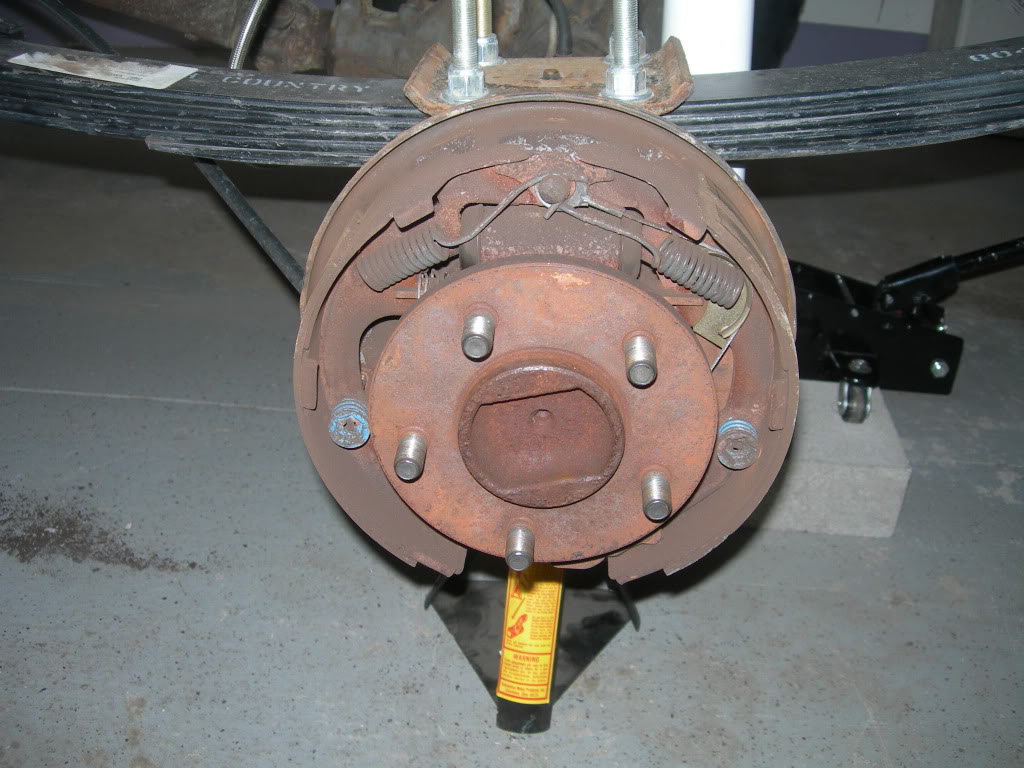
Drum removed, exposing the brake assembly:
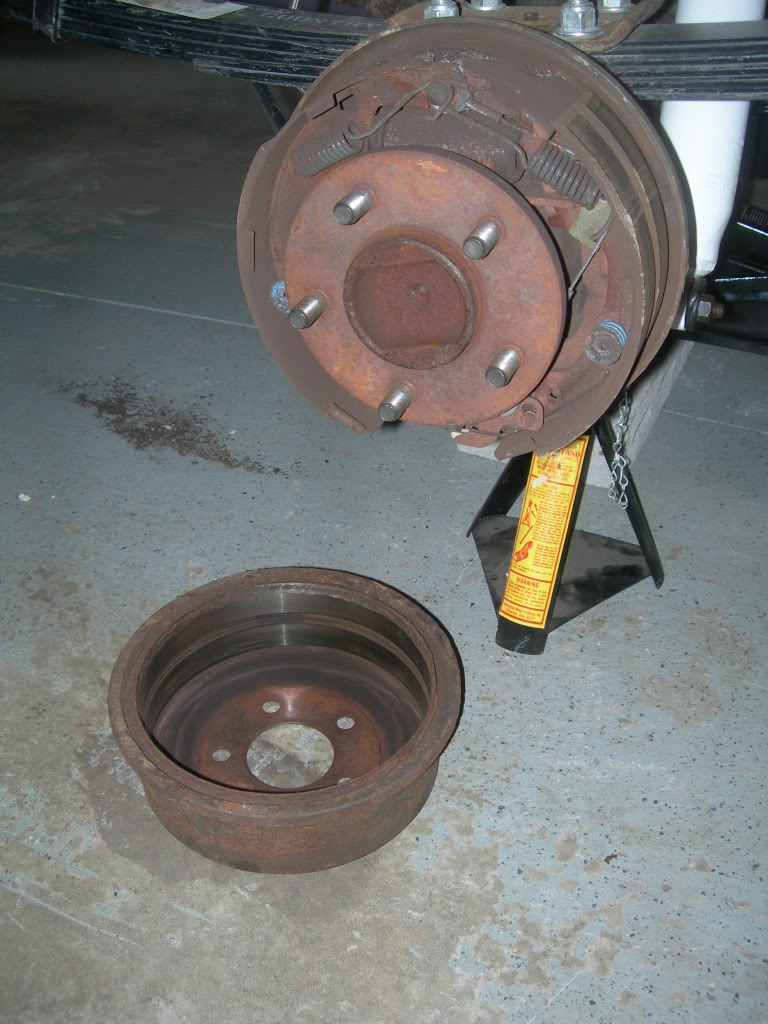
I will not miss you, crappy little drum brake assembly..
Once the drums were off, I was ready to remove the rear differential cover and drain the rear end fluid. I removed all the bolts except a couple near the top, then pry'ed the cover open a little to drain the fluid:
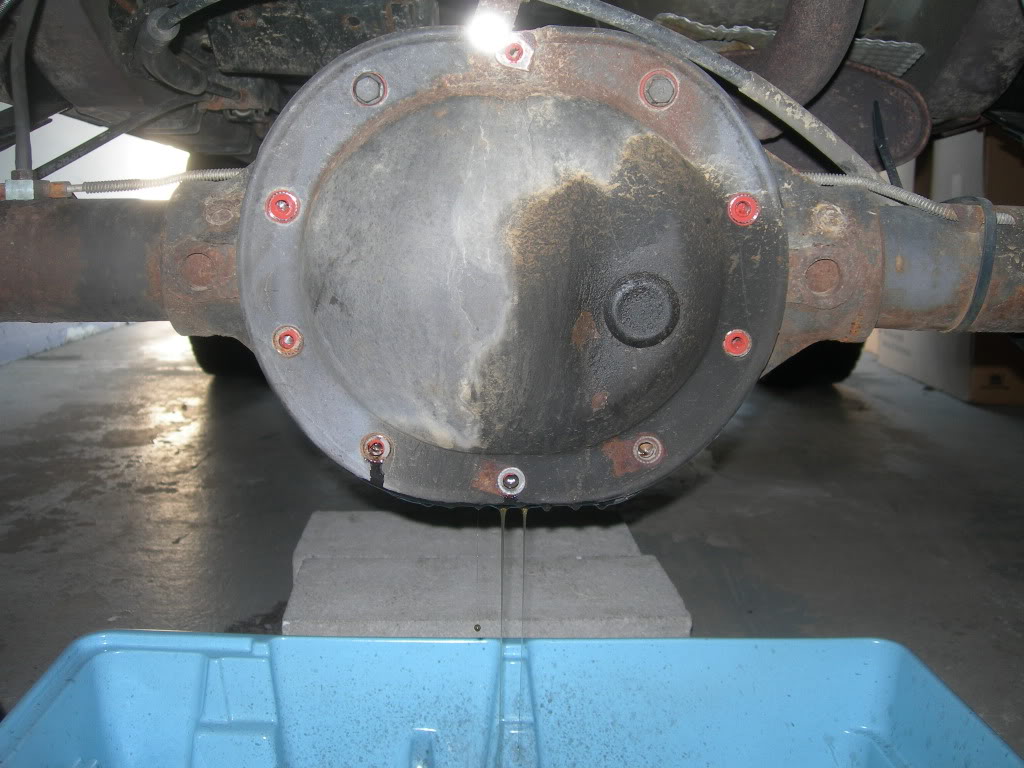
I was pretty nervous opening the rear diff. I had never worked on one before, but with all the fluid in a pan, I was at the point of no return. The cover had to come off:
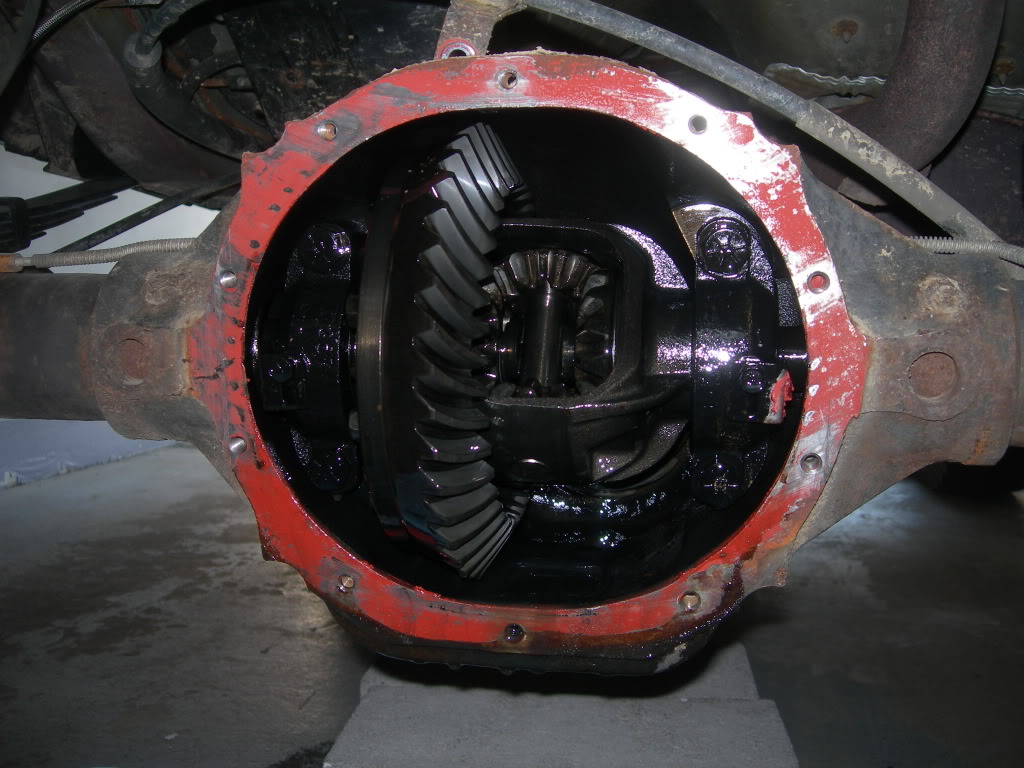
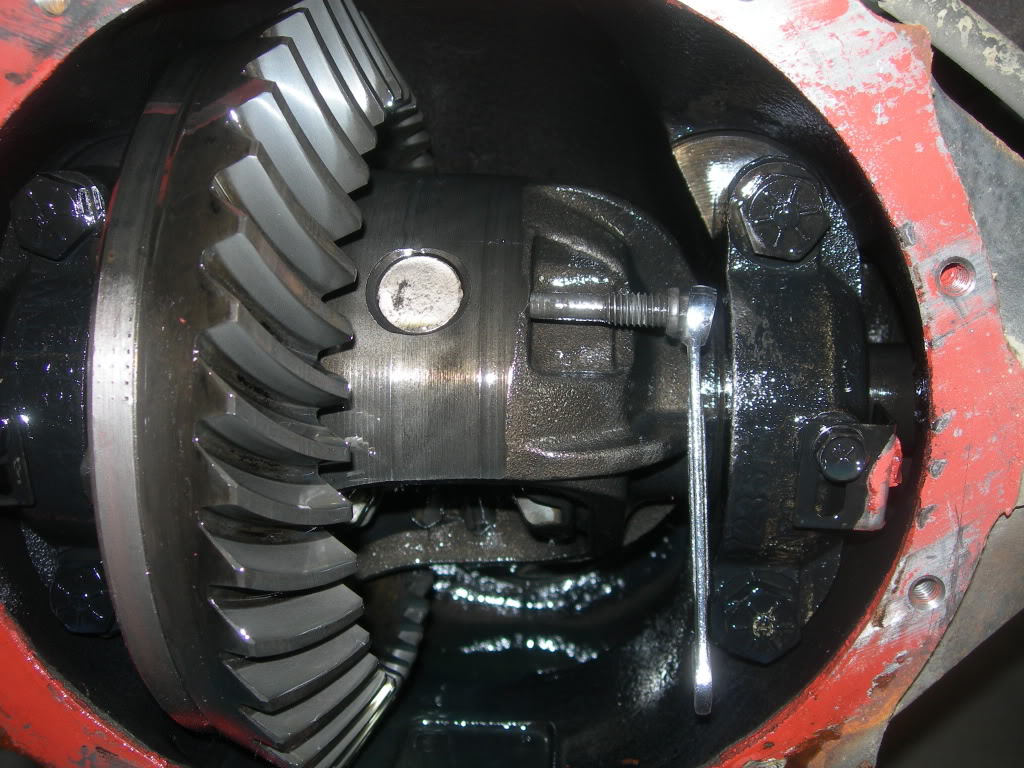
In order to remove the backing plate for the rear brakes, the axle shafts must be removed. The axle shafts of a Chrysler 8.25 rear end are retained in the carrier by c-clips. In order to release the c-clips, the cross shaft must be unbolted. Here you can see the bolt which fastens the cross shaft:
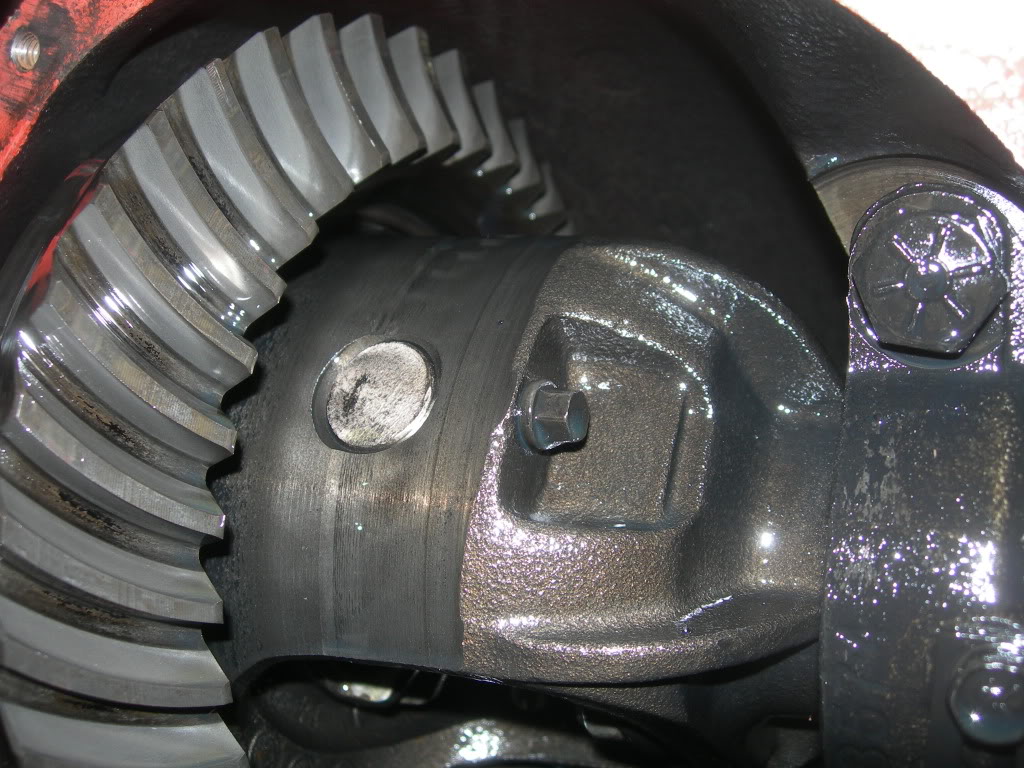
Unbolting cross shaft:
Sliding the cross shaft out:
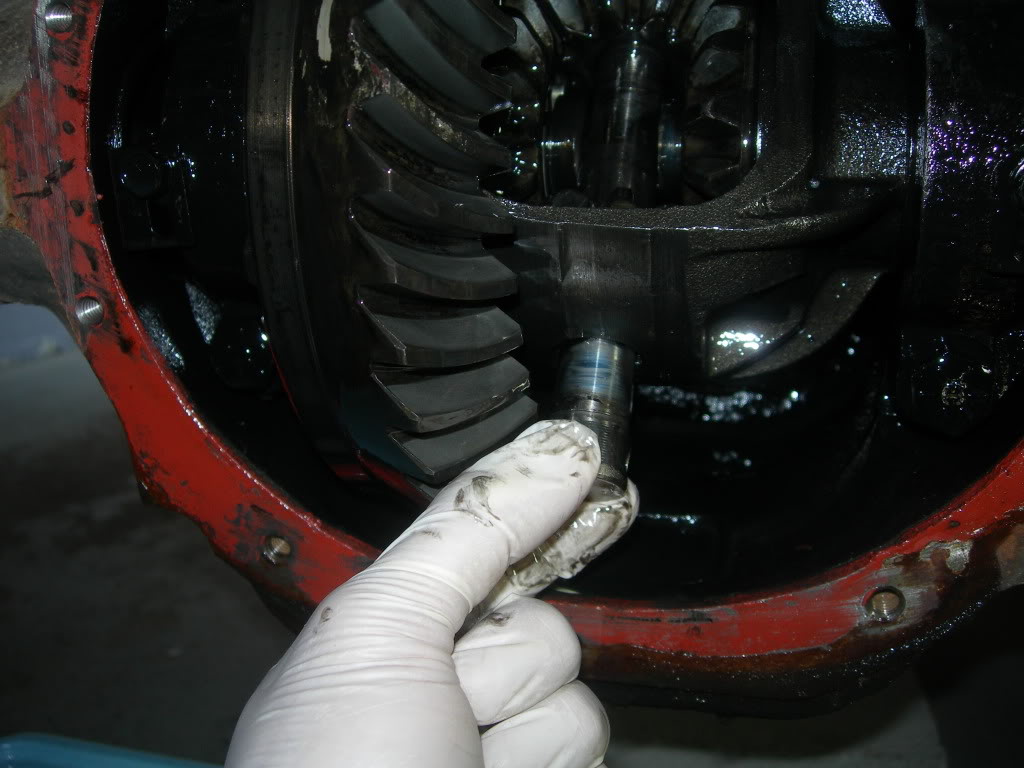
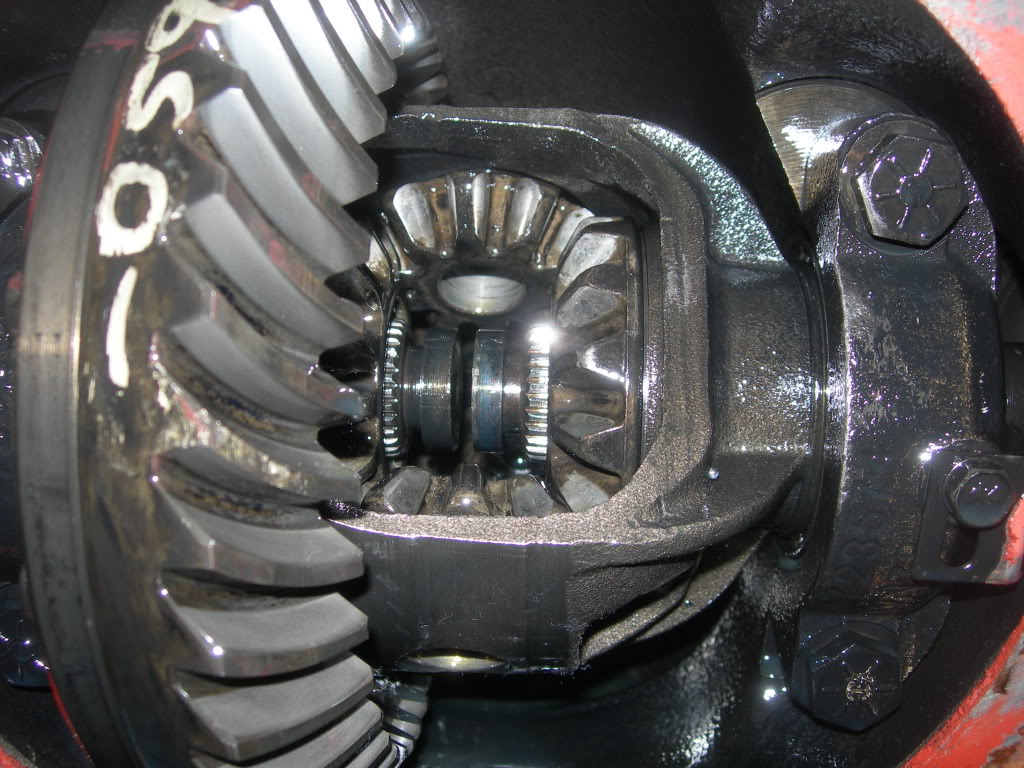
Once the cross shaft is removed, the axles can be pushed in a little to release the c-clips. They basically fall right off the axles...
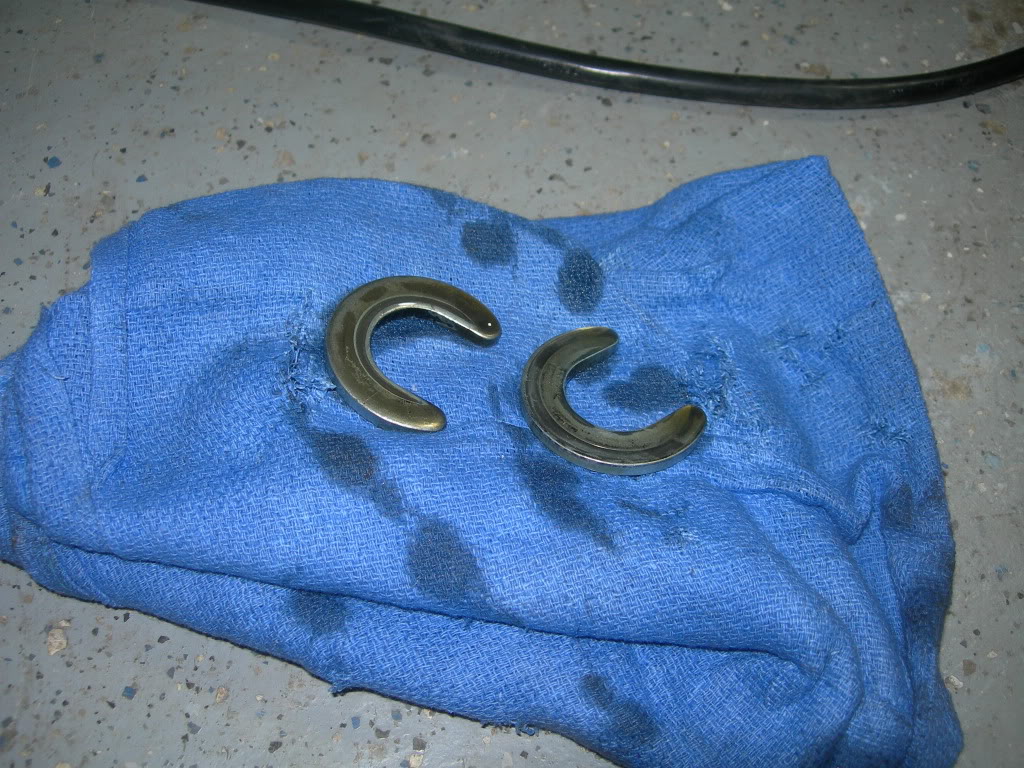
Here you can see both axles, pushed in towards each other with c-clips removed:
Passenger side axle removed:

Axle shaft:
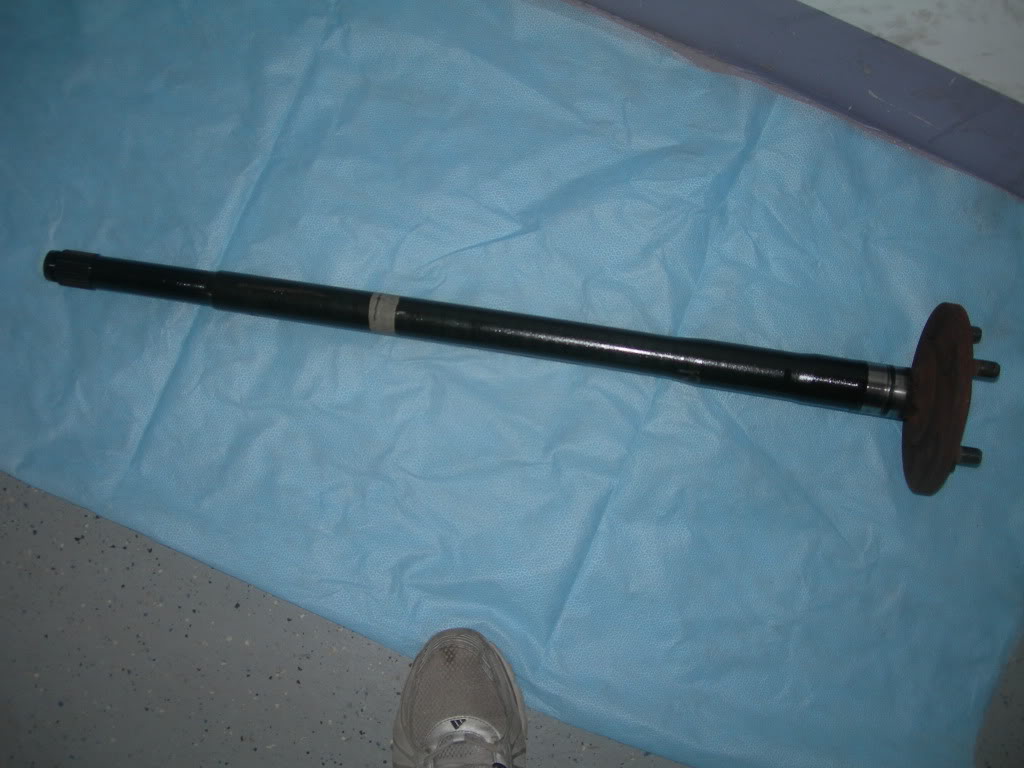
Brake assembly still in place but axle removed, you can see the wheel bearing...
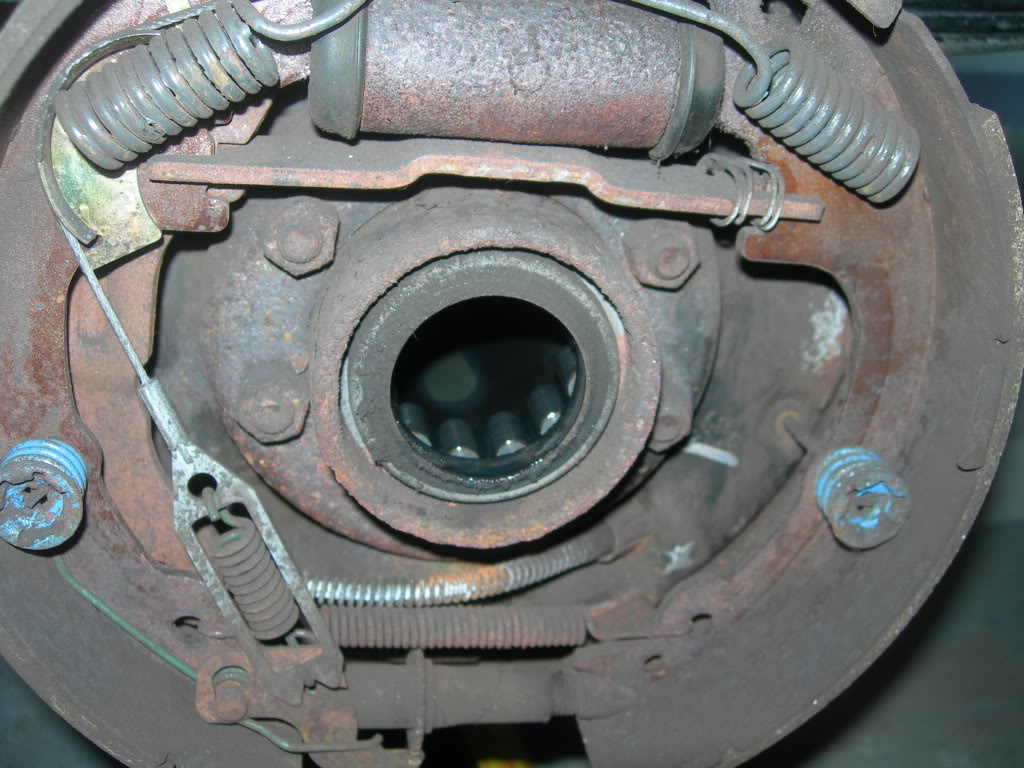
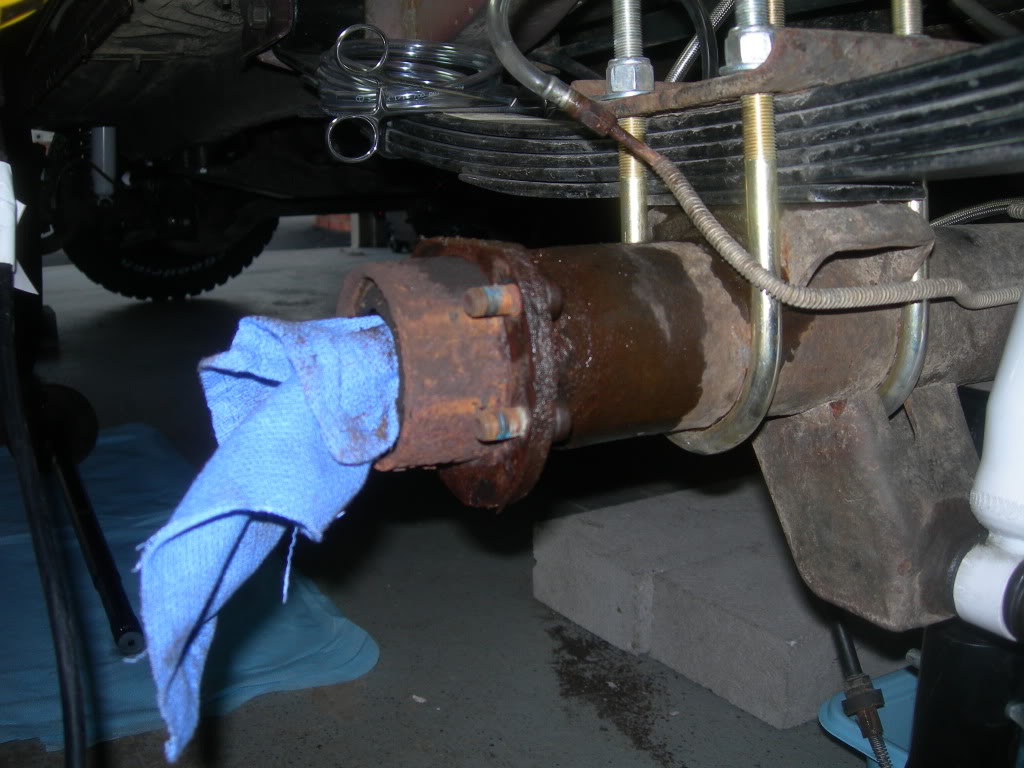
I stuffed a rag in the axle tube, unhooked the hard brake line and started disassembling the brake hardware. I had never done this before and since everything was getting trashed I just started yanking stuff out. Also removed the parking brake cable from the backing plate. Left me with this:
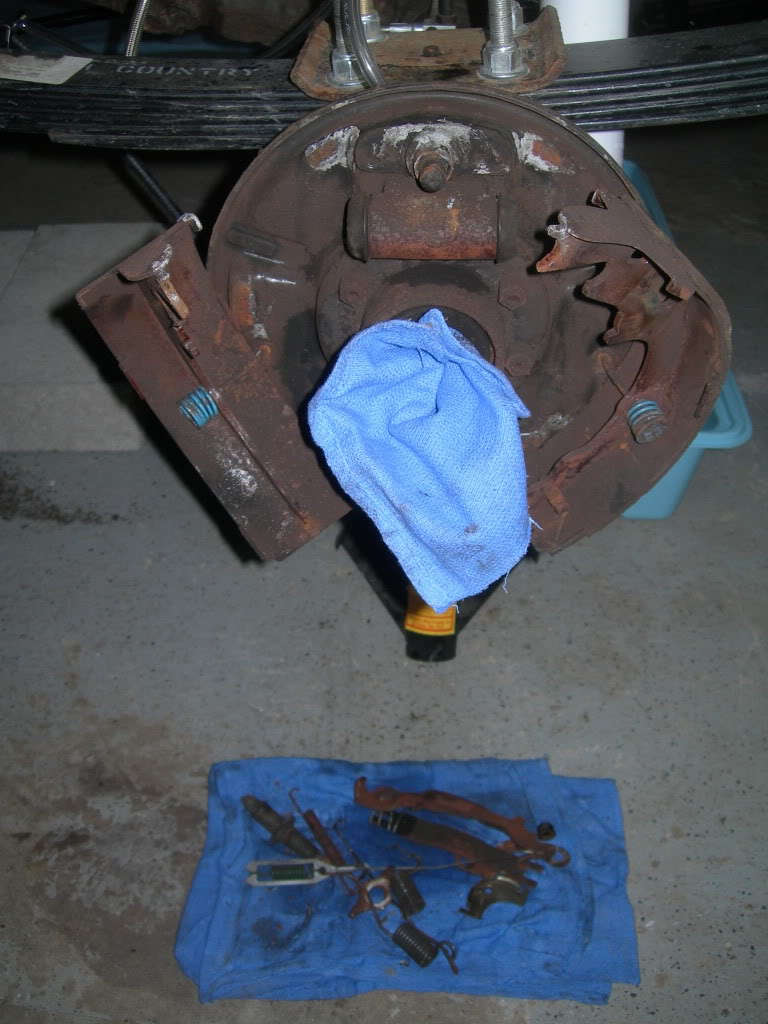
Backing plate removed:
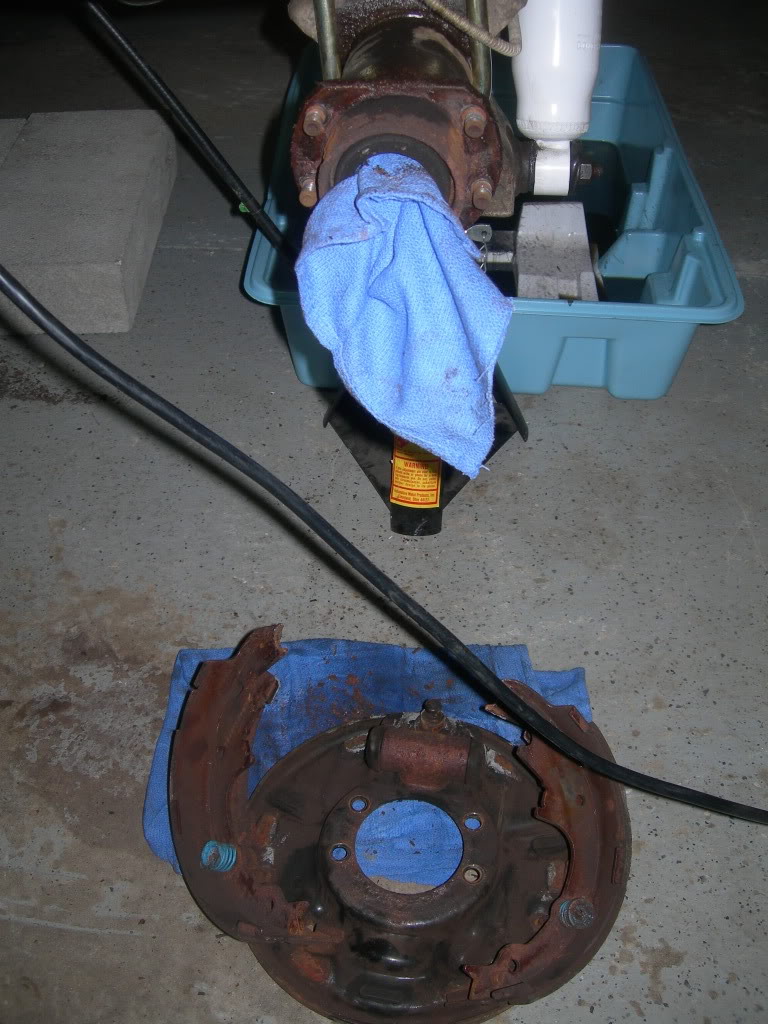
That's it for the tear down. All that's left is installation of the aftermarket pieces. Before wrapping it up for the night, I went ahead and mocked up the new backing plate. I'll bolt it down tomorrow and hopefully have everything else bolted up and finished as well.
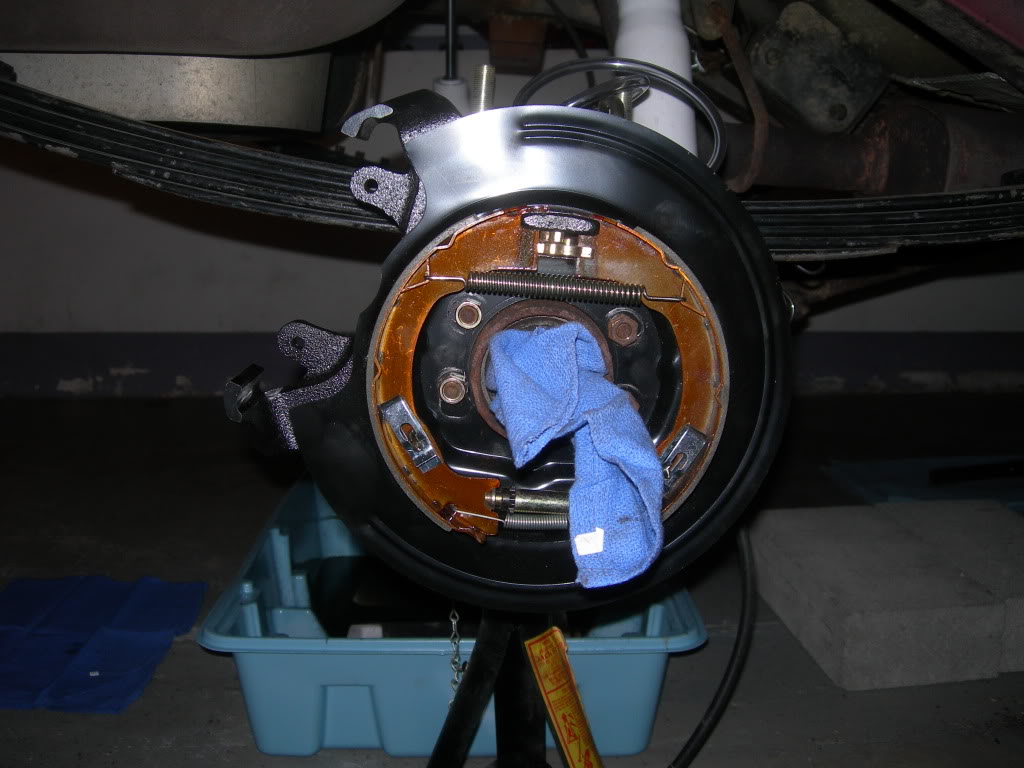
What you're looking at is the new backing plate, caliper mounting bracket and new parking brake assembly (resembles drum brakes).
So far so good.
Anyway... on to the brakes... So, I wasn't real happy with the brake performance of the Jeep when I bought it. I also hate drum brakes, they are more difficult to service, subpar performers and overall just don't look cool. I decided to convert them from drum to disc and purchased the Teraflex conversion kit.
First thing I did was remove the brake drum, NOT AN EASY TASK. In fact, my little 2 lbs. hammer basically couldn't even budge them. They were really seized on there. I submitted and sought the help of a local garage. They busted them off at no charge. I tossed the guy a $10 spot for his trouble though. He said they had to bust out "big Bertha", I assume that's a huge hammer/sledge.
Anyway, I drove it back to my garage and went to work. Here's the brake drum:
Drum removed, exposing the brake assembly:
I will not miss you, crappy little drum brake assembly..
Once the drums were off, I was ready to remove the rear differential cover and drain the rear end fluid. I removed all the bolts except a couple near the top, then pry'ed the cover open a little to drain the fluid:
I was pretty nervous opening the rear diff. I had never worked on one before, but with all the fluid in a pan, I was at the point of no return. The cover had to come off:
In order to remove the backing plate for the rear brakes, the axle shafts must be removed. The axle shafts of a Chrysler 8.25 rear end are retained in the carrier by c-clips. In order to release the c-clips, the cross shaft must be unbolted. Here you can see the bolt which fastens the cross shaft:
Unbolting cross shaft:
Sliding the cross shaft out:
Once the cross shaft is removed, the axles can be pushed in a little to release the c-clips. They basically fall right off the axles...
Here you can see both axles, pushed in towards each other with c-clips removed:
Passenger side axle removed:
Axle shaft:
Brake assembly still in place but axle removed, you can see the wheel bearing...
I stuffed a rag in the axle tube, unhooked the hard brake line and started disassembling the brake hardware. I had never done this before and since everything was getting trashed I just started yanking stuff out. Also removed the parking brake cable from the backing plate. Left me with this:
Backing plate removed:
That's it for the tear down. All that's left is installation of the aftermarket pieces. Before wrapping it up for the night, I went ahead and mocked up the new backing plate. I'll bolt it down tomorrow and hopefully have everything else bolted up and finished as well.
What you're looking at is the new backing plate, caliper mounting bracket and new parking brake assembly (resembles drum brakes).
So far so good.
07-22-2010, 02:17 PM
#165
Junior Member
Join Date: Jun 2010
Location: Burnt Hills NY
Posts: 66
Likes: 0
Received 0 Likes
on
0 Posts
Year: 2000
Model: Cherokee
Engine: 4.0
I'm glad your so pic saavy. Installing my lift this weekend and definitely comparing pics.
your Xj looks great! gotta be pumped
your Xj looks great! gotta be pumped