
Project Do work - 2001 XJ Build (Pic intensive)
 07-31-2010, 08:03 PM
#196
Junior Member
Join Date: Aug 2009
Location: Stockbridge, GA
Posts: 78
Likes: 0
Received 0 Likes
on
0 Posts
Year: 1998 XJ
Model: Cherokee
Very nice build you have going on...Can you take some pictures of when you do the internals on the propositioning valve? I'll be doing that this coming week, and curious how it comes together.
 08-01-2010, 08:55 AM
#197
CF Veteran
Join Date: Jul 2010
Location: WNY
Posts: 1,971
Likes: 0
Received 4 Likes
on
4 Posts
Year: 1999
Model: Cherokee
Engine: 4.0 High Output
This jeep is looking AWSOME, the rear disc conversion is a great idea and it looks like its worth the money, your XJ's looking great man, cant wait to see more of it 
08-01-2010, 11:29 AM
#198
Seasoned Member
Thread Starter
Join Date: May 2010
Location: Columbus, OH
Posts: 415
Likes: 0
Received 0 Likes
on
0 Posts
Year: 2001
Model: Cherokee
Engine: 4.0 I6
My stepdad has a nice garage so I've been doing a little work. I'm going to apologize upfront though, I didn't have access to a camera to document each step along the way until we had a few things done. Forgot mine at home. Was able to borrow one from a friend though.
Update to follow this post...
08-01-2010, 11:55 AM
#199
Seasoned Member
Thread Starter
Join Date: May 2010
Location: Columbus, OH
Posts: 415
Likes: 0
Received 0 Likes
on
0 Posts
Year: 2001
Model: Cherokee
Engine: 4.0 I6
ZJ Proportioning Valve Upgrade
The proportioning valve modification didn't go exactly as I expected it to. I thought the ZJ internals would just slip right in to the factory proportioning valve after removal of the XJ internals. However, the plunger/o-ring seemed a bit too large to fit in the XJ's proportioning valve assembly. This was a little perplexing, b/c from what I had read it should've been a direct swap. I tried reusing the XJ's o-ring on the ZJ's plunger but I felt like it didn't seat properly. Finally, we decided that simply exchanging out the springs might be the solution which is what we did.
Braking performance has increased with the spring change. I feel confidence in the braking system. The pedal feels good and there are no brake lights. The rear brakes do not lock up before the front as mentioned in some other p-valve modifications.
In order to get to the proportioning valve, I removed the air box to have better exposure/access. I laid down a rag to catch any brake fluid, though not much came out after unscrewing the bleeder cap.

Rubber cap removed and orange paper thingy...

I took those pictures a few days ago when I STARTED the procedure and decided to stop b/c I realized I didn't have anyone around to help me bleed the valve after I was done with the install. However, there really wasn't much to see anyway. It's a simple procedure. Unscrew the cap, remove the spring, plunger, and o-ring. Sometimes the o-ring gets hung up inside the valve but is easily retrieved with a screwdriver or pair of needle nose pliers.
After the items are removed, just reinstall in the same order they came out with the new spring. Don't forget to bleed the valve by having someone depress the pedal before the bleed screw is fully tightened down. It wasn't necessary to bleed the entire system.
The proportioning valve modification didn't go exactly as I expected it to. I thought the ZJ internals would just slip right in to the factory proportioning valve after removal of the XJ internals. However, the plunger/o-ring seemed a bit too large to fit in the XJ's proportioning valve assembly. This was a little perplexing, b/c from what I had read it should've been a direct swap. I tried reusing the XJ's o-ring on the ZJ's plunger but I felt like it didn't seat properly. Finally, we decided that simply exchanging out the springs might be the solution which is what we did.
Braking performance has increased with the spring change. I feel confidence in the braking system. The pedal feels good and there are no brake lights. The rear brakes do not lock up before the front as mentioned in some other p-valve modifications.
In order to get to the proportioning valve, I removed the air box to have better exposure/access. I laid down a rag to catch any brake fluid, though not much came out after unscrewing the bleeder cap.
Rubber cap removed and orange paper thingy...
I took those pictures a few days ago when I STARTED the procedure and decided to stop b/c I realized I didn't have anyone around to help me bleed the valve after I was done with the install. However, there really wasn't much to see anyway. It's a simple procedure. Unscrew the cap, remove the spring, plunger, and o-ring. Sometimes the o-ring gets hung up inside the valve but is easily retrieved with a screwdriver or pair of needle nose pliers.
After the items are removed, just reinstall in the same order they came out with the new spring. Don't forget to bleed the valve by having someone depress the pedal before the bleed screw is fully tightened down. It wasn't necessary to bleed the entire system.
08-01-2010, 12:09 PM
#200
Seasoned Member
Thread Starter
Join Date: May 2010
Location: Columbus, OH
Posts: 415
Likes: 0
Received 0 Likes
on
0 Posts
Year: 2001
Model: Cherokee
Engine: 4.0 I6
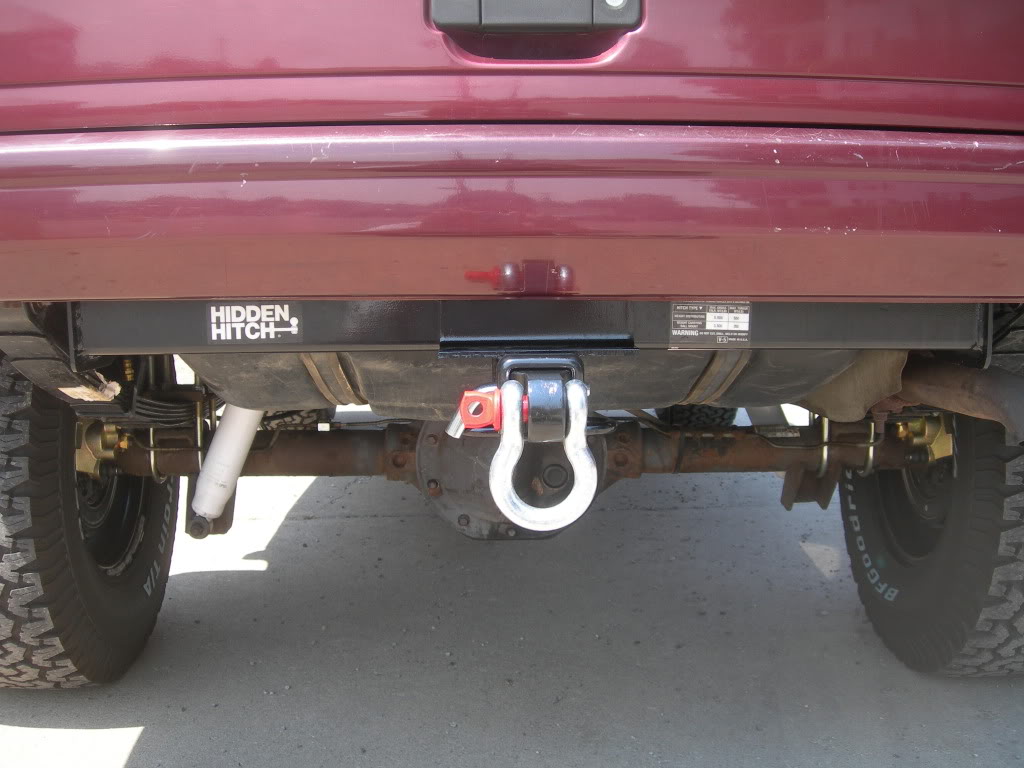
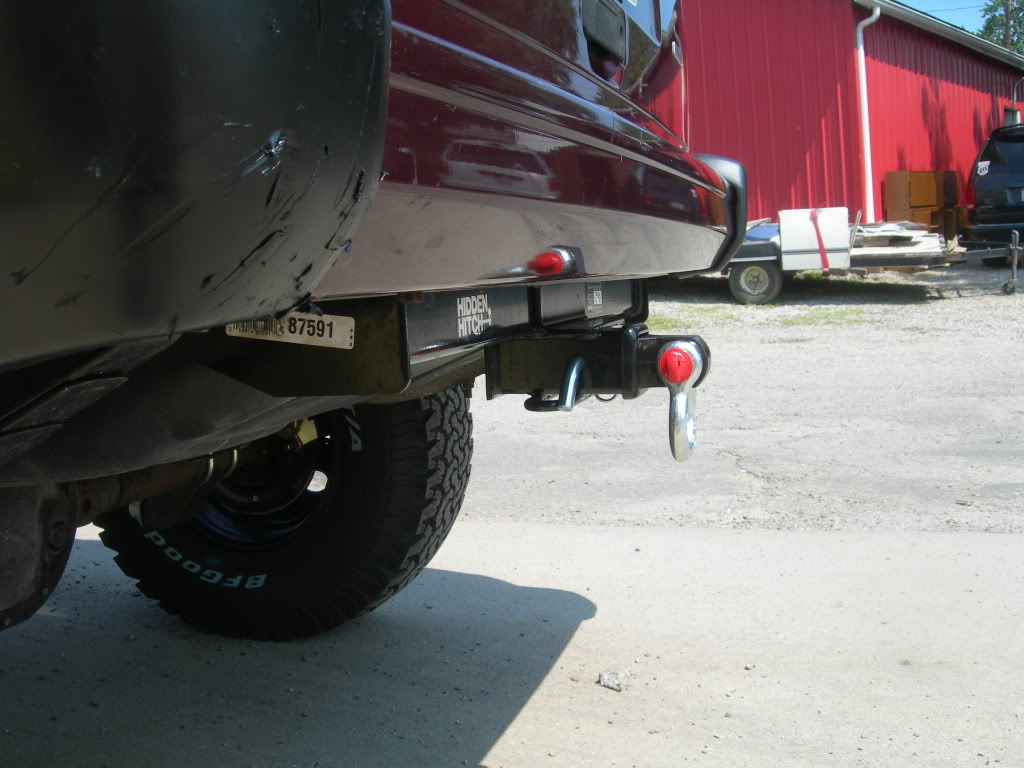
Also got the rear hitch installed yesterday... Again, no camera until I was finished so didn't get to snap some shots along the way. But basically, another simple procedure involving fishing of some plates and bolts through the frame rails. And if you're familiar with my thread, you know I'm a master of fishing hardware, haha.
Anyway, it's just held in by 8 bolts... we fished them all without any issues. However, one thing to note is that we deviated slightly from the Hidden Hitch installation directions which instructed to use the factory nut strip located in the passenger side (there was not one in the driver side) frame rail. It's basically just a metal strip of nuts running along the inside of the frame rail that was being used to bolt an exhaust hanger and gas tank side plate up. It simply lays in there and is not welded in place. The nut strip was extremely corroded and would not allow the new hardware to bolt in so we removed the nut strip by sliding it out the end of the frame rail towards the rear bumper.
The hitch came packaged with enough bolts and plates for both sides so I'm pretty sure that it just depends on the model/year of your XJ on whether or not you even have that nut strip. Either way, I like not having to depend on an old rusted up nut strip to hold the passenger side of my hitch up.
I wanted to hitch more for recovery than actual towing so I also purchased a nice d-ring receiver for it. Here's a couple shots:
08-01-2010, 12:14 PM
#201
Seasoned Member
Thread Starter
Join Date: May 2010
Location: Columbus, OH
Posts: 415
Likes: 0
Received 0 Likes
on
0 Posts
Year: 2001
Model: Cherokee
Engine: 4.0 I6
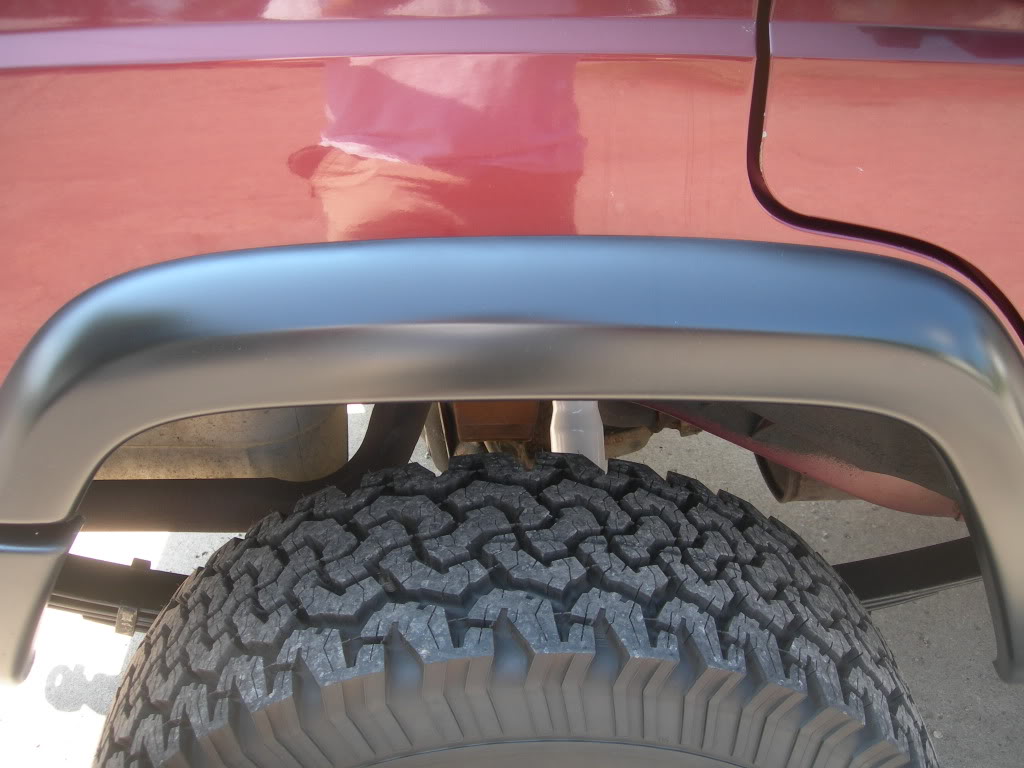
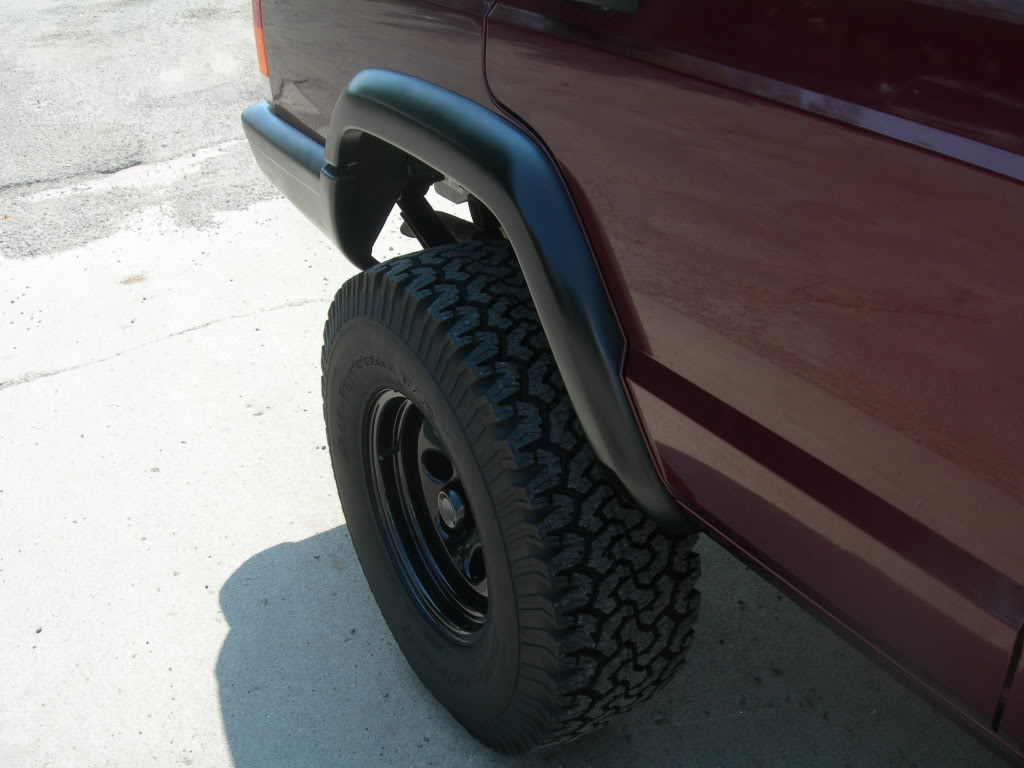
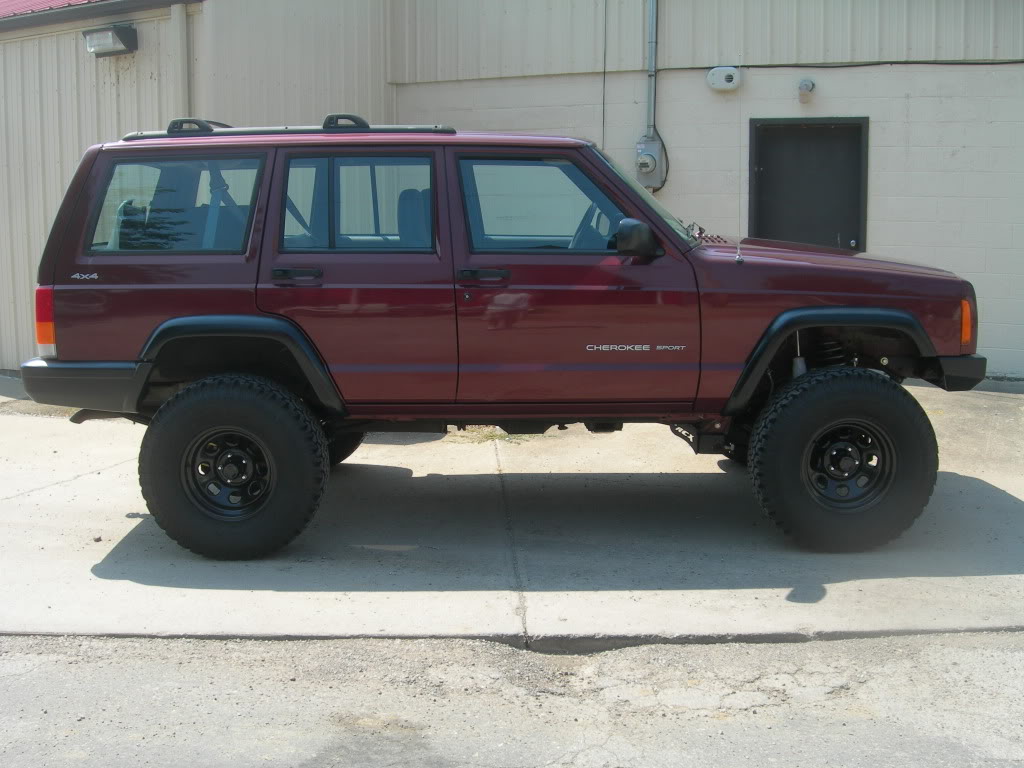
Got the fender flares installed as well... What do you think of the new look?
I think the satin black pPaint matches up pretty decent with the wheels/bumpers/endcaps, etc...


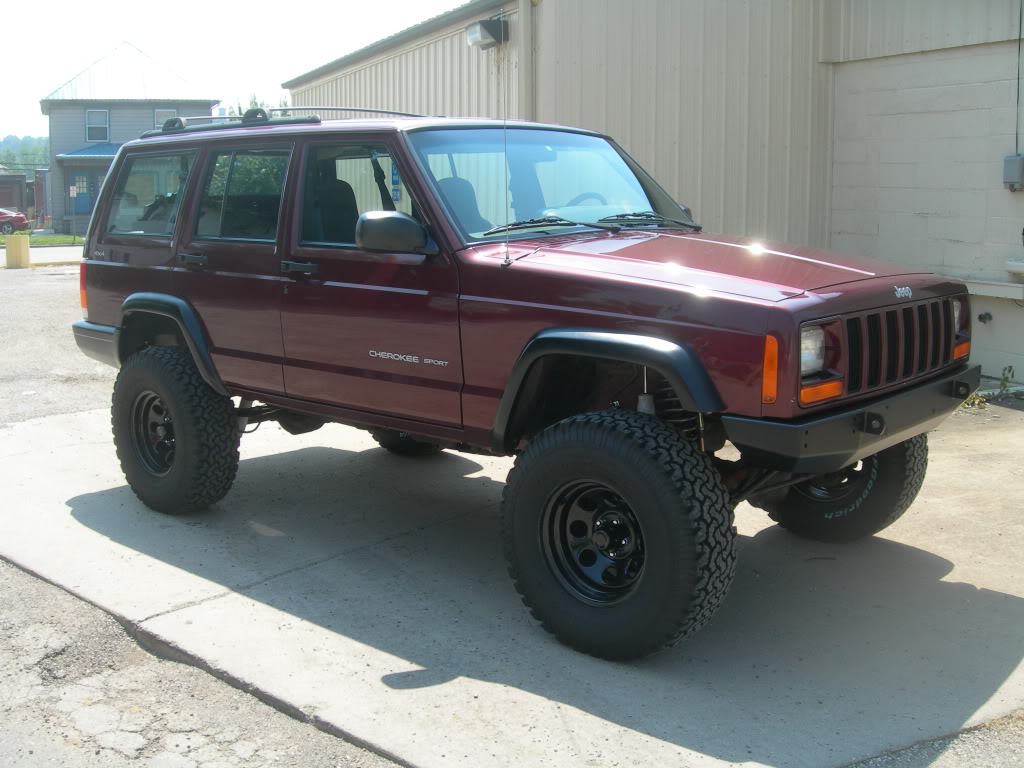


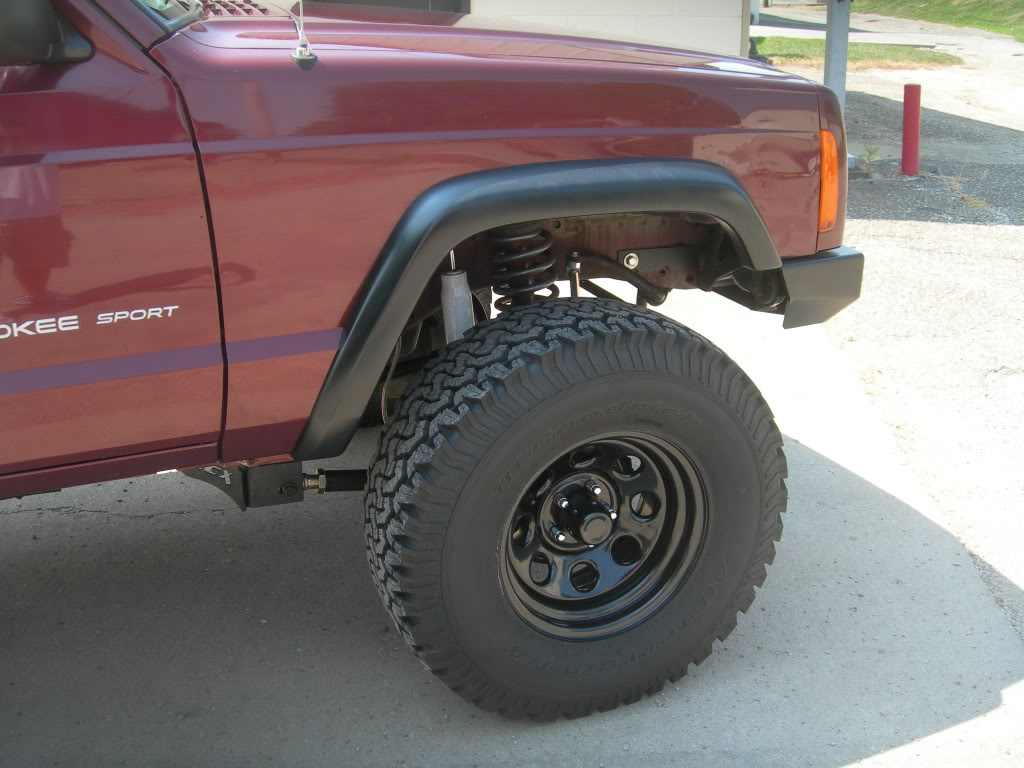

I think the satin black pPaint matches up pretty decent with the wheels/bumpers/endcaps, etc...

 08-01-2010, 09:22 PM
#205
Honorary Moderator
Join Date: Mar 2010
Location: Gilbert AZ/Las Cruces NM
Posts: 8,135
Likes: 0
Received 14 Likes
on
12 Posts
Year: 1996
Model: Cherokee
Engine: 4.0 upgraded
sick dude! i love how it turned out all together! very clean looking! ..to clean looking  .... now lets see some action shots!!
(but make sure you attach the rest of your bumper bolts ASAP)
also i sweat i missed it but are those RE super flex adjustable Control Arms with RC control arm drop brackets
??
 .... now lets see some action shots!!
(but make sure you attach the rest of your bumper bolts ASAP)
also i sweat i missed it but are those RE super flex adjustable Control Arms with RC control arm drop brackets
??
 08-03-2010, 11:30 AM
#207
Seasoned Member
Thread Starter
Join Date: May 2010
Location: Columbus, OH
Posts: 415
Likes: 0
Received 0 Likes
on
0 Posts
Year: 2001
Model: Cherokee
Engine: 4.0 I6
sick dude! i love how it turned out all together! very clean looking! ..to clean looking .... now lets see some action shots!!
(but make sure you attach the rest of your bumper bolts ASAP)
also i sweat i missed it but are those RE super flex adjustable Control Arms with RC control arm drop brackets
??
.... now lets see some action shots!!(but make sure you attach the rest of your bumper bolts ASAP)
also i sweat i missed it but are those RE super flex adjustable Control Arms with RC control arm drop brackets
??
And they are RC adjustable X-flex control arms with RC control arm drop brackets.
08-03-2010, 11:45 AM
#208
Seasoned Member
Thread Starter
Join Date: May 2010
Location: Columbus, OH
Posts: 415
Likes: 0
Received 0 Likes
on
0 Posts
Year: 2001
Model: Cherokee
Engine: 4.0 I6
Picked up a wiring harness for trailer lights, figured since I have a hitch might as well have the wiring to support a trailer as well.
Pretty simple install since the harness was a simple plug-n-play design, T-one connector type. Requires no cutting or splicing of wires.
Remove the interior panel to expose the taillight wiring harness..

You can see there are several wiring harnesses in this location, just trace the one coming from the taillight assembly. Mine was the harness all the way to the left.
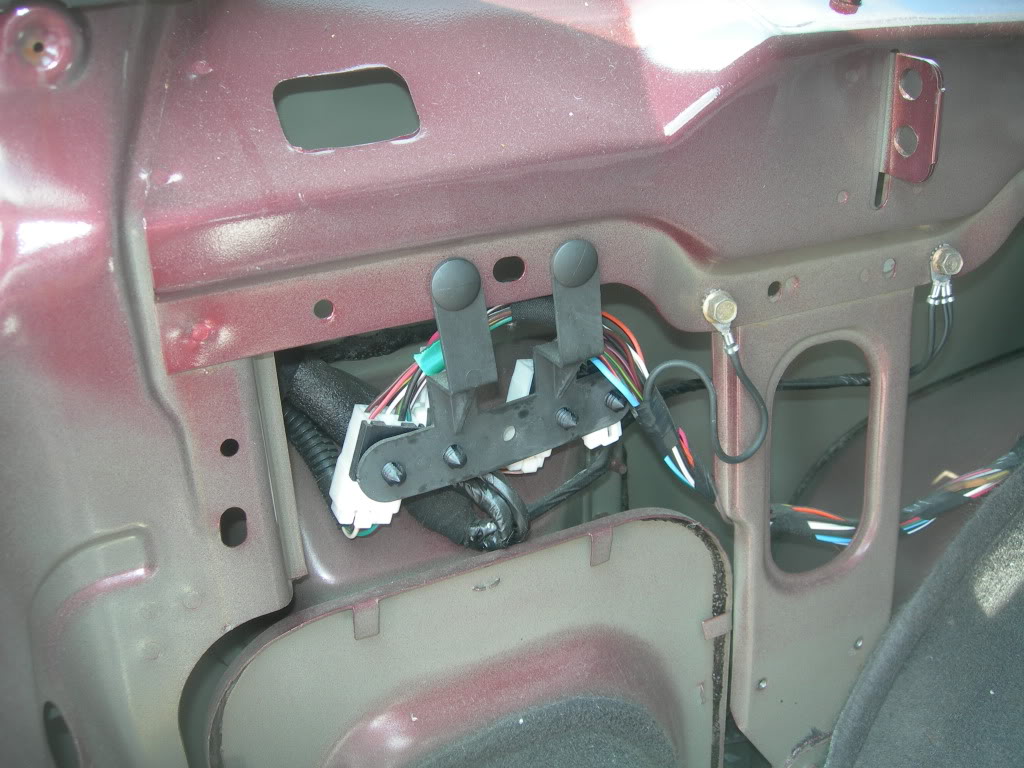
Plug in your new harness...
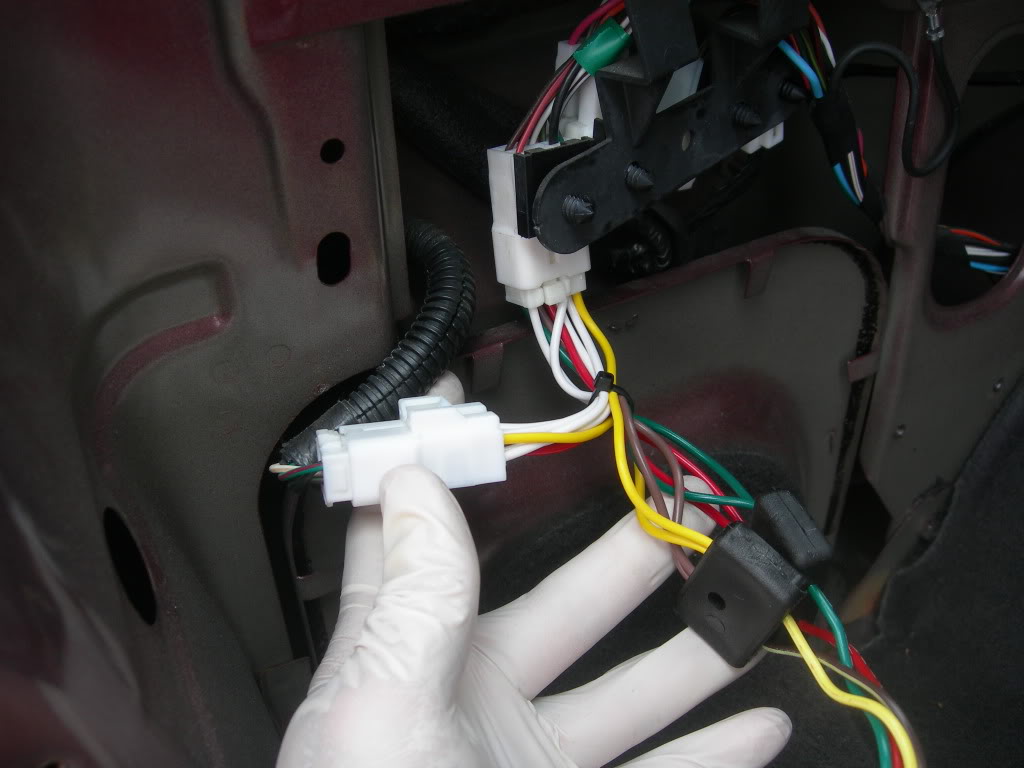
You need to ground the circuit, so I reused a factory grounding location by adding the new harness' ground wire to an existing factory ground. The new wiring harness' ground wire is white.

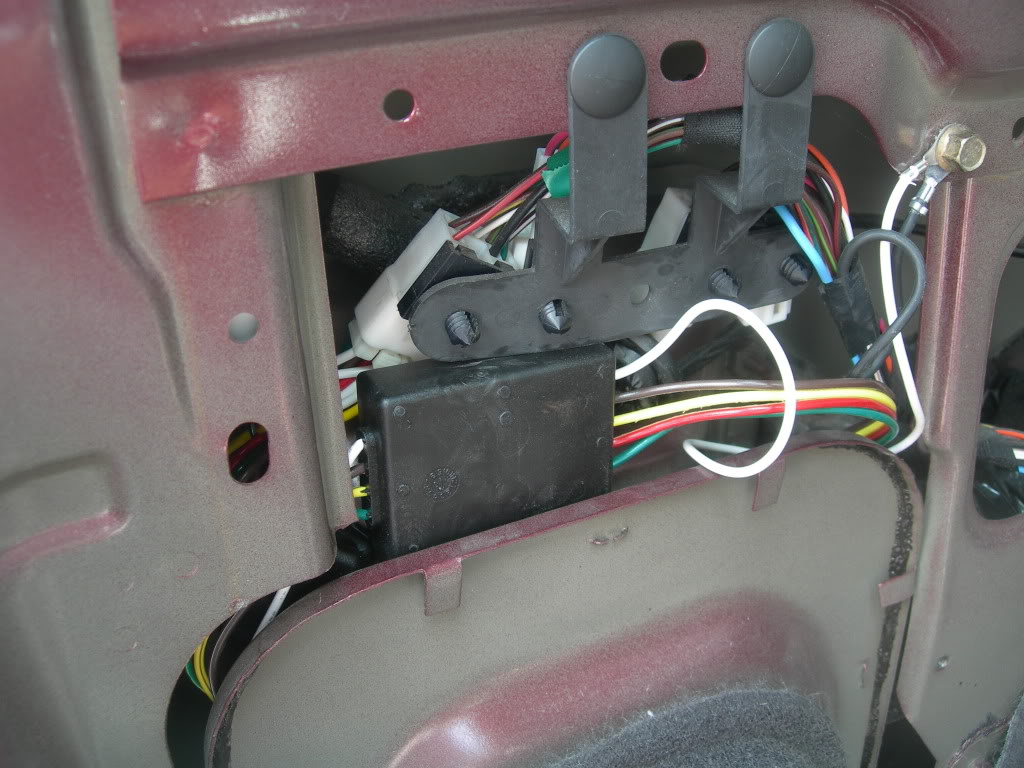
Then just place the new wiring harness box in there with the rest of that crap and you're done. You can screw it down if you prefer or zip tie it in place, but it fit pretty snug so I left it as is. Plus, right now the wire is just laying in the back and I would like to eventually run it through the floor and outside where I can attach it to the hitch but I had to install this thing quickly yesterday in order to go pick up a car dolly for a friend.
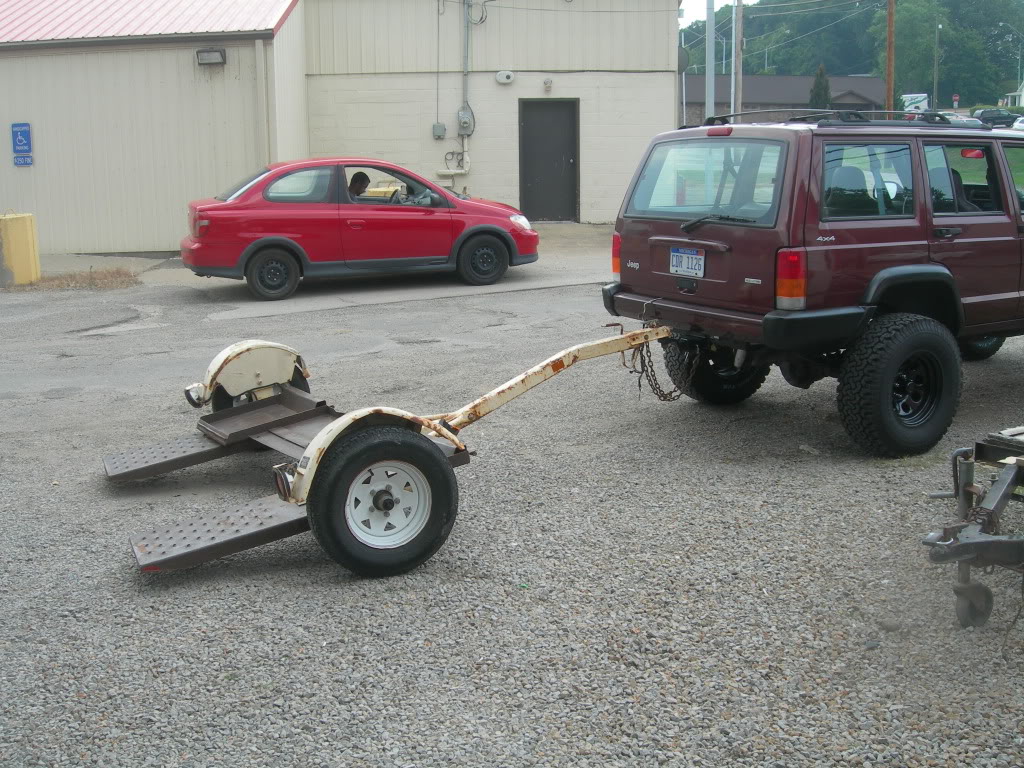
Transported this for a friend.... my first tow.
Pretty simple install since the harness was a simple plug-n-play design, T-one connector type. Requires no cutting or splicing of wires.
Remove the interior panel to expose the taillight wiring harness..
You can see there are several wiring harnesses in this location, just trace the one coming from the taillight assembly. Mine was the harness all the way to the left.
Plug in your new harness...
You need to ground the circuit, so I reused a factory grounding location by adding the new harness' ground wire to an existing factory ground. The new wiring harness' ground wire is white.
Then just place the new wiring harness box in there with the rest of that crap and you're done. You can screw it down if you prefer or zip tie it in place, but it fit pretty snug so I left it as is. Plus, right now the wire is just laying in the back and I would like to eventually run it through the floor and outside where I can attach it to the hitch but I had to install this thing quickly yesterday in order to go pick up a car dolly for a friend.
Transported this for a friend.... my first tow.