
Project Do work - 2001 XJ Build (Pic intensive)
 03-23-2011, 11:13 AM
#421
Junior Member
Join Date: Aug 2010
Location: Chicago, IL
Posts: 34
Likes: 0
Received 1 Like
on
1 Post
Year: 1997
Model: Cherokee
Engine: 4.0HO K&N FIPK2, Gibson chrome headers
Excellent build. I quite like those CAD's and run them on my rig without a single problem.
Fv**ing thieves man. The same thing happened to both my wife's jeep and my jeep this past Xmas. I rest assured that the Karmic Gods of Jeep will inflict severe punishment, or that one day i'll catch someone doing it to someone else's ride and stamp 'em a few times with an asp.
Fv**ing thieves man. The same thing happened to both my wife's jeep and my jeep this past Xmas. I rest assured that the Karmic Gods of Jeep will inflict severe punishment, or that one day i'll catch someone doing it to someone else's ride and stamp 'em a few times with an asp.

 03-23-2011, 10:20 PM
#424
Seasoned Member
Thread Starter
Join Date: May 2010
Location: Columbus, OH
Posts: 415
Likes: 0
Received 0 Likes
on
0 Posts
Year: 2001
Model: Cherokee
Engine: 4.0 I6
Excellent build. I quite like those CAD's and run them on my rig without a single problem.
Fv**ing thieves man. The same thing happened to both my wife's jeep and my jeep this past Xmas. I rest assured that the Karmic Gods of Jeep will inflict severe punishment, or that one day i'll catch someone doing it to someone else's ride and stamp 'em a few times with an asp.
Fv**ing thieves man. The same thing happened to both my wife's jeep and my jeep this past Xmas. I rest assured that the Karmic Gods of Jeep will inflict severe punishment, or that one day i'll catch someone doing it to someone else's ride and stamp 'em a few times with an asp.
Welcome to my thread. I will keep the updates coming, hopefully more frequently now that the winter is breaking.
04-25-2011, 04:11 PM
#425
Seasoned Member
Thread Starter
Join Date: May 2010
Location: Columbus, OH
Posts: 415
Likes: 0
Received 0 Likes
on
0 Posts
Year: 2001
Model: Cherokee
Engine: 4.0 I6
Finally found some time over the weekend to work on the Jeep. As previously mentioned, my buddy found a replacement door for me on Craigslist for a cool $100.
Removing and reinstalling the driver door was a fairly straightforward procedure. First thing I did was to disconnect the electrical connections. Removing the floor trim and kick plate pieces was necessary:

Please disregard the untidyness of my Jeep, I also went off roading over the weekend and it was rather muddy.
After removing the 2 screws securing the door sill trim, the kick plate trim could be removed:

Removal of the kick plate revealed a loom of 3 wiring harnesses:

Here's a closer shot, disconnect all three of these harnesses:

Removing and reinstalling the driver door was a fairly straightforward procedure. First thing I did was to disconnect the electrical connections. Removing the floor trim and kick plate pieces was necessary:
Please disregard the untidyness of my Jeep, I also went off roading over the weekend and it was rather muddy.
After removing the 2 screws securing the door sill trim, the kick plate trim could be removed:
Removal of the kick plate revealed a loom of 3 wiring harnesses:
Here's a closer shot, disconnect all three of these harnesses:
04-25-2011, 04:38 PM
#426
Seasoned Member
Thread Starter
Join Date: May 2010
Location: Columbus, OH
Posts: 415
Likes: 0
Received 0 Likes
on
0 Posts
Year: 2001
Model: Cherokee
Engine: 4.0 I6
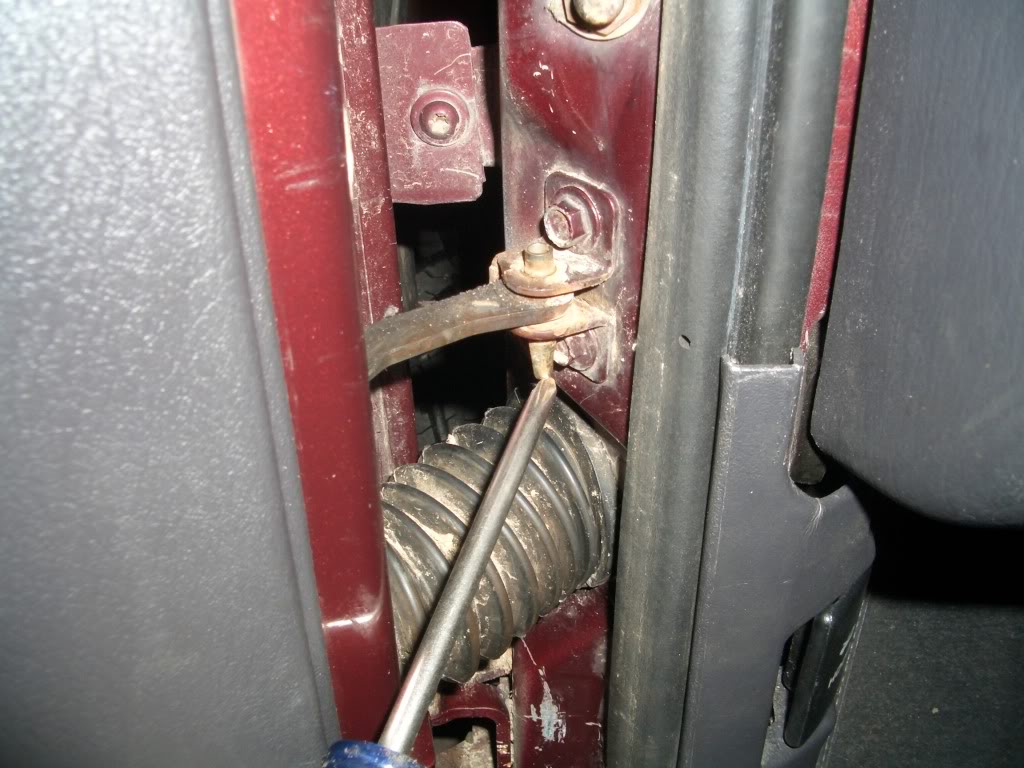
Once the electrical connections are handled, it was time to start unbolting stuff. I decided to disconnect the "door helper" hinge first in hopes that it might also allow me a little more room to work. I'm not sure if that's what it's really called or not, but I think it's there to help prevent your door from opening to wide and putting too much stress on the primary hinges. It's kind of like a shock for the door. It connects the door to the frame by way of a pin, just simply knock it out. I found it easier to remove by tapping it while moving the door in and out a little at the same time. My screwdriver is pointing towards the pin:
Once that pin is removed, all that's left is to unbolt the primary hinges which are secured by 3 torx head bolts in each hinge. A T40 torx bit to be exact:

As I've already mentioned, working space is limited:

I was not able to fit a regular ratchet in the door jamb, however I did have this laying around which has come in handy in more than once occasion for a tight spot:
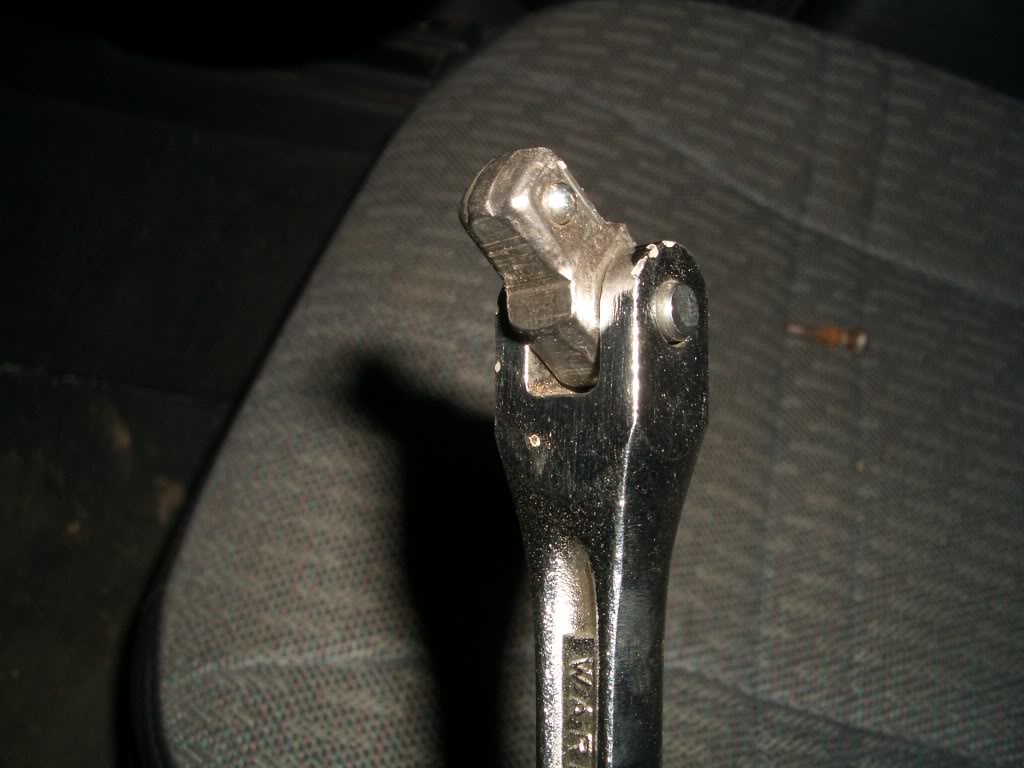
Not quite as fast as a ratchet, but still gets the job done:

The top 3 bolts came out pretty easily and without much fuss:

The bottom 3 bolts however, put up a pretty good fight. I sprayed them down real good with some PB Blaster and let them soak a while. After quite a while, one of the three finally gave up and I was down to 2.
Continuing to work on the remaining 2 bolts resulted in a rounding out of the torx heads. There's nothing I despise more than a rounded out bolt.
Eventually I was able to persuade another bolt out with a combination of beating the head of the bolt with a hammer and chisel and breaking it loose with a pair of vice grips. 2 down, 1 to go.
The last and final bolt could not be reached by the vise grips so I resorted to chiseling off the head of the bolt completely. Finally the door came off.
Once that pin is removed, all that's left is to unbolt the primary hinges which are secured by 3 torx head bolts in each hinge. A T40 torx bit to be exact:
As I've already mentioned, working space is limited:
I was not able to fit a regular ratchet in the door jamb, however I did have this laying around which has come in handy in more than once occasion for a tight spot:
Not quite as fast as a ratchet, but still gets the job done:
The top 3 bolts came out pretty easily and without much fuss:
The bottom 3 bolts however, put up a pretty good fight. I sprayed them down real good with some PB Blaster and let them soak a while. After quite a while, one of the three finally gave up and I was down to 2.
Continuing to work on the remaining 2 bolts resulted in a rounding out of the torx heads.
There's nothing I despise more than a rounded out bolt.Eventually I was able to persuade another bolt out with a combination of beating the head of the bolt with a hammer and chisel and breaking it loose with a pair of vice grips. 2 down, 1 to go.
The last and final bolt could not be reached by the vise grips so I resorted to chiseling off the head of the bolt completely.
Finally the door came off.
04-25-2011, 05:39 PM
#427
Seasoned Member
Thread Starter
Join Date: May 2010
Location: Columbus, OH
Posts: 415
Likes: 0
Received 0 Likes
on
0 Posts
Year: 2001
Model: Cherokee
Engine: 4.0 I6
Installation of the replacement door is MOSTLY just reverse of removal.
My original door came from the factory with a door shim sandwiched between both the top and bottom hinge. Shims allows for the door to have a small degree of adjustability for proper closure and ensuring a good seal. They're basically just thin sheets of metal which get smashed between the door and hinge. I forgot to snap a picture of them when I had mine out so I searched the internet for a generic picture:

When I went to reinstall the new door, I decided to install it with the factory shims that came with my original door. I figured that'd be a good place to start. Unfortunately, the door did not close well. Closing it required you to also pull up simultaneously as the door was hanging a bit low and not smoothly engaging the latch.
So, we decided to remove the shim from the upper hinge which brought the door up a bit. The adjustment resulted in smooth closure. However, upon test driving, wind/air could be heard coming from the door. It was not sealing well. In fact, closer inspection revealed that you could even see some light through the top of the door frame. It was going to need some further adjusting.
Back in the garage, we decided to add the shim from the top hinge to the bottom hinge, which meant that now the bottom hinge had 2 shims while the top hinge had 0 shims. The door continued to close smoothly and also sealed great as evidenced by the test drive. No more wind/air noise and no more light shining through. Everything appears to be good.
I snapped a couple pics of the final hinge set up. It's kind of hard to know what you are looking at if you aren't familiar with the process but you can get an idea. Also, please disregard the dirty door jambs, we went wheeling to celebrate the new door and it was rather muddy.
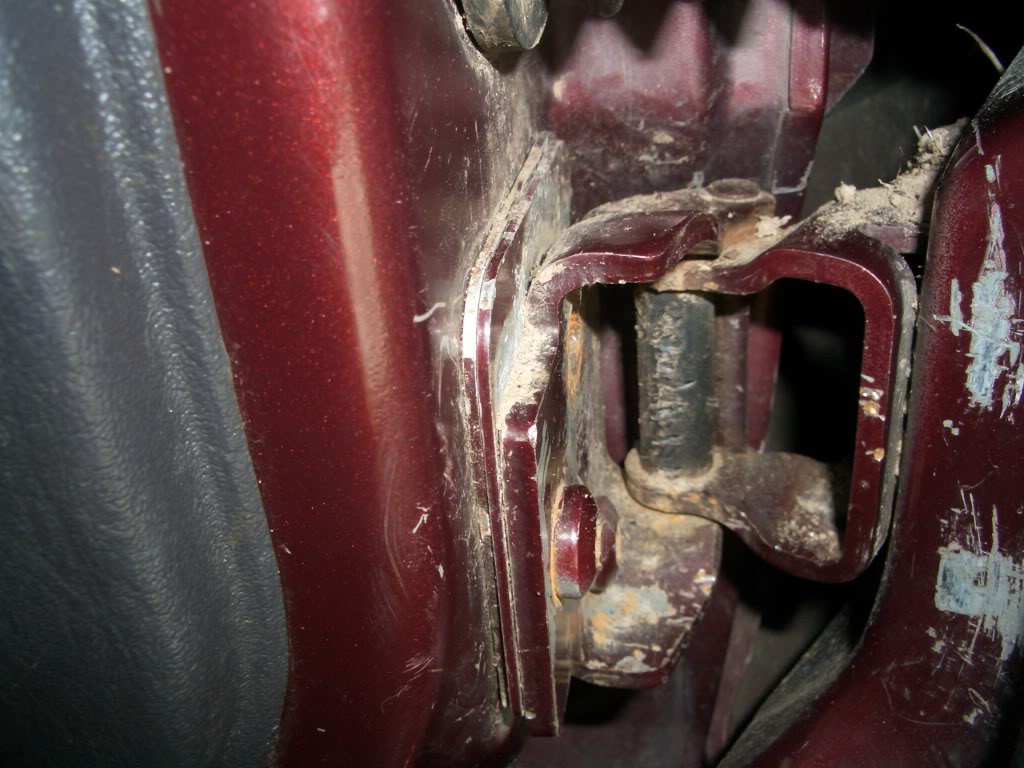
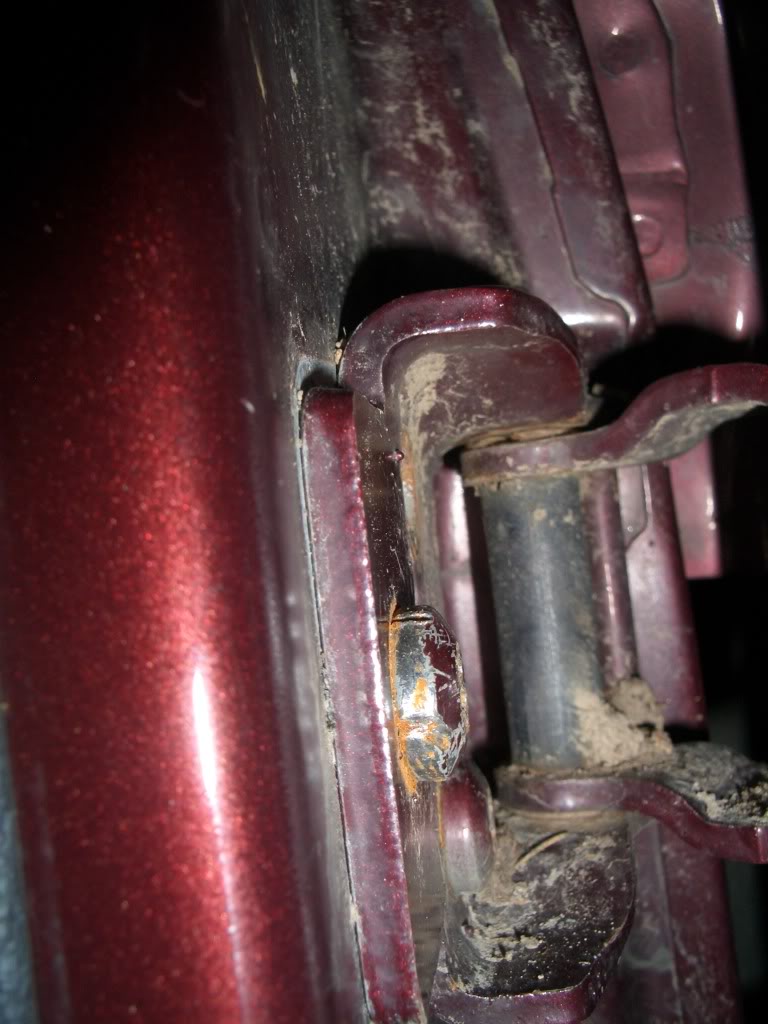
These 2 pics show the bottom hinge and the 2 shims installed:

This is the top hinge, with no shims installed:
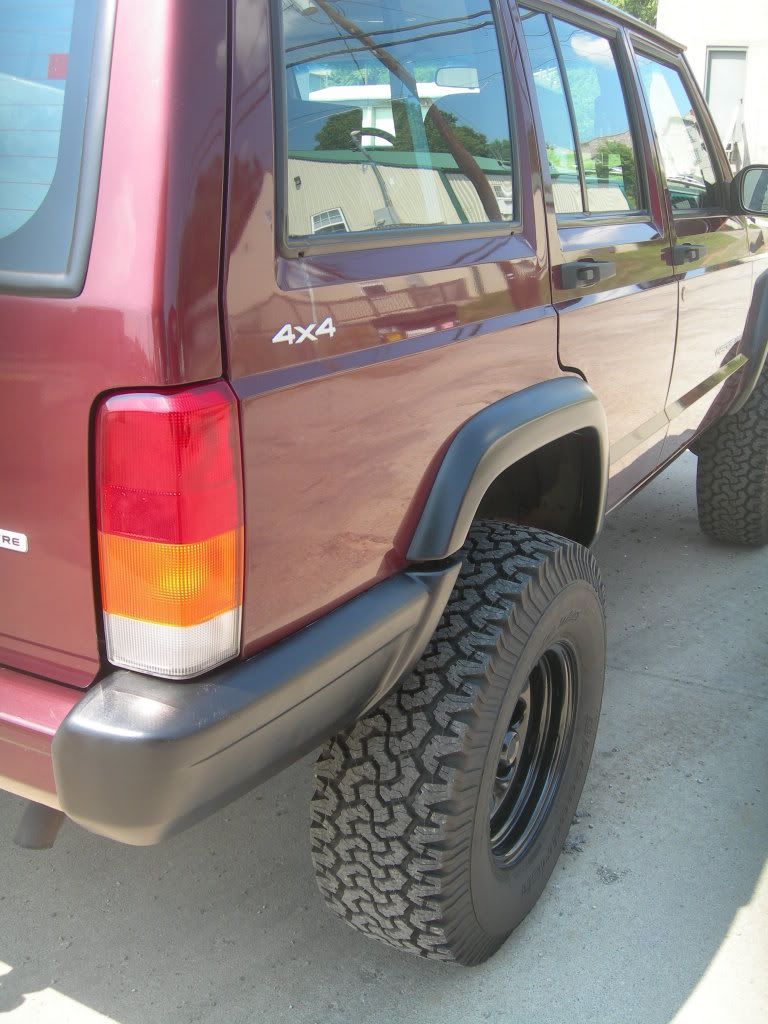
The final product, no hole!

I ripped the side molding off since the rest of my Jeep has it off but I haven't had a chance to remove the adhesive residue. Also, I was a little disappointed that the words weren't complete:

My original door came from the factory with a door shim sandwiched between both the top and bottom hinge. Shims allows for the door to have a small degree of adjustability for proper closure and ensuring a good seal. They're basically just thin sheets of metal which get smashed between the door and hinge. I forgot to snap a picture of them when I had mine out so I searched the internet for a generic picture:
When I went to reinstall the new door, I decided to install it with the factory shims that came with my original door. I figured that'd be a good place to start. Unfortunately, the door did not close well. Closing it required you to also pull up simultaneously as the door was hanging a bit low and not smoothly engaging the latch.
So, we decided to remove the shim from the upper hinge which brought the door up a bit. The adjustment resulted in smooth closure. However, upon test driving, wind/air could be heard coming from the door. It was not sealing well. In fact, closer inspection revealed that you could even see some light through the top of the door frame. It was going to need some further adjusting.
Back in the garage, we decided to add the shim from the top hinge to the bottom hinge, which meant that now the bottom hinge had 2 shims while the top hinge had 0 shims. The door continued to close smoothly and also sealed great as evidenced by the test drive. No more wind/air noise and no more light shining through. Everything appears to be good.
I snapped a couple pics of the final hinge set up. It's kind of hard to know what you are looking at if you aren't familiar with the process but you can get an idea. Also, please disregard the dirty door jambs, we went wheeling to celebrate the new door and it was rather muddy.
These 2 pics show the bottom hinge and the 2 shims installed:
This is the top hinge, with no shims installed:
The final product, no hole!
I ripped the side molding off since the rest of my Jeep has it off but I haven't had a chance to remove the adhesive residue. Also, I was a little disappointed that the words weren't complete:
04-30-2011, 09:32 PM
#428
Seasoned Member
Thread Starter
Join Date: May 2010
Location: Columbus, OH
Posts: 415
Likes: 0
Received 0 Likes
on
0 Posts
Year: 2001
Model: Cherokee
Engine: 4.0 I6
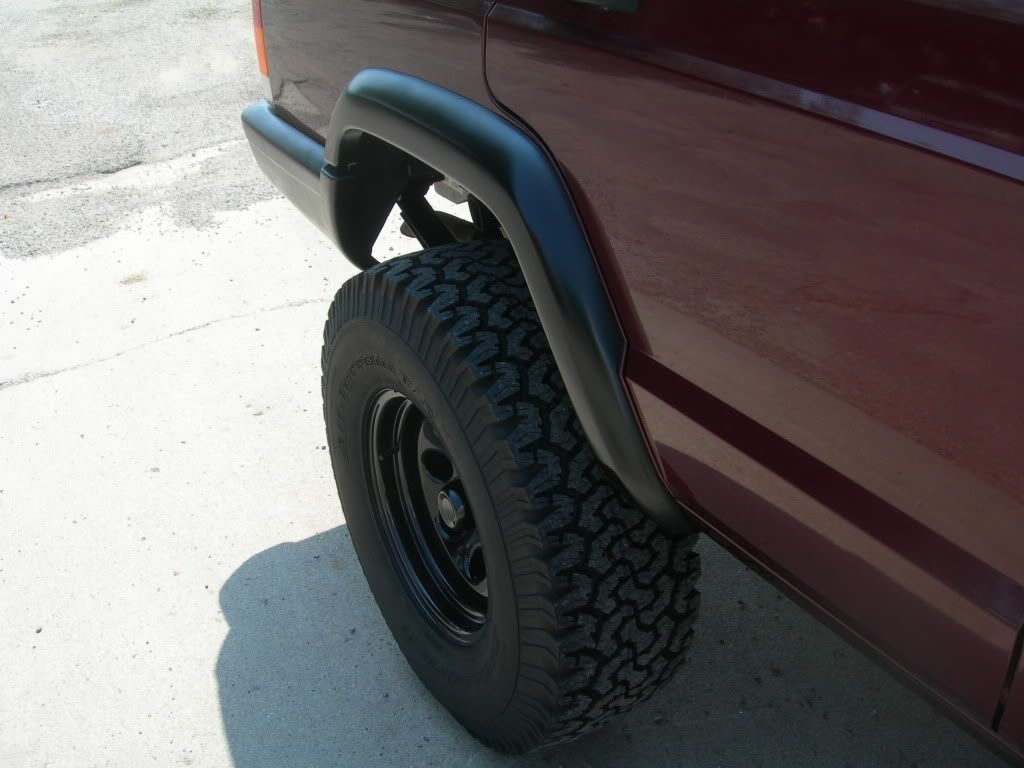
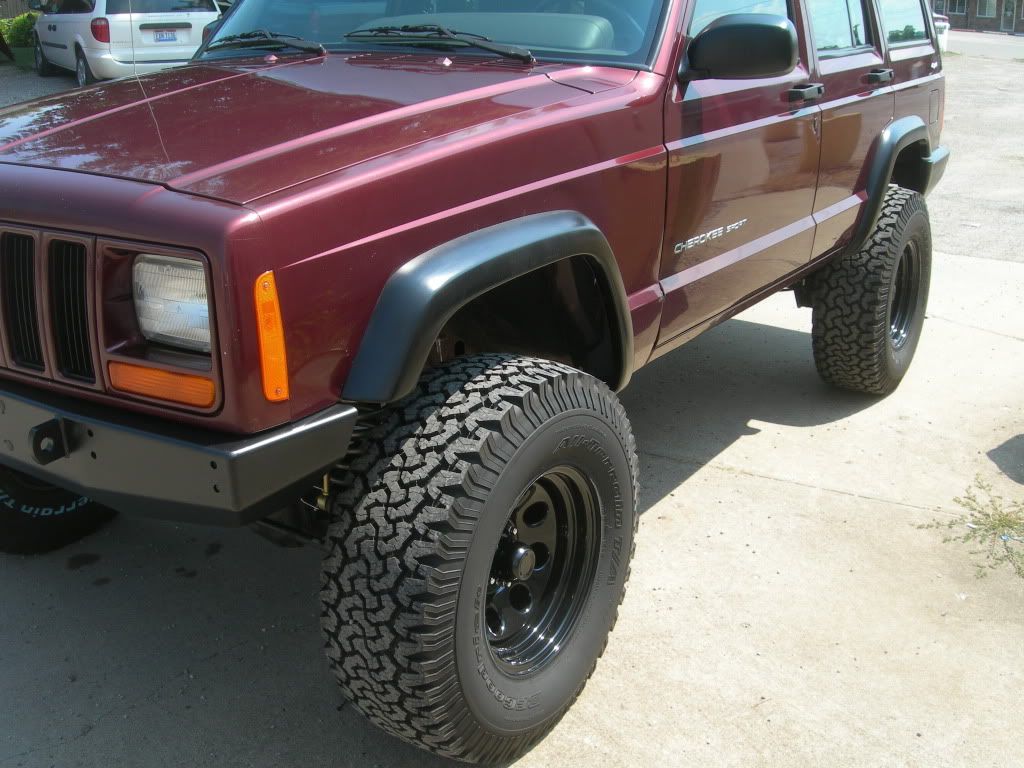
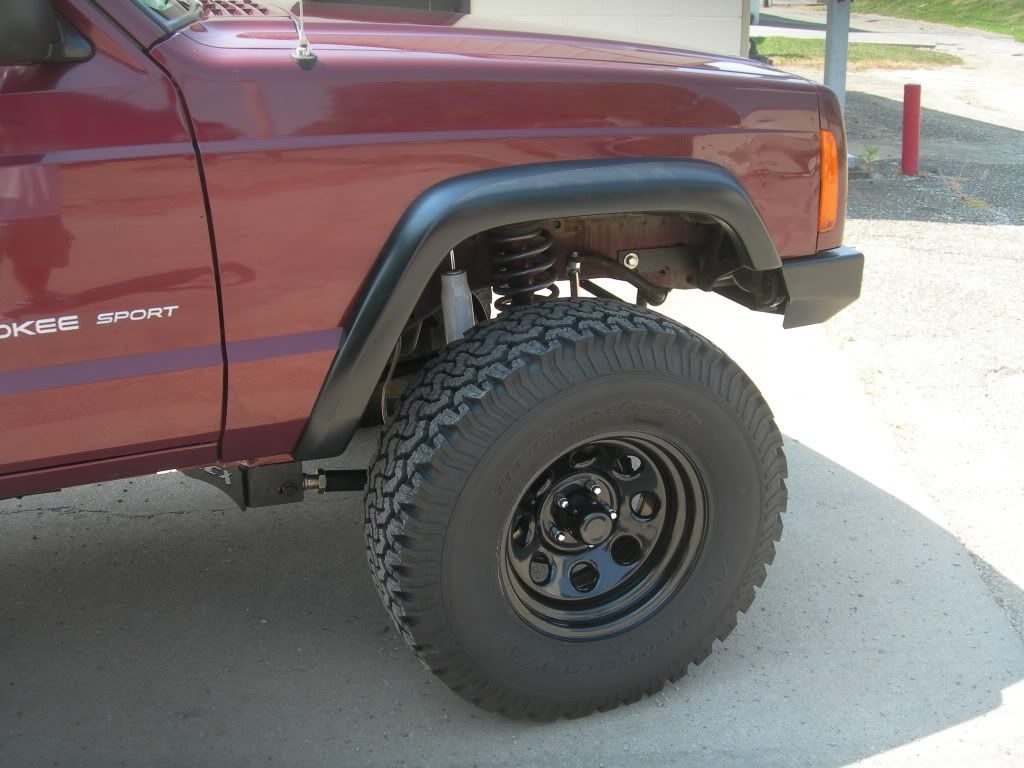
Well, I decided today that it was time to stop procrastinating on trimming up the rear fenders. I got a good start on it tonight so I thought I'd post up some of my progress. Cut and roll seemed to be the most practical approach.... I'm sure most have seen this a thousand times since it's a very common procedure but here's where I'm at so far....
My fender flares were previously removed so I didn't have worry about those, but I still had to remove the bumper end caps. They're fastened by a screw and a bolt, once released you can slide it right back:

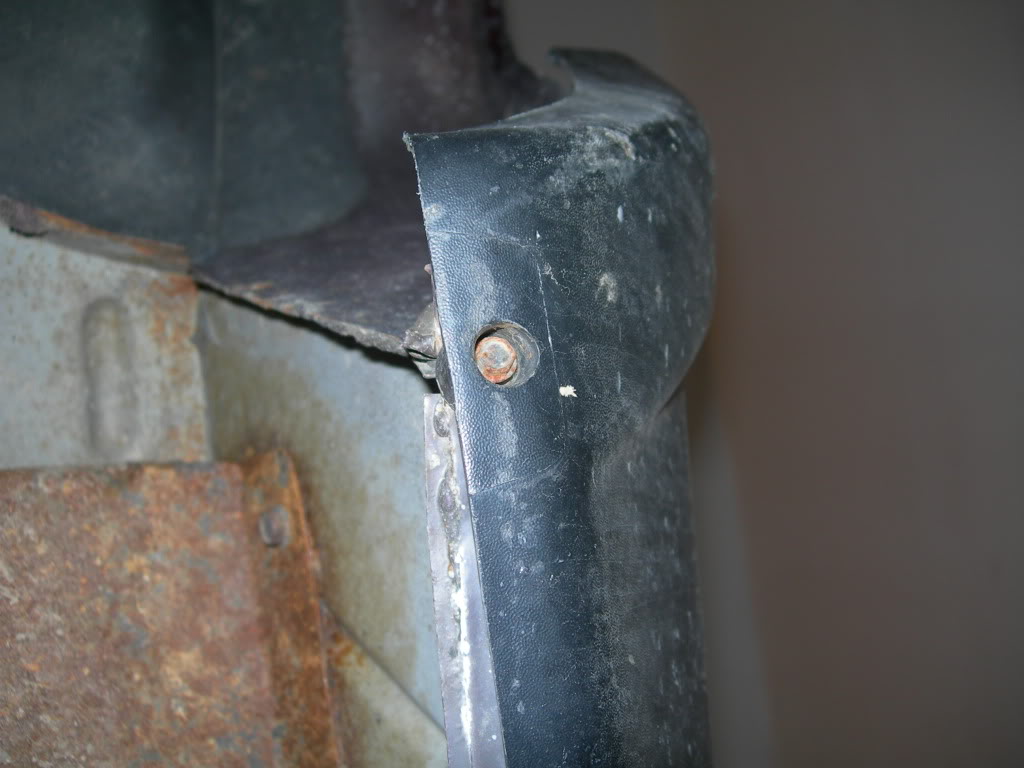
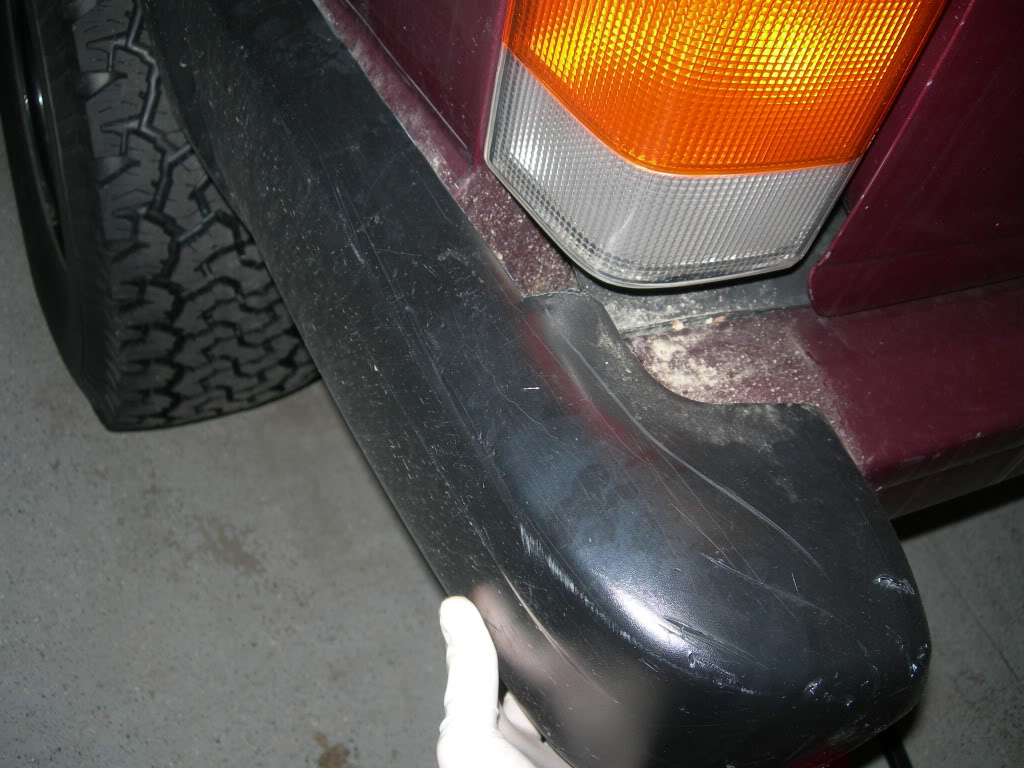
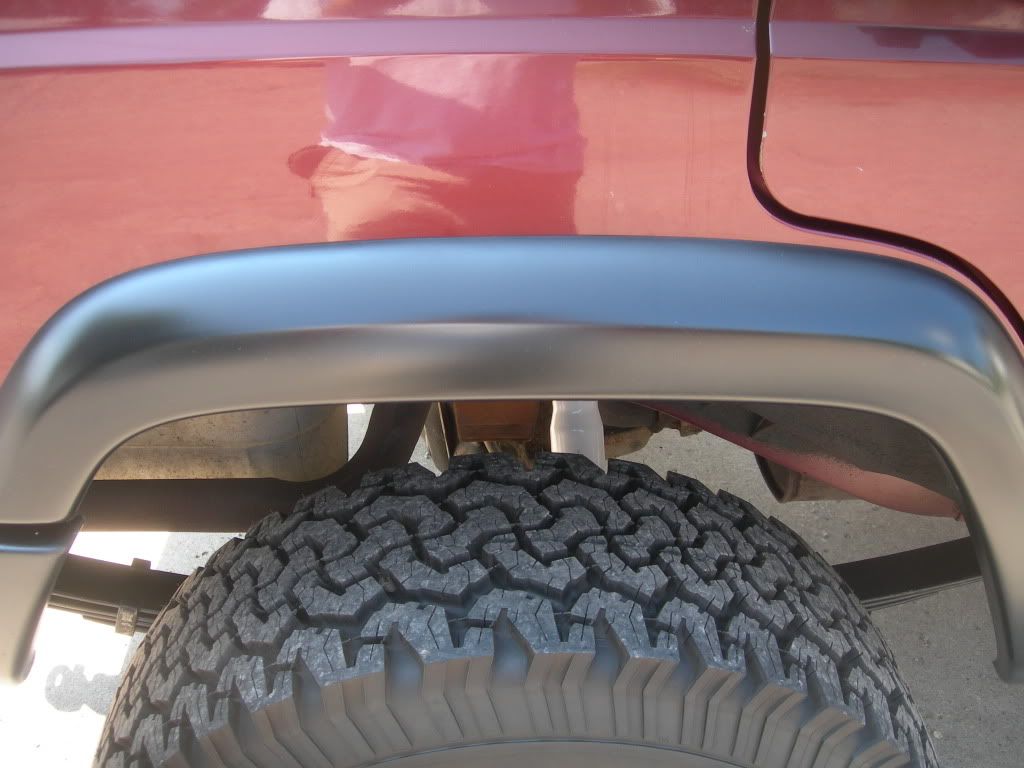
With the flare and end cap removed, you should be left with something like this:

I went ahead and measured my clearance before trimming, just for ****s and giggles:

My fender flares were previously removed so I didn't have worry about those, but I still had to remove the bumper end caps. They're fastened by a screw and a bolt, once released you can slide it right back:
With the flare and end cap removed, you should be left with something like this:
I went ahead and measured my clearance before trimming, just for ****s and giggles:
04-30-2011, 09:49 PM
#429
Seasoned Member
Thread Starter
Join Date: May 2010
Location: Columbus, OH
Posts: 415
Likes: 0
Received 0 Likes
on
0 Posts
Year: 2001
Model: Cherokee
Engine: 4.0 I6
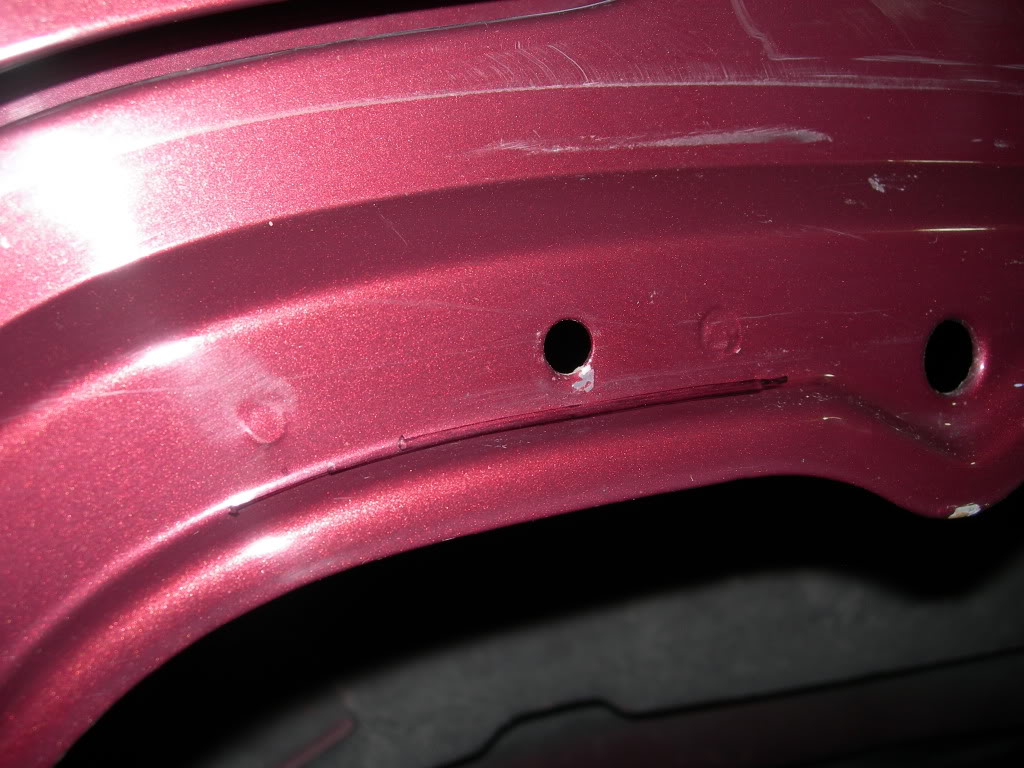
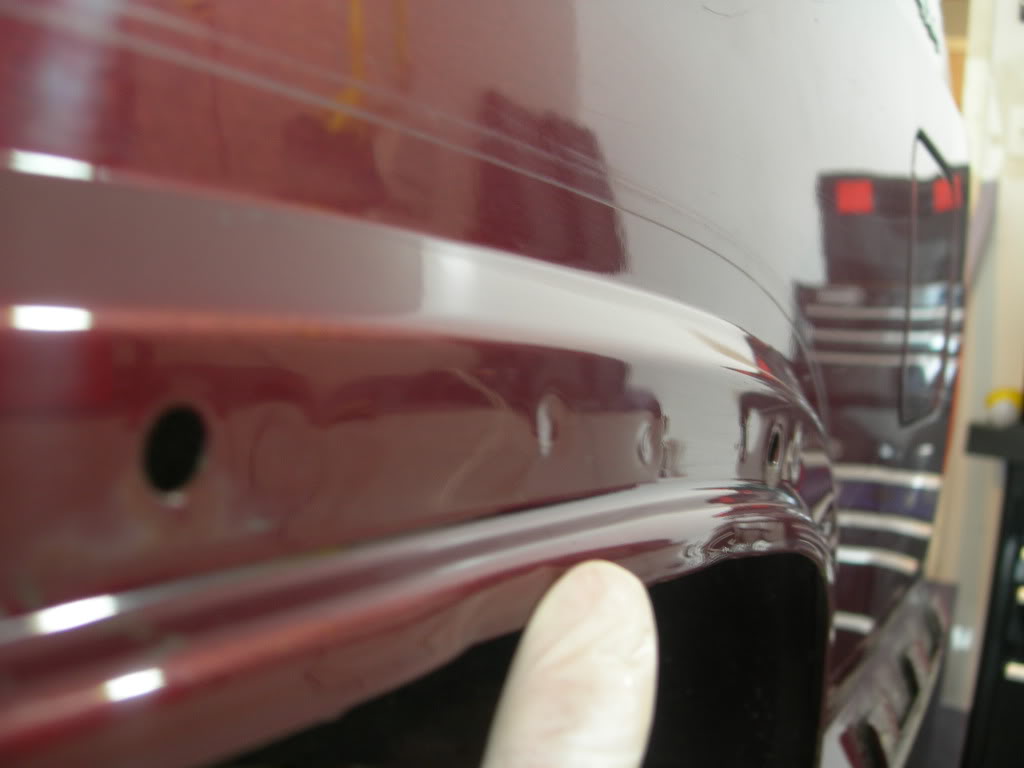
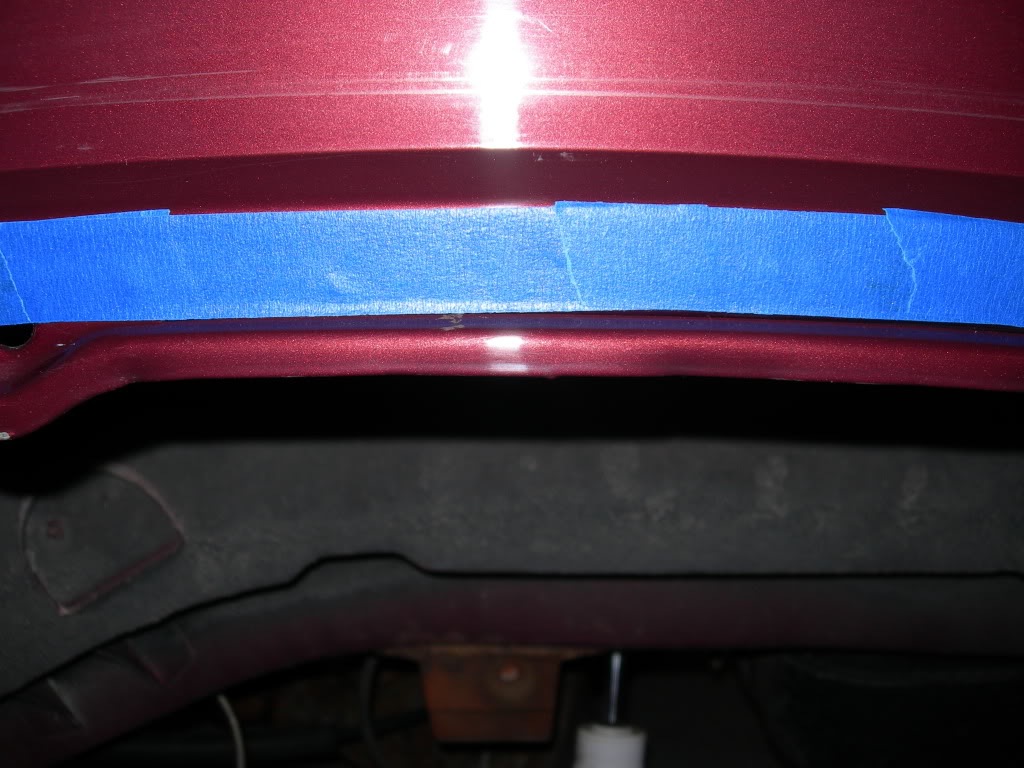
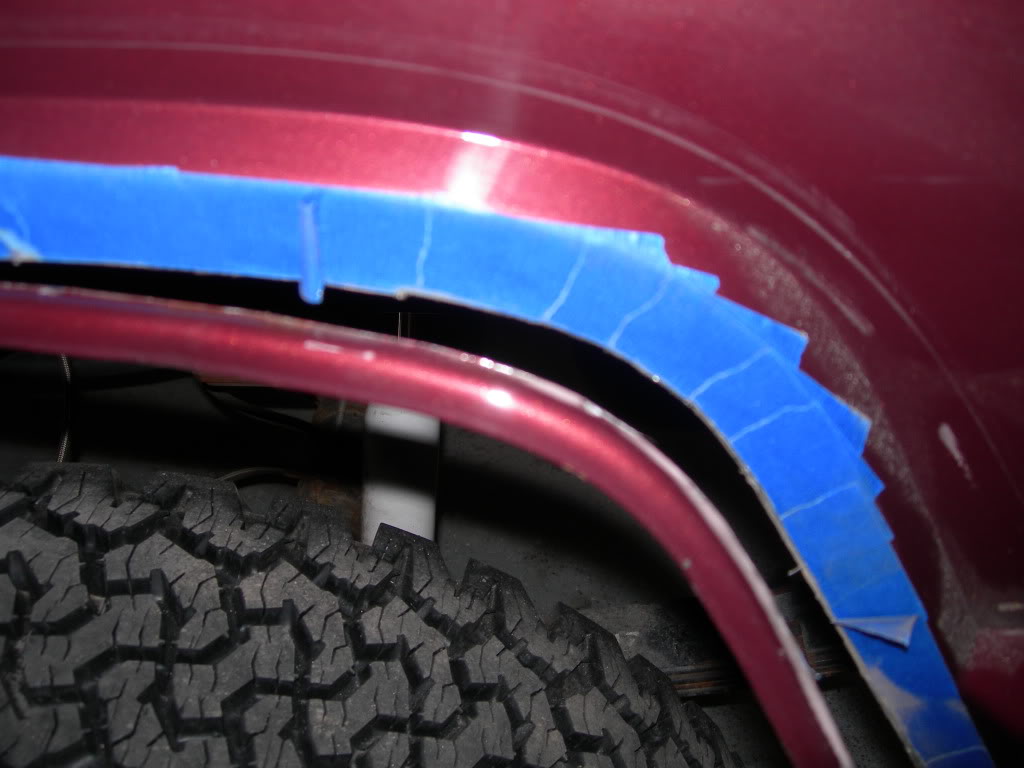
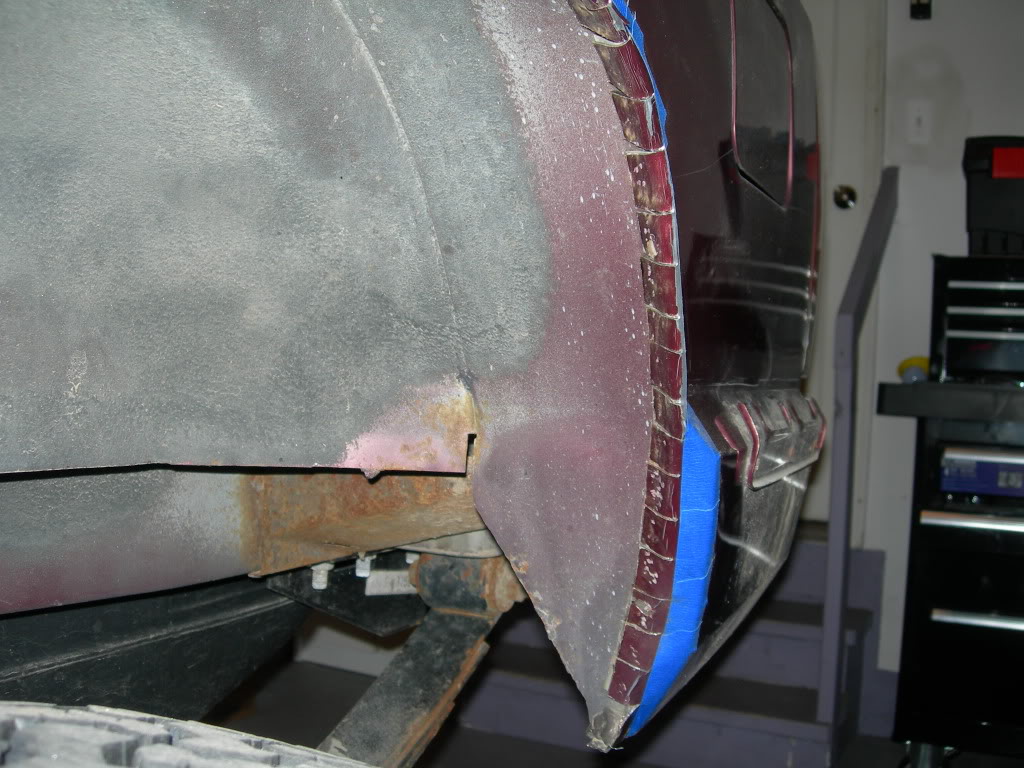
One of the things you have to be concerned about when trimming the rear fenders are the spot welds which seal the rear of the XJ's unibody contstruction. They're somewhat difficult to see if you aren't looking closely, but you'll certainly want to identify and locate them before making any cuts. Take a look at a couple of the pics below, you can see the spot welds which exist on either side of the hole where the fender flare retainer brackets were once fastened.

Now that I located the spot welds, the cutting begins with the first lip. I taped it off so that I'd have a nice guide to run my Dremmel along.

Weapon of choice:

The Dremmel makes a nice clean cut:
First lip gone:

Tape removed:

Spot welds still in tact:

Now that I located the spot welds, the cutting begins with the first lip. I taped it off so that I'd have a nice guide to run my Dremmel along.
Weapon of choice:
The Dremmel makes a nice clean cut:
First lip gone:
Tape removed:
Spot welds still in tact:
04-30-2011, 09:57 PM
#430
Seasoned Member
Thread Starter
Join Date: May 2010
Location: Columbus, OH
Posts: 415
Likes: 0
Received 0 Likes
on
0 Posts
Year: 2001
Model: Cherokee
Engine: 4.0 I6
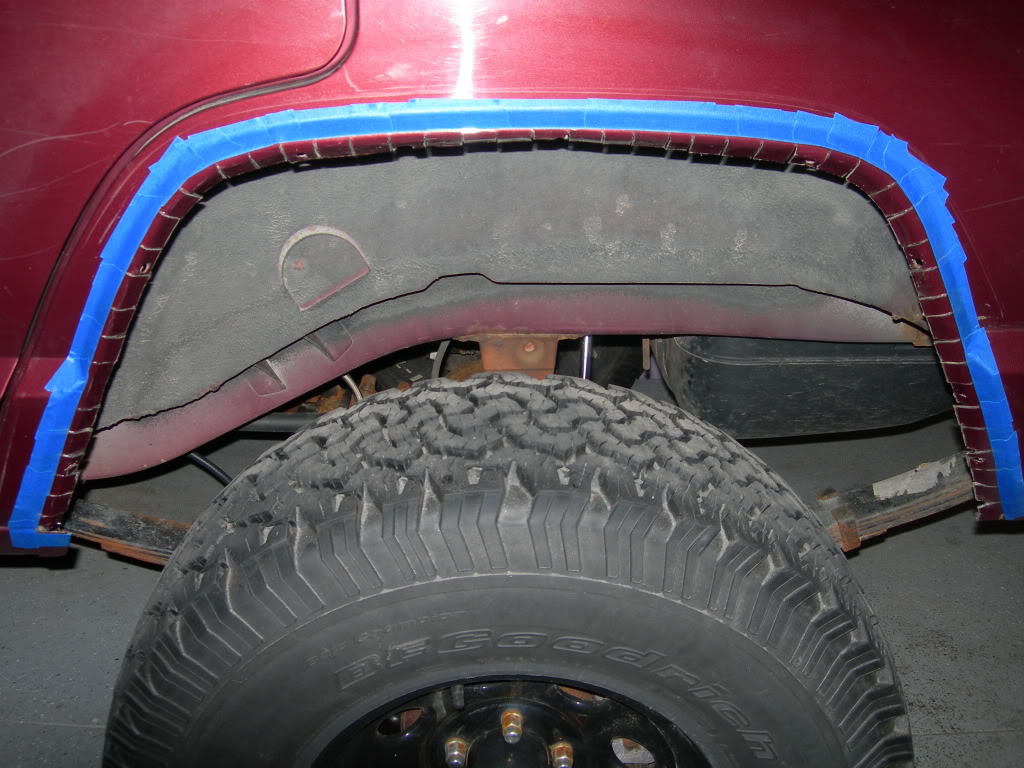
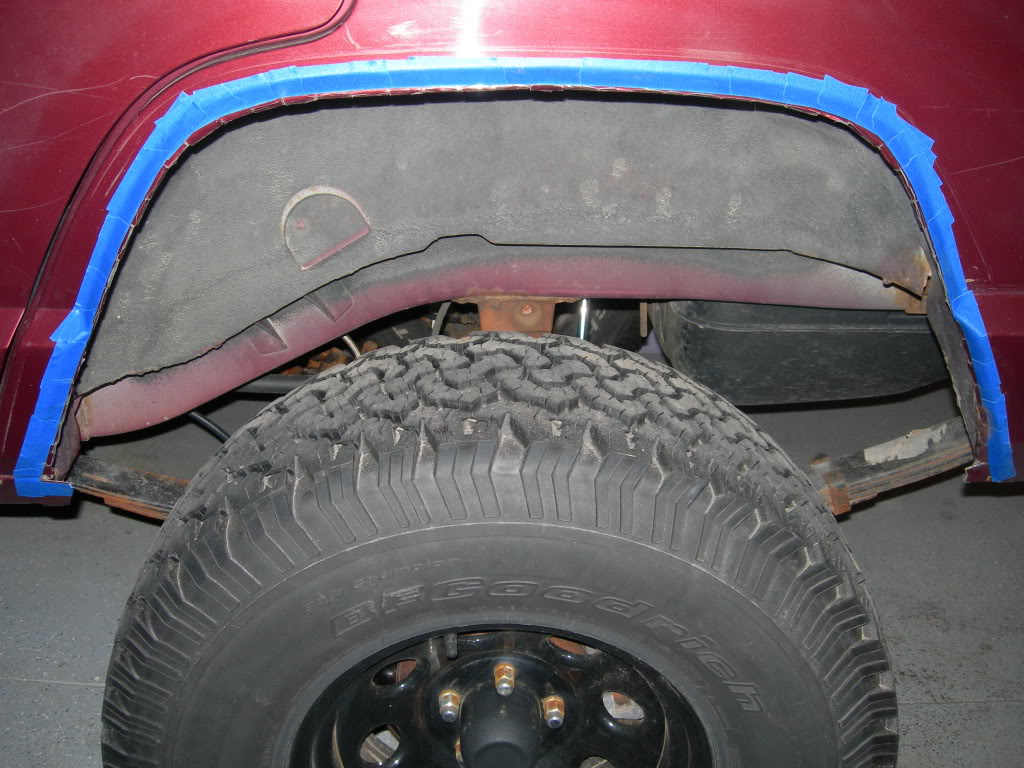
The next order of business is to start making vertical cuts into the fender. In order to make sure my cuts were clear of the spot welds, I identified each and every one of them with pieces of vertical tape. In this way, I would know my cuts should be between the tape. Here's what it looked like all taped up:


So I whipped out the trusty old Dremmel and went to town:


So I whipped out the trusty old Dremmel and went to town:
04-30-2011, 10:05 PM
#431
Seasoned Member
Thread Starter
Join Date: May 2010
Location: Columbus, OH
Posts: 415
Likes: 0
Received 0 Likes
on
0 Posts
Year: 2001
Model: Cherokee
Engine: 4.0 I6
Once all the cuts are made you are left with a bunch of tabs. I started bending them all back one at a time with a pair of pliers:

Here they are all bent back:
I used a rubber mallet and hammer to put the tabs into their final position:

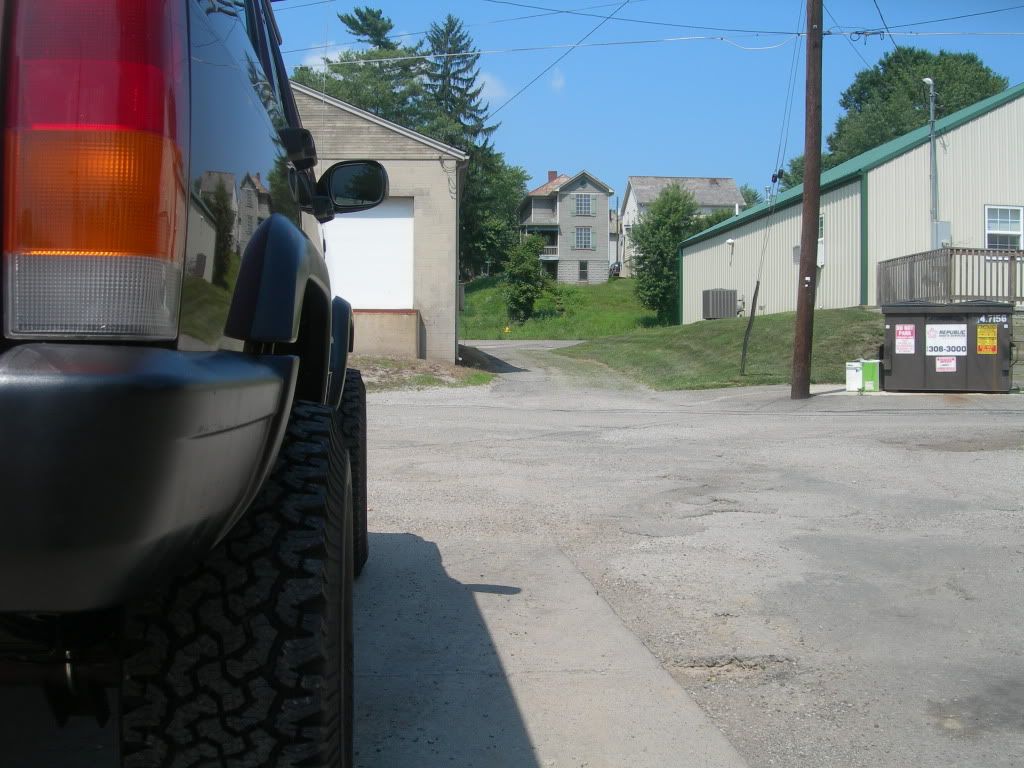
That's all the further I got tonight. I still have ALOT of cleaning up to do, as far as sanding down the chipped paint, sealing everything up and figuring out what I'm going to do to dress up the new look.
More to follow tomorrow....
Here they are all bent back:
I used a rubber mallet and hammer to put the tabs into their final position:
That's all the further I got tonight. I still have ALOT of cleaning up to do, as far as sanding down the chipped paint, sealing everything up and figuring out what I'm going to do to dress up the new look.
More to follow tomorrow....
05-01-2011, 06:41 AM
#432
Senior Member
Join Date: May 2009
Location: dingmans Ferry, PA
Posts: 887
Likes: 0
Received 0 Likes
on
0 Posts
Year: 99
Model: Cherokee
Engine: 4.0
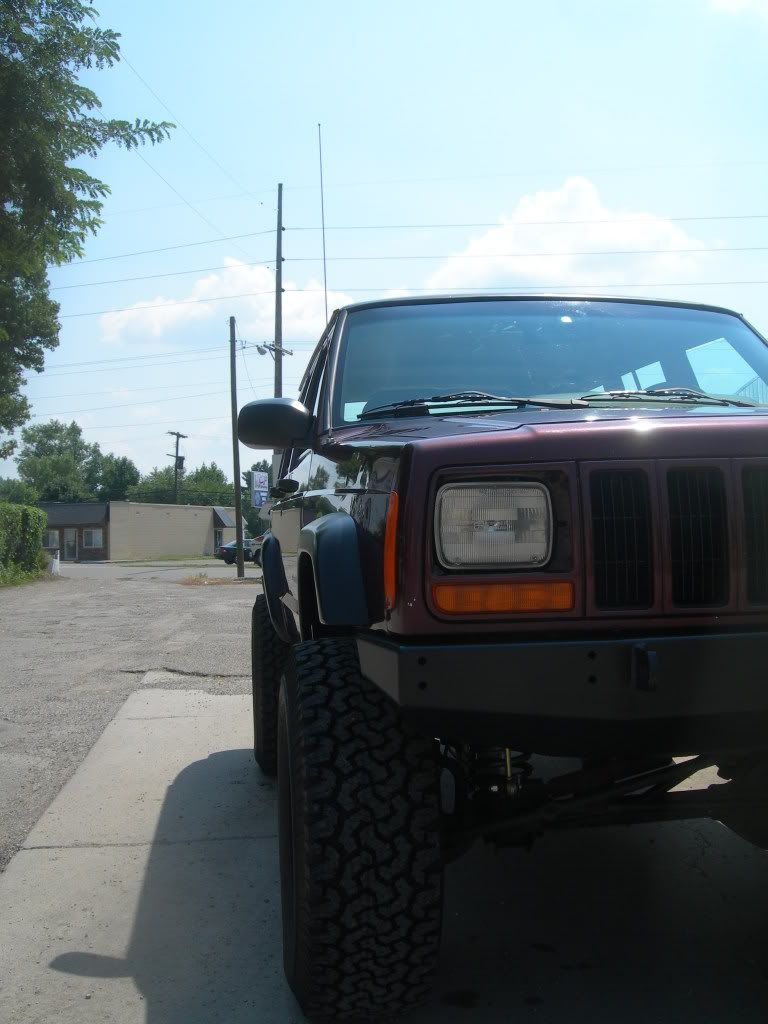
very nice...whats funny on the second picture my wife asked if there was a dent on you front passanger door...my reply: no, thats his reflection, we dont get reflections on our jeep any more

 05-02-2011, 11:29 PM
#433
CF Veteran
Join Date: Jan 2011
Location: Las Vegas
Posts: 1,894
Likes: 0
Received 4 Likes
on
4 Posts
Year: 1999
Model: Cherokee
Engine: 4.0
That's some awesome work you done on your rig....LOVING IT !
Thx for taking time to take so many pics, it really help newbie like myself (it must be a pain between wrenching and taking pics
  , appreciate what you done tho).
Oh, did you manage to set up a security system?
Keep up the good work!
Thx for taking time to take so many pics, it really help newbie like myself
(it must be a pain between wrenching and taking pics Oh, did you manage to set up a security system?
Keep up the good work!
05-04-2011, 09:08 AM
#434
Seasoned Member
Thread Starter
Join Date: May 2010
Location: Columbus, OH
Posts: 415
Likes: 0
Received 0 Likes
on
0 Posts
Year: 2001
Model: Cherokee
Engine: 4.0 I6
That's some awesome work you done on your rig....LOVING IT !
Thx for taking time to take so many pics, it really help newbie like myself (it must be a pain between wrenching and taking pics , appreciate what you done tho).
Oh, did you manage to set up a security system?
Keep up the good work!
Thx for taking time to take so many pics, it really help newbie like myself
(it must be a pain between wrenching and taking pics Oh, did you manage to set up a security system?
Keep up the good work!
About the security system, not yet. Recently, I've just been avoiding the parking garage where it happened, which really just means I've been driving my other car.
05-04-2011, 09:28 AM
#435
CF Veteran
Join Date: Jun 2010
Location: Ohio
Posts: 2,117
Likes: 0
Received 3 Likes
on
3 Posts
Year: 1998
Model: Cherokee
Engine: 4.0 stock
Man... Thieves suck... My 95 Cherokee was stolen and wasn't recovered for almost 4 months. The kid got caught but was only charged with receiving stolen property
I have a security/keyless entry on mine. Not that it is thief proof I'm hoping they just leave it alone and move on to an easier target...
I have a security/keyless entry on mine. Not that it is thief proof I'm hoping they just leave it alone and move on to an easier target...