
Project Do work - 2001 XJ Build (Pic intensive)

 08-05-2011, 09:06 AM
#558
Seasoned Member
Thread Starter
Join Date: May 2010
Location: Columbus, OH
Posts: 415
Likes: 0
Received 0 Likes
on
0 Posts
Year: 2001
Model: Cherokee
Engine: 4.0 I6
Thanks Jake! Lovin the new interior of yours as well. Avatar change? As you wish...

Excited to see your build thread take off now that the lift kit is ordered. Get to work! And don't forget to take some pics for us here on the forum.
Excited to see your build thread take off now that the lift kit is ordered. Get to work! And don't forget to take some pics for us here on the forum.
08-05-2011, 09:25 AM
#559
CF Veteran
Join Date: Oct 2010
Location: York PA/State College PA
Posts: 2,412
Likes: 0
Received 1 Like
on
1 Post
Year: 2001
Model: Cherokee
Engine: 4.0L I6
Originally Posted by sanchezcruz_20
Excited to see your build thread take off now that the lift kit is ordered. Get to work! And don't forget to take some pics for us here on the forum.
08-07-2011, 12:02 AM
#560
Seasoned Member
Thread Starter
Join Date: May 2010
Location: Columbus, OH
Posts: 415
Likes: 0
Received 0 Likes
on
0 Posts
Year: 2001
Model: Cherokee
Engine: 4.0 I6
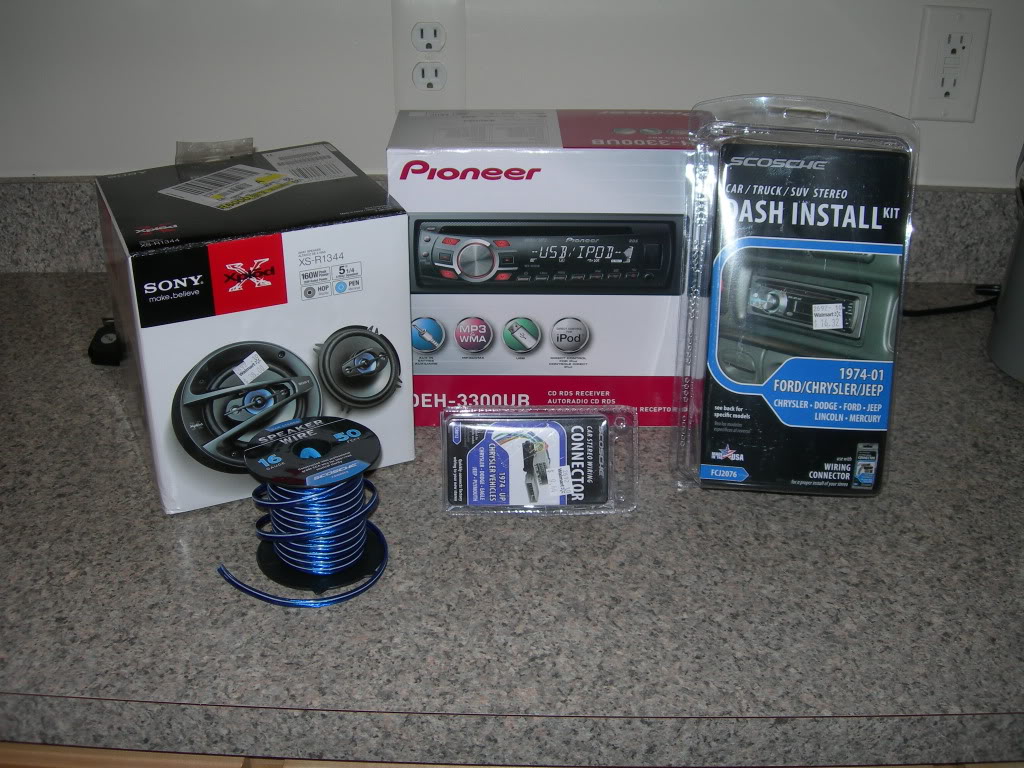
Got tired of only having rear speakers so I went out and picked up a few basic things at the store today:
The front speakers have not worked well for me since I bought the XJ. The passenger speaker never worked, while the driver speaker worked only occasionally.
Apparently, this is a common issue in the XJ. Typically, there is a break down in the wiring between the headset and the speaker. Repeated opening and closing of the doors wears on the wiring passing through the rubber boot in the door jamb leading to eventual failure of the connection.
There are a couple ways to rectify this problem. Some prefer to identify the location of the wiring fault and replace that section of wire, usually between the interior kick panel and speaker. I inspected the wire in that location as best I could and could not find any obvious interruptions in the the continuity of the wire. However, good inspection was difficult due to the obstruction from the rubber boot and factory wire wrapping/taping. I decided I didn't want to trace the wires further or pick apart any of the harnesses so I moved on to an alternative solution.
I decided to replace the entire wire from the headset to the speaker. Off to the store to pick up the goodies. I figured while I was at it, I might as well upgrade the speakers and the headset from the underperforming stock pieces. The headset volume control **** on the factory unit was becoming increasingly more diffuclt to operate, so it was due for replacement anyway.
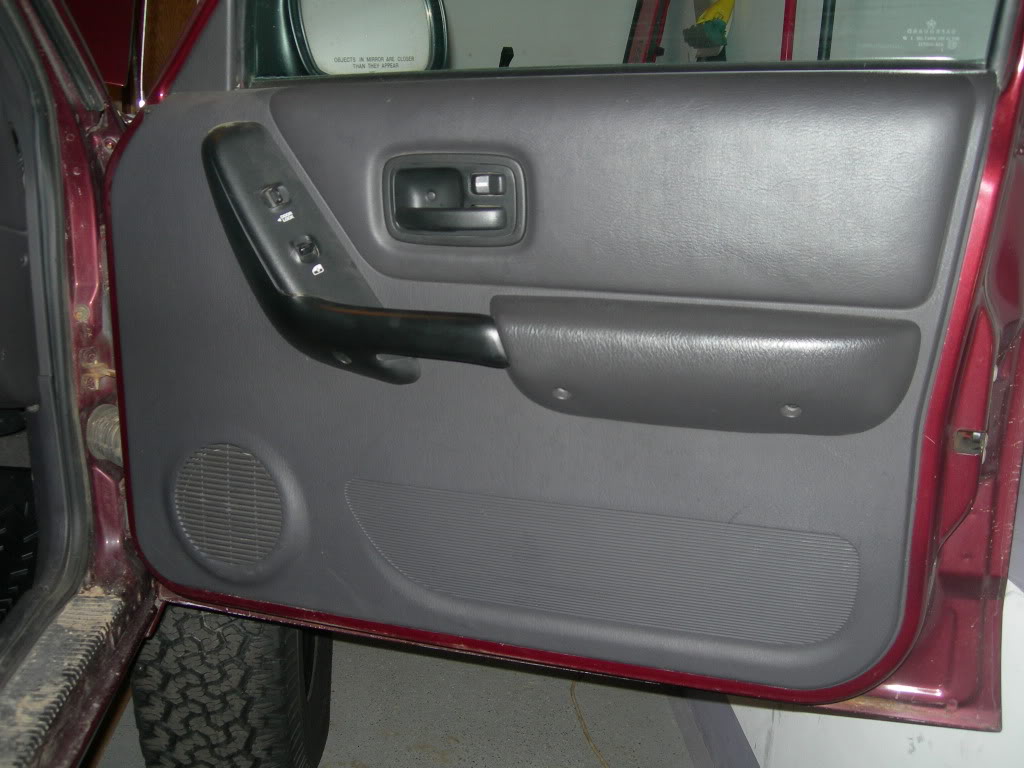
The first thing I did was to gain access to the speaker by removing the interior door trim panel. There are 5 phillips head screws that need to be removed. 3 on/under the arm rest, one in the door handle and another in the upper left hand corner:
Once the screws are removed, you can start gently prying back on the trim. There are several push pins around the perimeter of the trim, sometimes they require a bit of force to remove.

With the push pins released, you'll need to raise the trim a bit to remove it from the recessed edge that it lays in. Then, you'll be able to see behind the trim and begin disassembling the door latch:
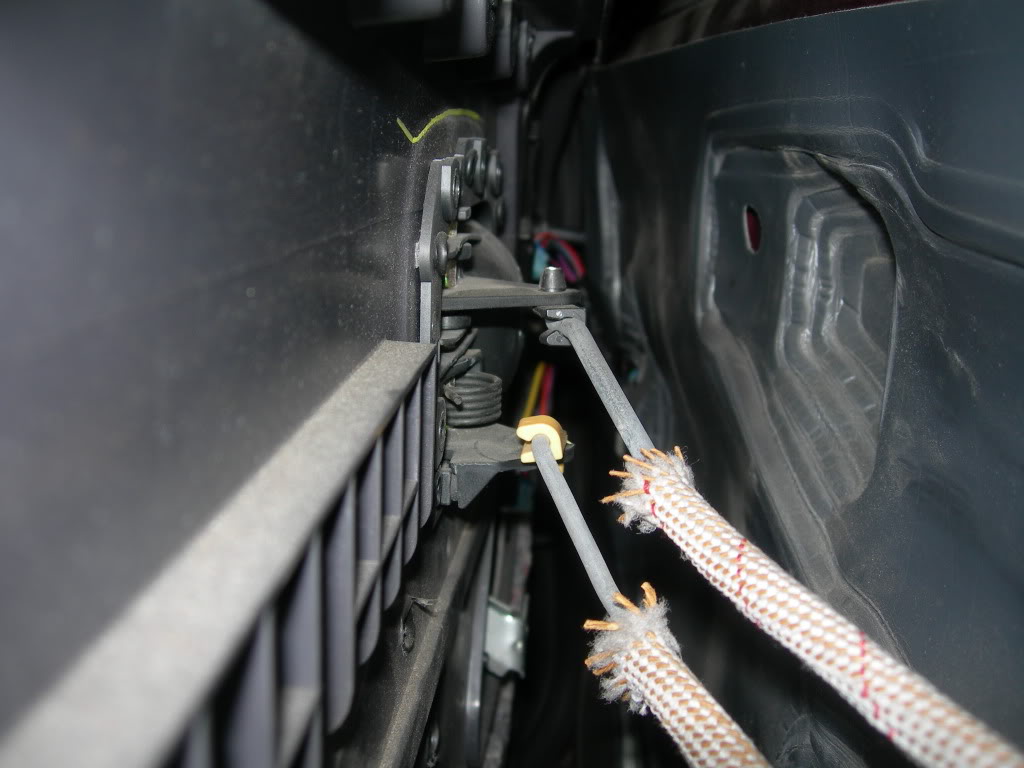
There are 2 clips on the rods which will have to be removed to release the rods from the interior door handle mechanism:

Then remove the 2 electrical connectors:
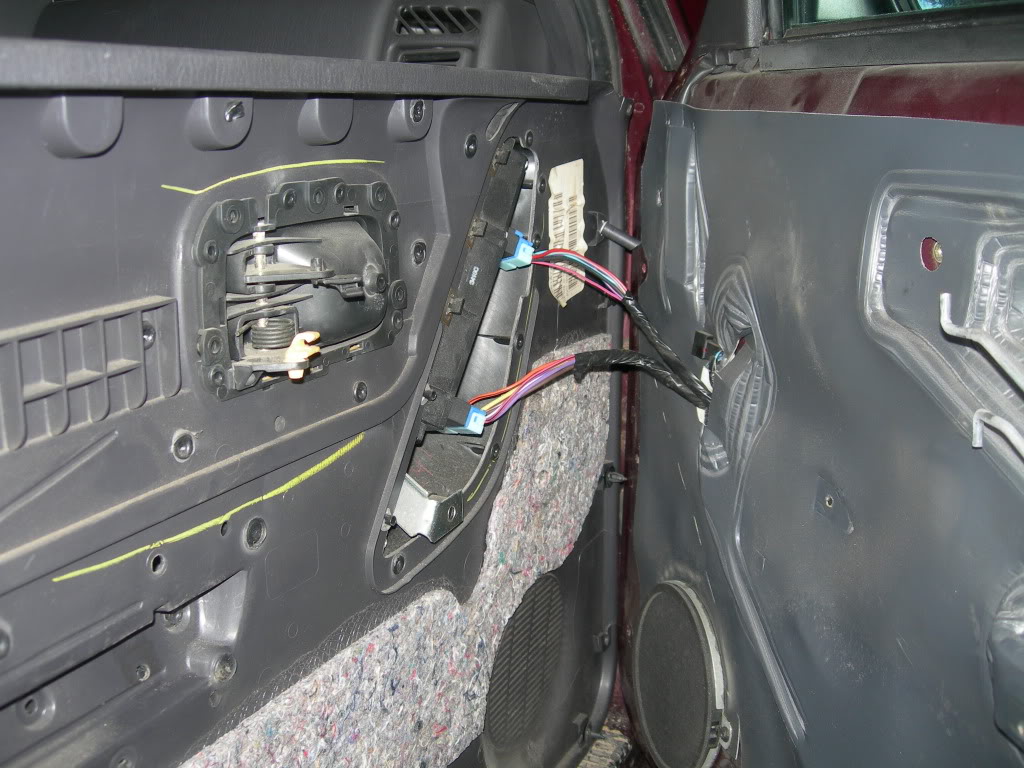
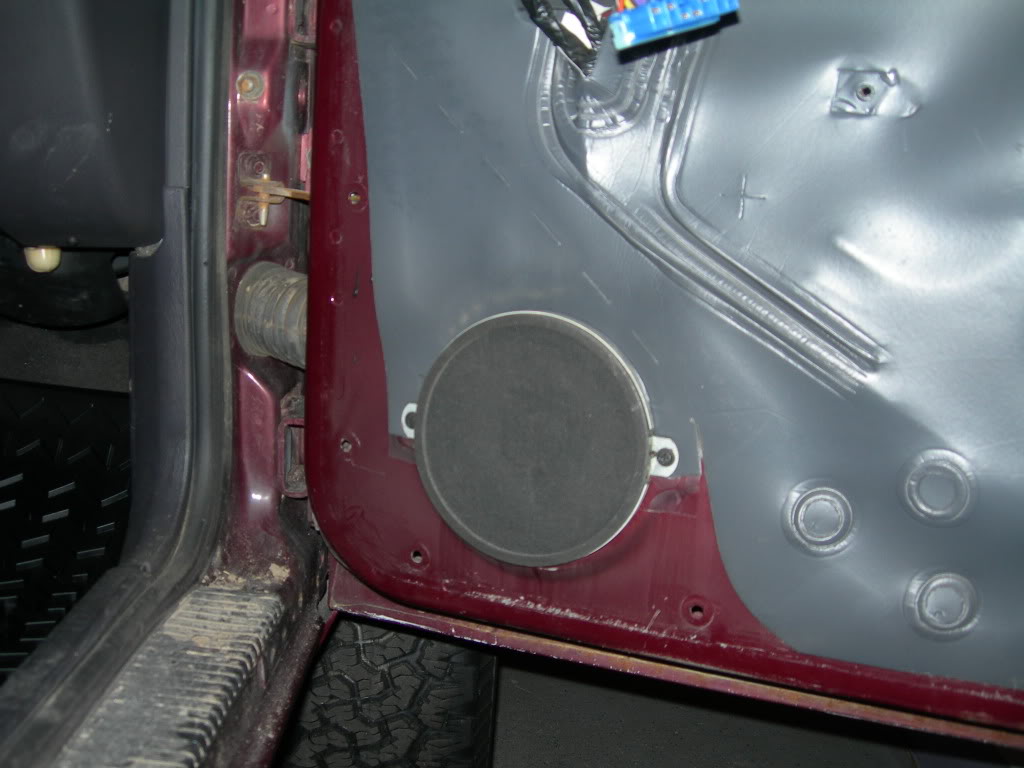
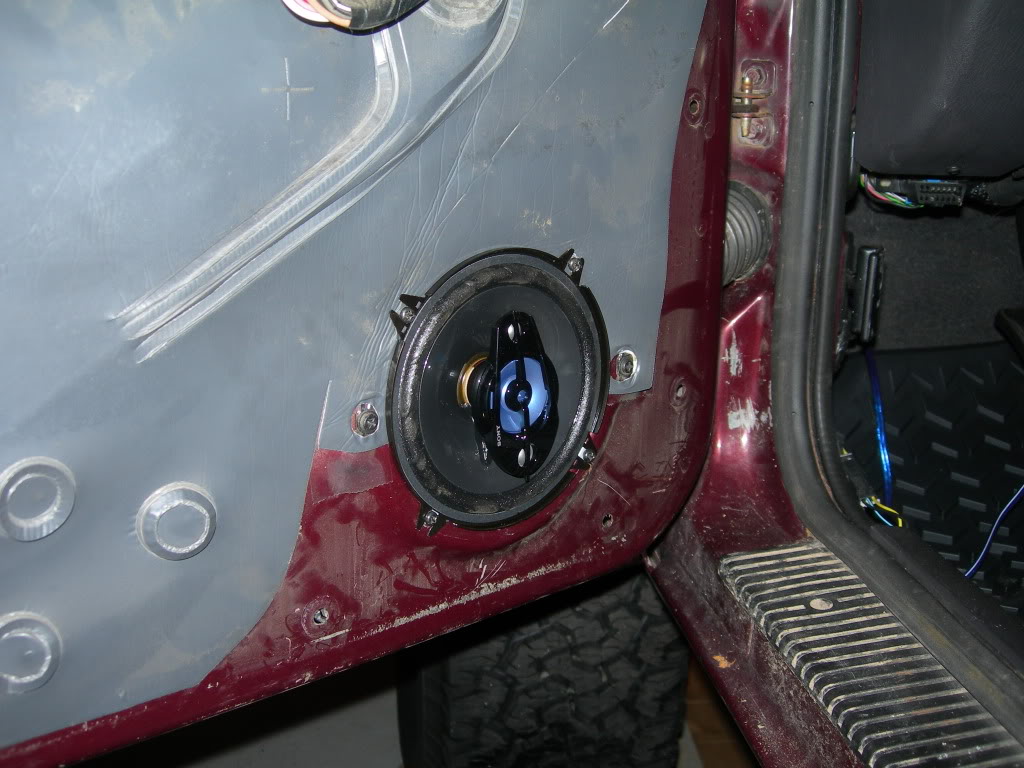
With the interior panel removed, the speaker is exposed:
The front speakers have not worked well for me since I bought the XJ. The passenger speaker never worked, while the driver speaker worked only occasionally.
Apparently, this is a common issue in the XJ. Typically, there is a break down in the wiring between the headset and the speaker. Repeated opening and closing of the doors wears on the wiring passing through the rubber boot in the door jamb leading to eventual failure of the connection.
There are a couple ways to rectify this problem. Some prefer to identify the location of the wiring fault and replace that section of wire, usually between the interior kick panel and speaker. I inspected the wire in that location as best I could and could not find any obvious interruptions in the the continuity of the wire. However, good inspection was difficult due to the obstruction from the rubber boot and factory wire wrapping/taping. I decided I didn't want to trace the wires further or pick apart any of the harnesses so I moved on to an alternative solution.
I decided to replace the entire wire from the headset to the speaker. Off to the store to pick up the goodies. I figured while I was at it, I might as well upgrade the speakers and the headset from the underperforming stock pieces. The headset volume control **** on the factory unit was becoming increasingly more diffuclt to operate, so it was due for replacement anyway.
The first thing I did was to gain access to the speaker by removing the interior door trim panel. There are 5 phillips head screws that need to be removed. 3 on/under the arm rest, one in the door handle and another in the upper left hand corner:
Once the screws are removed, you can start gently prying back on the trim. There are several push pins around the perimeter of the trim, sometimes they require a bit of force to remove.
With the push pins released, you'll need to raise the trim a bit to remove it from the recessed edge that it lays in. Then, you'll be able to see behind the trim and begin disassembling the door latch:
There are 2 clips on the rods which will have to be removed to release the rods from the interior door handle mechanism:
Then remove the 2 electrical connectors:
With the interior panel removed, the speaker is exposed:
08-07-2011, 12:09 AM
#561
Seasoned Member
Thread Starter
Join Date: May 2010
Location: Columbus, OH
Posts: 415
Likes: 0
Received 0 Likes
on
0 Posts
Year: 2001
Model: Cherokee
Engine: 4.0 I6
Remove the speaker from the door by removing the 2 screws:
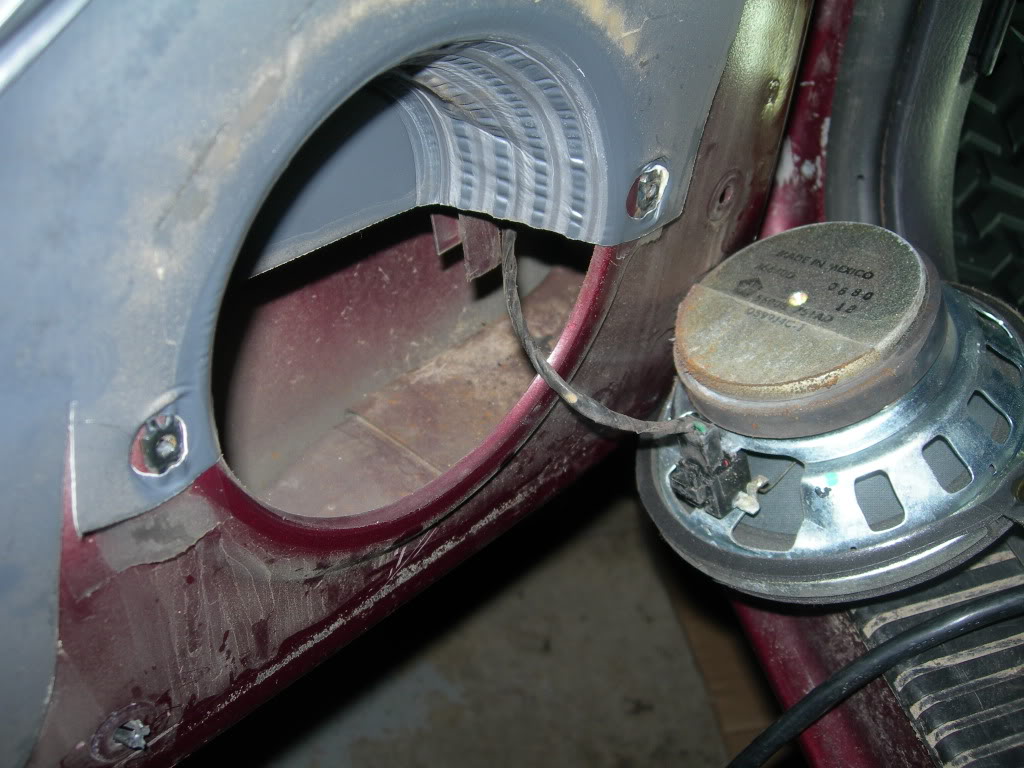
Disconnect the speaker from the wiring harness.
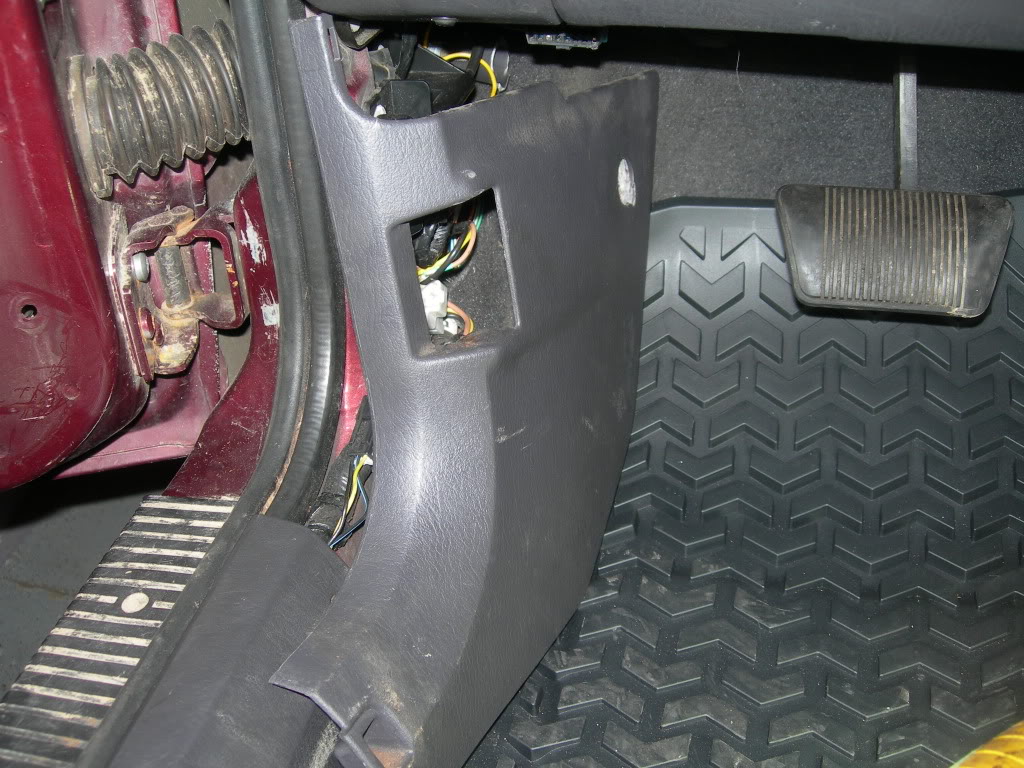
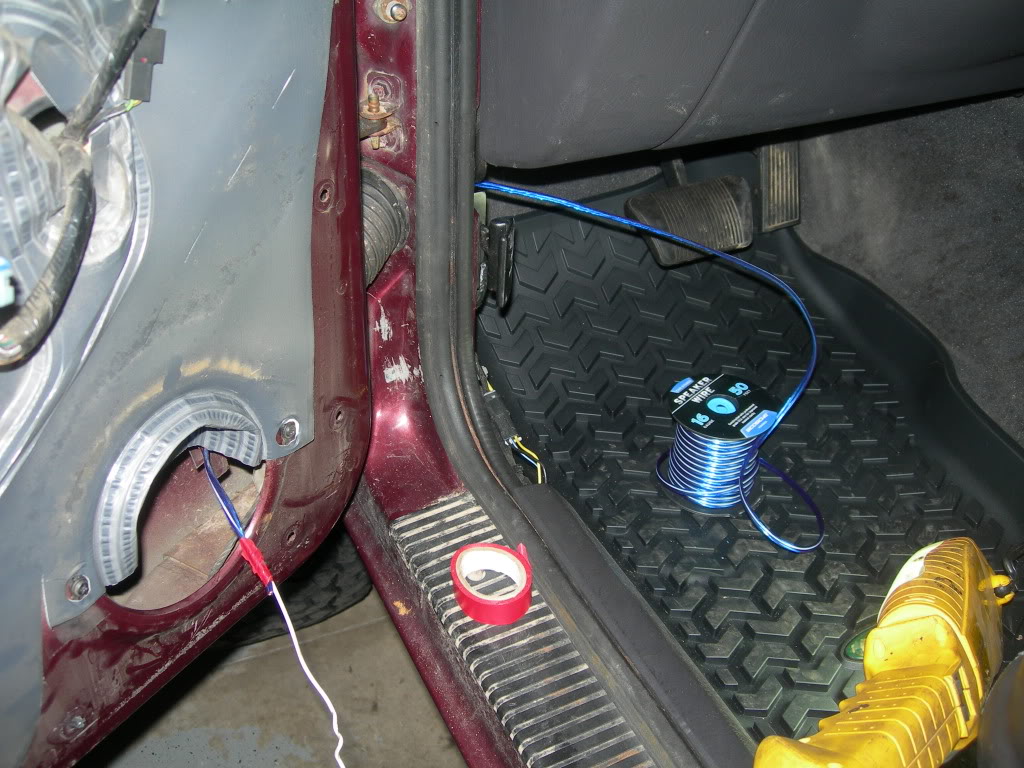
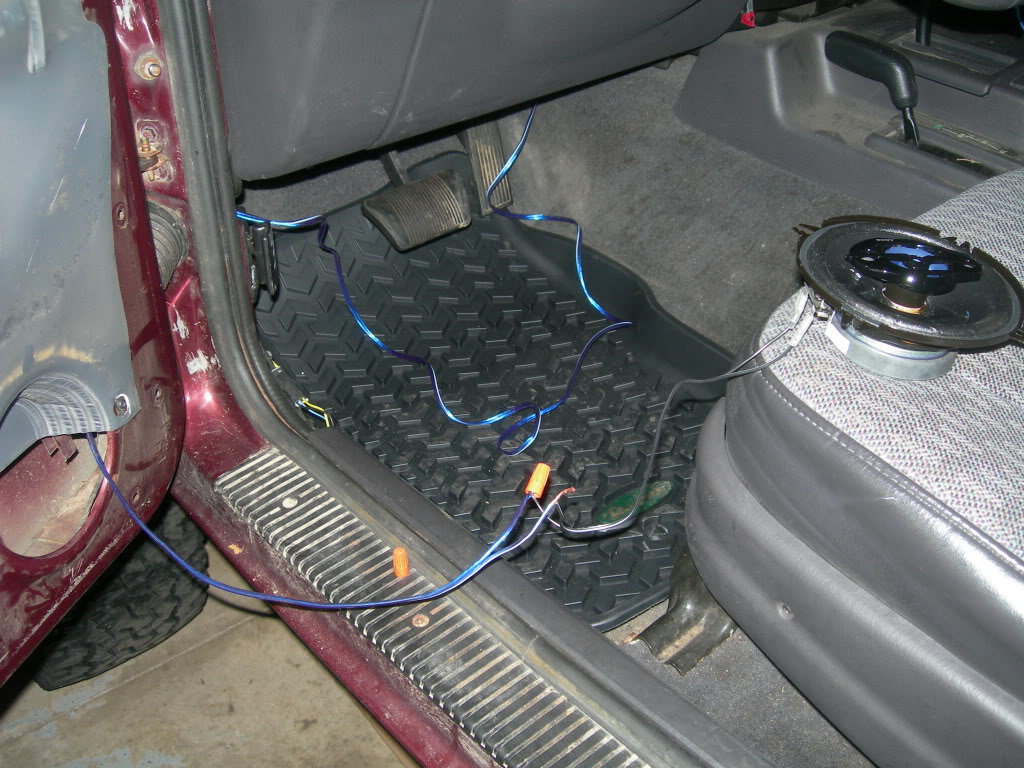
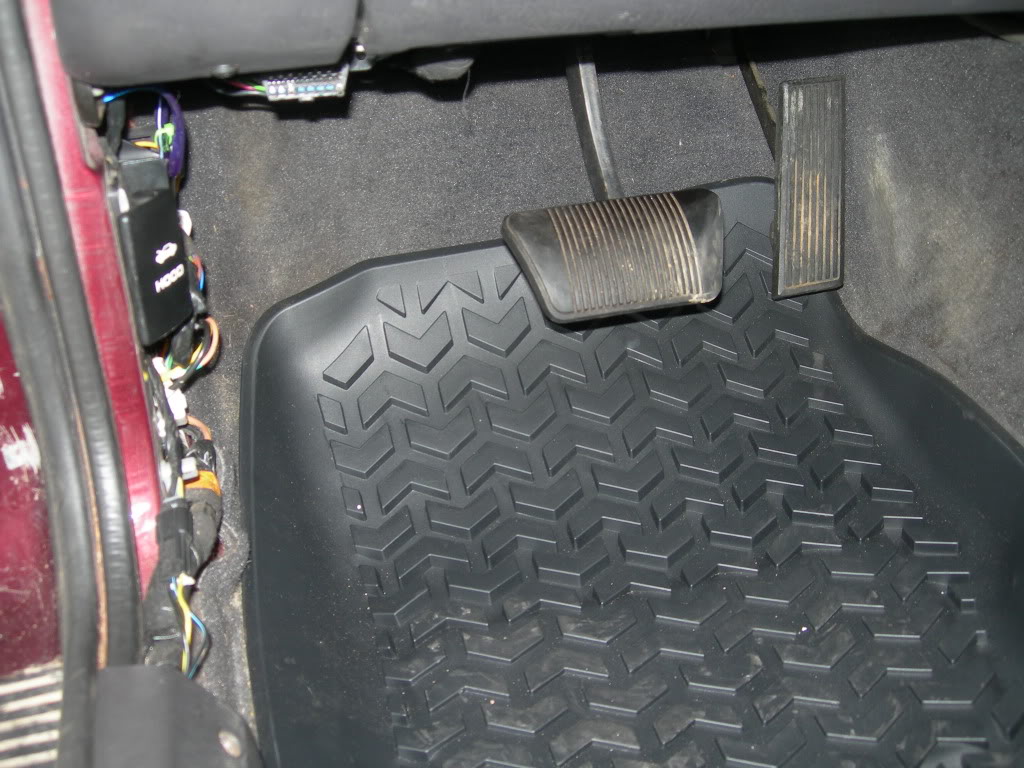
Turning to the interior, remove the door sill trim piece which allows removal of the foot well kick panel:

Now take your trusty old coat hanger and run it through the rubber boot to fish your new wiring:
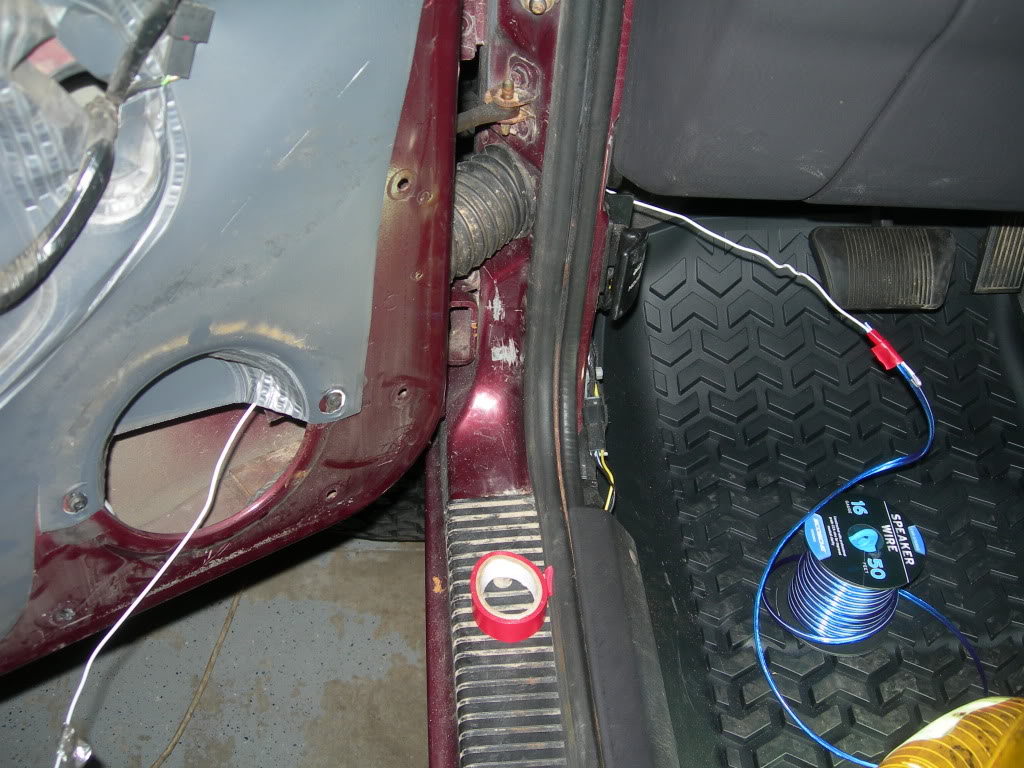
Pull the wiring through:
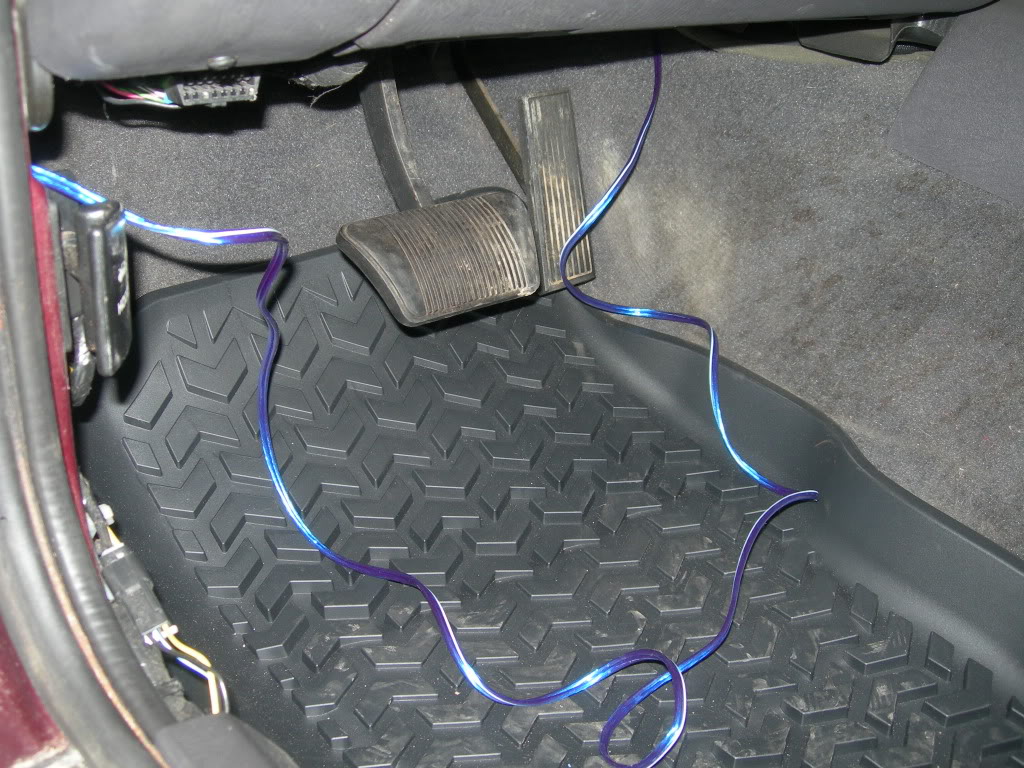
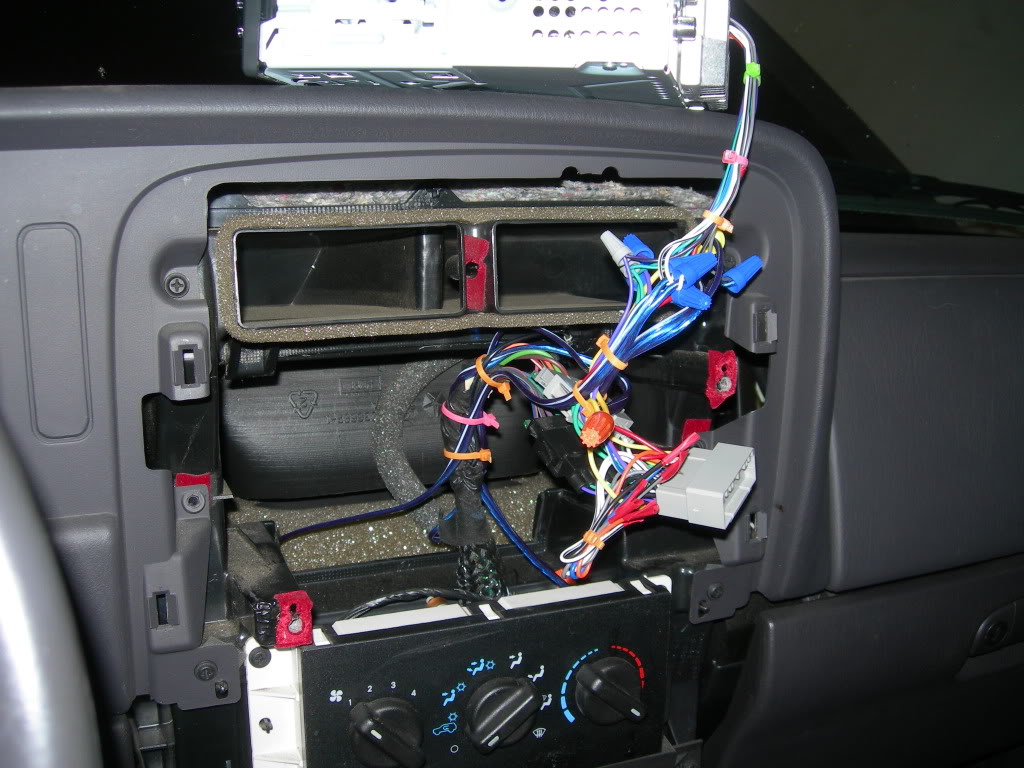
Then follow the same procedure in the dash to fish the new speaker wire up to the headset:

Make sure to give yourself enough wiring to properly hide it and so it'll reach:
Disconnect the speaker from the wiring harness.
Turning to the interior, remove the door sill trim piece which allows removal of the foot well kick panel:
Now take your trusty old coat hanger and run it through the rubber boot to fish your new wiring:
Pull the wiring through:
Then follow the same procedure in the dash to fish the new speaker wire up to the headset:
Make sure to give yourself enough wiring to properly hide it and so it'll reach:
08-07-2011, 12:25 AM
#562
Seasoned Member
Thread Starter
Join Date: May 2010
Location: Columbus, OH
Posts: 415
Likes: 0
Received 0 Likes
on
0 Posts
Year: 2001
Model: Cherokee
Engine: 4.0 I6
Cut and strip the wire at the speaker end:
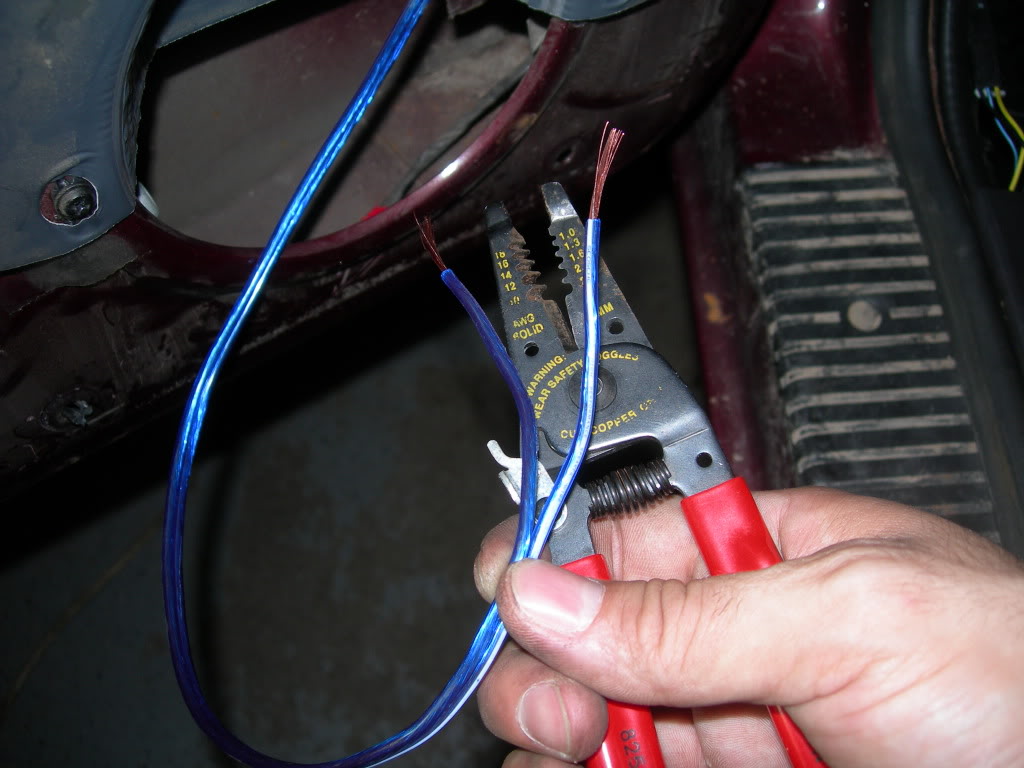
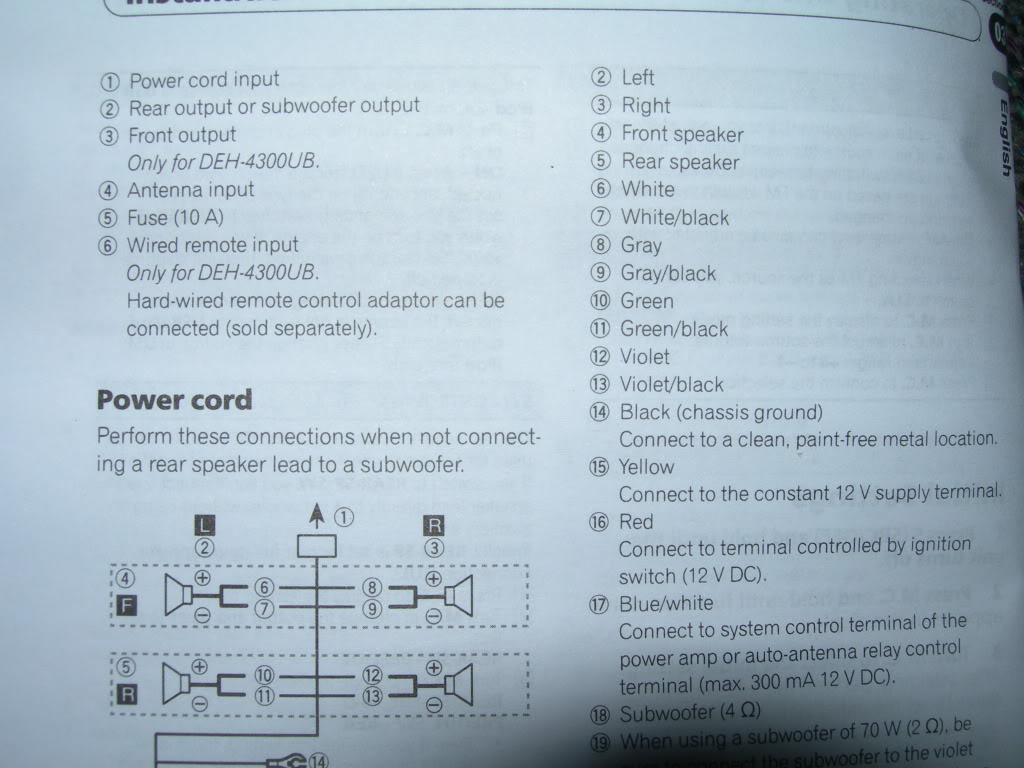
At this point, you'll want to reference the wiring diagram that came with your headset to locate the appropriate speaker outputs:
I used wire nuts to connect the new speaker wiring to the new speaker. They're fast and easy to work with. For the sake of clarity, I also tried to maintain the same "striping" of the wires, so solid mated with solid and striped with striped.
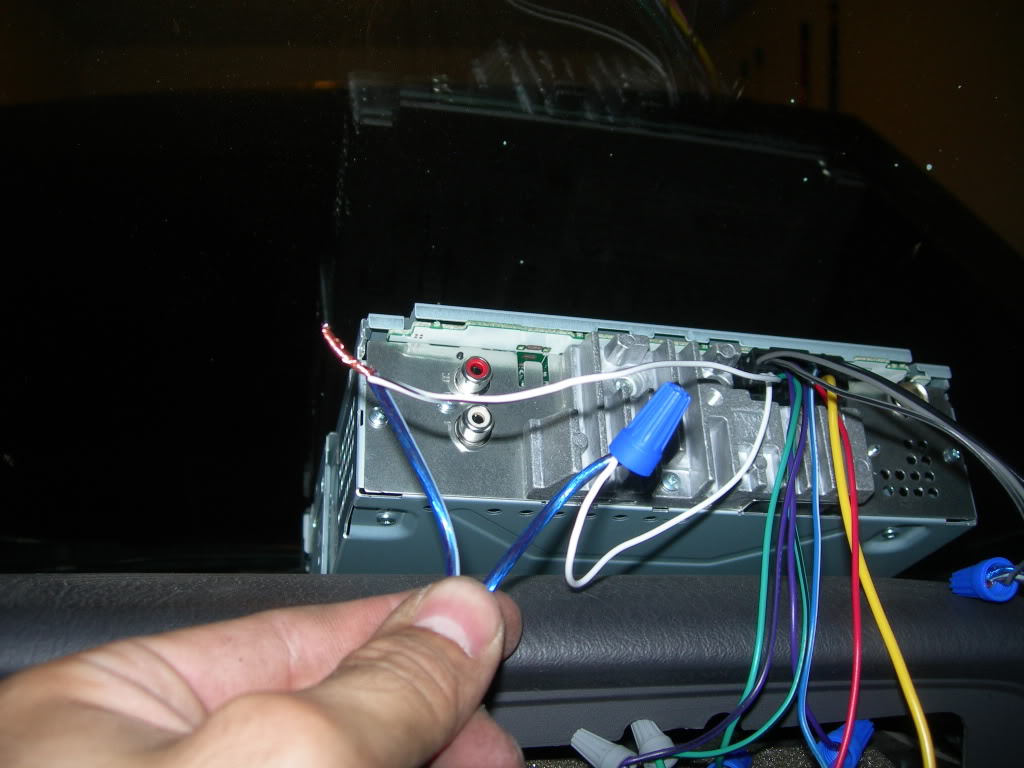
I repeated this process at the headset using the wiring diagram provided to identify the appropriate wires:
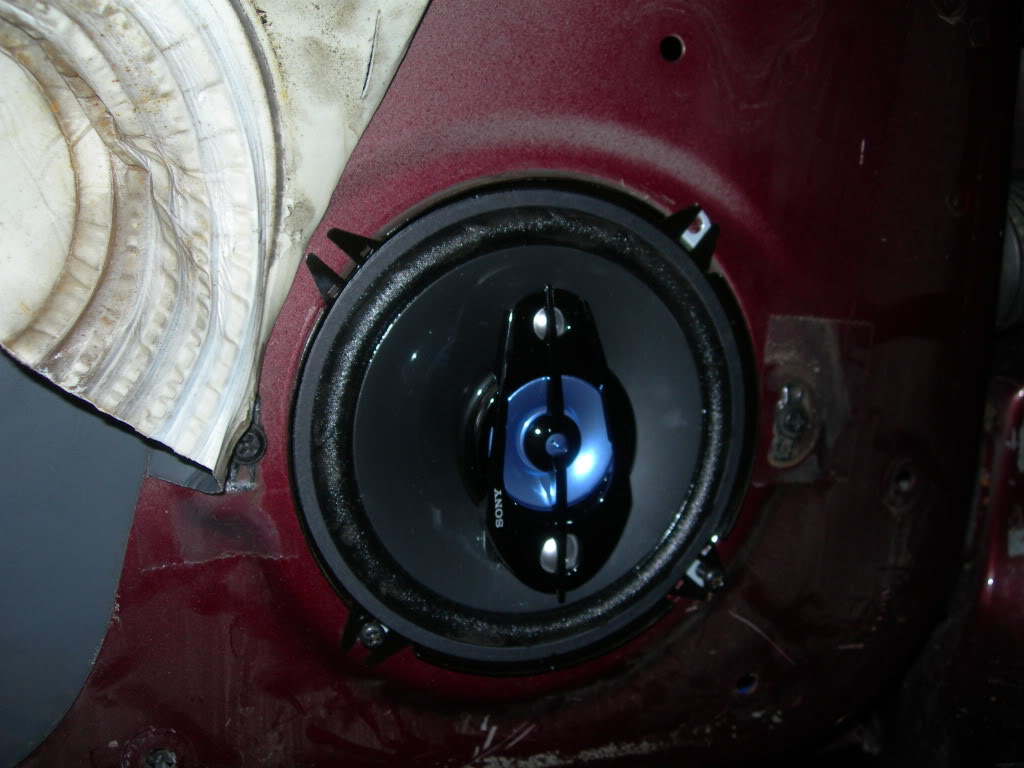
After testing proper speaker operation, I began mounting the speaker to it's new home. One issue I had was that the factory mounting screws were too far apart to anchor the new speaker. I ended up having to drill some new holes. The speakers came with some mounting hardware and it worked out great:
At this point, you'll want to reference the wiring diagram that came with your headset to locate the appropriate speaker outputs:
I used wire nuts to connect the new speaker wiring to the new speaker. They're fast and easy to work with. For the sake of clarity, I also tried to maintain the same "striping" of the wires, so solid mated with solid and striped with striped.
I repeated this process at the headset using the wiring diagram provided to identify the appropriate wires:
After testing proper speaker operation, I began mounting the speaker to it's new home. One issue I had was that the factory mounting screws were too far apart to anchor the new speaker. I ended up having to drill some new holes. The speakers came with some mounting hardware and it worked out great:
08-07-2011, 12:29 AM
#563
Seasoned Member
Thread Starter
Join Date: May 2010
Location: Columbus, OH
Posts: 415
Likes: 0
Received 0 Likes
on
0 Posts
Year: 2001
Model: Cherokee
Engine: 4.0 I6
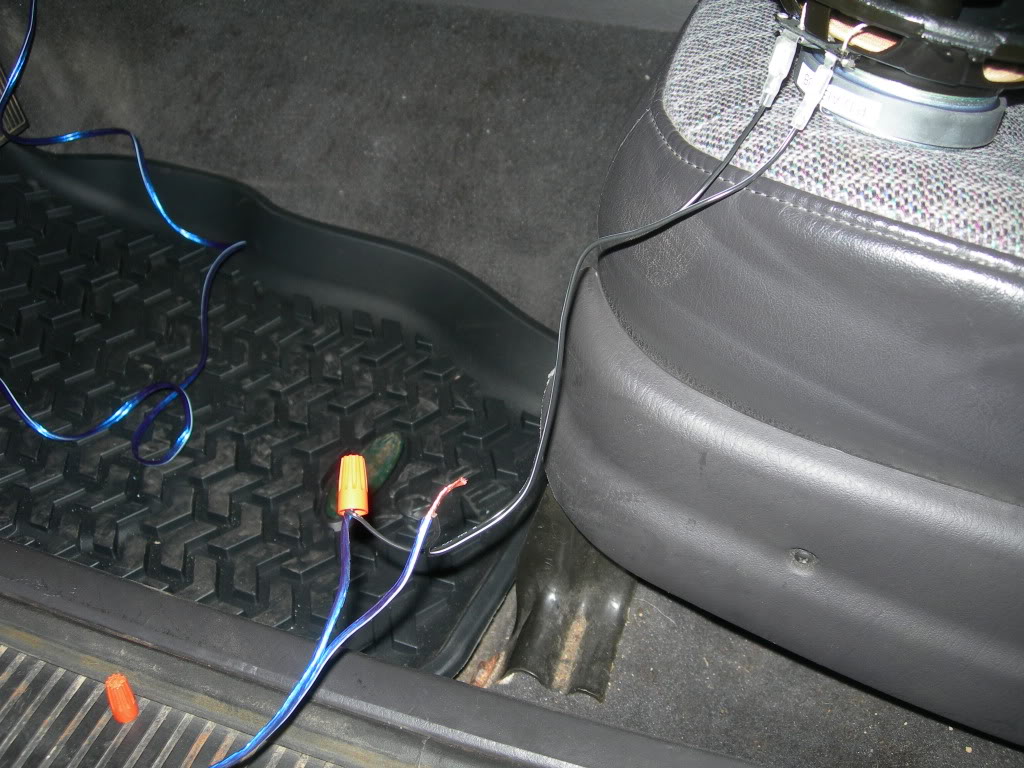
Time to clean up and hide the wires. A few zip ties and some tucking behind the carpet:
Then reinstall the interior trim pieces.
I then cleaned up the headset wiring harness a bit:
And bolted it back in place using the dash install kit:
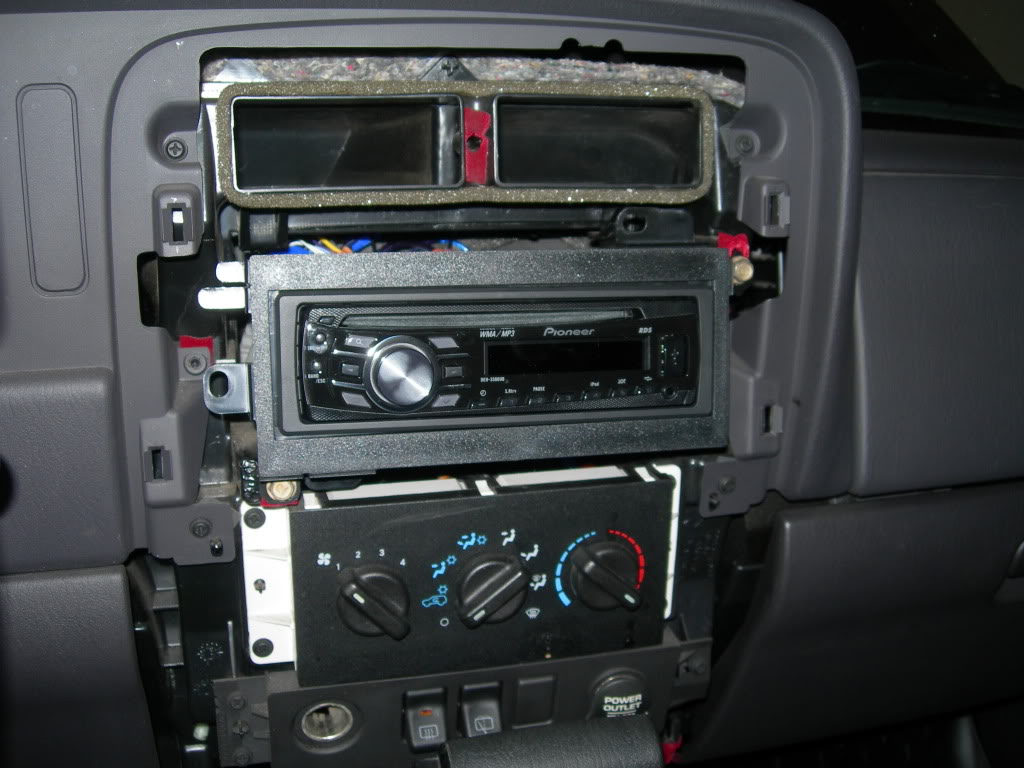
Then, reinstall the trim:
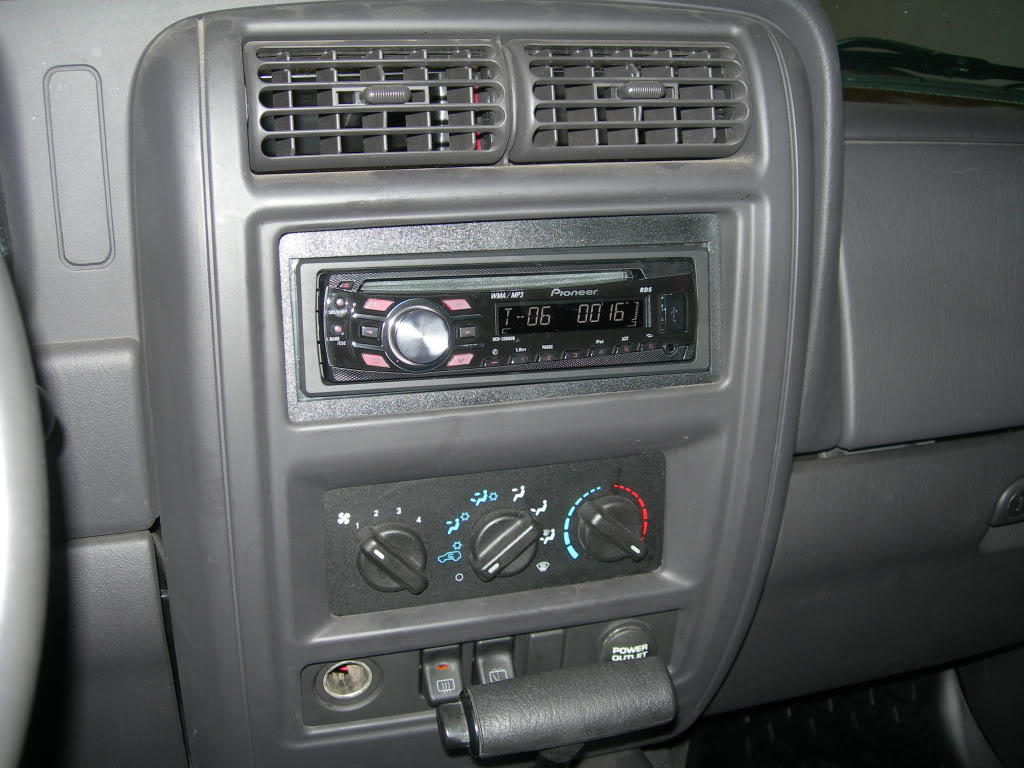
And now I'm enjoying all 4 speakers!
Then reinstall the interior trim pieces.
I then cleaned up the headset wiring harness a bit:
And bolted it back in place using the dash install kit:
Then, reinstall the trim:
And now I'm enjoying all 4 speakers!
08-07-2011, 09:14 AM
#566
Seasoned Member
Thread Starter
Join Date: May 2010
Location: Columbus, OH
Posts: 415
Likes: 0
Received 0 Likes
on
0 Posts
Year: 2001
Model: Cherokee
Engine: 4.0 I6
It scares me too! I don't know if you noticed, but I don't have any offroad lights either, lol.
Honestly, this little project wasn't bad at all... basically just 2 wires, a positive and a negative between the speaker and CD player.
Weld? Do you mean, solder?
 Unfortunately, I don't have either of those tools for the job. Thanks for the advice though.
08-07-2011, 09:46 AM
Unfortunately, I don't have either of those tools for the job. Thanks for the advice though.
08-07-2011, 09:46 AM
#567
CF Veteran
Join Date: Oct 2010
Location: York PA/State College PA
Posts: 2,412
Likes: 0
Received 1 Like
on
1 Post
Year: 2001
Model: Cherokee
Engine: 4.0L I6
Originally Posted by sanchezcruz_20
Thanks.
It scares me too! I don't know if you noticed, but I don't have any offroad lights either, lol.
Honestly, this little project wasn't bad at all... basically just 2 wires, a positive and a negative between the speaker and CD player.
08-07-2011, 09:54 AM
#568
Junior Member
Join Date: Aug 2011
Location: Montreal, Quebec
Posts: 81
Likes: 0
Received 0 Likes
on
0 Posts
Model: Cherokee
Originally Posted by sanchezcruz_20
Thanks.
It scares me too! I don't know if you noticed, but I don't have any offroad lights either, lol.
Honestly, this little project wasn't bad at all... basically just 2 wires, a positive and a negative between the speaker and CD player.
Thanks for checking out my build.
Weld? Do you mean, solder?
Unfortunately, I don't have either of those tools for the job. Thanks for the advice though.I'm a French Canadian, I have a tendency to mix up some words.
But how is the sound?
08-07-2011, 11:29 AM
#569
Seasoned Member
Thread Starter
Join Date: May 2010
Location: Columbus, OH
Posts: 415
Likes: 0
Received 0 Likes
on
0 Posts
Year: 2001
Model: Cherokee
Engine: 4.0 I6

The sound is great! It should be, I went from only 2 REAR speakers to 4 speakers.
The speakers certainly aren't competition grade but they are a ton better than the 10 year-old factory ones.
08-07-2011, 11:46 AM
#570
Junior Member
Join Date: Aug 2011
Location: Montreal, Quebec
Posts: 81
Likes: 0
Received 0 Likes
on
0 Posts
Model: Cherokee
Originally Posted by sanchezcruz_20
Haha, no problem
The sound is great! It should be, I went from only 2 REAR speakers to 4 speakers.
The speakers certainly aren't competition grade but they are a ton better than the 10 year-old factory ones.