
Project Do work - 2001 XJ Build (Pic intensive)
 09-21-2011, 09:08 AM
#646
Seasoned Member
Thread Starter
Join Date: May 2010
Location: Columbus, OH
Posts: 415
Likes: 0
Received 0 Likes
on
0 Posts
Year: 2001
Model: Cherokee
Engine: 4.0 I6
Wow, that was a lot to read. I really appreciate your taking so many pictures. I am still stock as far as suspension goes, I have been reading a lot of build threads lately for ideas, so like I said, it's nice to see one so well documented.
Oh! And I learned a new word from you: concomitant
I look forward to seeing you do work!
Oh! And I learned a new word from you: concomitant
I look forward to seeing you do work!

Thanks for the comments! Good luck with your build.
great build! you make all the Michigan cherokee owners proud! ill be putting my 4.5in RE lift on this weekend and finishing shaving my fenders i really like your use of the door stripping for the front fenders. nice looking jeep! not sure if youve even been to the Mounds but thats where me and my buddy with a cherokee go its in genesse county its pretty cool well thats the only place ive ever been so for me its cool http://www.geneseecountyparks.org/pages/MoundsORV
mines the non lifted one the other one is some random persons that i found in my town the other day! i thought itd be a cool picture

mines the non lifted one the other one is some random persons that i found in my town the other day! i thought itd be a cool picture
bruiser01TJ is the owner of the TJ in the pictures I posted. Welcome to THE Cherokee forum.
 09-21-2011, 07:19 PM
#647
Seasoned Member
Join Date: Aug 2011
Location: Michigan--> SOCAL--> Eastern Carolina--> Middle Tennessee
Posts: 264
Likes: 0
Received 0 Likes
on
0 Posts
Year: 01,01,99,98,97,97,96,94,90MJ,90MJ,86MJ
Model: Cherokee
Engine: 4.0
You name it the mound has it there's a lot of hills some mud and some pretty nice rock piles, always a good time
09-23-2011, 08:41 AM
#648
CF Veteran
Join Date: Jun 2010
Location: Ohio
Posts: 2,117
Likes: 0
Received 3 Likes
on
3 Posts
Year: 1998
Model: Cherokee
Engine: 4.0 stock
I was watching those videos and thought... man those tires look familiar... I bought the same tires man lol Also have them on black steelies, only difference is I have 3.75" back spacing.
Nice videos, any future plans for long arms?
Nice videos, any future plans for long arms?
09-23-2011, 03:22 PM
#649
Seasoned Member
Thread Starter
Join Date: May 2010
Location: Columbus, OH
Posts: 415
Likes: 0
Received 0 Likes
on
0 Posts
Year: 2001
Model: Cherokee
Engine: 4.0 I6
At this time, I'm not really planning for long arms. I'm gonna stick with the short arms for a while. I have plenty of other plans that should keep me busy.
09-27-2011, 05:32 PM
#652
Seasoned Member
Thread Starter
Join Date: May 2010
Location: Columbus, OH
Posts: 415
Likes: 0
Received 0 Likes
on
0 Posts
Year: 2001
Model: Cherokee
Engine: 4.0 I6
Thanks for the comments guys!! 
Had a little free time tonight and did a little damage assessment on the XJ as a result of the Rock Run wheeling trip. Not too bad really... took a couple pics.
Somehow, a tree branch actually managed to inscribe a nearly perfect triangle into my hood!


Then, that tree's buddy decided to side-swipe me a little ways down the trail.... a-hole!

Even scraped off some of my rubberized undercoating!
These repairs are easy enough though. Just cosmetic.
However, sometime during the trip I noticed a noise developing on the right side. Sounded like a creaking/metal-on-metal noise which occurred during moderate to extreme flexing of the front axle. I looked around when we stopped for a bit and found that my passenger LCA bushing had become unseated from the control arm:
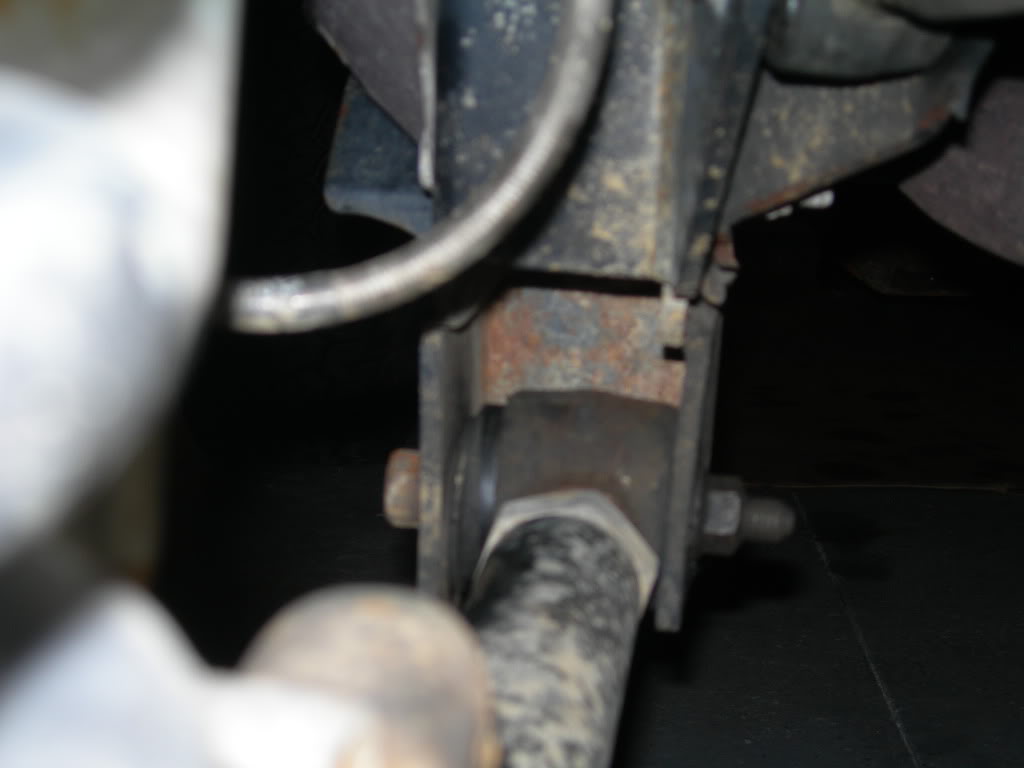
It was rather easy to spot because from the side of the Jeep you could easily see the lock ring which holds the bushing in place hanging below the CAD brackets:

I decided a field repair was not necessary and it would have to wait until I got home.
Had a little free time tonight and did a little damage assessment on the XJ as a result of the Rock Run wheeling trip. Not too bad really... took a couple pics.
Somehow, a tree branch actually managed to inscribe a nearly perfect triangle into my hood!
Then, that tree's buddy decided to side-swipe me a little ways down the trail.... a-hole!
Even scraped off some of my rubberized undercoating!
These repairs are easy enough though. Just cosmetic.
However, sometime during the trip I noticed a noise developing on the right side. Sounded like a creaking/metal-on-metal noise which occurred during moderate to extreme flexing of the front axle. I looked around when we stopped for a bit and found that my passenger LCA bushing had become unseated from the control arm:
It was rather easy to spot because from the side of the Jeep you could easily see the lock ring which holds the bushing in place hanging below the CAD brackets:
I decided a field repair was not necessary and it would have to wait until I got home.
09-27-2011, 05:47 PM
#653
Seasoned Member
Thread Starter
Join Date: May 2010
Location: Columbus, OH
Posts: 415
Likes: 0
Received 0 Likes
on
0 Posts
Year: 2001
Model: Cherokee
Engine: 4.0 I6
I unbolted the LCA which presented to me in this manner:
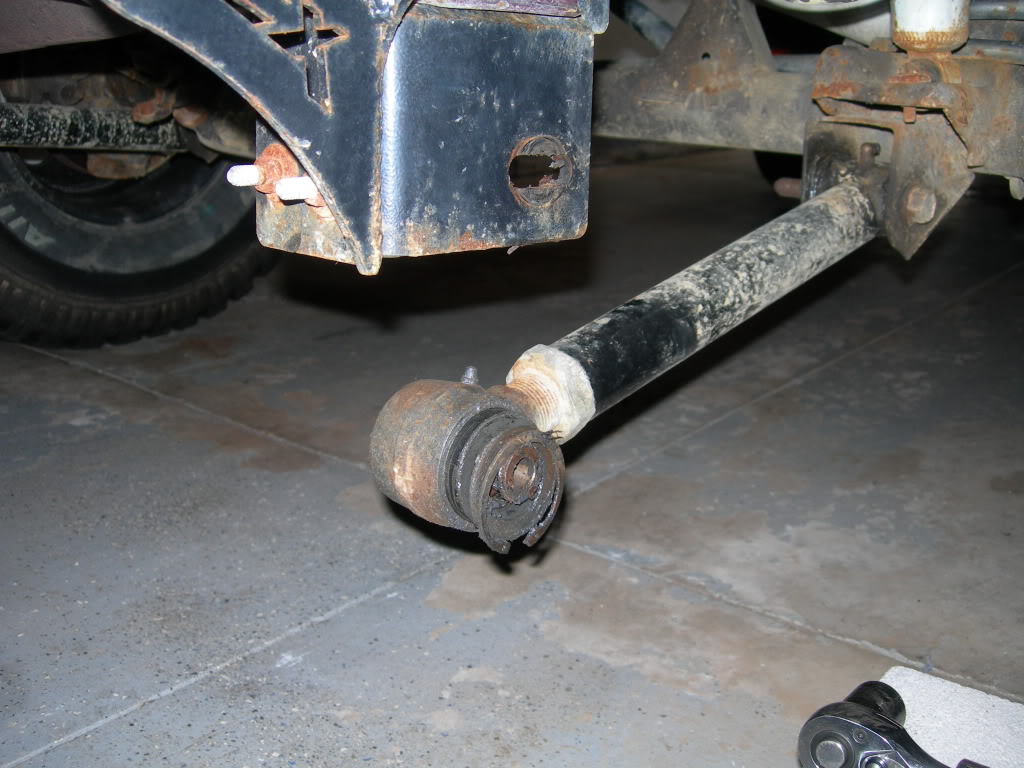
That's exactly how it came out of the CA drop bracket.
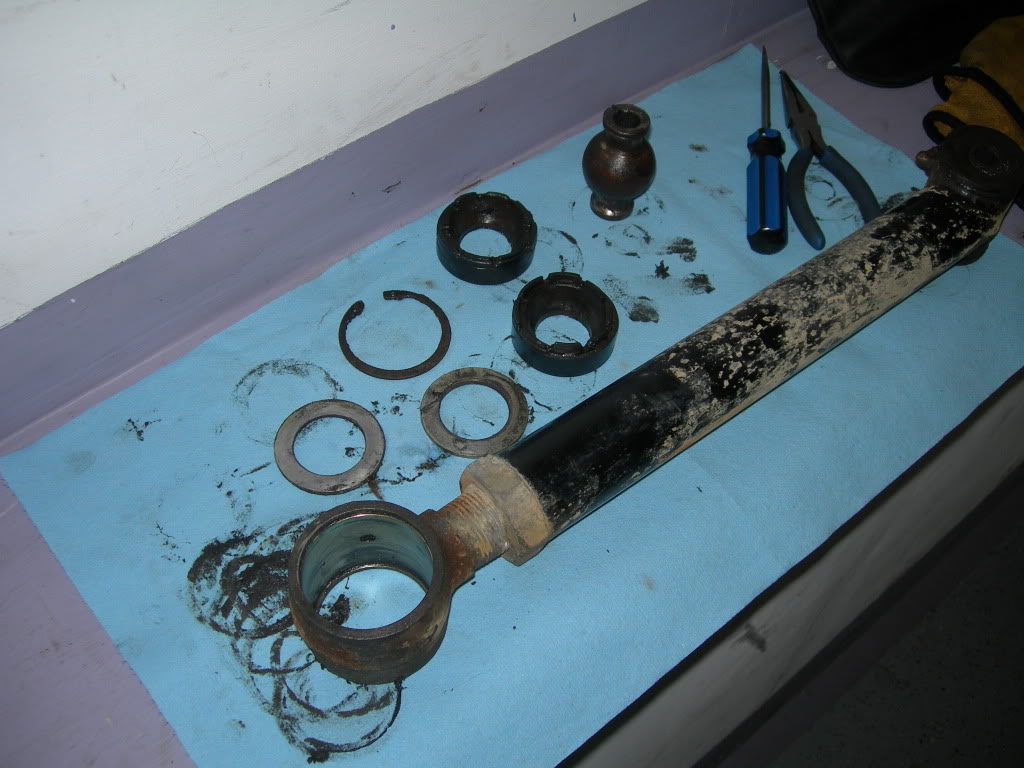
So I uninstalled it and took it over to the bench and completely disassembled the bushing:
That's exactly how it came out of the CA drop bracket.
So I uninstalled it and took it over to the bench and completely disassembled the bushing:
09-27-2011, 06:01 PM
#654
Seasoned Member
Thread Starter
Join Date: May 2010
Location: Columbus, OH
Posts: 415
Likes: 0
Received 0 Likes
on
0 Posts
Year: 2001
Model: Cherokee
Engine: 4.0 I6
I wiped all the debris off the pieces and began the reassembly process. Lithium grease was applied to everything. It was hard to use the camera with greasey gloves, so the pictures aren't exactly step-by-step.
First install the washer/spacer:

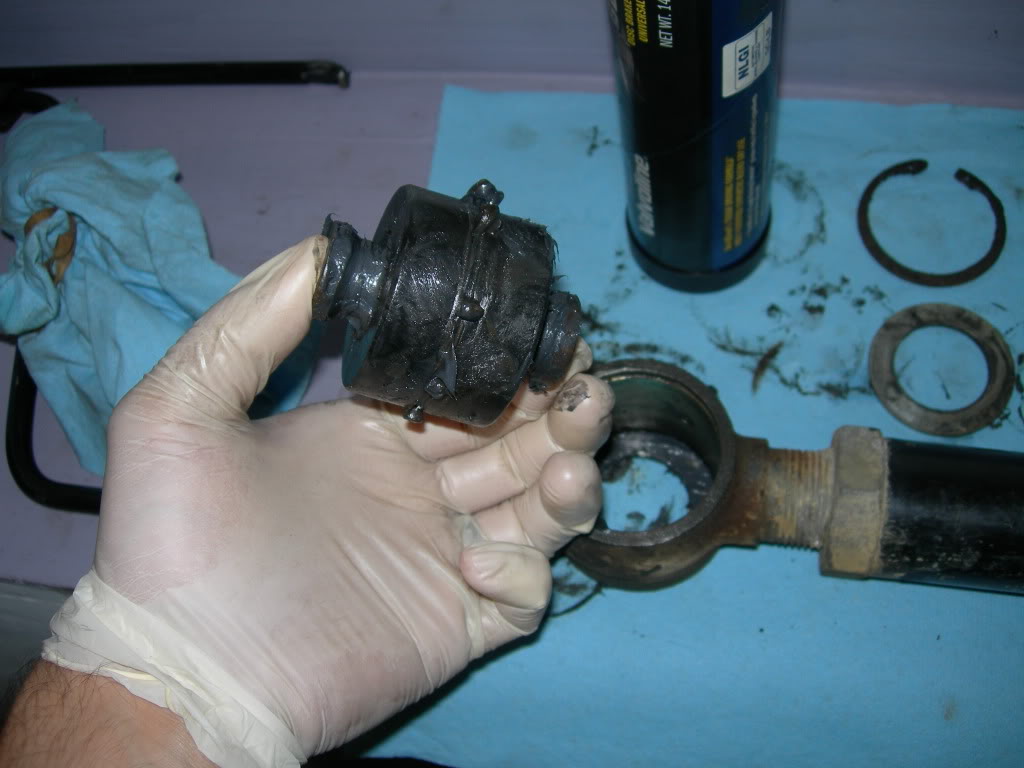
Assemble the bushing and joint. Note that the polyurethane halves have teeth and interlock:

Greased and assembled:
Install the bushing into the control arm, then install the second washer/spacer and lock ring:

Bushing assembly complete:

Time to reinstall. P.S. Don't tell my wife I used a kitchen knife to apply some of the grease.
First install the washer/spacer:
Assemble the bushing and joint. Note that the polyurethane halves have teeth and interlock:
Greased and assembled:
Install the bushing into the control arm, then install the second washer/spacer and lock ring:
Bushing assembly complete:
Time to reinstall. P.S. Don't tell my wife I used a kitchen knife to apply some of the grease.
Last edited by sanchezcruz_20; 09-27-2011 at 06:08 PM. Reason: Image not working


 10-01-2011, 05:14 PM
#657
Seasoned Member
Thread Starter
Join Date: May 2010
Location: Columbus, OH
Posts: 415
Likes: 0
Received 0 Likes
on
0 Posts
Year: 2001
Model: Cherokee
Engine: 4.0 I6

 10-02-2011, 09:45 AM
#659
Seasoned Member
Thread Starter
Join Date: May 2010
Location: Columbus, OH
Posts: 415
Likes: 0
Received 0 Likes
on
0 Posts
Year: 2001
Model: Cherokee
Engine: 4.0 I6
10-02-2011, 10:19 AM
#660
Seasoned Member
Thread Starter
Join Date: May 2010
Location: Columbus, OH
Posts: 415
Likes: 0
Received 0 Likes
on
0 Posts
Year: 2001
Model: Cherokee
Engine: 4.0 I6
At some point during the wheeling trip my key became stuck in the ignition. I fooled around with it for a while and eventually came to the conclusion that it was actually a failure of the shift interlock cable.
This cable runs between the AW4's shifter and the ignition switch. It is actuated by the button on the side of the shifter by your thumb. I believe the purpose of this cable is to prevent removal of the key from the ignition while the vehicle is in gear or not in park.
I had some time this morning and opened her up to take a look around. I removed the knee panel (2 screws) and lower steering column trim piece (3 screws).

You can see the cable, hanging loosely in position. It's right in front of the yellow piece, with the spring exposed.
If you recall, my Jeep was broken into some time ago in an attempt to steal my rig. The failed attempt resulted in some busted steering column trim pieces and a punched out lock in my driver's door. It looks like those weren't the only injuries.
I'm pretty sure that the occurence of this issue during the wheeling trip was just a coincidence. The damage incurred during the break-in likely just weakened the cable system enough to finally result in recent failure.
So, I pulled the cable out of the ignition switch. You can see it's busted up pretty bad. Even the metal casing of the ignition switch is cracked!


I'm going to try and head off to the JY and see if I can scrounge up a couple parts:

For now at least, I just have the cable uninstalled into the ignition switch. It operates fine without it, except now I can remove the key in any gear.
Thieves
This cable runs between the AW4's shifter and the ignition switch. It is actuated by the button on the side of the shifter by your thumb. I believe the purpose of this cable is to prevent removal of the key from the ignition while the vehicle is in gear or not in park.
I had some time this morning and opened her up to take a look around. I removed the knee panel (2 screws) and lower steering column trim piece (3 screws).
You can see the cable, hanging loosely in position. It's right in front of the yellow piece, with the spring exposed.
If you recall, my Jeep was broken into some time ago in an attempt to steal my rig. The failed attempt resulted in some busted steering column trim pieces and a punched out lock in my driver's door. It looks like those weren't the only injuries.
I'm pretty sure that the occurence of this issue during the wheeling trip was just a coincidence. The damage incurred during the break-in likely just weakened the cable system enough to finally result in recent failure.
So, I pulled the cable out of the ignition switch. You can see it's busted up pretty bad. Even the metal casing of the ignition switch is cracked!
I'm going to try and head off to the JY and see if I can scrounge up a couple parts:
For now at least, I just have the cable uninstalled into the ignition switch. It operates fine without it, except now I can remove the key in any gear.
Thieves