
Project Do work - 2001 XJ Build (Pic intensive)

 06-27-2010, 07:52 AM
#62
Seasoned Member
Join Date: Sep 2009
Location: MA
Posts: 377
Likes: 0
Received 1 Like
on
1 Post
Year: 2001
Model: Cherokee
Engine: 4.0
I agree!
Also I see you snaked that bolt in for the upper rear shock mount.! good idea, except how do you plan on putting a wrench on that other end to stop it from spinning and get it really tight?
Great job so far, keep up the good work it isn't easy.
Also I see you snaked that bolt in for the upper rear shock mount.! good idea, except how do you plan on putting a wrench on that other end to stop it from spinning and get it really tight?
Great job so far, keep up the good work it isn't easy.
06-28-2010, 10:29 AM
#63
Seasoned Member
Thread Starter
Join Date: May 2010
Location: Columbus, OH
Posts: 415
Likes: 0
Received 0 Likes
on
0 Posts
Year: 2001
Model: Cherokee
Engine: 4.0 I6
As far as tightening the rear shock bolts, I am hoping to squeeze a wrench through the access port. I haven't tried it myself yet but I've seen it done a time or 2 in other write-ups. We'll see what happens.
06-28-2010, 11:34 AM
#64
Member
Join Date: Nov 2008
Location: Colorado Springs, CO
Posts: 216
Likes: 0
Received 1 Like
on
1 Post
Year: 1998
Model: Cherokee
Engine: 4.0HO
It worked pretty well for me. I put a nut up there in stead of a bolt because I was putting in JKS bar pin eliminators. I used some electrical tape on the back of a box wrench, super glue to keep the washer and nut together, and RTV to help keep it still long enough to start the threads, and then the wrench did the rest once it got wedged in place. I also had to cut one of my front spring bolts. That was a major PITA. But it all worked out. Nice documentation on your build, I don't have the patience to keep taking pictures as I work. But it is fun to read the updates.
 06-28-2010, 09:20 PM
#66
Seasoned Member
Thread Starter
Join Date: May 2010
Location: Columbus, OH
Posts: 415
Likes: 0
Received 0 Likes
on
0 Posts
Year: 2001
Model: Cherokee
Engine: 4.0 I6
It worked pretty well for me. I put a nut up there in stead of a bolt because I was putting in JKS bar pin eliminators. I used some electrical tape on the back of a box wrench, super glue to keep the washer and nut together, and RTV to help keep it still long enough to start the threads, and then the wrench did the rest once it got wedged in place. I also had to cut one of my front spring bolts. That was a major PITA. But it all worked out. Nice documentation on your build, I don't have the patience to keep taking pictures as I work. But it is fun to read the updates.
06-28-2010, 09:24 PM
#67
Seasoned Member
Thread Starter
Join Date: May 2010
Location: Columbus, OH
Posts: 415
Likes: 0
Received 0 Likes
on
0 Posts
Year: 2001
Model: Cherokee
Engine: 4.0 I6
As requested, by popular demand:
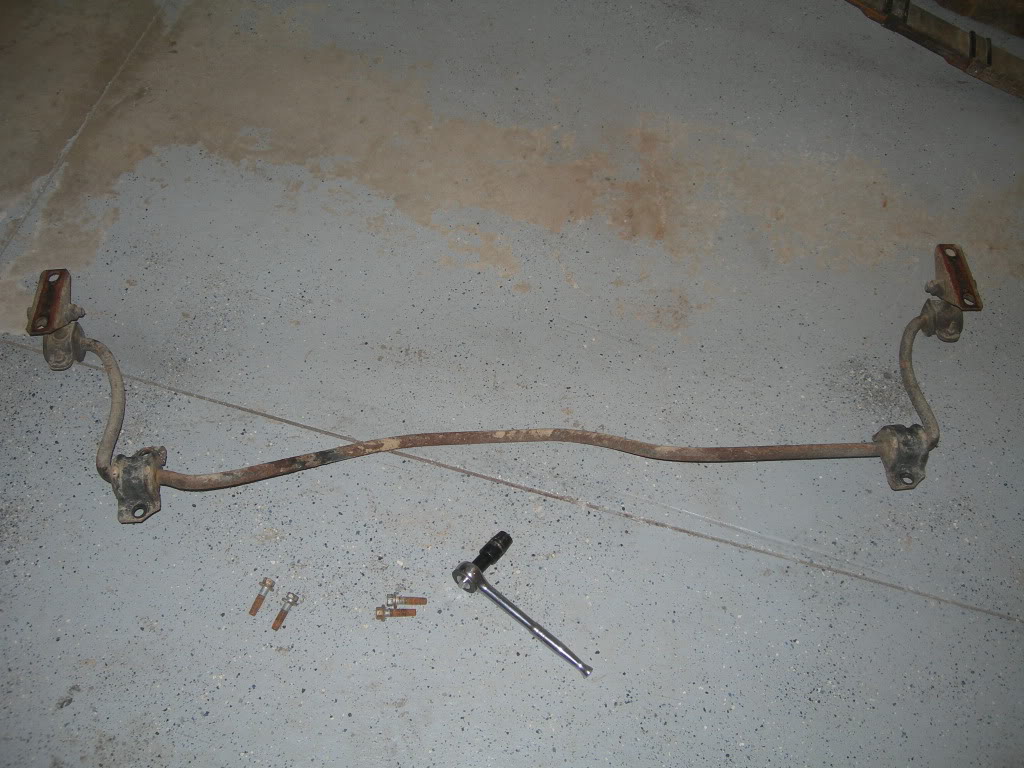
See ya later sway bar. Just four 13mm bolts and it's out. Good riddens.
See ya later sway bar. Just four 13mm bolts and it's out. Good riddens.
06-28-2010, 09:50 PM
#68
Seasoned Member
Thread Starter
Join Date: May 2010
Location: Columbus, OH
Posts: 415
Likes: 0
Received 0 Likes
on
0 Posts
Year: 2001
Model: Cherokee
Engine: 4.0 I6
Since the rear suspension components are removed, I decided to go ahead and start the rear brake line extension install while I have all the room to get in there.
The e-clip was difficult to remove from the factory bracket, it required some scooting around on my back underneath the Jeep. I lubed it up pretty good and went to town on it with a pair of pliers and it eventually gave in allowing me to separate the hardline and rubber line.
Once separated, brake fluid began dripping out as expected. A nice, steady drip. Initially, I thought I would just catch it in a bottle. However, I wasn't sure how long it was gonna take me to hook up the rest of the lines and didn't really want to lose all that brake fluid. I rigged up a nifty little solution with some PVC tubing I had laying around. By attaching it to the hardline and draping it over the Jeep I created a "u-tube" effect. Since the fluid is only draining due to gravity, it rises in the tubing only to the height level of the fluid in the reservoir.
Here's what it looks like:
Attached to the hardline at the bracket
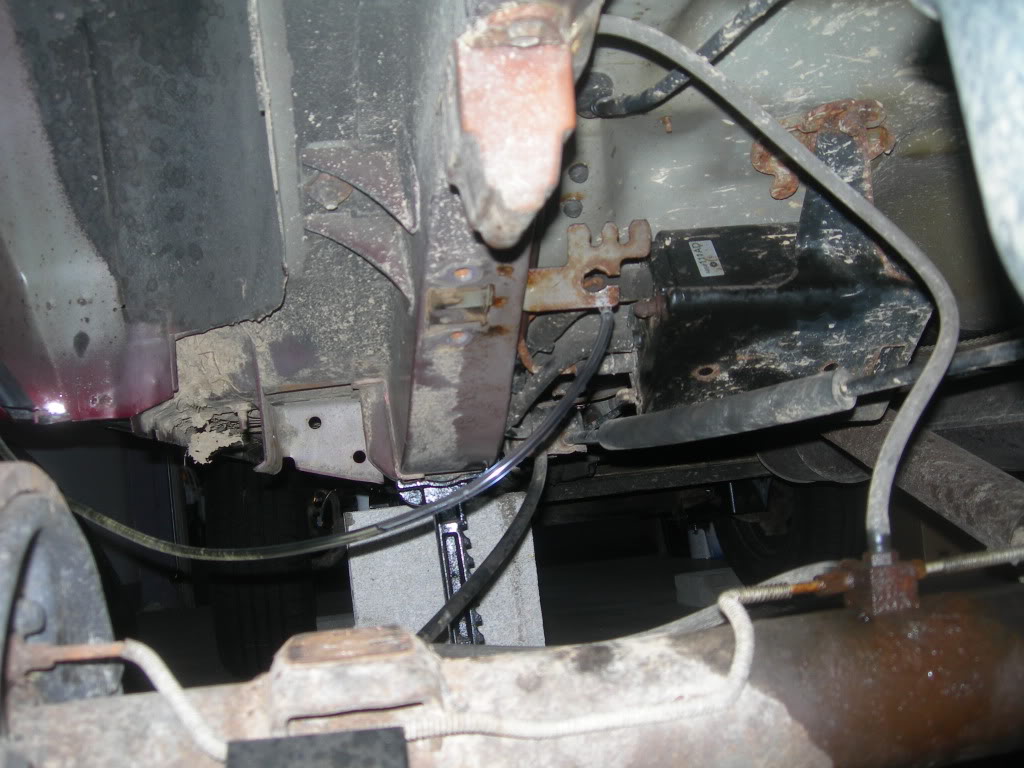
Draped up the side of the vehicle:
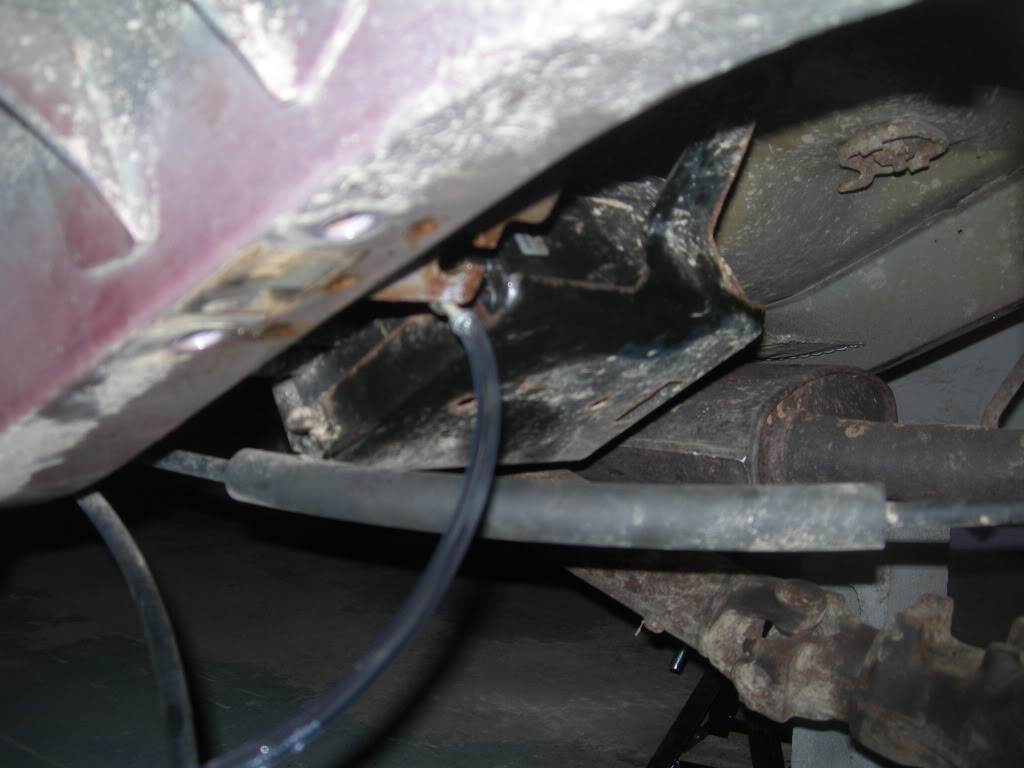
Now it's time to disconnect the t-fitting on the axle for replacement:
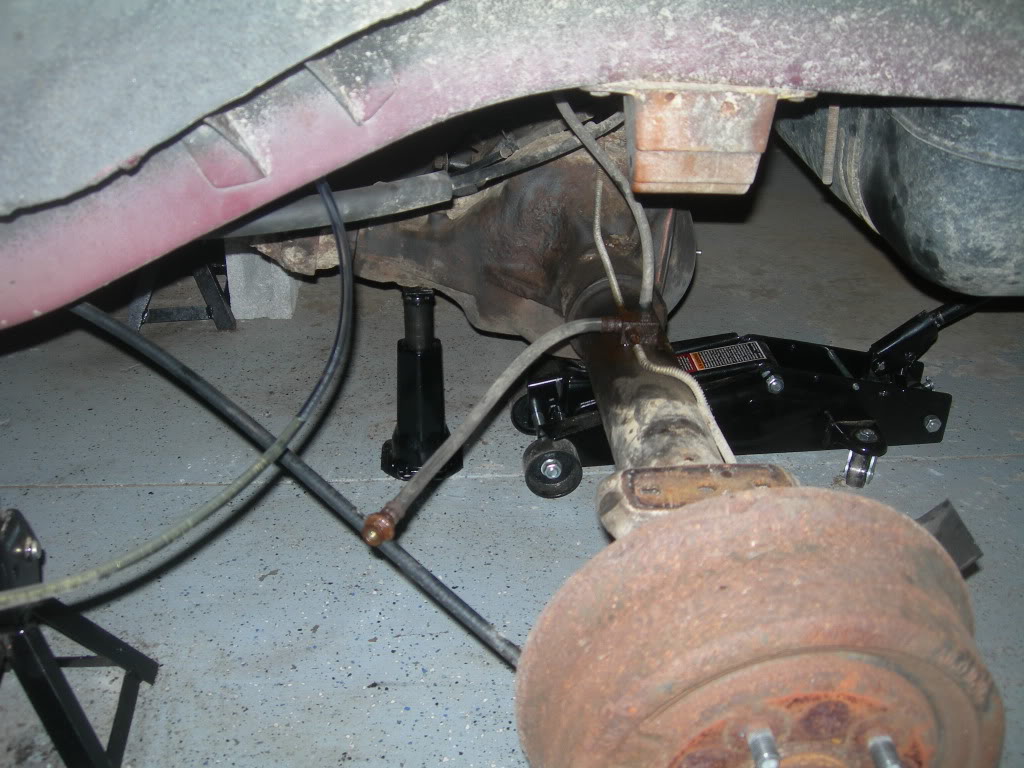
T-fitting gone:

And comparison of factory and aftermarket brake lines:

Now, as usual, I ran into a slight problem when installing the new brake line. When I went to tighten down the axle vent/breather line I noticed it was screwing down a little crooked, so I backed it out and attempted it again. Unfortunately, I cannot get the line to bite. It won't screw in.
Is it possible that I cross-threaded the line and screwed up the threads either on the line or axle? I was thinking about trying a little grease to see if that would help ease it in, but I'm done for tonight so that'll be tomorrow.
Here's a pick of what I'm talking about, it's the rubber hose coming down from the top. Obviously, the t-fitting is not pictured here but I was trying to see if it would thread even at all.
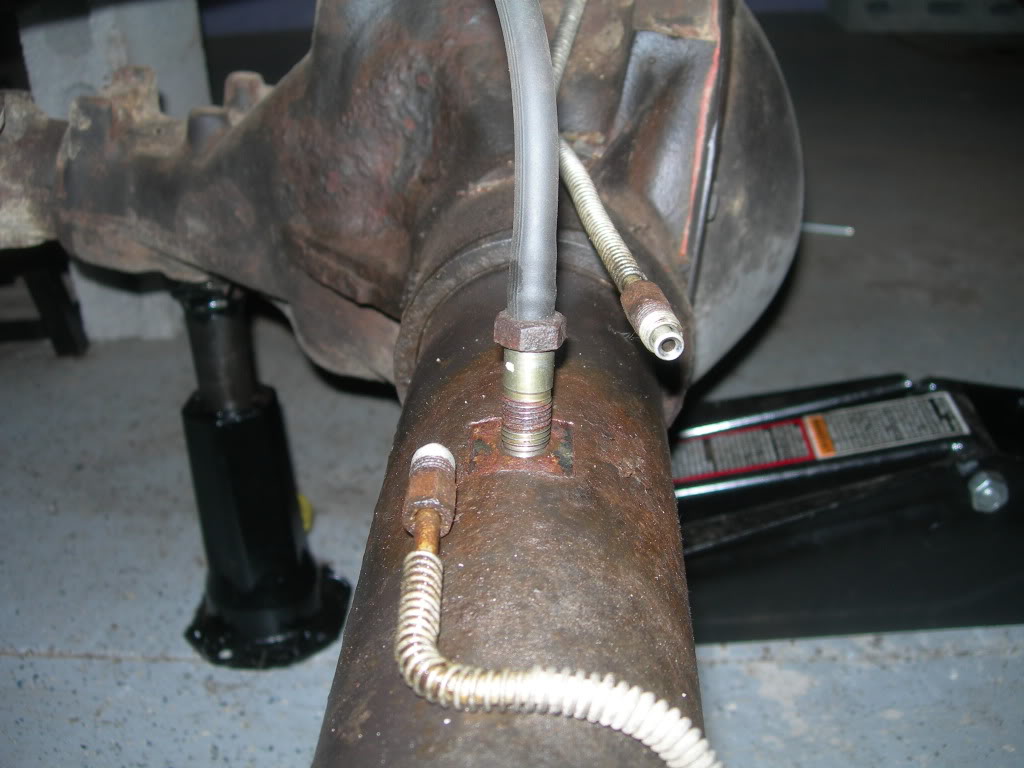
Any advice? Re-tap?
The e-clip was difficult to remove from the factory bracket, it required some scooting around on my back underneath the Jeep. I lubed it up pretty good and went to town on it with a pair of pliers and it eventually gave in allowing me to separate the hardline and rubber line.
Once separated, brake fluid began dripping out as expected. A nice, steady drip. Initially, I thought I would just catch it in a bottle. However, I wasn't sure how long it was gonna take me to hook up the rest of the lines and didn't really want to lose all that brake fluid. I rigged up a nifty little solution with some PVC tubing I had laying around. By attaching it to the hardline and draping it over the Jeep I created a "u-tube" effect. Since the fluid is only draining due to gravity, it rises in the tubing only to the height level of the fluid in the reservoir.
Here's what it looks like:
Attached to the hardline at the bracket
Draped up the side of the vehicle:
Now it's time to disconnect the t-fitting on the axle for replacement:
T-fitting gone:
And comparison of factory and aftermarket brake lines:
Now, as usual, I ran into a slight problem when installing the new brake line. When I went to tighten down the axle vent/breather line I noticed it was screwing down a little crooked, so I backed it out and attempted it again. Unfortunately, I cannot get the line to bite. It won't screw in.
Is it possible that I cross-threaded the line and screwed up the threads either on the line or axle? I was thinking about trying a little grease to see if that would help ease it in, but I'm done for tonight so that'll be tomorrow.
Here's a pick of what I'm talking about, it's the rubber hose coming down from the top. Obviously, the t-fitting is not pictured here but I was trying to see if it would thread even at all.
Any advice? Re-tap?
06-29-2010, 08:23 AM
#71
Seasoned Member
Thread Starter
Join Date: May 2010
Location: Columbus, OH
Posts: 415
Likes: 0
Received 0 Likes
on
0 Posts
Year: 2001
Model: Cherokee
Engine: 4.0 I6
I don't regret taking this install on myself, but I feel like I've had my fair share of hang-ups along the way. I'm just ready to drive this thing!
If it doesn't go, I'll go get a set of tap and dies. Been looking for an excuse to buy some anyway. Any idea what size tap this would be? Or do I need start counting threads per inch?
06-29-2010, 10:11 PM
#73
Seasoned Member
Thread Starter
Join Date: May 2010
Location: Columbus, OH
Posts: 415
Likes: 0
Received 0 Likes
on
0 Posts
Year: 2001
Model: Cherokee
Engine: 4.0 I6
 06-29-2010, 10:22 PM
#74
Member
Join Date: Jan 2010
Location: Pennsylvania
Posts: 103
Likes: 0
Received 0 Likes
on
0 Posts
Year: 2000
Model: Cherokee
Engine: 4.0
I don't regret taking this install on myself, but I feel like I've had my fair share of hang-ups along the way. I'm just ready to drive this thing!
If it doesn't go, I'll go get a set of tap and dies. Been looking for an excuse to buy some anyway. Any idea what size tap this would be? Or do I need start counting threads per inch?
If it doesn't go, I'll go get a set of tap and dies. Been looking for an excuse to buy some anyway. Any idea what size tap this would be? Or do I need start counting threads per inch?
p.s. it does give you a reason to buy more tools and other cool ****. haha
06-29-2010, 10:32 PM
#75
Seasoned Member
Thread Starter
Join Date: May 2010
Location: Columbus, OH
Posts: 415
Likes: 0
Received 0 Likes
on
0 Posts
Year: 2001
Model: Cherokee
Engine: 4.0 I6
Alright guys, quick update tonight for those of you loyal followers of my struggle to install a 4.5'' RC lift....
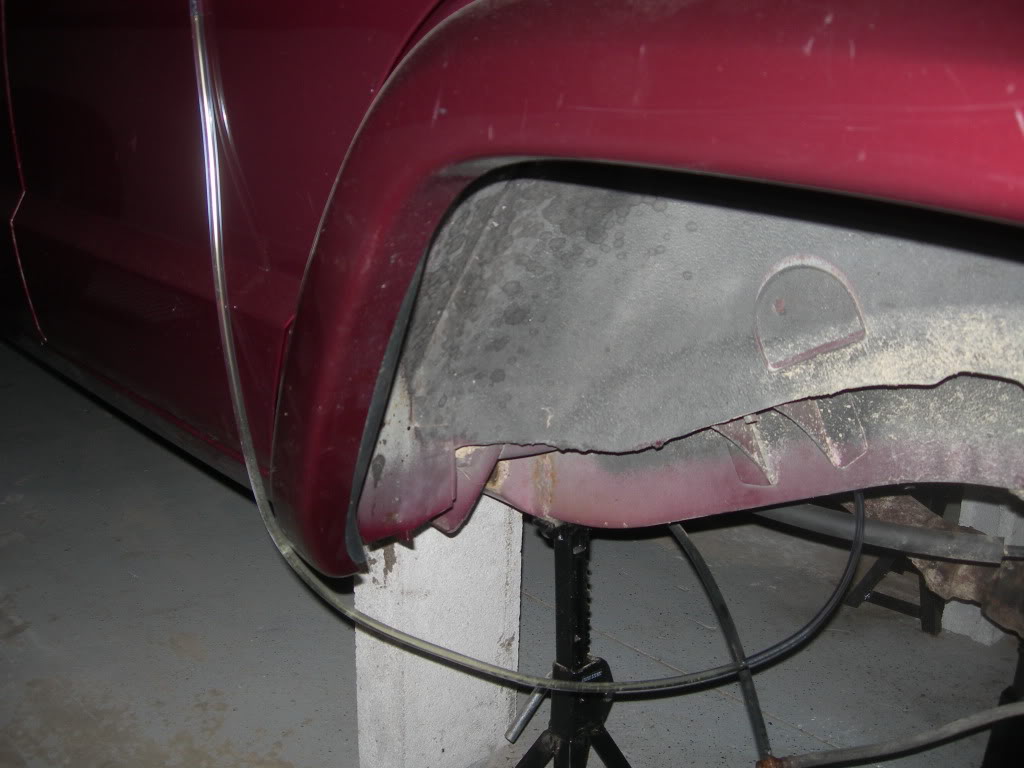
Was having trouble installing the rear brake line extension. Specifically, getting the t-fitting secured to the axle with the axle breather line which was not seating/threading properly into the axle. My presumption is that I may have screwed up the threads during my initial install where I possibly crossthreaded the bolt. Either that, or the threads just needed a nice clean-up from corrosion and debris.
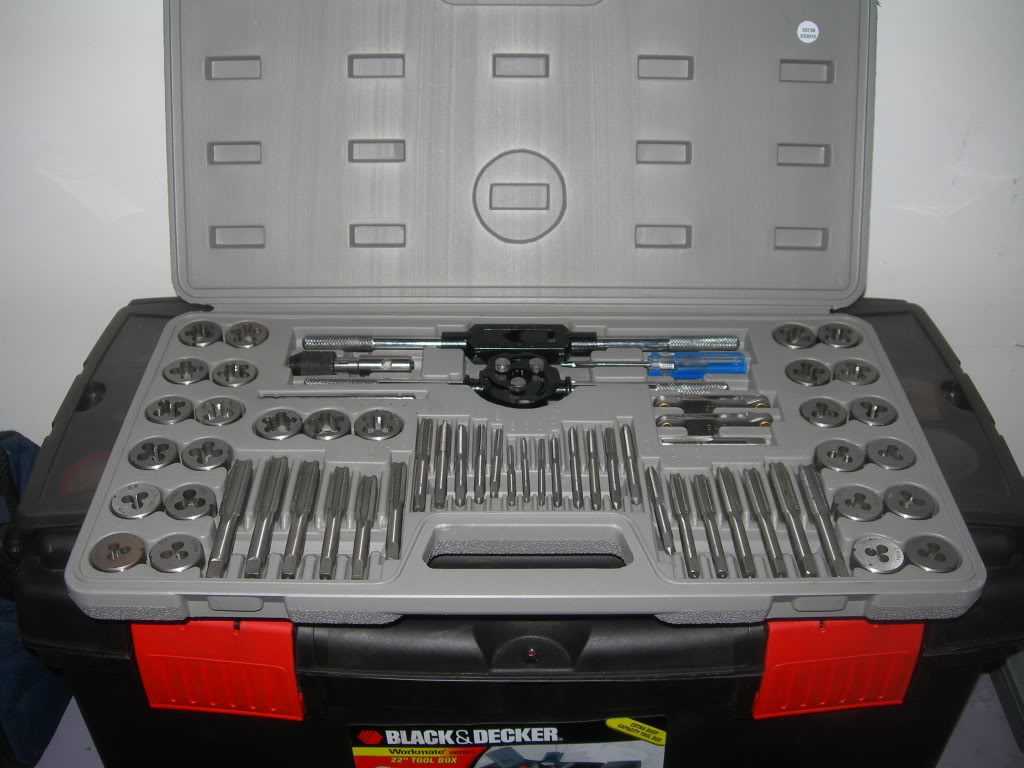
So I went out and bought a small kit, as pictured above. This was my first time ever using a tap and die set. Here's how the procedure went down...
First, I had to determine the diameter of the bolt:
I read 7/16''.... and there happen to be a couple 7/16'' options in my kit.
Next was to determine the pitch of the threads using the supplied gauge:
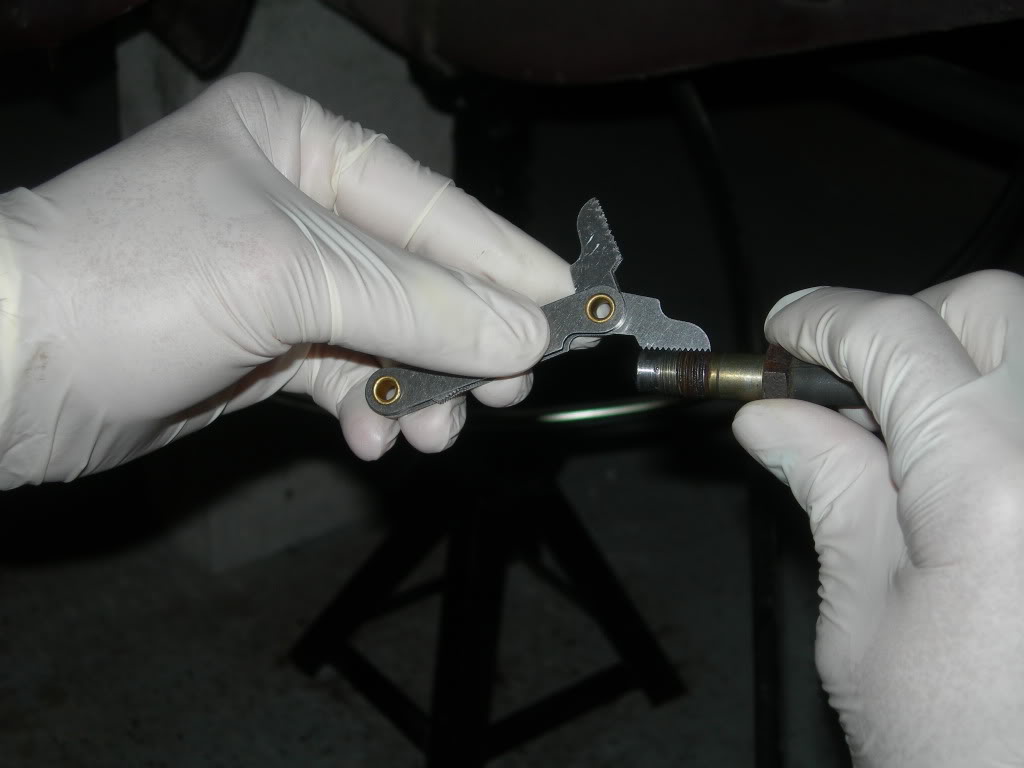
The best was found to be #20.
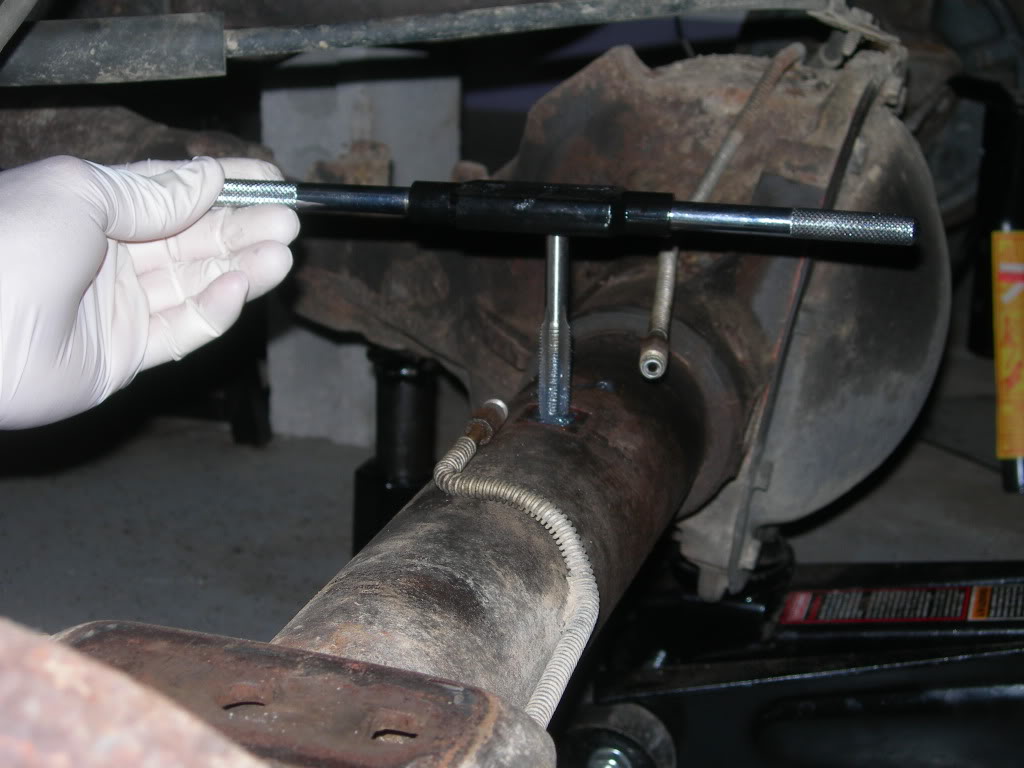
So I started with the bolt/axle breather line. After loading the appropriate sized die and using a little grease I slowly reconditioned the threads. Back and forth, back and forth, nice and slow advancement of the die. Here it is in action:
Yes, I have 3 hands. 2 for the die procedure, 1 for taking pictures.
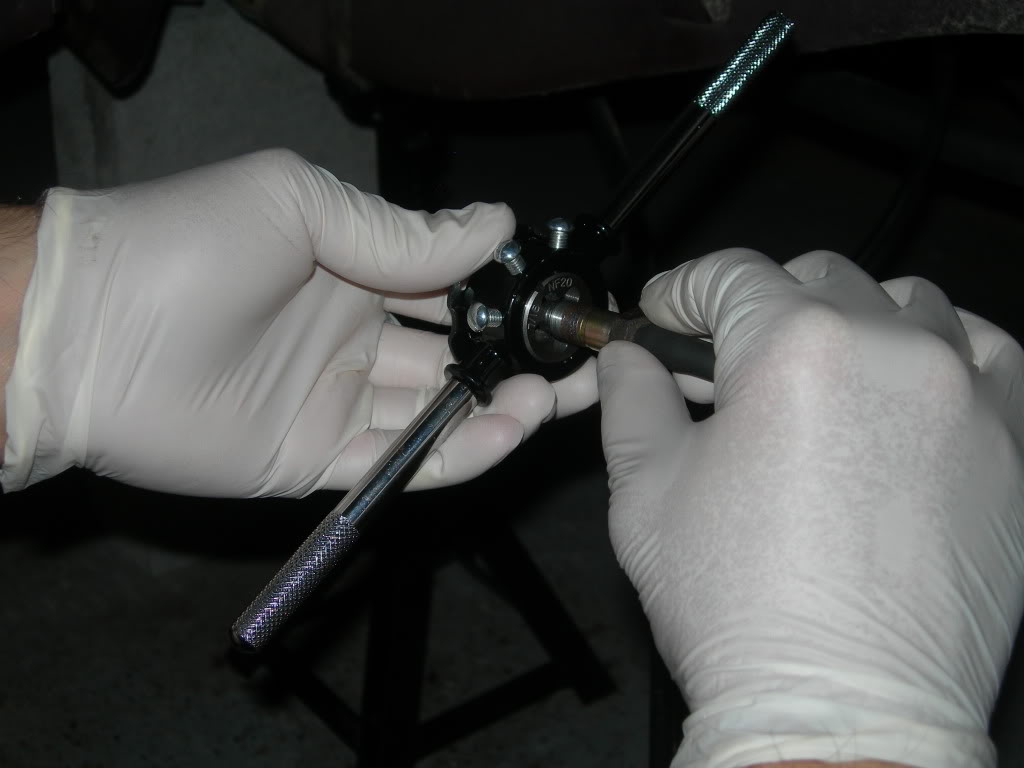
Moving onto the axle hole, using the same sized tap and employing a similar procedure of back and forth motion until the threads were nice and reconditioned...
And after all that hard work, the 2 finally mated up nice and tight:
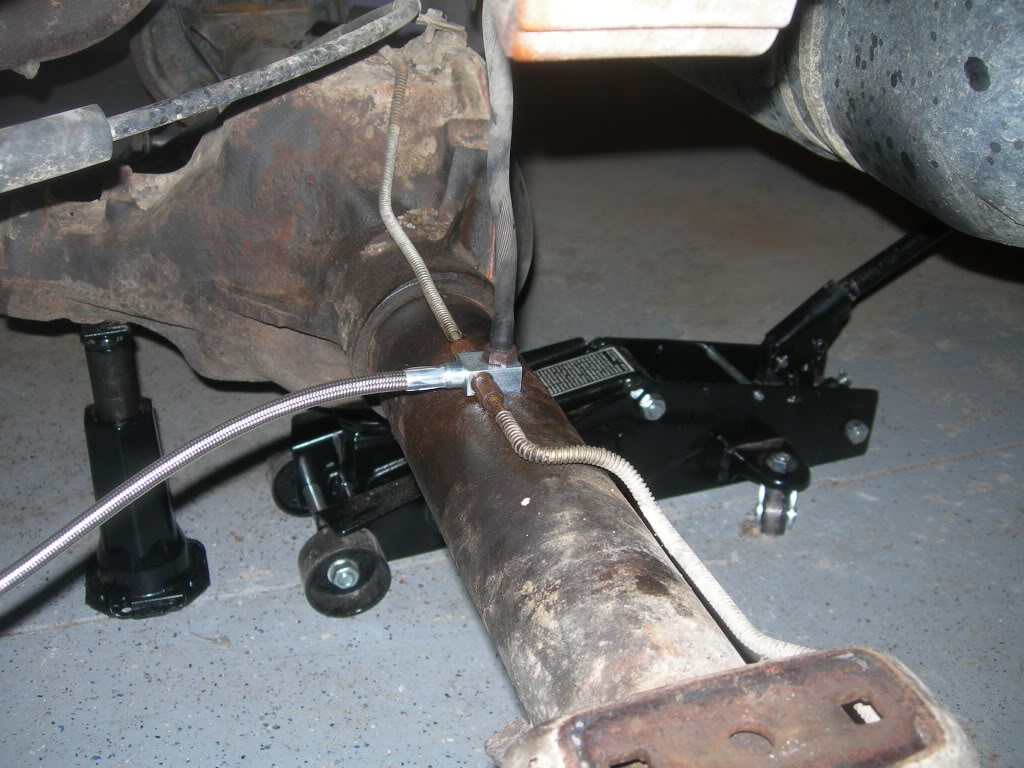
Looks nice don't it? I'm real pleased with the performance of the tap and die and results tonight.
Now, please, let's get on with the SUSPENSION install.
Was having trouble installing the rear brake line extension. Specifically, getting the t-fitting secured to the axle with the axle breather line which was not seating/threading properly into the axle. My presumption is that I may have screwed up the threads during my initial install where I possibly crossthreaded the bolt. Either that, or the threads just needed a nice clean-up from corrosion and debris.
So I went out and bought a small kit, as pictured above. This was my first time ever using a tap and die set. Here's how the procedure went down...
First, I had to determine the diameter of the bolt:
I read 7/16''.... and there happen to be a couple 7/16'' options in my kit.
Next was to determine the pitch of the threads using the supplied gauge:
The best was found to be #20.
So I started with the bolt/axle breather line. After loading the appropriate sized die and using a little grease I slowly reconditioned the threads. Back and forth, back and forth, nice and slow advancement of the die. Here it is in action:
Yes, I have 3 hands. 2 for the die procedure, 1 for taking pictures.
Moving onto the axle hole, using the same sized tap and employing a similar procedure of back and forth motion until the threads were nice and reconditioned...
And after all that hard work, the 2 finally mated up nice and tight:
Looks nice don't it? I'm real pleased with the performance of the tap and die and results tonight.
Now, please, let's get on with the SUSPENSION install.