Project "Hippo"...black 99 XJ
#17
Thread Starter
CF Veteran
Joined: Jan 2011
Posts: 1,894
Likes: 4
From: Las Vegas
Year: 1999
Model: Cherokee
Engine: 4.0
#18
Thread Starter
CF Veteran
Joined: Jan 2011
Posts: 1,894
Likes: 4
From: Las Vegas
Year: 1999
Model: Cherokee
Engine: 4.0
My little Valve Cover mod while replacing the gasket.
Parts
>Valve Cover Gasket FEL-PRO Part # VS50458R
>CCV Valve and grommets (x2)....#stealership
My broken CCV

No sludge

Painted Valve Cover

Parts
>Valve Cover Gasket FEL-PRO Part # VS50458R
>CCV Valve and grommets (x2)....#stealership
My broken CCV

No sludge


Painted Valve Cover

#19
Thread Starter
CF Veteran
Joined: Jan 2011
Posts: 1,894
Likes: 4
From: Las Vegas
Year: 1999
Model: Cherokee
Engine: 4.0
Next leak fix was the Oil Filter Adapter O-rings.
Got my parts from the stealership.
Here are the before and after pics.


Here are some write-ups worth reading.
• http://www.lunghd.com/Tech_Articles/...nt_O-Rings.htm
• https://www.cherokeeforum.com/f2/oil...r-o-ring-9625/
• http://www.myjeepxj.com/cherokee-rep...filter-adapter
RMS replacement next on the list.
Got my parts from the stealership.
Here are the before and after pics.


Here are some write-ups worth reading.
• http://www.lunghd.com/Tech_Articles/...nt_O-Rings.htm
• https://www.cherokeeforum.com/f2/oil...r-o-ring-9625/
• http://www.myjeepxj.com/cherokee-rep...filter-adapter
RMS replacement next on the list.
Last edited by BotakBeng; 03-24-2012 at 09:03 AM.
#20
Thread Starter
CF Veteran
Joined: Jan 2011
Posts: 1,894
Likes: 4
From: Las Vegas
Year: 1999
Model: Cherokee
Engine: 4.0
Frustration got the better of me, thus no pics  .
.
>RMS purchased from stealership.
>Oil Pan Gasket #OS34308R
>Timing Chain Set #C3225
>Harmonic Balancer #6005229
Here is the common RMS leak

I ran into a little problem when trying to remove the oil pan support bracket.
Turned out i just need to PRESS the socket really hard into the bolts.

This is how i did mine.
• Disconnect Negative (-) battery cable
• Jack up Jeep and support with jack stand by the frame
• Drain oil
• Remove starter * (torque front bolt 30ft.lb/rear 35ft.lb)
• Loosen oil pan bolts*
• Support oil pan with floor jack
• Remove oil pan bolts
• To get oil pan out - lower the back half of the oil pan and pull in out under the transmission with the front axle jack up (this will allow the axle to move forward)
• Remove bearing cap retainer (10x bolts)
• Remove rear bearing cap (2x bolts)
• Loosen ALL bearing caps (this will help with the removal of upper RMS)
• Remove upper seal with pin punch and nose head pilers
• Remove upper RMS
• Remove front and rear neoprene oil seals
• Soap new upper RMS and inside with oil
• Inspect front seal
• Inspect timing chain
• Coat outside of the lower RMS with soap and the inside lip with engine oil
• Press lower RMS firmly into lower bearing cap
• Lip of RMS must face to the front of the engine (with the sloped side toward the rear)
• RTV lower seal tip (top and bottom)
• Lube inside of lower seal and bearing surface
• RTV rear bearing block and cap surface, about 2.3mm bead in diameter (fsm page 111, fig 70)
• Lower bearing torque spec
**** 54Nm (40ft.lbs) first
**** 95Nm (70ft.lbs) then
**** 108Nm (80ft.lbs) final
• Install bearing brace **** 47Nm (35ft.lbs)
• RTV oil pan to block 4 corners* (fsm page 108, fig 74)
• Oil pan bolts torque **** 1/4 bolts- 9.5Nm (84in.lbs)
• **** 5/16 bolts - 15Nm (132in.lbs)
• Replace oil filter
• Wait 8 hr for sealant to cure!!!
Is also a good time to check and tighten the flexplate bolts since the inspection plate has been removed.

Here is a good write-up on flexplate knocking fix.
Looking at the video, it looks like i may have some slack on my Timing Chain, so i went ahead and order a new set.

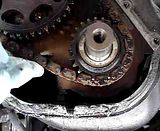
My suspicion was right

Cleaned up and ready for new Timing Set.

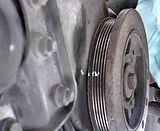
New Harmonic Balancer Installed

Here are some great write-ups and video worth reading.
• http://www.dailydriventj.com/forum/viewtopic.php?t=811
• http://www.go.jeep-xj.info/HowtoRearMain.htm
• http://jeepin.com/features/rearmain
Btw, it would be a good time to have the starter and alternator check by your friendly Autozone store
 .
.>RMS purchased from stealership.
>Oil Pan Gasket #OS34308R
>Timing Chain Set #C3225
>Harmonic Balancer #6005229
Here is the common RMS leak

I ran into a little problem when trying to remove the oil pan support bracket.
Turned out i just need to PRESS the socket really hard into the bolts.

This is how i did mine.
• Disconnect Negative (-) battery cable
• Jack up Jeep and support with jack stand by the frame
• Drain oil
• Remove starter * (torque front bolt 30ft.lb/rear 35ft.lb)
• Loosen oil pan bolts*
• Support oil pan with floor jack
• Remove oil pan bolts
• To get oil pan out - lower the back half of the oil pan and pull in out under the transmission with the front axle jack up (this will allow the axle to move forward)
• Remove bearing cap retainer (10x bolts)
• Remove rear bearing cap (2x bolts)
• Loosen ALL bearing caps (this will help with the removal of upper RMS)
• Remove upper seal with pin punch and nose head pilers
• Remove upper RMS
• Remove front and rear neoprene oil seals
• Soap new upper RMS and inside with oil
• Inspect front seal
• Inspect timing chain
• Coat outside of the lower RMS with soap and the inside lip with engine oil
• Press lower RMS firmly into lower bearing cap
• Lip of RMS must face to the front of the engine (with the sloped side toward the rear)
• RTV lower seal tip (top and bottom)
• Lube inside of lower seal and bearing surface
• RTV rear bearing block and cap surface, about 2.3mm bead in diameter (fsm page 111, fig 70)
• Lower bearing torque spec
**** 54Nm (40ft.lbs) first
**** 95Nm (70ft.lbs) then
**** 108Nm (80ft.lbs) final
• Install bearing brace **** 47Nm (35ft.lbs)
• RTV oil pan to block 4 corners* (fsm page 108, fig 74)
• Oil pan bolts torque **** 1/4 bolts- 9.5Nm (84in.lbs)
• **** 5/16 bolts - 15Nm (132in.lbs)
• Replace oil filter
• Wait 8 hr for sealant to cure!!!
Is also a good time to check and tighten the flexplate bolts since the inspection plate has been removed.

Here is a good write-up on flexplate knocking fix.
Looking at the video, it looks like i may have some slack on my Timing Chain, so i went ahead and order a new set.

My suspicion was right

Cleaned up and ready for new Timing Set.

New Harmonic Balancer Installed

Here are some great write-ups and video worth reading.
• http://www.dailydriventj.com/forum/viewtopic.php?t=811
• http://www.go.jeep-xj.info/HowtoRearMain.htm
• http://jeepin.com/features/rearmain
Btw, it would be a good time to have the starter and alternator check by your friendly Autozone store

Last edited by BotakBeng; 03-26-2012 at 01:01 PM.
#21
Thread Starter
CF Veteran
Joined: Jan 2011
Posts: 1,894
Likes: 4
From: Las Vegas
Year: 1999
Model: Cherokee
Engine: 4.0
Ever since i bought the Jeep, i always have to crank at least twice in the morning to get it started.
Replaced my battery with a Yellow top, thinking i could have a weak battery , alternator and starter checked as well (all good btw), but it didn't help.
After doing some reading, i found thread by tjwalker (Thank you!).
After following his diagnostic, i figured i could have a bad fuel pressure regulator.
Parts
Fuel Pressure Regulator #PR318
Fuel Strainers #FS220, #FS221
Following this write-up, i got my regulator replaced and now it starts with ONE crank everytime .
.
I would recommend a gear wrench to make the work a whole lot easier.
Replaced my battery with a Yellow top, thinking i could have a weak battery , alternator and starter checked as well (all good btw), but it didn't help.
After doing some reading, i found thread by tjwalker (Thank you!).
The check valve is located on top of the gas tank and is part of the fuel pump assembly on 95.5-2001 vintage 4.0 XJs. When the check valve starts to fail, it reduces fuel pressure to a point where an extended crank is needed to start the engine. It is a very common failure. I experienced it on my 99 at around 75K.
A good (and simple) way to troubleshoot this problem is called “the poor mans prime”
1. Turn key to ON position (do not crank the engine!)
2. The fuel pump will energize and run for a couple of seconds
3. Turn key to OFF position
4. Repeat above a two more times
5. NOW crank the engine over
If the engine starts quickly and cleanly after performing this procedure, you may have the check valve issue. If it starts and runs poorly for a few seconds, it could also be a leaky fuel injector resulting in the bleed down and the stumble upon startup is the engine clearing the excess fuel that has leaked into the cylinder because of the faulty injector.
Also be aware that a bad battery can give you this symptom. Sounds strange but it definitely does happen. Have battery load tested if you have any questions; your XJ does NOT like low available battery voltage. Be sure battery connections and posts are CLEAN.
Some troubleshooting tips for extended crank times:
Hook up fuel pressure gauge on the schrader valve on the fuel rail
Start engine and bring to normal operating temperature.
Observe test gauge. Normal operating pressure should be 49.2 psi (plus or minus 5 psi)
Shut engine off.
Pressure should not fall below 30 psi for five minutes.
If pressure falls below 30 psi, it must be determined if a fuel injector, the check valve within the
fuel pump module, or a fuel tube/line is leaking. An adaptor tool/hose included with the fuel pressure gauge can help you with this. Consult gauge manual for more information on this but here is basically how it works:
*Turn the engine off and immediately clamp the fuel line at the adaptor hose. Watch the pressure gauge and see how long it takes to lose pressure.
*If the pressure remains at 49 psi for an extended period of time then the problem is in the tank - possibly the check valve. If the pressure falls below 49 psi fairly rapidly then the problem is probably a leaky fuel injector.
You can limp a check valve problem along indefinitely if you wish as it doesn't mean the fuel pump itself is going bad. Normally, the check valve is replaced as an entire assembly as you have to drop the gas tank to access the assembly. Fuel pump assembly consists of fuel pump, regulator, check valve, filter. If you do replace the fuel pump assembly, purchase a high quality OEM style unit. Some cheap aftermarket assemblies don’t hold up and fail prematurely.
After following his diagnostic, i figured i could have a bad fuel pressure regulator.
Parts
Fuel Pressure Regulator #PR318
Fuel Strainers #FS220, #FS221
Following this write-up, i got my regulator replaced and now it starts with ONE crank everytime
 .
.I would recommend a gear wrench to make the work a whole lot easier.
Last edited by BotakBeng; 09-05-2012 at 11:44 AM.
#22
Thread Starter
CF Veteran
Joined: Jan 2011
Posts: 1,894
Likes: 4
From: Las Vegas
Year: 1999
Model: Cherokee
Engine: 4.0
Got my transmission filter, transmission mounts and motor mounts replaced!
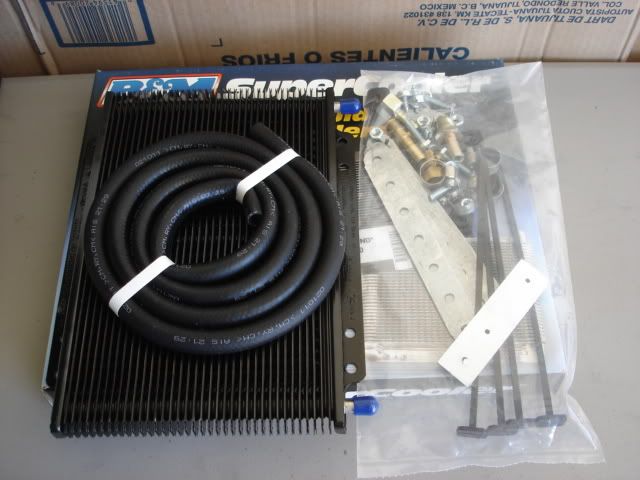
Installed transmission cooler at the same time.
Parts
>Transmission Filter #58936
>Transmission Mount #6201204
>Transmission Cooler #B&M 70268
>Motor Mount #BK6021567
>1/2" Rubber Fuel Line
>Clamps x2
>AFT (Dex/Merc) 4qt
and this

Here are some good write-ups.
• http://go.jeep-xj.info/HowtoAutoService.htm
• http://www.naxja.org/forum/showthread.php?t=1031061


Initially i went with Browndog's Motor Mount but i was having a bit too much of a vibration for my liking.
Great product and customer service if i may add.
After everything installed, i went ahead and adjust the transmission cable.
Installed transmission cooler at the same time.
Parts
>Transmission Filter #58936
>Transmission Mount #6201204
>Transmission Cooler #B&M 70268
>Motor Mount #BK6021567
>1/2" Rubber Fuel Line
>Clamps x2
>AFT (Dex/Merc) 4qt
and this
Here are some good write-ups.
• http://go.jeep-xj.info/HowtoAutoService.htm
• http://www.naxja.org/forum/showthread.php?t=1031061


Initially i went with Browndog's Motor Mount but i was having a bit too much of a vibration for my liking.
Great product and customer service if i may add.
After everything installed, i went ahead and adjust the transmission cable.
Last edited by BotakBeng; 11-18-2012 at 12:12 PM.
#25
Thread Starter
CF Veteran
Joined: Jan 2011
Posts: 1,894
Likes: 4
From: Las Vegas
Year: 1999
Model: Cherokee
Engine: 4.0
I had a little problem while installing the browndog motor mount as i could not align the mount to sit on the bracket.
As advised by their customer service (great customer service btw), the trick is to use a ratchet strap to shift the engine.
Anyway, i might have gone a little too far with the pulling.
This is what i found later...

In order to slide the linkage back in the bracket, i would have to access these bolts under the carpet.

One thing lead to another, and i ended up having this .
.

Well, i guess is a good time to check for rust (what rust? ).
).
Give the carpet a good shampoo and pressure wash it.
Nice and clean now.
Sorry, can't find those pics , but i did find close to a dollar in change tho.
As advised by their customer service (great customer service btw), the trick is to use a ratchet strap to shift the engine.
Anyway, i might have gone a little too far with the pulling.
This is what i found later...

In order to slide the linkage back in the bracket, i would have to access these bolts under the carpet.

One thing lead to another, and i ended up having this
 .
.
Well, i guess is a good time to check for rust (what rust?
 ).
).Give the carpet a good shampoo and pressure wash it.
Nice and clean now.
Sorry, can't find those pics
 , but i did find close to a dollar in change tho.
Last edited by BotakBeng; 03-26-2012 at 10:13 PM.
#26
Thread Starter
CF Veteran
Joined: Jan 2011
Posts: 1,894
Likes: 4
From: Las Vegas
Year: 1999
Model: Cherokee
Engine: 4.0
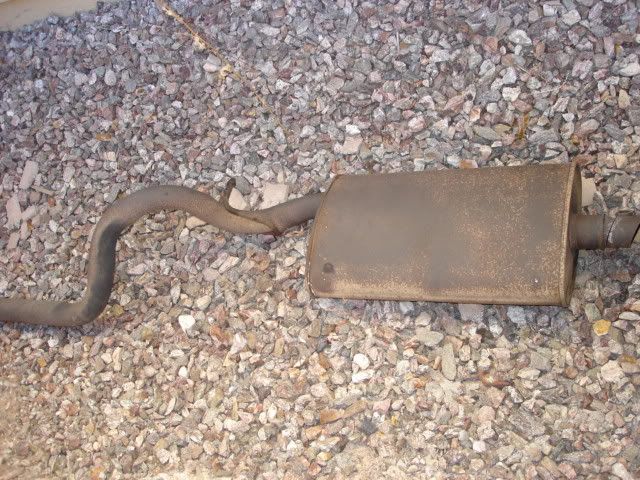
Pretty sure i have a crack on my exhaust manifold and while i'm at it, i went ahead and did the cat and muffler as well.
Parts
>APN Exhaust Manifold #15343
>Magnaflow Catalytic Converter #23226
Gear wrench is definitely recommended.

Goodbye OEM


The kit i purchased was a direct fit, so installation was a breeze.
With a reciprocating saw and a good blade, old parts was removed in no time.
Installed!


APN Exhaust Manifold
Removal and installation was fairly easy with the help of these write-ups.
• https://www.cherokeeforum.com/f51/je...91-98-a-80445/
• http://www.naxja.org/forum/showthrea...ghlight=header
• http://www.dailydriventj.com/forum/v...er=asc&start=0
• http://www.jeepforum.com/forum/f22/f...#post13309497*
Here is the cracked exhaust manifold

APN kit came with a exhaust/intake manifold gasket as well as downpipe/header hardware and gasket. Some members mentioned about getting a better Felpro gasket, so i went ahead i get one just in case.
(btw, i spoke to both APN and Felpro reps......NO sealant is required)
Felpro Gasket


I could have bought the wrong gasket, but anyway it was way off as you can tell from the pic.
APN Gasket....better fit

Test fitting APN


Perfect fit!

Time to give the intake manifold a good hot tank cleaning

Time to buckle up...somehow i lost a nut and have to purchase a complete set from Napa.
Here is a comparison of the old and new exhaust manifold


Parts
>APN Exhaust Manifold #15343
>Magnaflow Catalytic Converter #23226
Gear wrench is definitely recommended.

Goodbye OEM


The kit i purchased was a direct fit, so installation was a breeze.
With a reciprocating saw and a good blade, old parts was removed in no time.
Installed!


APN Exhaust Manifold
Removal and installation was fairly easy with the help of these write-ups.
• https://www.cherokeeforum.com/f51/je...91-98-a-80445/
• http://www.naxja.org/forum/showthrea...ghlight=header
• http://www.dailydriventj.com/forum/v...er=asc&start=0
• http://www.jeepforum.com/forum/f22/f...#post13309497*
Here is the cracked exhaust manifold

APN kit came with a exhaust/intake manifold gasket as well as downpipe/header hardware and gasket. Some members mentioned about getting a better Felpro gasket, so i went ahead i get one just in case.
(btw, i spoke to both APN and Felpro reps......NO sealant is required)
Felpro Gasket


I could have bought the wrong gasket, but anyway it was way off as you can tell from the pic.
APN Gasket....better fit

Test fitting APN


Perfect fit!

Time to give the intake manifold a good hot tank cleaning

Time to buckle up...somehow i lost a nut and have to purchase a complete set from Napa.
Here is a comparison of the old and new exhaust manifold


Last edited by BotakBeng; 09-24-2012 at 09:36 AM.
#27
Thread Starter
CF Veteran
Joined: Jan 2011
Posts: 1,894
Likes: 4
From: Las Vegas
Year: 1999
Model: Cherokee
Engine: 4.0
Now that i have done most of the maintenance and R/R and having driven daily for a while with no issue........is time for some major $ investment! 


Here are some pics before it when for a make-over....


......


Here are some pics before it when for a make-over....


......
#28
CF Veteran
Joined: Nov 2011
Posts: 1,314
Likes: 0
From: Las Vegas, NV - St. George, UT
Year: 1996
Model: Cherokee
Engine: 4.0
Sent you a PM on the springs. Let me know.
And sub'd to this build... What you doing with the old wheels and tires? I need some rollers for a few weeks lol. Might buy em off you.
And sub'd to this build... What you doing with the old wheels and tires? I need some rollers for a few weeks lol. Might buy em off you.
#29
Thread Starter
CF Veteran
Joined: Jan 2011
Posts: 1,894
Likes: 4
From: Las Vegas
Year: 1999
Model: Cherokee
Engine: 4.0
#30
Banned
Joined: Oct 2009
Posts: 2,231
Likes: 1
From: West Springfield, MA
Year: 1999
Model: Cherokee
Engine: 4.0
for the brown dogs did you do the plate kit as well or just the mounts...and sweet choice on tires if i didn't get such a steal on my almost perfect KM1's i would have boughten KM2's...and i am subscribed


