When you click on links to various merchants on this site and make a purchase, this can result in this site earning a commission. Affiliate programs and affiliations include, but are not limited to, the eBay Partner Network.
It's chili pepper red pearlcoat. Available 1998,1999. They went to sienna pearl for 2000 and 2001. Similar but a hair darker. Beautiful job on your rig man.
It's chili pepper red pearlcoat. Available 1998,1999. They went to sienna pearl for 2000 and 2001. Similar but a hair darker. Beautiful job on your rig man.
great build, love the color of the jeep, and gorgeous house.
and nice use of the big words, vacillate, had to look that one up.
BTW great shots, a nice quality picture always makes a build thread that much better, nothing worse that shaky blurry shots where you thinking.....whats that?
Thanks! I share the same photo thoughts as you. Pictures need to be clear and well lit if they are to be shared. Lighting, however, is a challenge in my garage...
I hit a trail this weekend to test out the flex with the new flares to see what I fixed and what I ruined. Went to the same trail as the pictures earlier in the thread so I could compare apples to apples.
Here's how it was flexing and rubbing before the new flares:
Here's how it's flexing and rubbing now:
The front is a bit better, but still rubs when fully flexed. I think I may need to extend those bumpstops. I don't have any pictures of the rear flexing, but take my word, there's plenty of room now. I'm quite pleased with the rear results.
I was wondering about this as well since I use mine as a daily driver. Would the stage 1 not have this issue?
The stage 1 won't stick out as far because it doesn't have the tube part which is about 3". The stage 1 still sticks out, but only by about 2" (instead of 5" total) so I doubt you'd have this problem. I do wish the whole thing was about 1-2" closer to the body though, but I've already learned to step over the sliders.
Hey! Found you over here! I have been following your thread over on JeepForum and didn't know you were over here. Your rig is by far my favorite, and a huge inspiration for where I want to take mine (all be it, money the deciding factor )! Here is mine as of now! Keep up the good work!
Hey! Found you over here! I have been following your thread over on JeepForum and didn't know you were over here. Your rig is by far my favorite, and a huge inspiration for where I want to take mine (all be it, money the deciding factor )! Here is mine as of now! Keep up the good work!
Ha! Yeah, I've been posting on both sites, but I like CF better! One of the best things I've done was talk with my wife to come up with a total figure of how much I can spend on the Cherokee (purchase + upgrades). Then I built a spreadsheet with all of the upgrades I want to do along with their prices to give a running total. Then weed out the things I don't need since I was overbudget. Kept a tally of what I paid for the items, too, which helps gauge what else I can or cannot do. Hope that can help with your build.
The chili pepper is a great color and you've got a lot of potential yet. One of the things I'm grateful the previous owner did was paint those fender flares and door guards black to match the bumpers! I have no idea why Jeep thought they should be grey.
Yeah, and being only in a college, it should get better once I'm finished! As for the spreadsheet thing, I do the same thing! It helps me decide what to do next, and makes me try to find the lowest price on everything that I can. Takes lots of time and research, but worth it!
The fenders drive me crazy! They used to be black (once upon a time) but just faded over time, something I am looking to tackle this summer once it warms up! Not sure how I am going to go about it yet, but I want to get it taken care of!
I ran out of zip ties to hold my swaybar and disconnects when on trail. I've been wanting to come up with a way of securing securing them that doesn't involve a bungee cord or zip ties. So, a couple of friends came over for the day and we came up with a way to use the JKS posts that supposedly can only be used on TJs or Cherokees if you have the stock skidplate. Since I have neither, we made a way for them to work.
Bottom view looking up:
It was really quite simple. There was already a threaded hole in the frame at the right spot. I have no idea what it was designed to hold, but we commandeered it. We tapped it for a 3/8 16 thread and bought a 1-inch bolt for it. Bought a 1/4 20 eye-bolt that was 3-inches long. Ran a nut all the way to the end of the threads of the eye-bolt and then ran the eye-bolt through the post and secured it with a nut inside the post. That keeps the post from falling off. Next, we put a 1/2-inch spacer and grommet inside the eye and ran the bolt through a washer and then the spacer and into the threaded holes.
Here's a bottom view looking up at the mounted posted:
We used a spacer so the eye-bolt can swing around the bolt without the bolt coming out. This allowed the post to be out of the way of the swaybar when connected:
The rubber grommet keeps the eye-bolt from freely spinning around the bolt when driving. It adds just enough pressure to keep it all in place.
Now disconnecting the JKS links are just as easy as they were when I had my TJ!
Last edited by WillyXJ; 03-06-2016 at 04:14 PM.
Reason: changed some wording
Awesome build, Keep up the great work!
Kind of similar to mine except I went with a Hanson front bumper and the cutout flairs... I just might steal your idea for when I do quick disconnects.
Check my build thread out when you get a chance.
I bought five tires rather than just four as I'm a big fan of rotating the full-size spare into the mix and not having to worry about tires being different sizes if I get a flat. But, that means the stock spare comes out of the cargo area and instead of putting a big ol' tire back there, I opted for a Surco rack and mounted my hi-lift jack, axe, and shovel as well. I need all the cargo room I can get for my gear (and sometimes others' as well).
How do you like your rack? i have been debating on makeing one or buying. is it pretty sturdy?


 01-23-2012 | 08:27 AM


 )! Here is mine as of now! Keep up the good work!
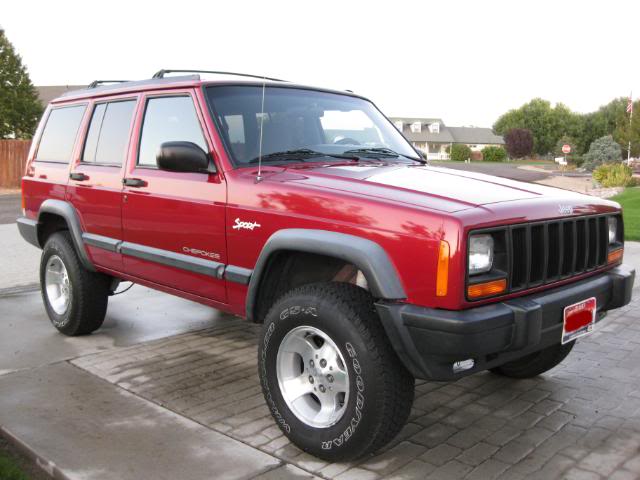

 Kept a tally of what I paid for the items, too, which helps gauge what else I can or cannot do. Hope that can help with your build.