
Drum brake leaking need help


 07-17-2012, 03:25 PM
#18
Member
Thread Starter
Join Date: May 2011
Location: Clutier IA, where the jeep lays in wait, Pensacola, Florida, where im stationed.
Posts: 140
Likes: 0
Received 2 Likes
on
1 Post
Year: 1994
Model: Grand Cherokee
Engine: 4.0L
Okay I got them rebuilt. Ended up replacing everything in them. Never would have been able to do it without the help from you guys and my dad. All I have left to do is bend new lines for the each side and install the new drums. I let the lines soak for days but they kinked anyways. Stupid rust. Thanks again for all your help!
07-17-2012, 03:25 PM
#19
Member
Thread Starter
Join Date: May 2011
Location: Clutier IA, where the jeep lays in wait, Pensacola, Florida, where im stationed.
Posts: 140
Likes: 0
Received 2 Likes
on
1 Post
Year: 1994
Model: Grand Cherokee
Engine: 4.0L
Ugh why are they coming up sideways?! Stupid phone.
05-12-2014, 07:16 AM
#22
Junior Member
Join Date: Sep 2013
Location: Fort Eustis Virginia
Posts: 96
Likes: 0
Received 0 Likes
on
0 Posts
Year: 1997
Model: Cherokee
Engine: l6
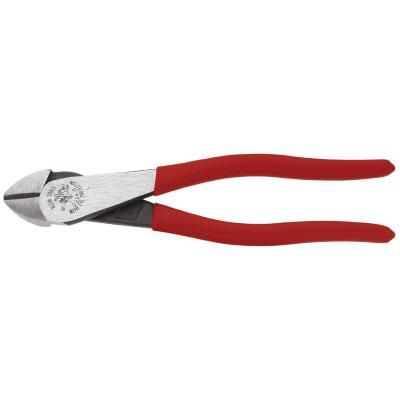
Definitely purchase a line wrench set. They look like open end wrenches, but they are contoured to help prevent the screw on the hard brake line from stripping.
(They look like this vvv)

Secure the Jeep by the axle on jackstands, remove the wheel. Remove the drum itself, make sure the parking brake isn't on. You may have to gently tap on the drums' lip on the backside to get it off.
Now you'll be looking at something along the lines of this:
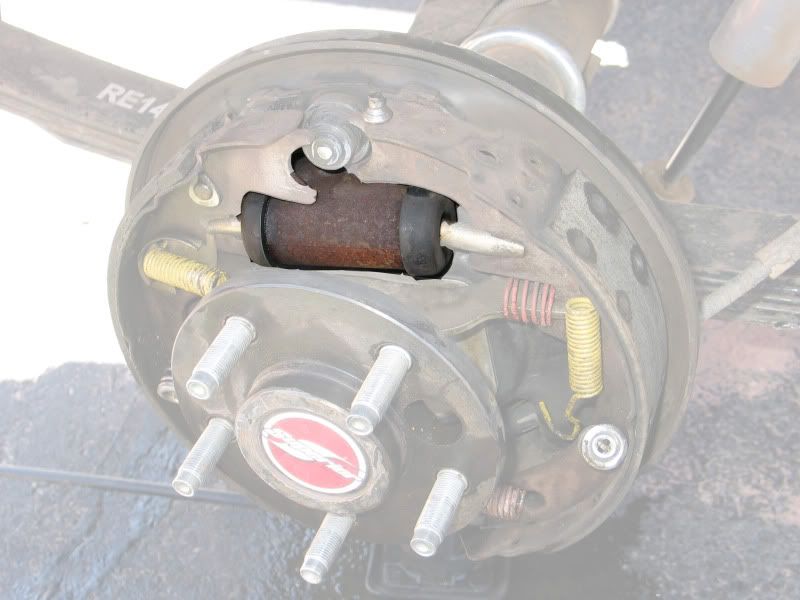
The part I highlighted is the wheel cylinder itself. That's whats leaking. To replace the cylinder itself, should take no more then 10 minutes on average. (I just did both of mine yesterday, it's nothing to be timid of)
You can see both of the shoe retaining springs that meet at the top in front of the wheel cylinder. (NOTE - in this picture, they're already off! MAKE SURE TO MEMORIZE HOW THEY SIT BEFORE YOU TAKE THEM OFF)
The best tool I've found to remove those is a pair of dyke. In my experiences over the years, these are better then pliers, vice grips, needle nose pliers etc.
Using the dykes, grab each spring at about it's mid point, and slowly unclip it from the shaft they meet at.
On the backside of the wheel cylinder, where it meets the housing, you'll see a metal brake line entering the cylinder (that is where the line wrench will come into play) a bleeder screw just above it, and 2 bolts on either side, that hold the wheel cylinder in place.
Using you line wrench, being rather easy, undo the metal brake line. If it's fighting you, use some PB Blaster or WD-40. You have to remember, that fitting hasn't been off in years, and metal brake lines do weaken overtime if the fluid has been neglected.
Once that line is off, remove both bolts (10mm) holding the wheel cylinder in. Grab each brake shoe, and move them apart. The metal arms sticking out of the cylinder arent actually attached, they kinda sit inside a little rubber boot. Once everythings disconnected, simply remove the wheel cylinder, and install you're new one the opposite of un-instillation.
As for the springs, CAREFULLY use your dyke tool to clip them back into place. This WILL take some effort, and wear eye and hand protection. Once everythings back on and secure, put the drum back on, top off the master cylinder, and pump the brakes until the pedal is stiff. Check the level again.
Have someone else pump the brake pedal now, about 10 times, and hold it. Use a wrench, and while they're pushing the brake pedal, open the bleeder screw to let air out of the brake system. They're foot should go to the floor. Don't let them release their foot until you've shut the bleeder completely. Then they can let their foot up and you can repeat the process a few more times. Check the fluid level, and you're set!
*** A COUPLE NOTES ***
This is JUST to replace the wheel cylinder only. Brake fluid will contaminate brake shoes, and its always suggested to replace them if they're saturated in fluid.
Before you run off on your mary way to the parts store, measure the length of your brake shoes!!! Being you have drums, I assume you have a 1993 ZJ. The shoe size will make sure you are given the correct cylinder.
Hope that helps.
(They look like this vvv)
Secure the Jeep by the axle on jackstands, remove the wheel. Remove the drum itself, make sure the parking brake isn't on. You may have to gently tap on the drums' lip on the backside to get it off.
Now you'll be looking at something along the lines of this:
The part I highlighted is the wheel cylinder itself. That's whats leaking. To replace the cylinder itself, should take no more then 10 minutes on average. (I just did both of mine yesterday, it's nothing to be timid of)
You can see both of the shoe retaining springs that meet at the top in front of the wheel cylinder. (NOTE - in this picture, they're already off! MAKE SURE TO MEMORIZE HOW THEY SIT BEFORE YOU TAKE THEM OFF)
The best tool I've found to remove those is a pair of dyke. In my experiences over the years, these are better then pliers, vice grips, needle nose pliers etc.
Using the dykes, grab each spring at about it's mid point, and slowly unclip it from the shaft they meet at.
On the backside of the wheel cylinder, where it meets the housing, you'll see a metal brake line entering the cylinder (that is where the line wrench will come into play) a bleeder screw just above it, and 2 bolts on either side, that hold the wheel cylinder in place.
Using you line wrench, being rather easy, undo the metal brake line. If it's fighting you, use some PB Blaster or WD-40. You have to remember, that fitting hasn't been off in years, and metal brake lines do weaken overtime if the fluid has been neglected.
Once that line is off, remove both bolts (10mm) holding the wheel cylinder in. Grab each brake shoe, and move them apart. The metal arms sticking out of the cylinder arent actually attached, they kinda sit inside a little rubber boot. Once everythings disconnected, simply remove the wheel cylinder, and install you're new one the opposite of un-instillation.
As for the springs, CAREFULLY use your dyke tool to clip them back into place. This WILL take some effort, and wear eye and hand protection. Once everythings back on and secure, put the drum back on, top off the master cylinder, and pump the brakes until the pedal is stiff. Check the level again.
Have someone else pump the brake pedal now, about 10 times, and hold it. Use a wrench, and while they're pushing the brake pedal, open the bleeder screw to let air out of the brake system. They're foot should go to the floor. Don't let them release their foot until you've shut the bleeder completely. Then they can let their foot up and you can repeat the process a few more times. Check the fluid level, and you're set!
*** A COUPLE NOTES ***
This is JUST to replace the wheel cylinder only. Brake fluid will contaminate brake shoes, and its always suggested to replace them if they're saturated in fluid.
Before you run off on your mary way to the parts store, measure the length of your brake shoes!!! Being you have drums, I assume you have a 1993 ZJ. The shoe size will make sure you are given the correct cylinder.
Hope that helps.
05-12-2014, 04:22 PM
#23
Old fart with a wrench
I didn't get to you in time, but I was going to tell you about my "gravity bleed" technique. When you take the brake line off, plug the pipe with something so the fluid doesn't drain out. When you connect the new parts back up, open the bleeder screw and wait for the fluid to start leaking out of it. Close the screw and you'll find the brake pedal is pretty firm. This doesn't always work because sometimes the shuttle valve has closed off that part of the system because of the original leak or the ABS system gets involved.
Of course, if the master cylinder drained out, this won't work. I discovered this trick during many years of working alone. Sometimes training a woman on the proper way to "pump and hold" the brakes gets annoying.
You did a nice job on your first brake job. One thing my Dad taught me was to take both brake drums off but replace the shoes and springs one side at a time, using the opposite side as a reference as to where the parts go. Another thing he said, "It may not go fast, but it's GOT to be able to stop!"
Last edited by dave1123; 05-12-2014 at 04:35 PM.
05-13-2014, 06:54 AM
#24
Junior Member
Join Date: Sep 2013
Location: Fort Eustis Virginia
Posts: 96
Likes: 0
Received 0 Likes
on
0 Posts
Year: 1997
Model: Cherokee
Engine: l6
I didn't get to you in time, but I was going to tell you about my "gravity bleed" technique. When you take the brake line off, plug the pipe with something so the fluid doesn't drain out. When you connect the new parts back up, open the bleeder screw and wait for the fluid to start leaking out of it. Close the screw and you'll find the brake pedal is pretty firm. This doesn't always work because sometimes the shuttle valve has closed off that part of the system because of the original leak or the ABS system gets involved.
Of course, if the master cylinder drained out, this won't work. I discovered this trick during many years of working alone. Sometimes training a woman on the proper way to "pump and hold" the brakes gets annoying.
You did a nice job on your first brake job. One thing my Dad taught me was to take both brake drums off but replace the shoes and springs one side at a time, using the opposite side as a reference as to where the parts go. Another thing he said, "It may not go fast, but it's GOT to be able to stop!"
Of course, if the master cylinder drained out, this won't work. I discovered this trick during many years of working alone. Sometimes training a woman on the proper way to "pump and hold" the brakes gets annoying.
You did a nice job on your first brake job. One thing my Dad taught me was to take both brake drums off but replace the shoes and springs one side at a time, using the opposite side as a reference as to where the parts go. Another thing he said, "It may not go fast, but it's GOT to be able to stop!"
05-13-2014, 08:49 AM
#25
Beach Bum
I always liked the 'jar & vinyl hose' method of brake bleeding. Wife not required
Also works good for flushing out old fluid, and can be made into a 'vacuum brake bleeder'.
http://temp.corvetteforum.net/c3/joe..._Bleeder.shtml
Also works good for flushing out old fluid, and can be made into a 'vacuum brake bleeder'.
http://temp.corvetteforum.net/c3/joe..._Bleeder.shtml
05-14-2014, 03:20 AM
#26
Old fart with a wrench
About the flushing out the old fluid. This is something most people don't do often enough. Brake fluid holds moisture in it and rots out the inside of cylinders and steel lines. It should be changed whenever it gets dark or whenever you open a brake system.
05-14-2014, 09:06 PM
#27
Junior Member
Join Date: Sep 2013
Location: Fort Eustis Virginia
Posts: 96
Likes: 0
Received 0 Likes
on
0 Posts
Year: 1997
Model: Cherokee
Engine: l6
Good to know. I might do the wife's rig too I bought twice as much fluid as I needed

Thread
Thread Starter
Forum
Replies
Last Post
NM-XJ
Stock XJ Cherokee Tech. All XJ Non-modified/stock questions go here
18
10-23-2018 04:21 PM
Blackxj51
Stock XJ Cherokee Tech. All XJ Non-modified/stock questions go here
22
09-13-2015 06:06 PM
canada_man
Stock XJ Cherokee Tech. All XJ Non-modified/stock questions go here
0
09-04-2015 11:05 AM
RickJames Bish
Modified XJ Cherokee Tech
5
09-02-2015 03:22 PM
Currently Active Users Viewing This Thread: 3 (0 members and 3 guests)