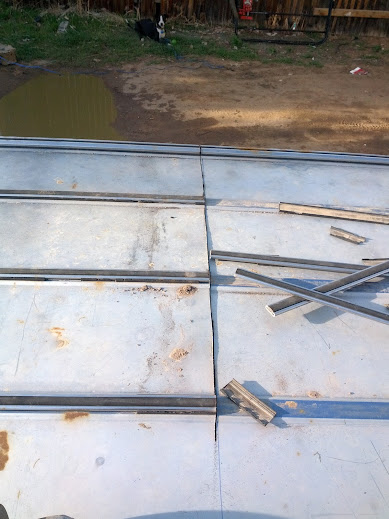
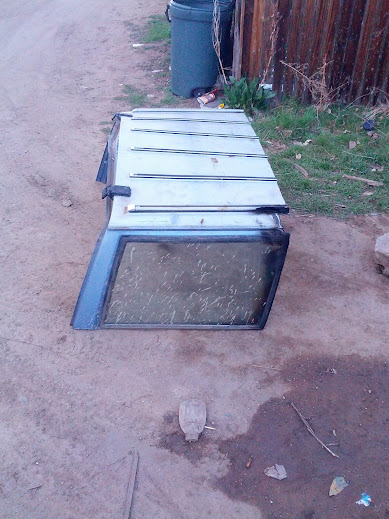
The start of another chop top
#16
Thread Starter
Senior Member
Joined: Oct 2010
Posts: 562
Likes: 0
From: Pagosa Springs, Colorado
Year: 88-ish
Model: Cherokee
Engine: 4.0 I6
Ok, things might get a little picture heavy here. Top is off and everything is mostly capped off and ready to go. I still have to get my removable window figured out but i'm getting closer.
Hatch off

Rack off

Ready to start

Did my best to mark a straight line across the top

Hit it with the disc grinder

Its starting to fall off. And I even managed to save both the back windows

I ran out of discs and needed to finish before dark so the cutting torch came out.

still smoking a bit

Bent the rear a little with my high lift

Left me with this

Rear end.

Now time to start the actual hard work

...

The back

I did screw up and cut the wire harness that runs through the roof to the passenger tail lights so I built a new harness to wire in. I'll wire it better down the road but this works for now

Hatch off

Rack off

Ready to start

Did my best to mark a straight line across the top

Hit it with the disc grinder

Its starting to fall off. And I even managed to save both the back windows

I ran out of discs and needed to finish before dark so the cutting torch came out.

still smoking a bit

Bent the rear a little with my high lift

Left me with this

Rear end.

Now time to start the actual hard work

...

The back

I did screw up and cut the wire harness that runs through the roof to the passenger tail lights so I built a new harness to wire in. I'll wire it better down the road but this works for now

#17
Thread Starter
Senior Member
Joined: Oct 2010
Posts: 562
Likes: 0
From: Pagosa Springs, Colorado
Year: 88-ish
Model: Cherokee
Engine: 4.0 I6
Day two -
Well there a few parts of this that I didnt get good pictures for. I got caught up in welding and cutting and forgot to snap some pics along the way. You can piece it together easy enough.
I welded in a piece of 1x1 angle across the roof to flatten it out and to give me something solid to work off of to get the top tied into the cage.


Then I took another piece of the angle and welded that right below so that it would match up with the top tube on the cage.

Beads

Then that left me with this.

This did add a slight bubble to the roof but honestly, once I got everything together and got the rack back on you cant really notice it. And its stiff enough that it doesnt rattle or anything either.

Next up is the sides

More angle

Tack tack tack

Same game plan for the sides. Since this has a slight curve to it I had to take some body hammers to it but it worked out pretty well and doesn't look terrible


Welding it all in.

I mainly just focused on that one side for the pictures. Its the same on the other side. Here it is with all of that welded in.

Now time for the corner caps. Used the ol cardboard template that i'm so fond of again for this one.

Which then gave me this.

Threw some primer on it til I can get around to painting it right.

I haven't capped the ends above the tail lights yet. After welding for a day straight to get it to this point I just didn't have it in my to work on it anymore. I'll probably cap that part either this afternoon or tomorrow sometime. All of the angle iron that I used for this came from a small bed frame that was given to me. I was walking around the flea market last month and one of the vendors was walking to the trash with the frame getting ready to trash it so I told him I would take it isn't. I still have enough left over after all of this to build another battery box to mount in the back. Basically, not counting welding supplies, I have about $15 into this project. So all you super budget guys should enjoy it as well. Really just takes some time to get everything boxed up and welded back together.


Well there a few parts of this that I didnt get good pictures for. I got caught up in welding and cutting and forgot to snap some pics along the way. You can piece it together easy enough.
I welded in a piece of 1x1 angle across the roof to flatten it out and to give me something solid to work off of to get the top tied into the cage.


Then I took another piece of the angle and welded that right below so that it would match up with the top tube on the cage.

Beads

Then that left me with this.

This did add a slight bubble to the roof but honestly, once I got everything together and got the rack back on you cant really notice it. And its stiff enough that it doesnt rattle or anything either.

Next up is the sides

More angle

Tack tack tack

Same game plan for the sides. Since this has a slight curve to it I had to take some body hammers to it but it worked out pretty well and doesn't look terrible


Welding it all in.

I mainly just focused on that one side for the pictures. Its the same on the other side. Here it is with all of that welded in.

Now time for the corner caps. Used the ol cardboard template that i'm so fond of again for this one.

Which then gave me this.

Threw some primer on it til I can get around to painting it right.

I haven't capped the ends above the tail lights yet. After welding for a day straight to get it to this point I just didn't have it in my to work on it anymore. I'll probably cap that part either this afternoon or tomorrow sometime. All of the angle iron that I used for this came from a small bed frame that was given to me. I was walking around the flea market last month and one of the vendors was walking to the trash with the frame getting ready to trash it so I told him I would take it isn't. I still have enough left over after all of this to build another battery box to mount in the back. Basically, not counting welding supplies, I have about $15 into this project. So all you super budget guys should enjoy it as well. Really just takes some time to get everything boxed up and welded back together.


#18
Thread Starter
Senior Member
Joined: Oct 2010
Posts: 562
Likes: 0
From: Pagosa Springs, Colorado
Year: 88-ish
Model: Cherokee
Engine: 4.0 I6
Backup light brackets added. Didn't get much done today cause I was helping a buddy with his sway bars and a few odds and ends on his jeep.


#21
Senior Member
Joined: Oct 2011
Posts: 823
Likes: 0
From: Raleigh,NC
Year: 1992
Model: Cherokee
Engine: 4.0L HO
Looks good. I took the rear windows out before cutting and just followed the window frame with my cut so I didn't have to cap anything but the top corners and above the tail lights.
#22
Thread Starter
Senior Member
Joined: Oct 2010
Posts: 562
Likes: 0
From: Pagosa Springs, Colorado
Year: 88-ish
Model: Cherokee
Engine: 4.0 I6
Thank you. Glad to hear some good things about it.
I thought about doing that but I didn't want to leave the pinch seam exposed across the sides. I like the look of the flush metal better.
I thought about doing that but I didn't want to leave the pinch seam exposed across the sides. I like the look of the flush metal better.
#25
Thread Starter
Senior Member
Joined: Oct 2010
Posts: 562
Likes: 0
From: Pagosa Springs, Colorado
Year: 88-ish
Model: Cherokee
Engine: 4.0 I6
Nailed it.
#26
Thread Starter
Senior Member
Joined: Oct 2010
Posts: 562
Likes: 0
From: Pagosa Springs, Colorado
Year: 88-ish
Model: Cherokee
Engine: 4.0 I6
Got my tank installed and a tarp thrown on it before the snow hit again.
Air!

Pre snow cover

Post snow. It really wasn't too bad driving with it covered like this today either.

Air!

Pre snow cover

Post snow. It really wasn't too bad driving with it covered like this today either.

#28
Thread Starter
Senior Member
Joined: Oct 2010
Posts: 562
Likes: 0
From: Pagosa Springs, Colorado
Year: 88-ish
Model: Cherokee
Engine: 4.0 I6
https://www.cherokeeforum.com/f58/ro...-build-133348/


