
XJ 96 and under Fuel Tank Relocation Write-up
 04-29-2012, 07:10 PM
#1
CF Veteran
Thread Starter
Join Date: Mar 2009
Location: Berea, OH
Posts: 7,996
Likes: 0
Received 0 Likes
on
0 Posts
Year: 1998
Model: Cherokee
Engine: 4.0
Ok....so I needed to replace the rear deck in my XJ for a while now. I had already done from the rear seats forward, and sleeved the frame rails with 3x2 angle.
I waited on doing the rear because I had to drop the tank to do it. And, since I had to drop the tank anyways, I decided it needed to move and get the heck out of the way of the rocks....
So...I give you gas tank relocation:
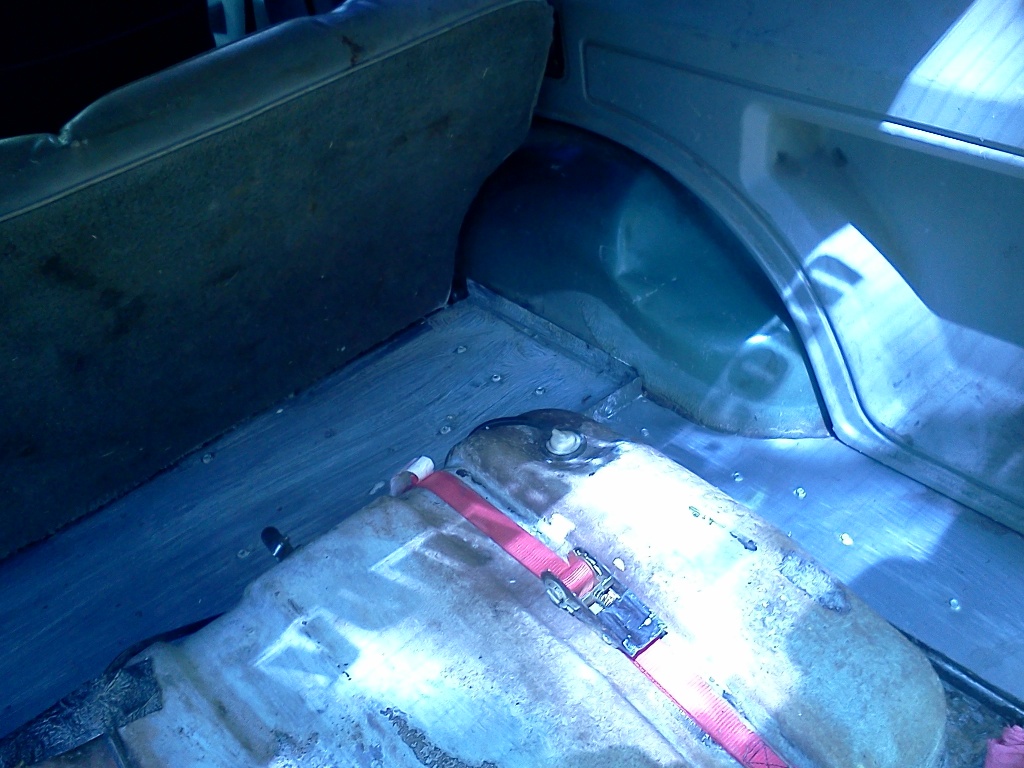
Unfortunately, I did not take a pic of how rusted the floors were....suffice it to say that I did not need to cut much out:
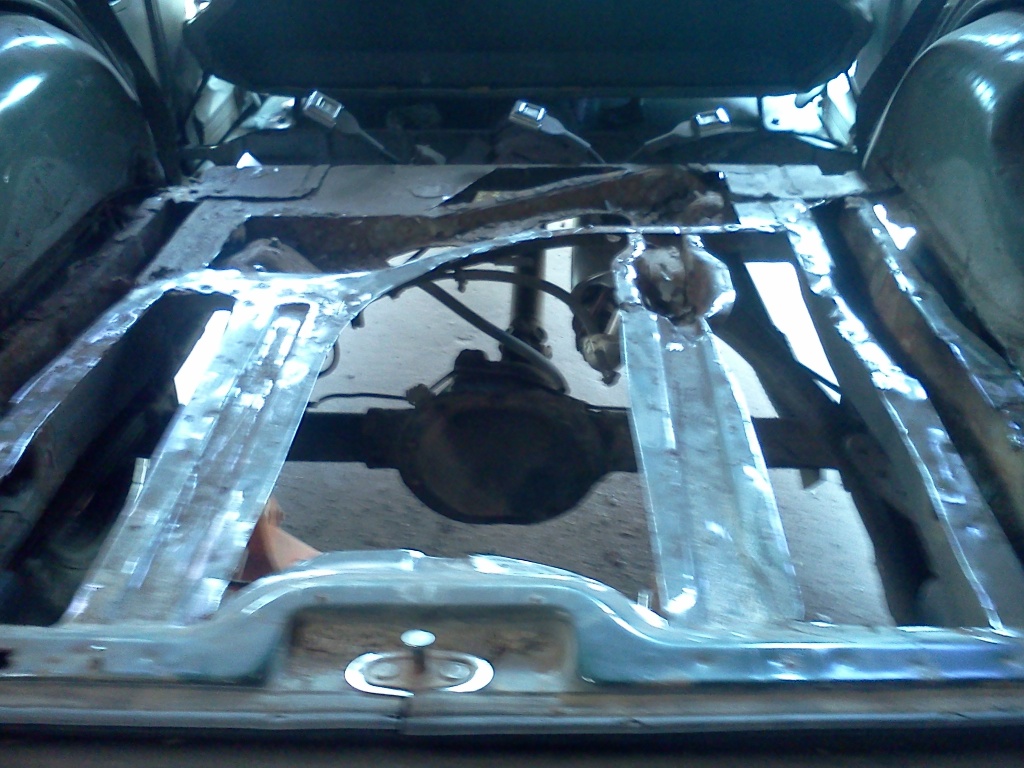

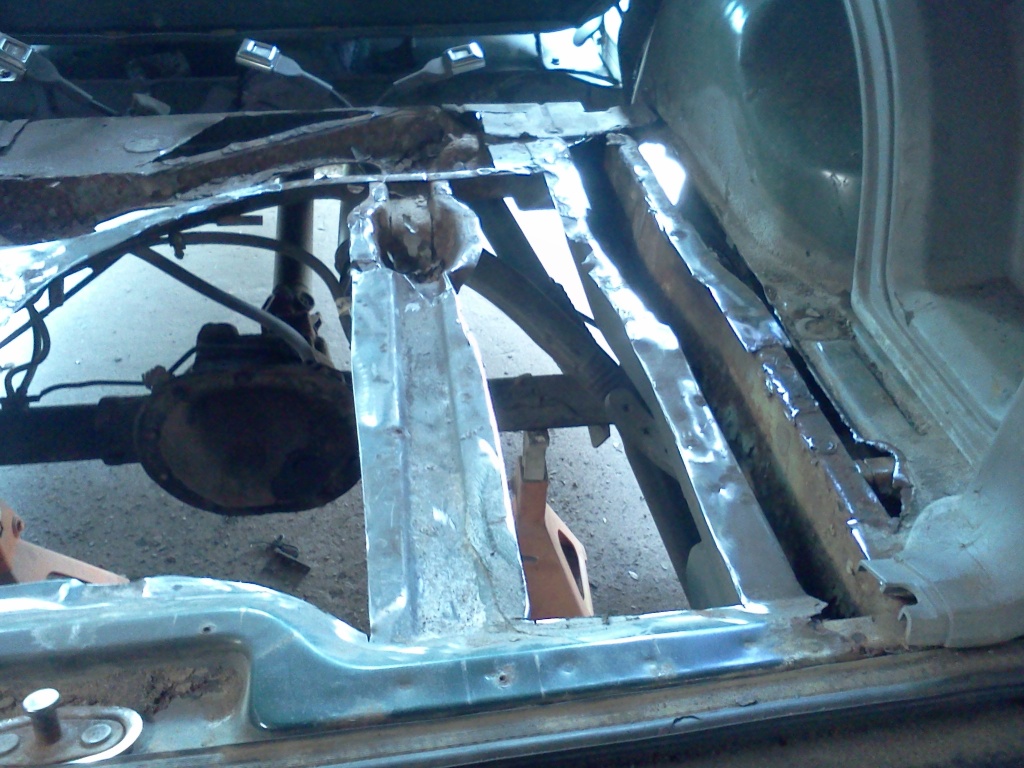
Once we had the floor out, it was time to measure the gas tank and build a frame out of 1x1 3/16" angle:
I left the cross bars in the rear for this step until everything is welded in. Very tight fit between the frame rails, but it DOES just fit.
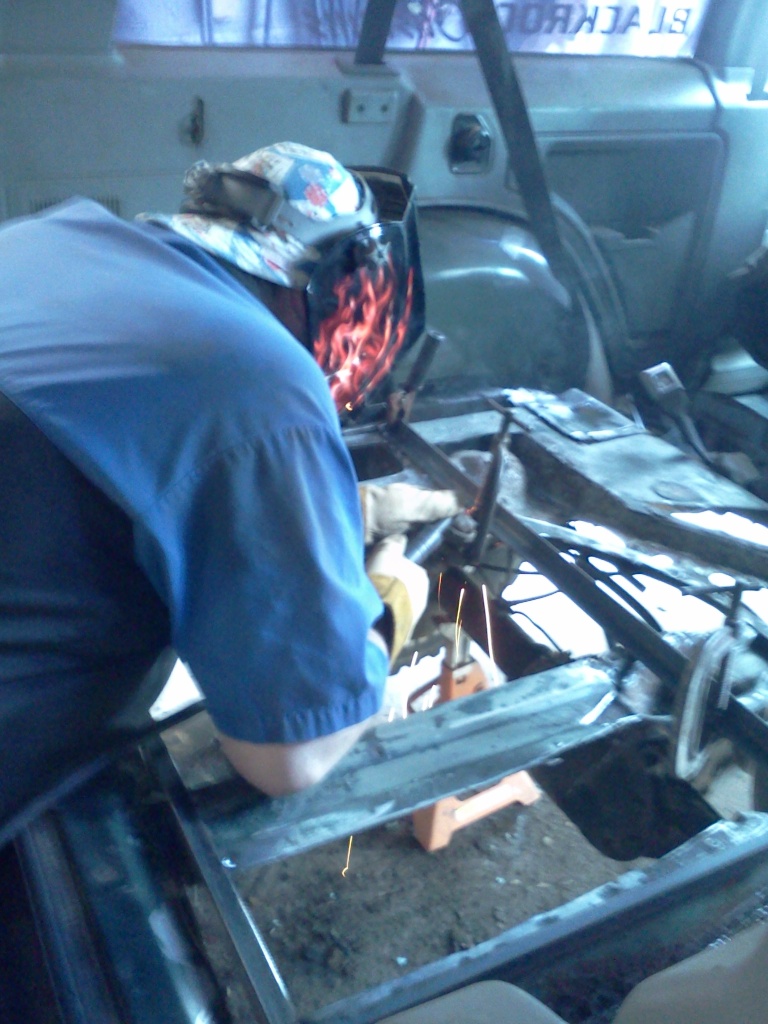
Once the frame was welded in, time to cut out the cross bars...
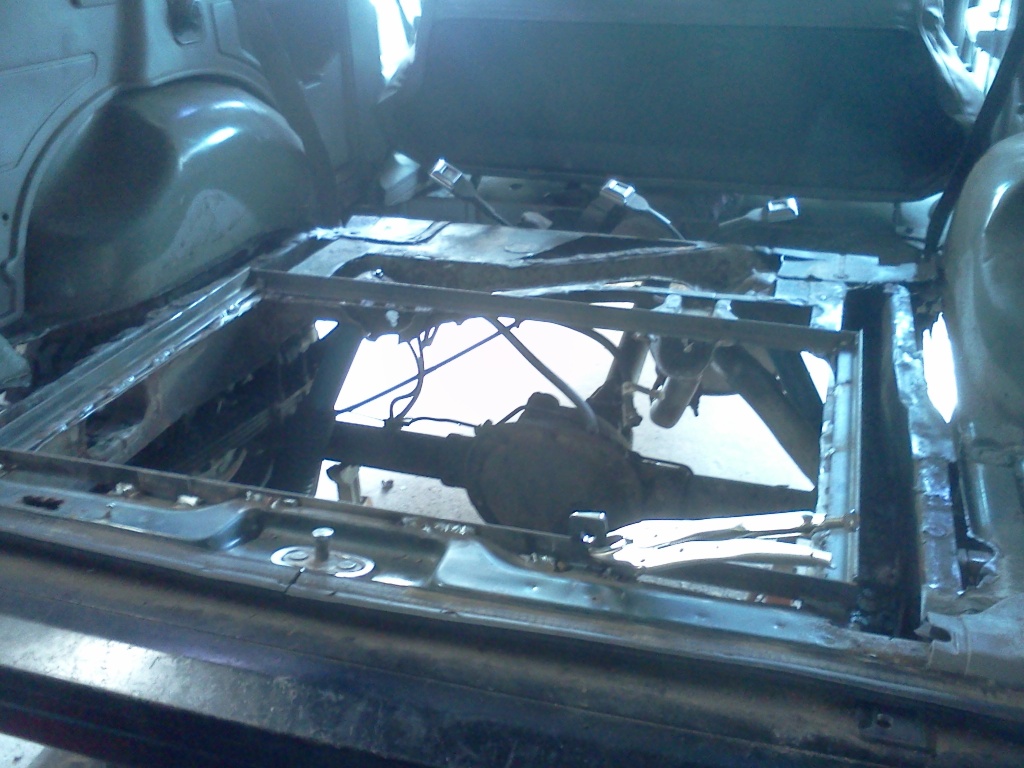
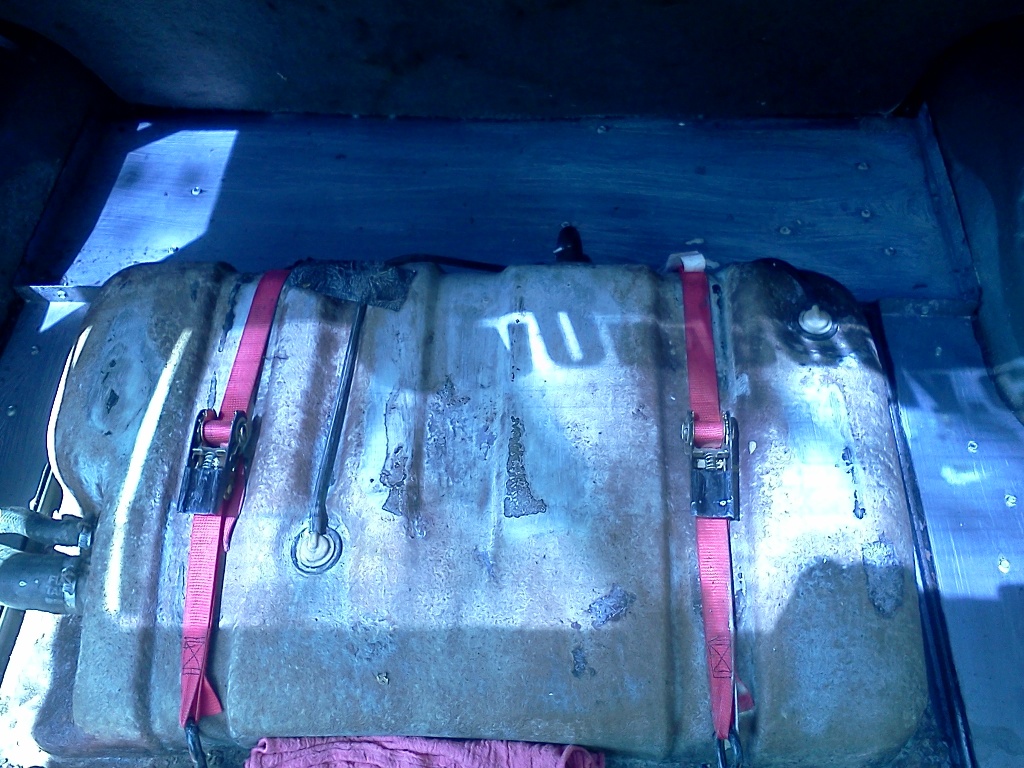
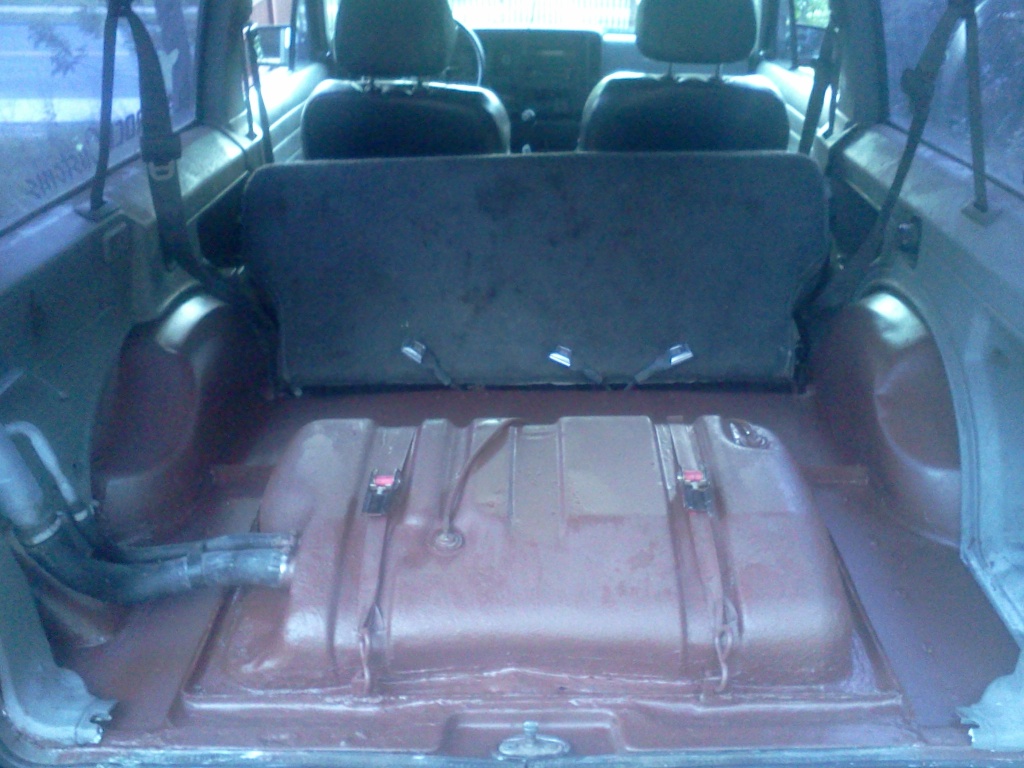
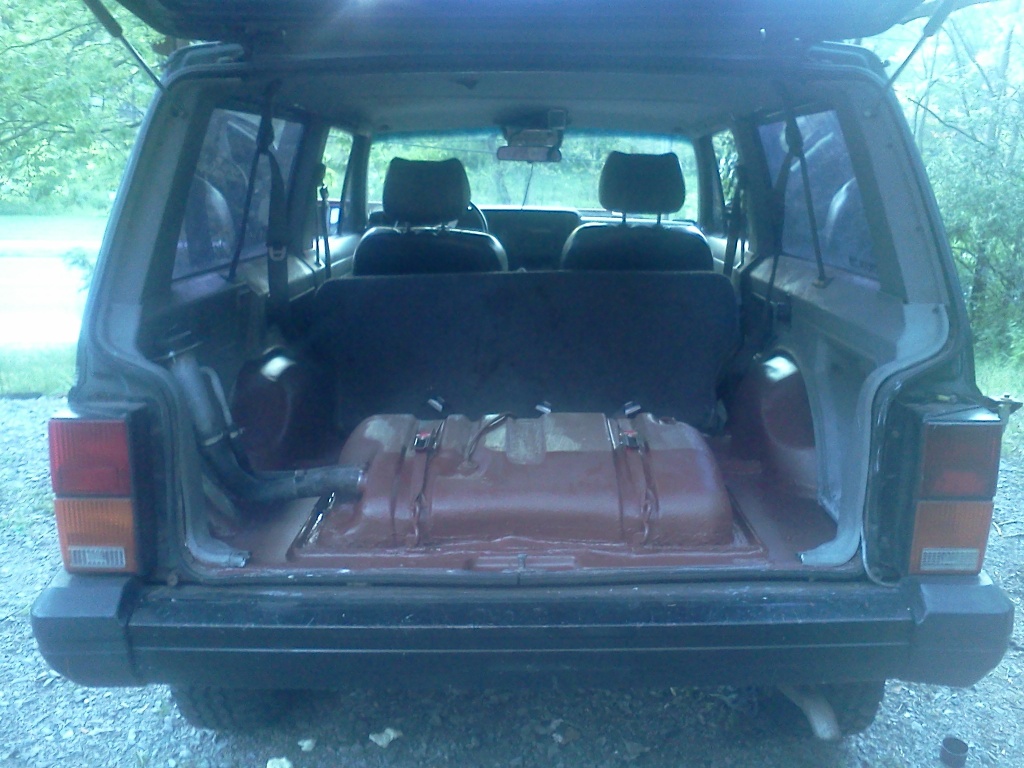
Then insert tank:
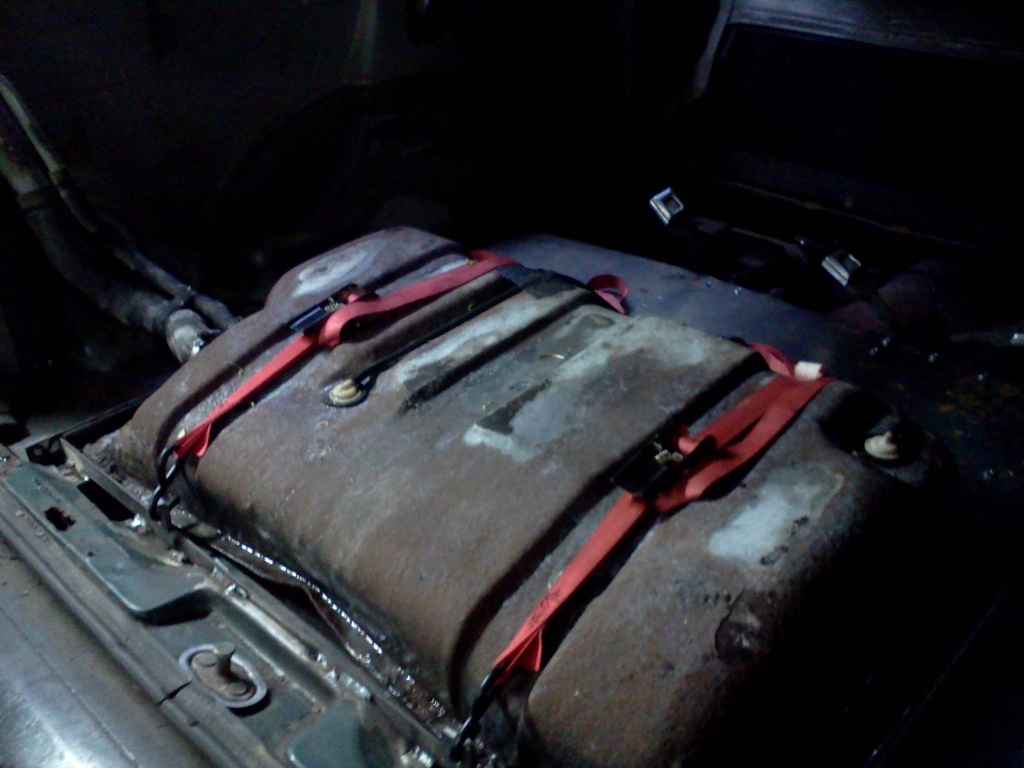
Yes...those are ratchet straps on top of the tank, i like it that way.
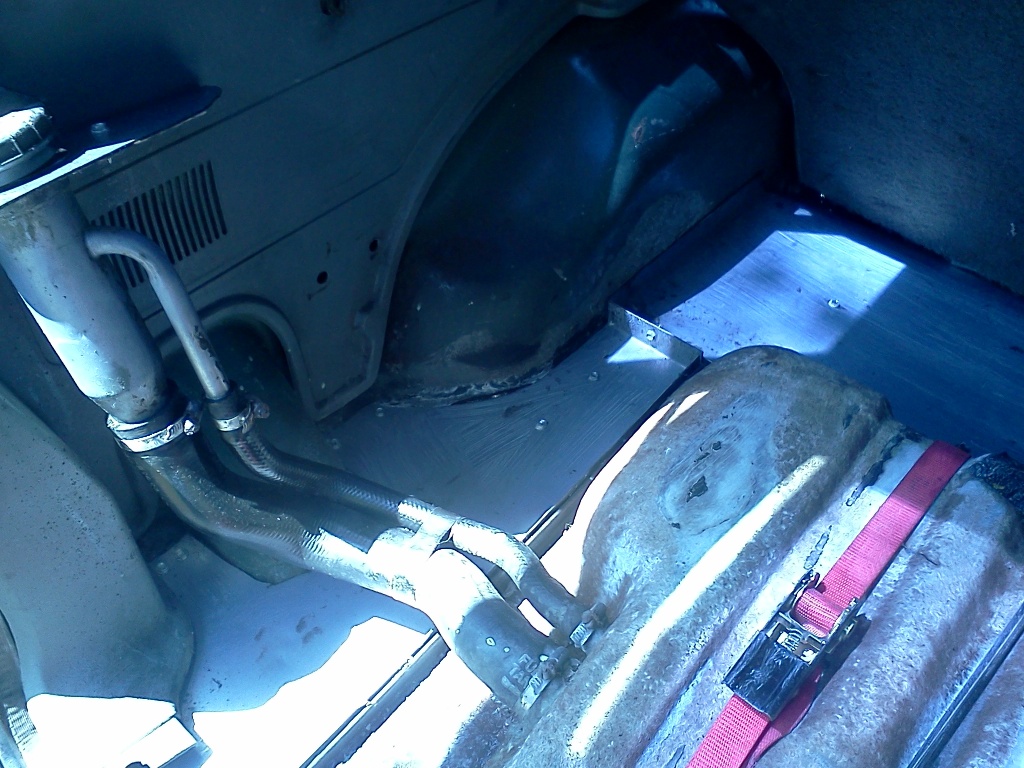
Once the gas tank is back in, you need to rehook all the lines up. I put a 2" hole right in front of the tank and lined the edge with a cut piece uf fuel rubber hose (I falied to take a pic of this step, but will try and post one later).
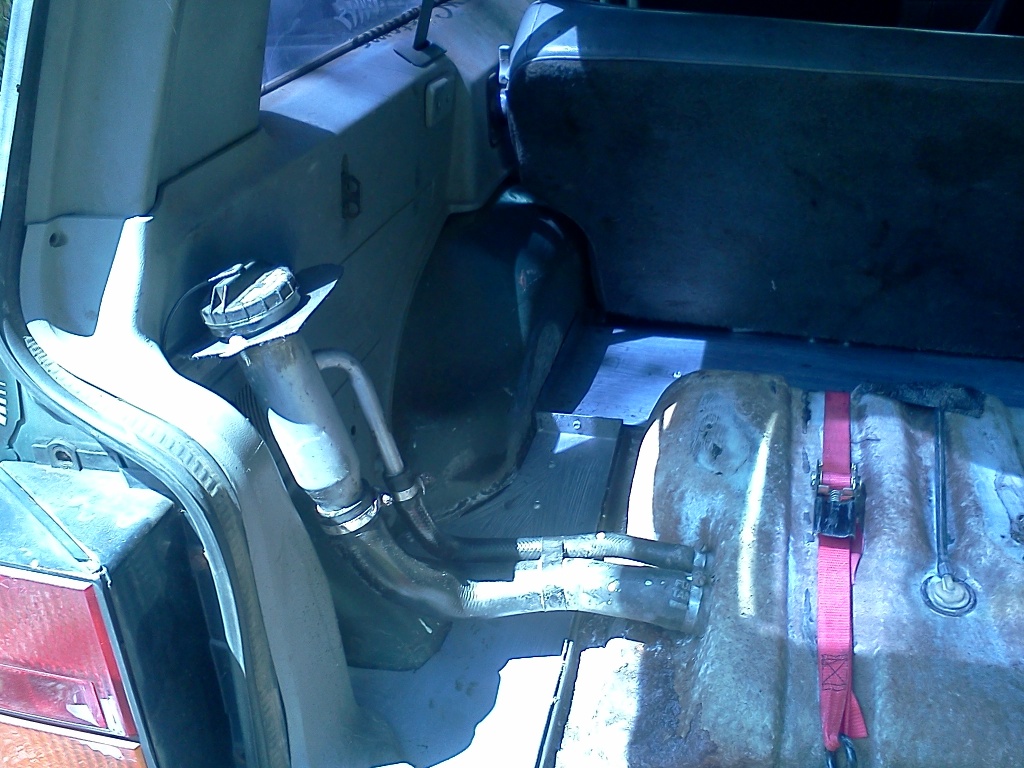
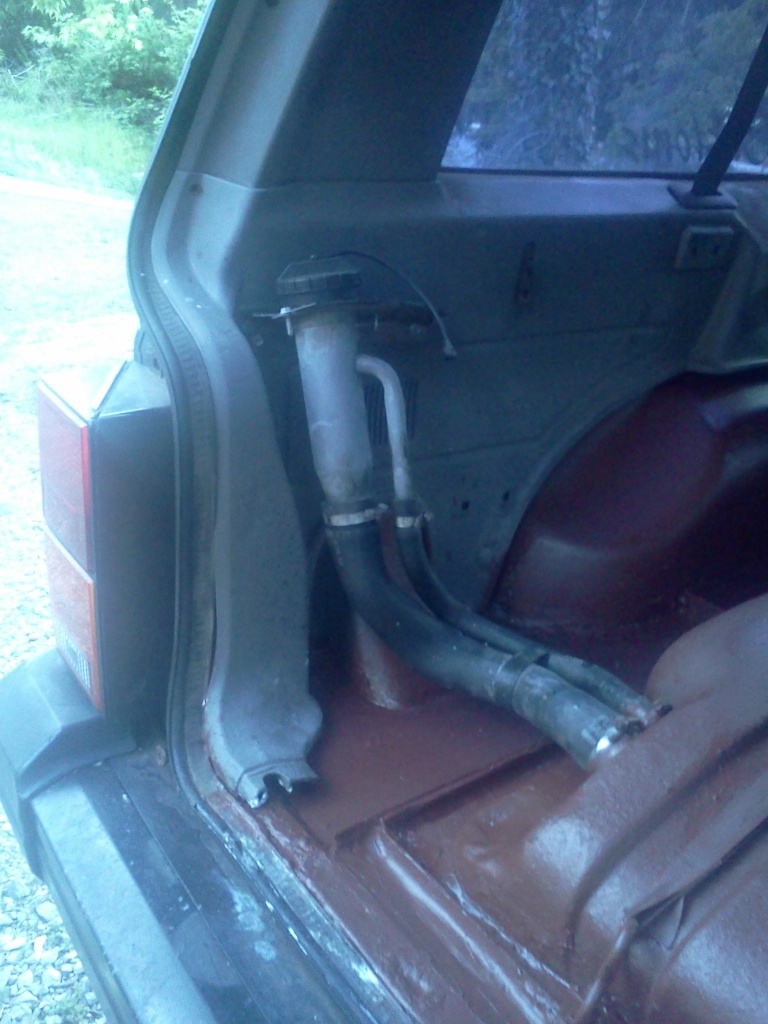
Next was the fuel filler. I used a piece of sheet metal with a few beads rolled in for rigidity for a bracket and screwed it into the side trim paney and then attached the filler neck:
Next was just to sheet out the rest of the rear:
I then insulated some areas with great stuff, and seem sealed ALL the edges...once complete...today it got some primer:
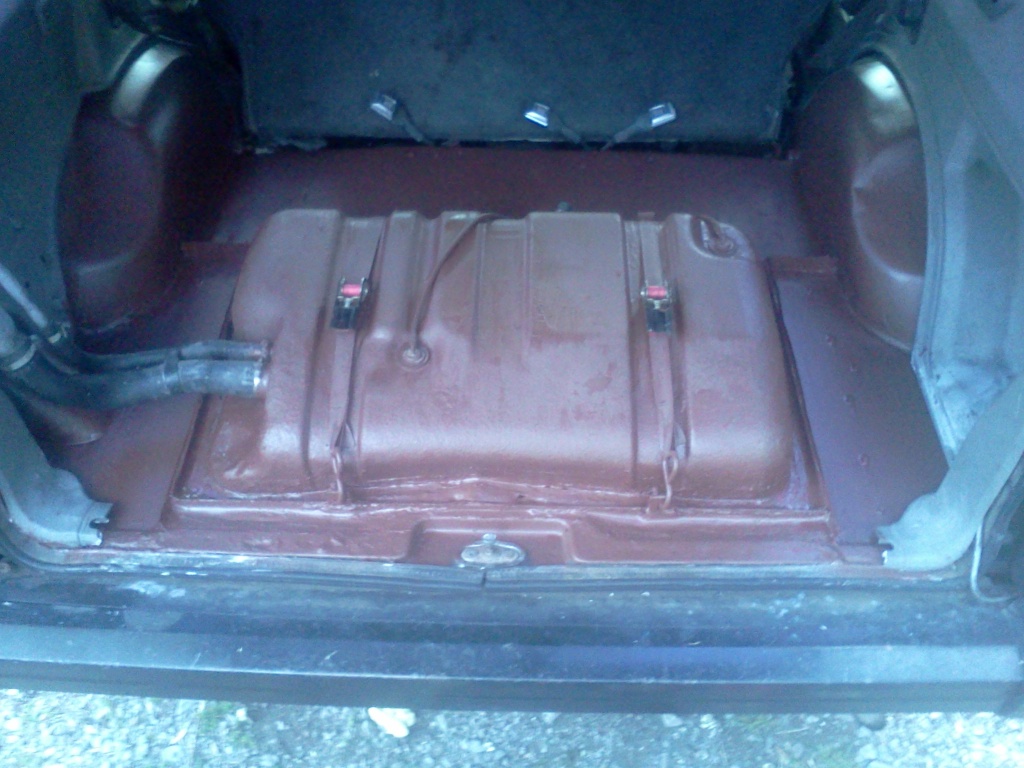
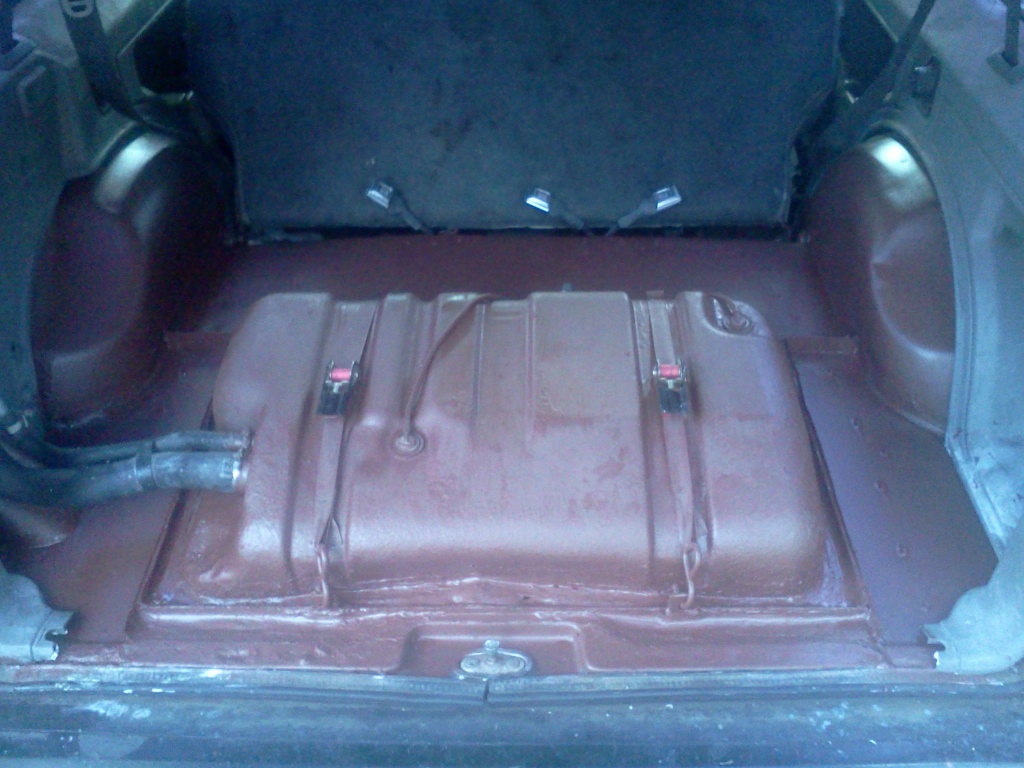
Next it will get some liner.
Here is what it looks like underneath...all of it has been undercoated. Notice the tank is even with the frame rails...in the future I plan to put 3/16: plate across it to further protect it.
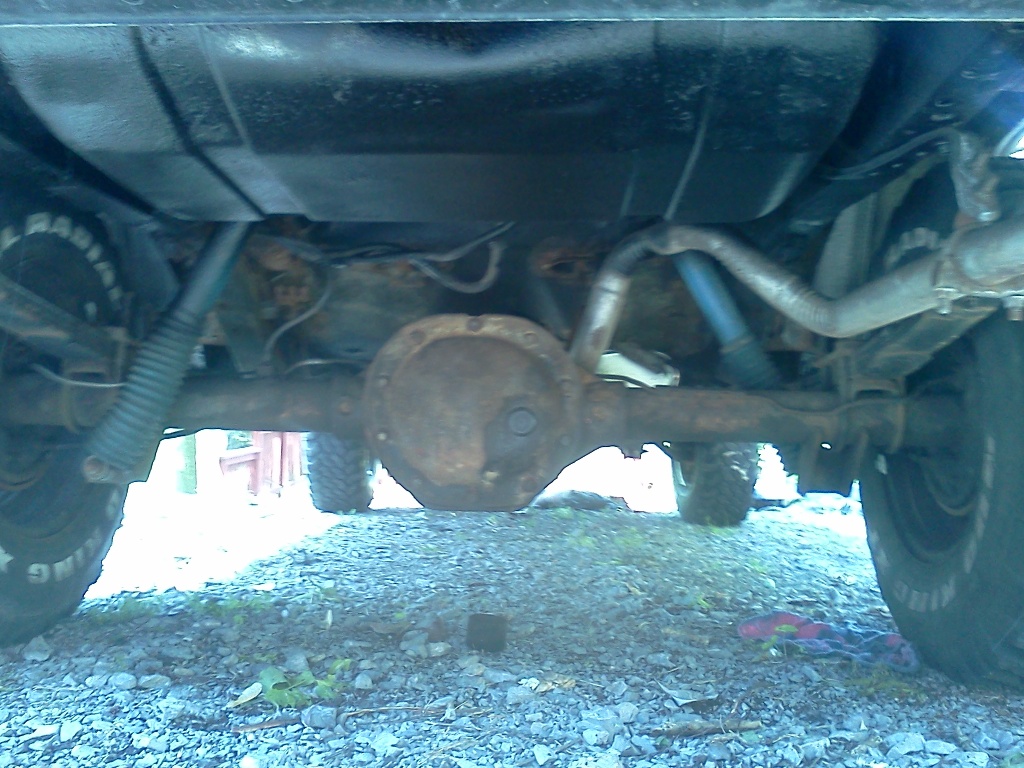
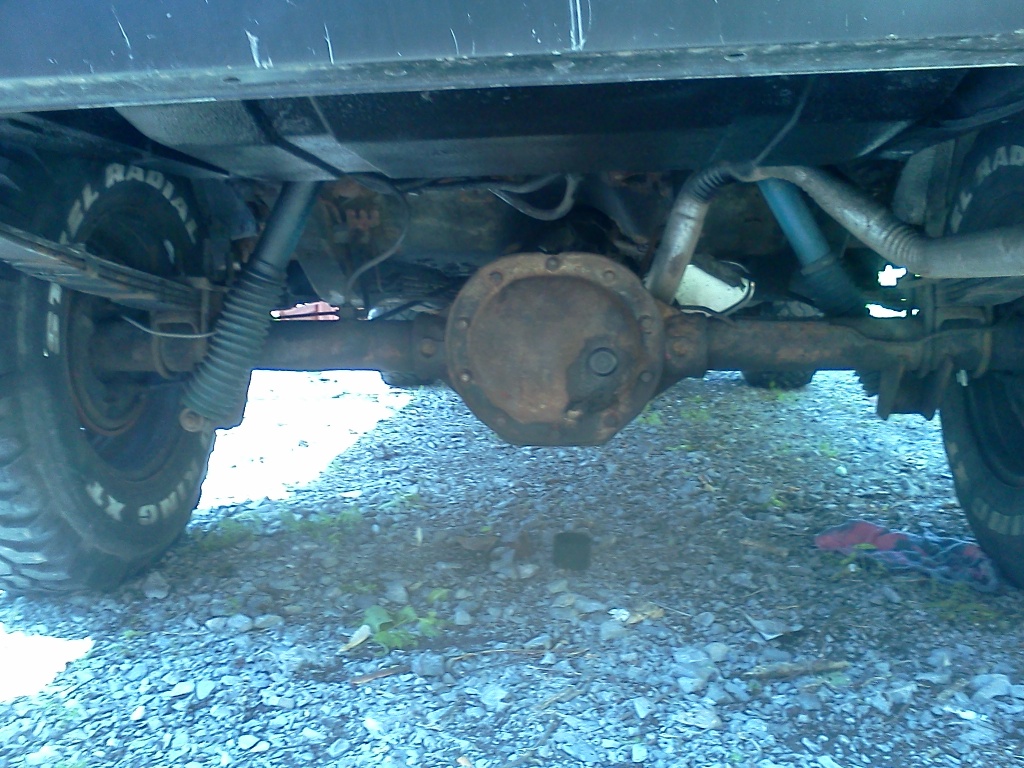
Yeah, the gas tank is dented. That was my motivation.
I will keep this writeup going and show what I did with the lines and how it looks linered in the next step.
I am also going to be building a cargo area box that will protect the tank from the interior and will keep you all posted on that progress as well.
Thanks so far for looking!
I waited on doing the rear because I had to drop the tank to do it. And, since I had to drop the tank anyways, I decided it needed to move and get the heck out of the way of the rocks....
So...I give you gas tank relocation:
Unfortunately, I did not take a pic of how rusted the floors were....suffice it to say that I did not need to cut much out:
Once we had the floor out, it was time to measure the gas tank and build a frame out of 1x1 3/16" angle:
I left the cross bars in the rear for this step until everything is welded in. Very tight fit between the frame rails, but it DOES just fit.
Once the frame was welded in, time to cut out the cross bars...
Then insert tank:
Yes...those are ratchet straps on top of the tank, i like it that way.
Once the gas tank is back in, you need to rehook all the lines up. I put a 2" hole right in front of the tank and lined the edge with a cut piece uf fuel rubber hose (I falied to take a pic of this step, but will try and post one later).
Next was the fuel filler. I used a piece of sheet metal with a few beads rolled in for rigidity for a bracket and screwed it into the side trim paney and then attached the filler neck:
Next was just to sheet out the rest of the rear:
I then insulated some areas with great stuff, and seem sealed ALL the edges...once complete...today it got some primer:
Next it will get some liner.
Here is what it looks like underneath...all of it has been undercoated. Notice the tank is even with the frame rails...in the future I plan to put 3/16: plate across it to further protect it.
Yeah, the gas tank is dented. That was my motivation.
I will keep this writeup going and show what I did with the lines and how it looks linered in the next step.
I am also going to be building a cargo area box that will protect the tank from the interior and will keep you all posted on that progress as well.
Thanks so far for looking!
 04-29-2012, 07:22 PM
#3
CF Veteran
Thread Starter
Join Date: Mar 2009
Location: Berea, OH
Posts: 7,996
Likes: 0
Received 0 Likes
on
0 Posts
Year: 1998
Model: Cherokee
Engine: 4.0
04-29-2012, 07:28 PM
#4
CF Veteran
Join Date: Nov 2011
Location: City of Trees, CA
Posts: 7,387
Likes: 0
Received 10 Likes
on
9 Posts
Year: 93 2 door
Model: Cherokee
Engine: 4.0
I like the red primer. thanks for doing the write up I definitely want to do this down the road great job man.
estimated labor time??
what factors made you decide to put the fill hole in that spot?
and do you have any plans for OBA with a nozzle placed in the stock gas filler location? becasue that would be sick and I wanted to figure out how to do that for mine as well
estimated labor time??
what factors made you decide to put the fill hole in that spot?
and do you have any plans for OBA with a nozzle placed in the stock gas filler location? becasue that would be sick and I wanted to figure out how to do that for mine as well
Last edited by Atmos; 04-29-2012 at 07:31 PM.
04-29-2012, 07:31 PM
#5
CF Veteran
Thread Starter
Join Date: Mar 2009
Location: Berea, OH
Posts: 7,996
Likes: 0
Received 0 Likes
on
0 Posts
Year: 1998
Model: Cherokee
Engine: 4.0
I like the red primer. thanks for doing the write up I definitely want to do this down the road great job man.
estimated labor time??
what factors made you decide to put the fill hole in that spot?
and do you have any planse for OBA with a nozzle placed in the stock gas filler location? becasue that would be sick and I wanted to figure out how to do that for mine as well
estimated labor time??
what factors made you decide to put the fill hole in that spot?
and do you have any planse for OBA with a nozzle placed in the stock gas filler location? becasue that would be sick and I wanted to figure out how to do that for mine as well
I put the fill hole in that spot because that is where the hose wanted to go...lol, and because I do not want it on the outside.
I am actually eliminating the fuel filler door entirely...the reason shall remain a secret until THAT write-up...lol
04-29-2012, 07:35 PM
#6
CF Veteran
Join Date: Nov 2011
Location: City of Trees, CA
Posts: 7,387
Likes: 0
Received 10 Likes
on
9 Posts
Year: 93 2 door
Model: Cherokee
Engine: 4.0
because that's what it looks you're forced to do
quarter panel guards right?
 04-29-2012, 07:44 PM
#7
CF Veteran
Thread Starter
Join Date: Mar 2009
Location: Berea, OH
Posts: 7,996
Likes: 0
Received 0 Likes
on
0 Posts
Year: 1998
Model: Cherokee
Engine: 4.0
No armor YET....but it will be coming. The sheet I used to hold the fuel filler has a few ribs rolled in to strengthen it and it will hold the fuel pump nozzle....it is actually pretty rigid.
I do want to eventually make an all steel to steel bracket for it, but for now this is surprisingly strong.
BTW...I sleeved in the old hole in the unibody where the fuel hoses used to run...forgot to get a pic of that too....never understood a hole through the frame....
It's actually the paint scheme that is making me get rid of the filler door. ;-)
Trending Topics

 Great job looks good. Would love to do this but not too much storage space as it is.
 04-29-2012, 09:43 PM
#10
CF Veteran
Join Date: Mar 2010
Location: Jacksonville, FL
Posts: 6,685
Likes: 0
Received 5 Likes
on
5 Posts
Year: 92
Model: Cherokee
Engine: 4.0
Looks good!
By far one of my more favorite mods I've done. I would box it in real soon though. Exposed gas tank in a non-chop xj makes me uneasy
By far one of my more favorite mods I've done. I would box it in real soon though. Exposed gas tank in a non-chop xj makes me uneasy
04-29-2012, 09:47 PM
#11
CF Veteran
Thread Starter
Join Date: Mar 2009
Location: Berea, OH
Posts: 7,996
Likes: 0
Received 0 Likes
on
0 Posts
Year: 1998
Model: Cherokee
Engine: 4.0
That IS the plan. Although, it didn't leak before, no need to think it will now....and I would think you would smell gas before it became bad enough to be combustible.
But yes, it is getting boxed for protection. I am still thinking out how to do it. The truck is not on the road yet, so no worries.
04-29-2012, 10:15 PM
#12
CF Veteran
Thread Starter
Join Date: Mar 2009
Location: Berea, OH
Posts: 7,996
Likes: 0
Received 0 Likes
on
0 Posts
Year: 1998
Model: Cherokee
Engine: 4.0
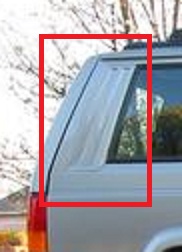
I thought about the safety....then I thought about old Jeeps with the tank under the seat. Old ford trucks with the tank right behind the bench....it is done, even in stock form. But I agree, I don;t want to drip gas inside, and it's a pain to open the hatch to fill up....lol. I am thinking about hinging the "vents" on the top of the c-pillar for now? Put the filler behind it, completely hidden?

04-30-2012, 01:51 PM
#13
CF Veteran
Join Date: Aug 2010
Location: Greensboro
Posts: 1,220
Received 0 Likes
on
0 Posts
Year: 1992
Model: Cherokee
Engine: 4.0L
That is one hell of an idea. It would be very easy to hinge those and if you ever choose to move the filler tube, the hole cut in the body would still be hidden.
04-30-2012, 10:12 PM
#14
Member

Join Date: Oct 2010
Location: Duluth MN
Posts: 209
Likes: 0
Received 0 Likes
on
0 Posts
Year: 1990
Model: Cherokee
Engine: 4.0
This may be a little more hardcore than most would like, but here's how I did mine using the stock hinge re-skinned.
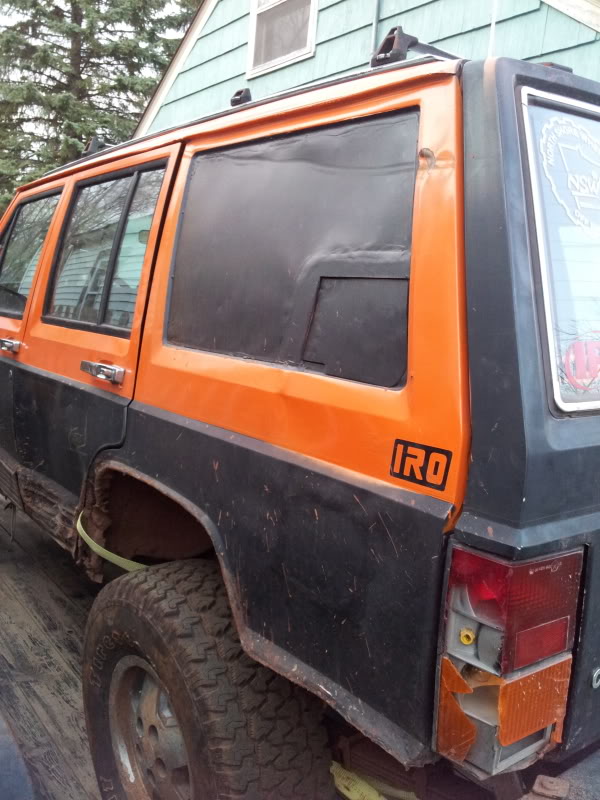
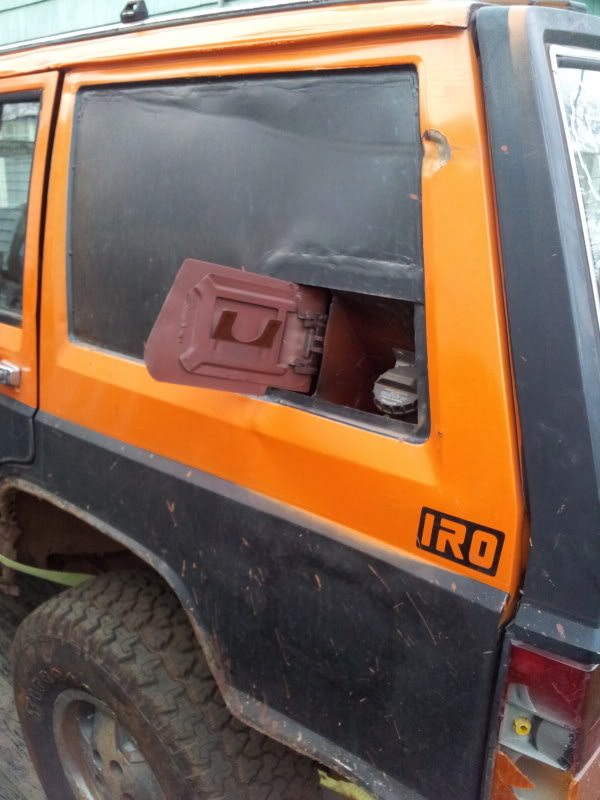
When you think about it you can't even see that window from the drivers seat, and obviously based on the dents in it, if I still had a window it'd be blown out anyway haha.
When you think about it you can't even see that window from the drivers seat, and obviously based on the dents in it, if I still had a window it'd be blown out anyway haha.