Wiring question - use single 12v dual switch for controlling 2 separate lights
#1
Hello all. Iíve successfully wired a 50Ē LED light bar and two rear small LED lights to my 2000 Jeep Cherokee. They use two separate buttons. I found a button for a Toyota 4Runner or Tacoma that is a switch for two light sources in one button and it fits nicely in the spot I have on the Jeep. Iíd like to use this as it is 12V button as well. Iíve created a diagram with the rundown and everything I could think of just to get peoples input on if it will work and if Iím approaching it right? Any help or insight would be greatly appreciated!
#2
::CF Moderator::

Joined: Sep 2009
Posts: 3,333
Likes: 381
From: Glen Burnie, MD
Year: 2001
Model: Cherokee (XJ)
Engine: 4.0l
Ok, Neat button.
Lemme see if I can explain this in a way to makes sense to someone besides myself.
You have Existing Switch 1 and Switch 2. Each have 12v, ground and a output wire. Lets call the output wires A (white) for the light bar and B (blue) for the light pods.
All you'll need to do for the toyota switch is use one of the existing 12v and ground from one of the current switches. 12v to pin 2 and Ground to pin 3. Connect output A to pin 1 and output B to pin 5. If you want the illumination to work any of the orange wires on the current switches can be tapped. you can just tape off or remove the other switch's 12v and ground wires.
#4

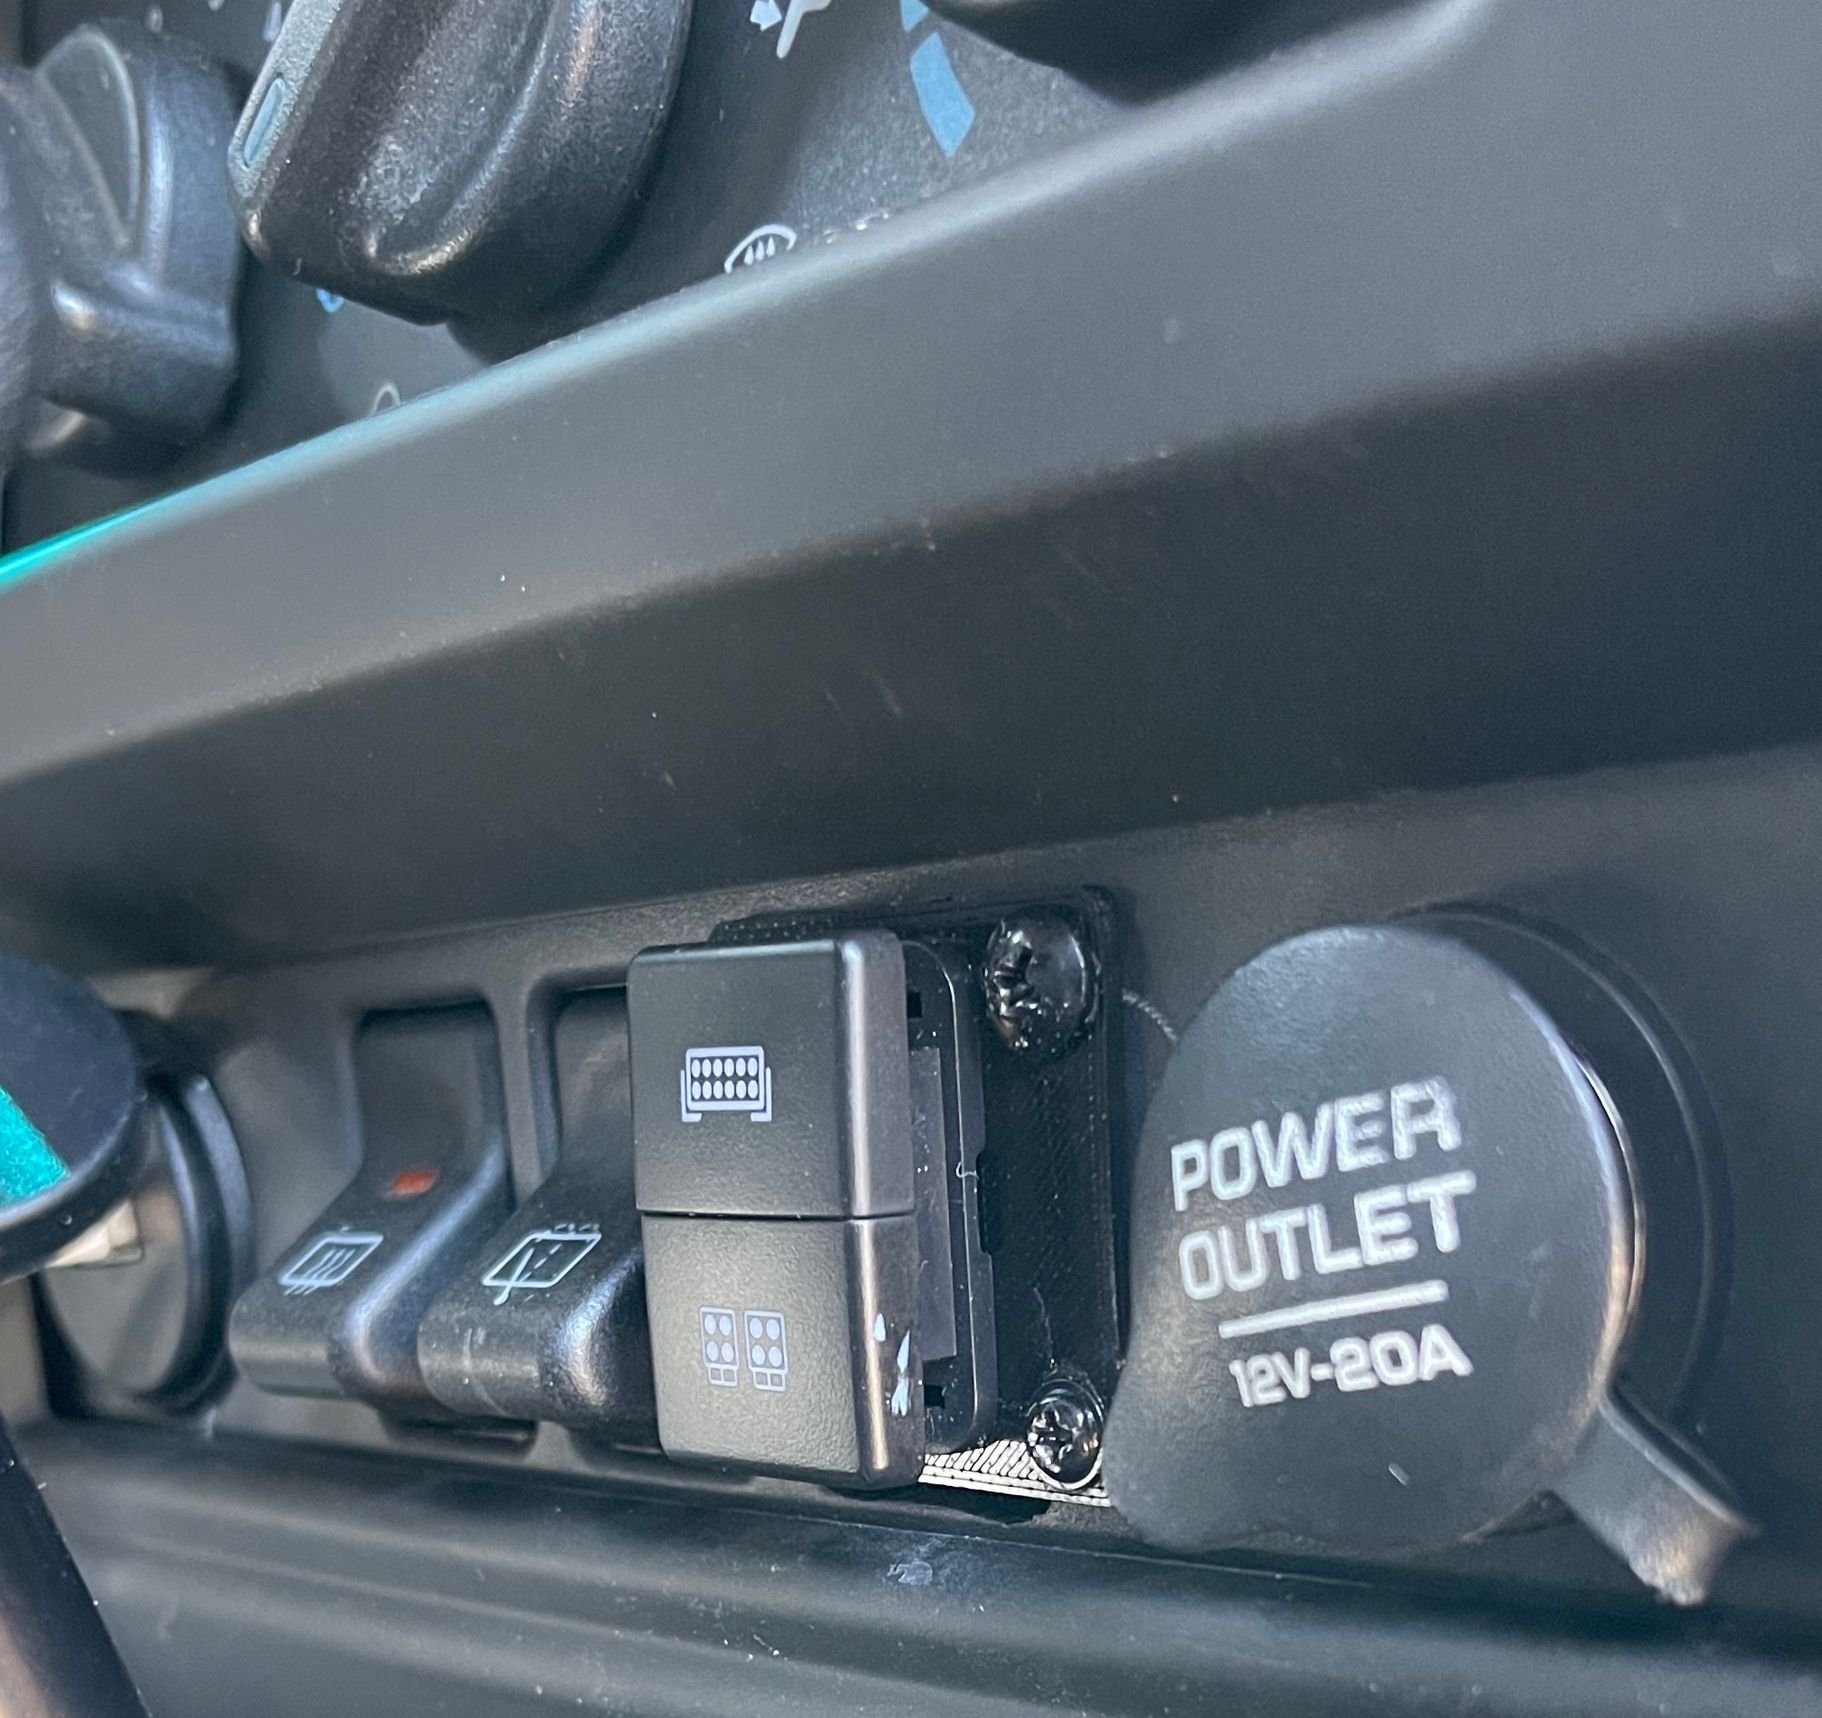
Here is the final product. It’s seated in a custom 3D printed holder designed specifically for that button to just snap in. The previous hole was too big to fit the previous button I did not like that also did not fit the plastic bezel that goes around this whole center console. Very happy with the end result. Thanks again for the help. I might even reprint the entire part that holds all these buttons if I can get ahold of the right material to print with. We’ll see.
The following 2 users liked this post by Seonline:
BlueRidgeMark (04-18-2021),
Dawson89xj (11-09-2021)
Thread
Thread Starter
Forum
Replies
Last Post
Currently Active Users Viewing This Thread: 1 (0 members and 1 guests)


