Jeep Cherokee 1984-1996: How to Install Sway Bar Disconnect
The sway bar creates a stiffening point between both ends of the front axle. This is great for controlling body sway around turns, but inhibits off-road suspension movement. By installing a set of disconnects you'll be able to quickly undo the link and gain large amounts of wheel articulation.
This article applies to the Jeep Cherokee XJ (1984-1996).
The sway bar is a solid metal rod that runs from one side of the solid axle to the other. Both ends connect to sway bar end links. These links connect to the solid axle and use bushings to allow for some twist and vibration damping. Sway bars are designed for effective use during cornering (particularly highway speeds). As g-forces rise when cornering, the wheel inside the turn begins to rise, creating an unstable effect. The sway bar keeps pressure against this wheel improving traction in the process.
Successful off-roading requires large amounts of suspension travel in all directions. During off-roading, the sway bar begins to act like a bump stop when its point of flex is reached. With a disconnect kit, you can undo and re-connect the end links in only a few minutes.

Materials Needed
- Jack stands (x2)
- Floor jack
- 18mm wrench or socket
- 15mm wrench or socket
- 1/2" ratchet (if using a socket)
- Special tool or torch (for stud removal)
- Hammer
- Drill with assorted bits (check your kit's instructions)
Step 1 – Remove the sway bar end link
Depending on the height of your Cherokee, you may want to raise the front off the ground. Set the emergency brake and lift it upwards with a floor jack using the factory jacking points. Place a jack stand capable of supporting your Cherokee's weight at the factory jacking point.
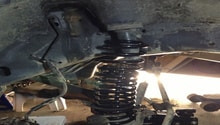
Locate the sway bar end links. These are beside the coil springs. You will see three fasteners of different types ( two nuts and one stud). Attach an 18mm wrench/socket to the lower nut, a 15mm wrench/socket to the upper nut, and remove them. Use a breaker bar if possible. The stud with the T55 head must be pressed out. A pulling/pushing tool such as a pitman arm puller or ball joint removal tool can be used. Another method is heating the bolt with a torch (almost cherry red), and then hitting the threaded end with a hammer.

Figure 1. The jacking point locations. 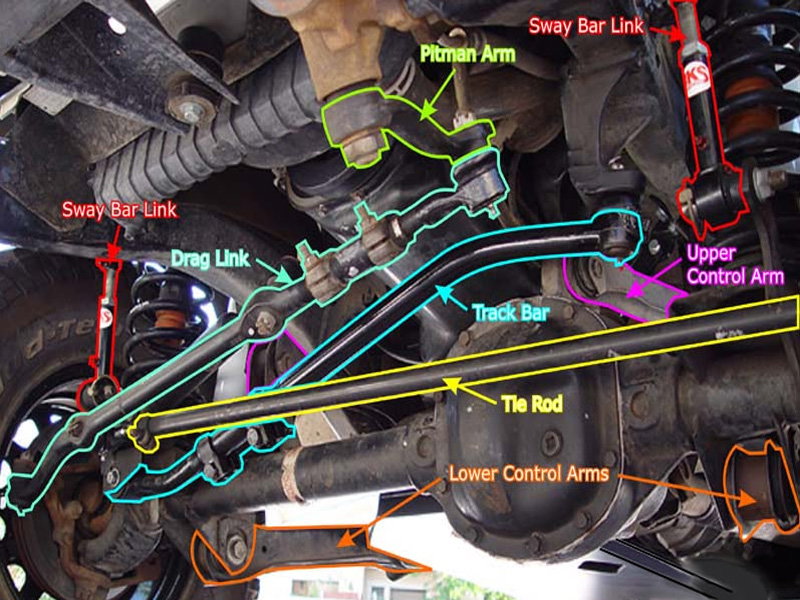
Figure 2. The locations of the sway bar end links in relation to the other suspension components.
Step 2 – Install the sway bar disconnect hardware
Use the following steps as a general process for installation. The kit you choose to buy may have extra or less steps included. Refer to your kit's instructions for reference.
Install the provided hardware into the sway bar and sway bar mount on the spindle. Position the hardware correctly. The new end link must attach between the two points. If the end link is adjustable, set its length to the amount indicated in the manufacturer's instructions.

Step 3 – Finish the sway bar disconnect installation
Now that most of the hardware is installed, you'll need to mount the upper bracket if your kit includes one. Match the brackets position to the image included in your instructions (or Figure 4). Mark the position of the bracket holes and drill them with the size corresponding to your kits hardware. Tighten the included bolts down until snug and test the disconnect feature of your kit. The end link should be able to move from position to position with ease.

Featured Video: Sway Bar Disconnect Install
Related Discussions
- Installing Rough Country Sway Bar Disconnect - CherokeeForum.com
- Sway Bar Disconnect vs. Fixed Link - CherokeeForum.com