Jeep Cherokee 1984-1996: How to Replace Coolant Temperature Sensor
The Jeep Cherokee monitors coolant temperature at several locations on the engine. Not only do these sensors indicate the engine coolant temperature to the driver, but they are also critical to the engine performance and the emission system.
This article applies to the Jeep Cherokee (1984-1996).
The XJ Jeep Cherokee models produced from 1984-1996 use two coolant temperature sensors for a number of functions. Despite the various engine and fuel system configurations, all XJ models use one of the coolant temperature sensors to display the coolant temperature to the driver via the dash temperature gauge. The second coolant temperature sensor, often referred to as a "temperature switch," functions to maintain engine performance and proper emissions control. In addition to these sensors, certain models use an additional coolant temperature sensor to control operation of the electric cooling fan. Many owners often find their temperature gauge pegged in one direction, or is bouncing wildly and making the engine coolant temperature unreadable. Additionally, poor engine performance or smog related issues, especially in fuel-injected models, can sometimes be traced to a faulty temperature switch, because a failed switch is unable to relay the engine temp back to the ECU for proper fueling adjustments. Fortunately, coolant temperature sensors are some of the easiest items to replace and can restore function to your temperature gauge, or better yet, they can improve engine performance and driveability.
Materials Needed
- Wrenches
- Sockets
- 3/8" drive ratchet and extension
- Teflon tape
- Shop rags or simiilar
- Catch pan & funnel (optional)
Step 1 – Locate coolant temperature sensors
Depending on the year of the XJ Cherokee, the sensors are located in different places.
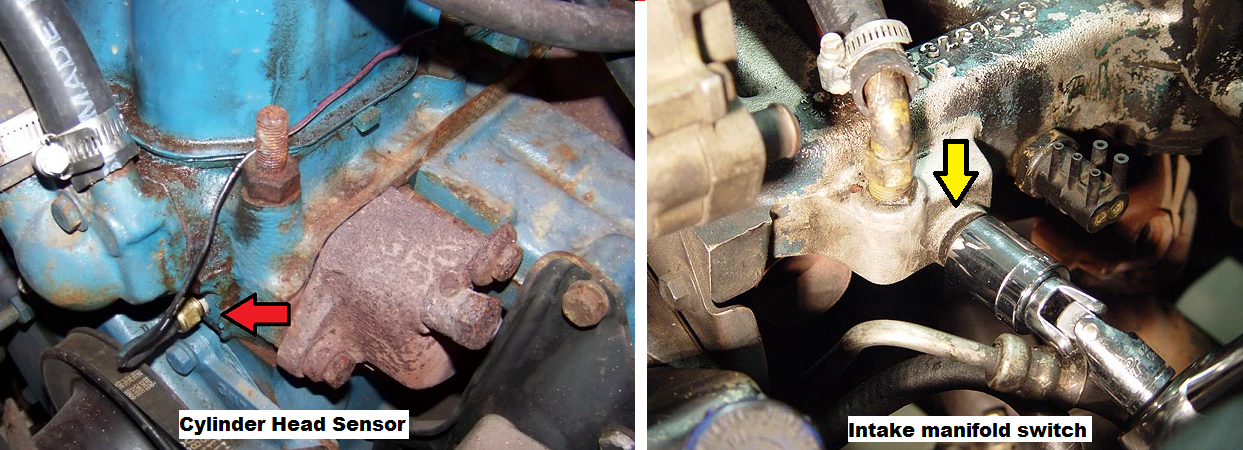
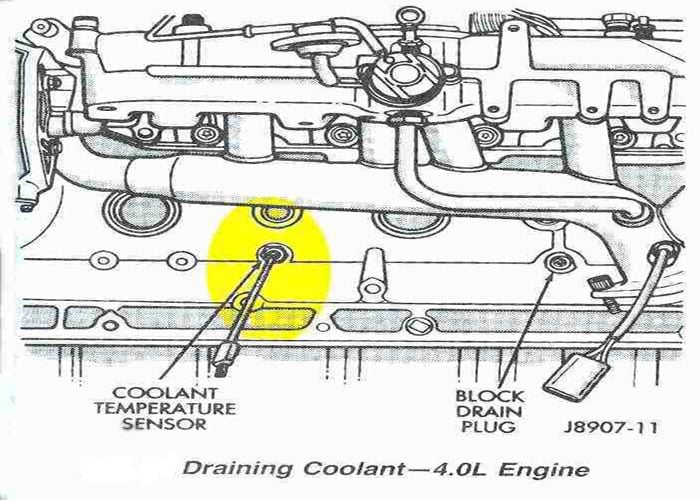
- For early models Cherokees (1984-1986) without the Renix fuel injection system, the coolant temperature sensor that operates the dash gauge is located in the front of the cylinder head near the thermostat housing. The temperature switch that functions as an emissions control device is located on the top of the intake manifold, roughly one-third of the way back.
With the introduction of the Renix fuel injection system in 1987, and subsequently OBD-I emission complaint fuel-injection and engine management in 1991, coolant temperature sensors and switches have been moved and are sometimes in different locations depending on the year model.
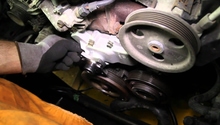
- 1987-1990 Renix 4.0L Engine: This engine is usually equipped with two coolant sensors, but can sometimes have three if equipped with an electric cooling fan. The first sensor that works the dash gauge is located at the rear of the cylinder head on the driver's side. The coolant switch that is monitored by the ECU is located on driver's side of the engine block, just below the exhaust manifold.
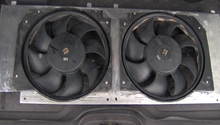
- The sensor that operates the electric cooling fan is located in the driver's side radiator coolant tank, approximately half way down the tank.
- 1987-1990 Renix 2.5L Engine: The sensor for the temperature gauge is also located at the rear of the driver's side cylinder head; however, the temperature switch is located in the intake manifold as depicted in Figure 2.

Figure 4. Cylinder head temperature sensor. - 1991+ 2.5L & 4.0L engines: For all 1991+ XJ models, the coolant sensor for the temperature gauge remained at the rear of the cylinder head on the driver's side. The coolant temperature switch was then placed in the thermostat housing for easy access.
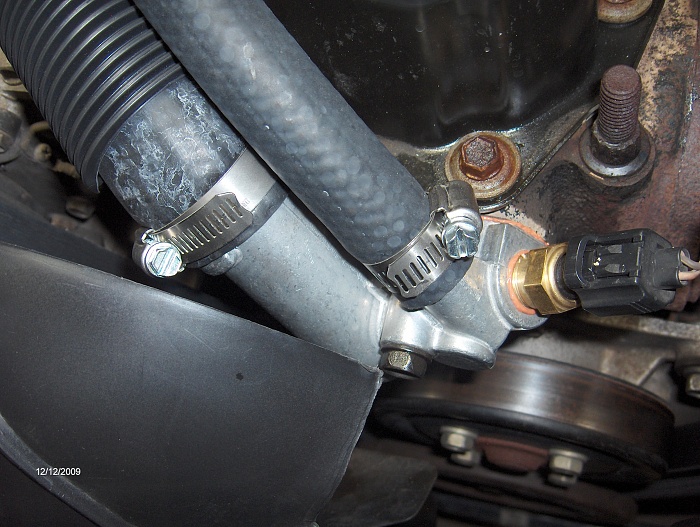
Figure 5. Temperature switch located in thermostat housing.
Pro Tip
If the coolant temperature sensor or switch is not located in the position specified for your particular vehicle, search the areas listed for other year models as they may have been relocated at some point when installing upgraded parts.
Step 2 – Replace sensor
After locating the sensor that you wish to replace, it is just a matter of swapping out the old part with the new one.
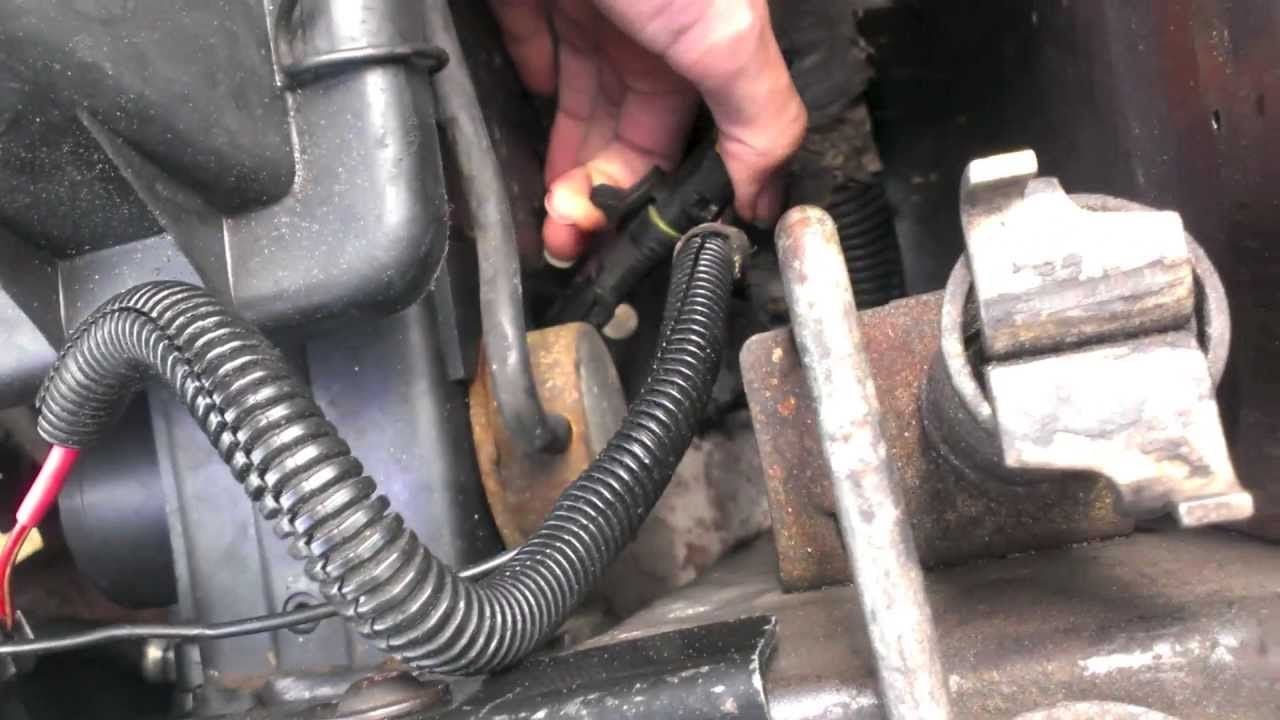
- With the engine cool, disconnect the electrical plug running to the sensor. The plugs typically have a small retaining clip that must be lifted in order to disconnect it from the sensor.
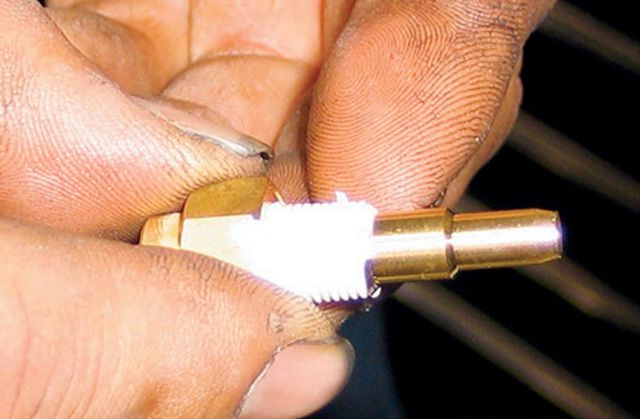
- Apply teflon tape or a similar product to the threads of the new sensor.
- The cooling system will typically be under a vacuum and will only seep a small amount of coolant when the old sensor is removed. A few quarts of coolant can be drained from the radiator drain cock if you want to prevent any coolant from seeping when replacing the faulty sensor. (Optional)
- Using the appropriate sized socket/wrench, remove the old temperature sensor.
- Thread the new sensor into place and tighten securely to prevent coolant from leaking.
- Wipe up any residual coolant near the sensor and reconnect the electrical plug.
- If coolant was drained from the radiator, refill the cooling system until full.
Pro Tip
It is recommended that the electrical plugs be closely inspected for damage or wear. A faulty electrical plug that is not making good contact can have the same symptoms as a failed temperature sensor.
Step 3 – Start car
With the new temperature sensor in place, start the car. Let the engine warm up while inspecting for leaks near the new sensor. Check for proper operation of the dash temperature gauge.
Featured Video: Jeep 4.0L Coolant Temperature Sensor Replacement
Related Discussions
- Coolant Temperature Sensor - CherokeeForum.com
- Replace Coolant Temp Sensor? - CherokeeForum.com
- 89 Jeep Coolant Temperature Sensor - CherokeeForum.com