Jeep Cherokee 1984-2001: How to Convert to Disc Brakes
Converting your drum brakes to disc brakes will make a tremendous difference in your Jeep Cherokee's stopping. The process is easier than you think, and we'll be your guide.
This article applies to the Jeep Cherokee XJ (1984-2001).
The drum brakes are old technology now, and even though they get the job done, they are not nearly as effective as disc brakes. If you like to take your Jeep Cherokee off-roading, or if you just want to have a piece of mind that you will be able to stop faster, then converting to disc brakes is a must. The process isn't the easiest, but it could be done if you have some mechanical skills in a few hours to spare.

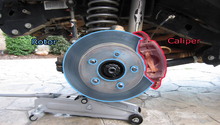
Figure 1. Disc brake. 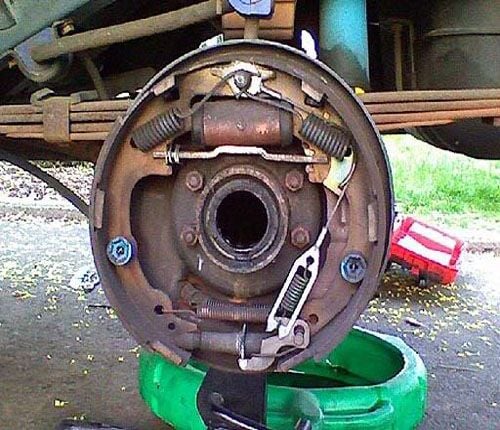
Figure 2. Drum brake.
Materials Needed
- A ratchet and socket set
- Backing plates
- Brake lines
- Brake fluid
- Brake pads
- Brake shoes
- 3-8"-16 1.25" Grade 8 bolts
- Brake fluid reservoir
- Rotors
- Wheel studs
- A box wrench set
- Screwdrivers
- Pry bars
Step 1 – Get the right tools
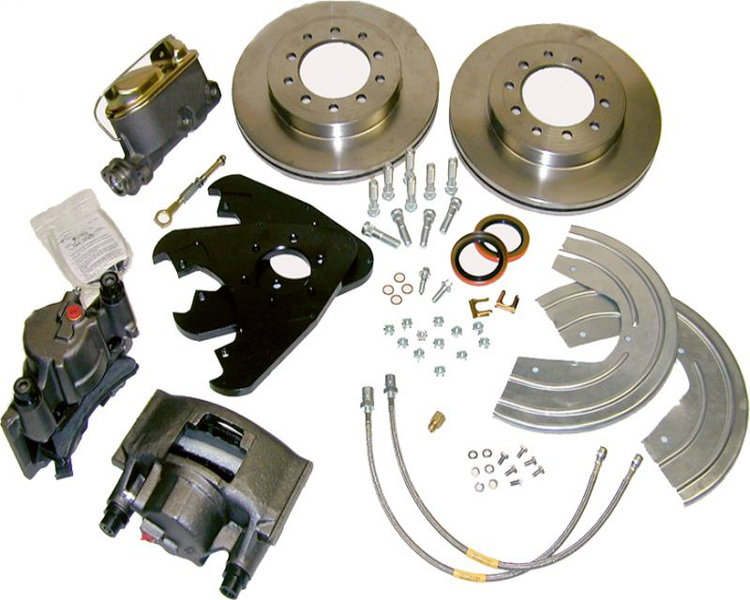
To get this job done, you'll need to get yourself dust shields, rotors and pads, some grade eight bolts, proportioning valve (this adjusts the flow so that the right amount of pedal pressure is transferred to the rear now that it'll be disc all around), and brake lines.
Pro Tip
The internet, forums and auction sites can be great places to score used parts without having to pull them from old vehicles yourself.
Step 2 – Remove brake drum
First step in getting the old, grimy brakes off is pulling the axles to have access to all the nuts, bolts and lines. Remove the wheels and pull the hub covering the brake hat off.
Now you'll need to remove the rear differential pumpkin cover by removing all the bolts.
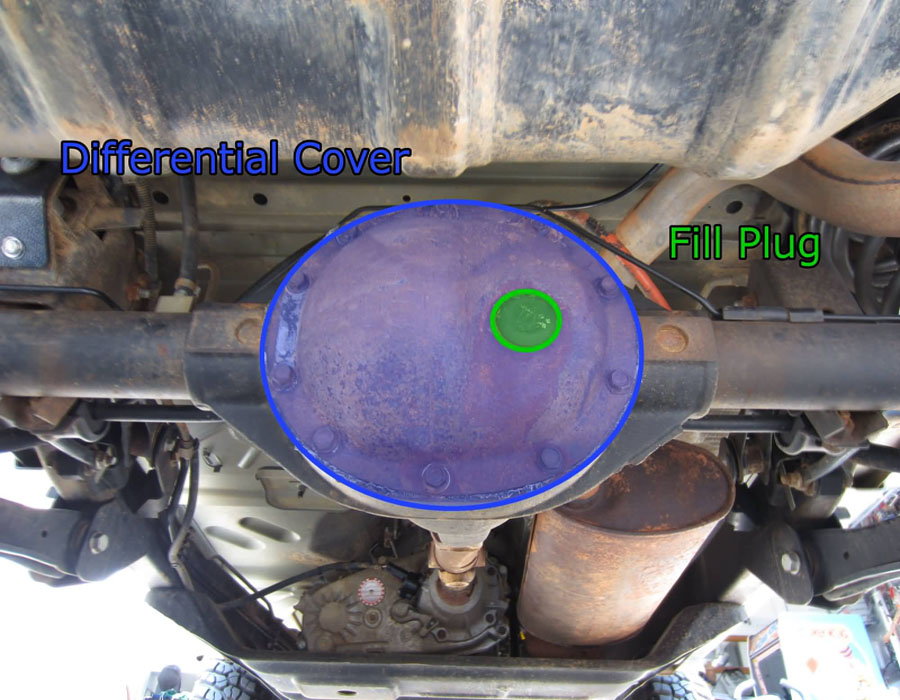
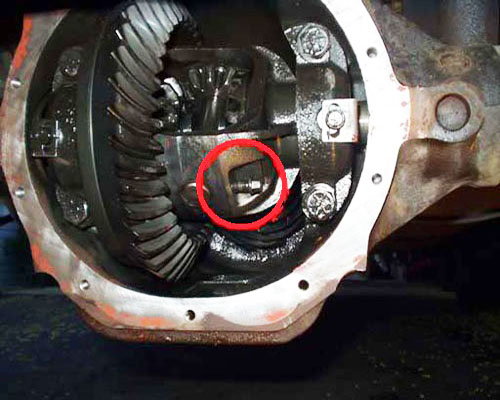
This will allow you to pull the pin, c-clips and pull the axles out. Once they are out, you should see the inside of the drum brake.
Pro Tip
Pinch off the old brake lines when removing to lessen the amount of bleeding you'll need to do later.
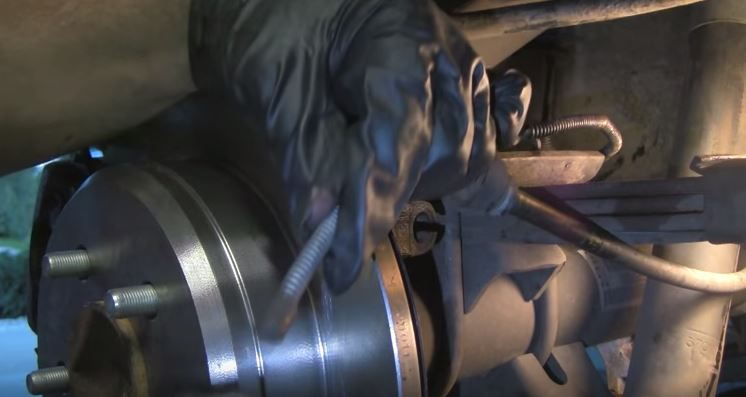
Step 3 – Remove old and install new
Unbolt the brake assembly and transfer the emergency brake cable over to the new assembly. You'll also want to pop out the old wheel studs and put in the new, longer ones. This is necessary to accommodate the thicker rotor.
Pictured here are the bolts you'll also need to hammer out and replace with those grade eight bolts you bought.

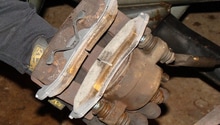
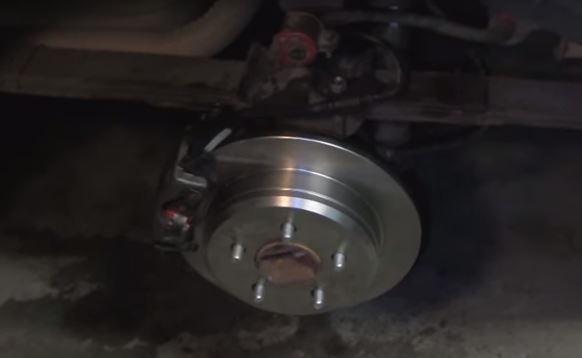
Figure 6. Old brake assembly. 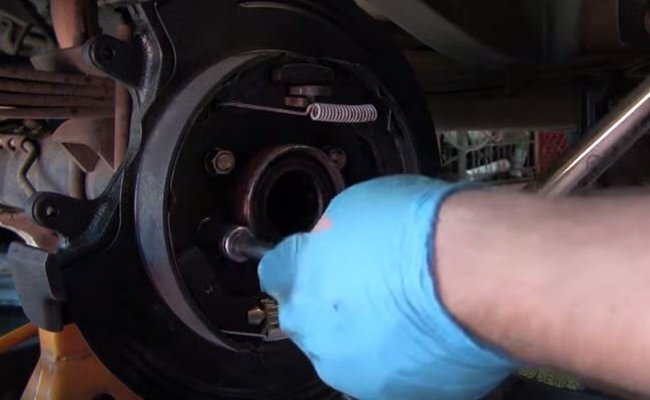
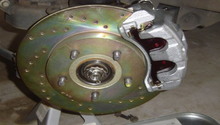
Figure 7. New brake assembly.
Step 4 – Reconnect brake line
Now you'll want to reconnect the emergency brake line. If you need a longer brake line, purchase it and replace the old line with the new one, then connect it.
Step 5 – Swap the proportioning valve
Proportioning valve is connected at the master cylinder in the engine bay. This will correctly change the brake bias to give a little more zing to the rears now that they are capable. This would be the time to bolt the calipers on, the lines and bleed the whole system.
Featured Video: Jeep Disc Brake Conversion
Related Discussions
- Rear Disc Brake Conversion - CherokeeForum.com
- Switching Rear Drums Disc Brakes - CherokeeForum.com