Jeep Cherokee 1984-2001: How to Replace Thermostat
The thermostat is responsible for regulating the flow of coolant to keep the engine temperature at a happy medium. If the thermostat fails, a number of engine related issues can pop up and cause major engine damage if left untreated.
This article applies to the Jeep Cherokee XJ (1984-2001).
The thermostat is a key component in the cooling system that regulates coolant flow throughout the engine. The thermostat is closed when the engine is cold and restricts the flow of coolant to allow the engine to quickly reach operating temperature. Once the engine is warm, the thermostat will open and allow unrestricted flow of coolant through the cooling system and across the radiator to maintain proper operating temperature.
Unfortunately, thermostats can often go bad and cause several engine issues. Thermostats that fail in the open position will cause the engine to run cooler than normal and can negatively affect emissions and fuel economy. This is especially true during the winter months and in cooler climates, and can even reduce the efficiency of the heater. A thermostat that has failed in the closed position can be a much more serious problem, as it will cut off all circulation of coolant through the cooling system, thus causing the engine to overheat. With this inexpensive part playing such a major role in maintaining the proper engine operation, replacement is essential if any of these symptoms arise. This article will outline the procedure for replacing a thermostat in XJ Jeep Cherokee models.
Materials Needed
- Catch pan
- Flat head screwdriver
- Pliers
- Scraper or razor blade
- Mineral spirits (i.e. acetone)
- 3/8" drive ratchet & extension
- 1/2" socket/wrench
- Anti-seize paste
- Funnel
- Shop rags
- Torque wrench
- Penetrating oil
Warning!
Before beginning the thermostat replacement procedure, be sure the engine is cool to the touch. A warm engine will have scalding hot coolant that can cause serious injury if it comes in contact with your skin.
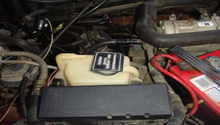
Step 1 – Drain coolant
The cooling system must be drained before removing the thermostat.
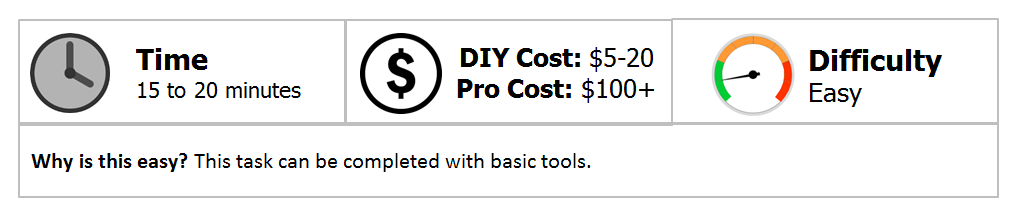
- The radiator drain cock is located in a secluded area on the passenger side of the radiator and is difficult to access without removing the front grille. For this reason, most mechanics opt to drain the system by removing the lower radiator hose on the driver's side. This hose is easily accessed and can allow coolant to be drained quickly.
- Remove the hose clamp on the lower radiator hose. Position your catch pan and remove the hose to catch the draining coolant.
- If draining from the radiator drain cock, remove the front grille, loosen the drain cock, and catch emerging coolant. A piece of vinyl hose can be used to direct coolant into the catch pan.
- Once the coolant has drained, reattach the radiator hose or tighten the drain cock.
Pro Tip
The cooling system holds approximately three gallons of coolant, so be sure you have a large enough catch pan handy. A wide catch pan can be useful if draining from the lower radiator hose since this method can be a bit messy.
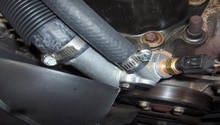
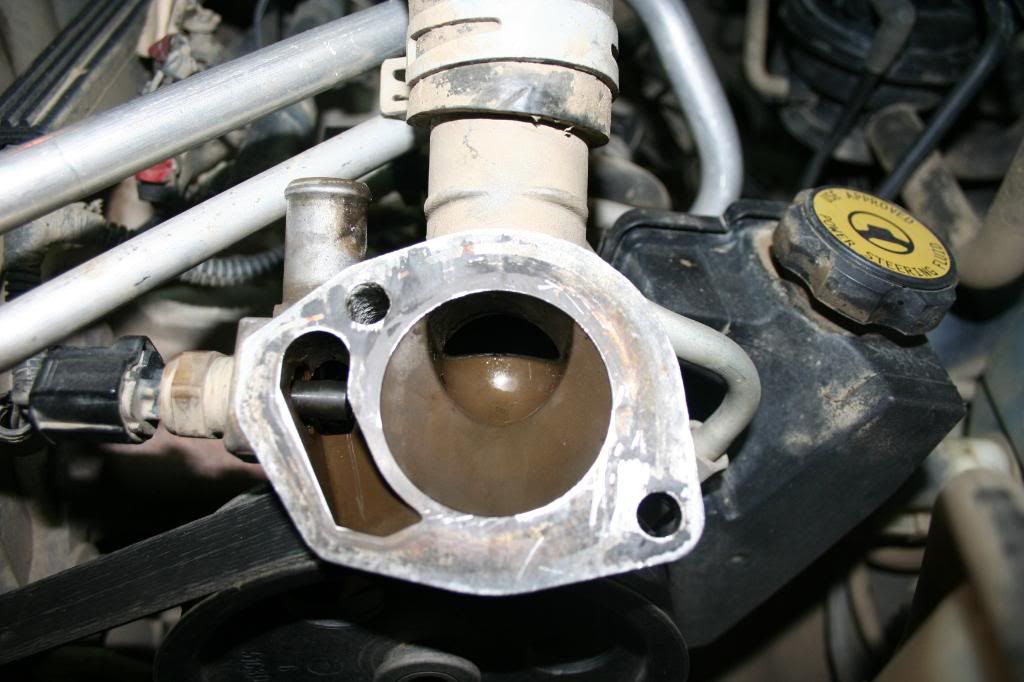
Step 2 – Remove thermostat housing
With the cooling system drained, the thermostat housing is ready for removal.
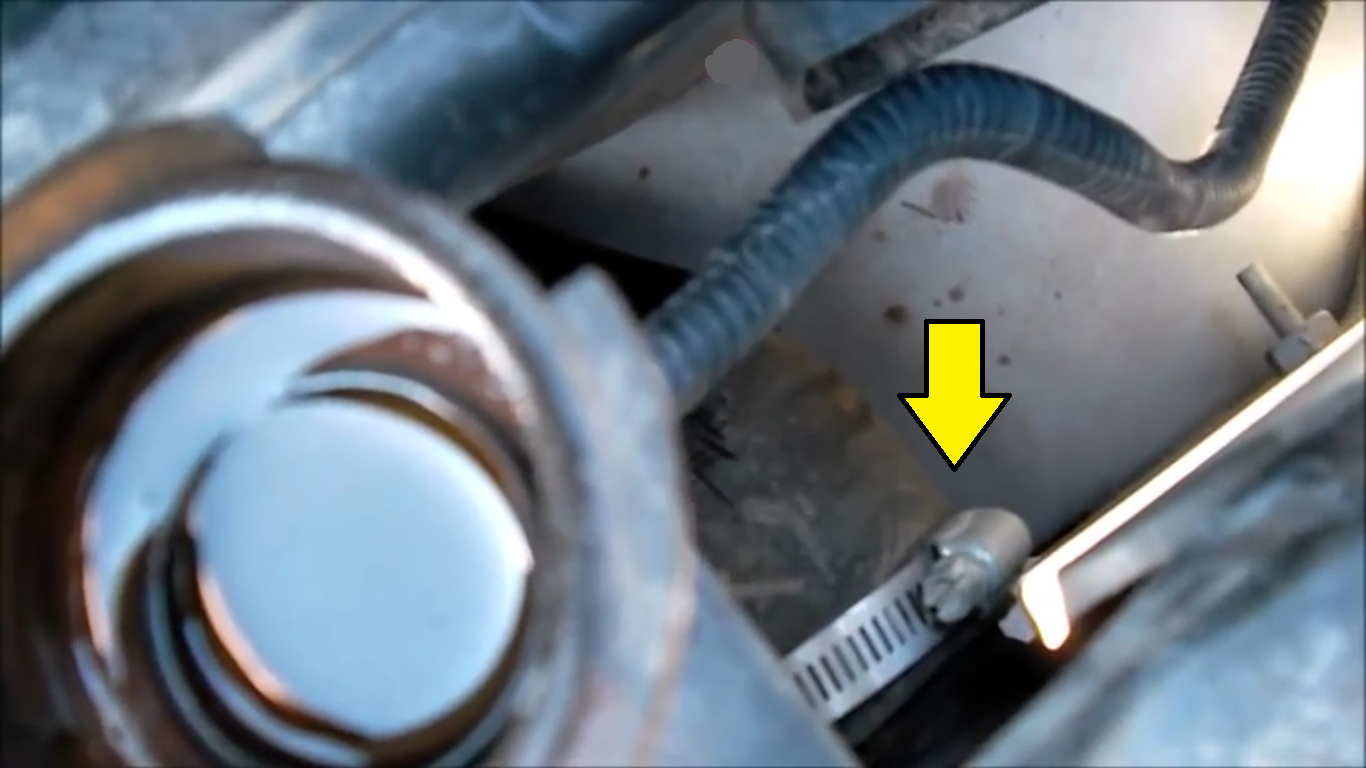
- Disconnect the electrical plug leading to the temperature switch (if applicable).
- Remove the coolant hose(s) from the thermostat housing.

- Remove the bolts securing the thermostat housing to the engine block. It is recommended that penetrating oil be applied to the bolts prior to removal to reduce the chances of one breaking. With the bolts removed, the housing may be bonded to the block and will require a bit of force to remove.

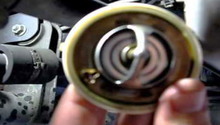
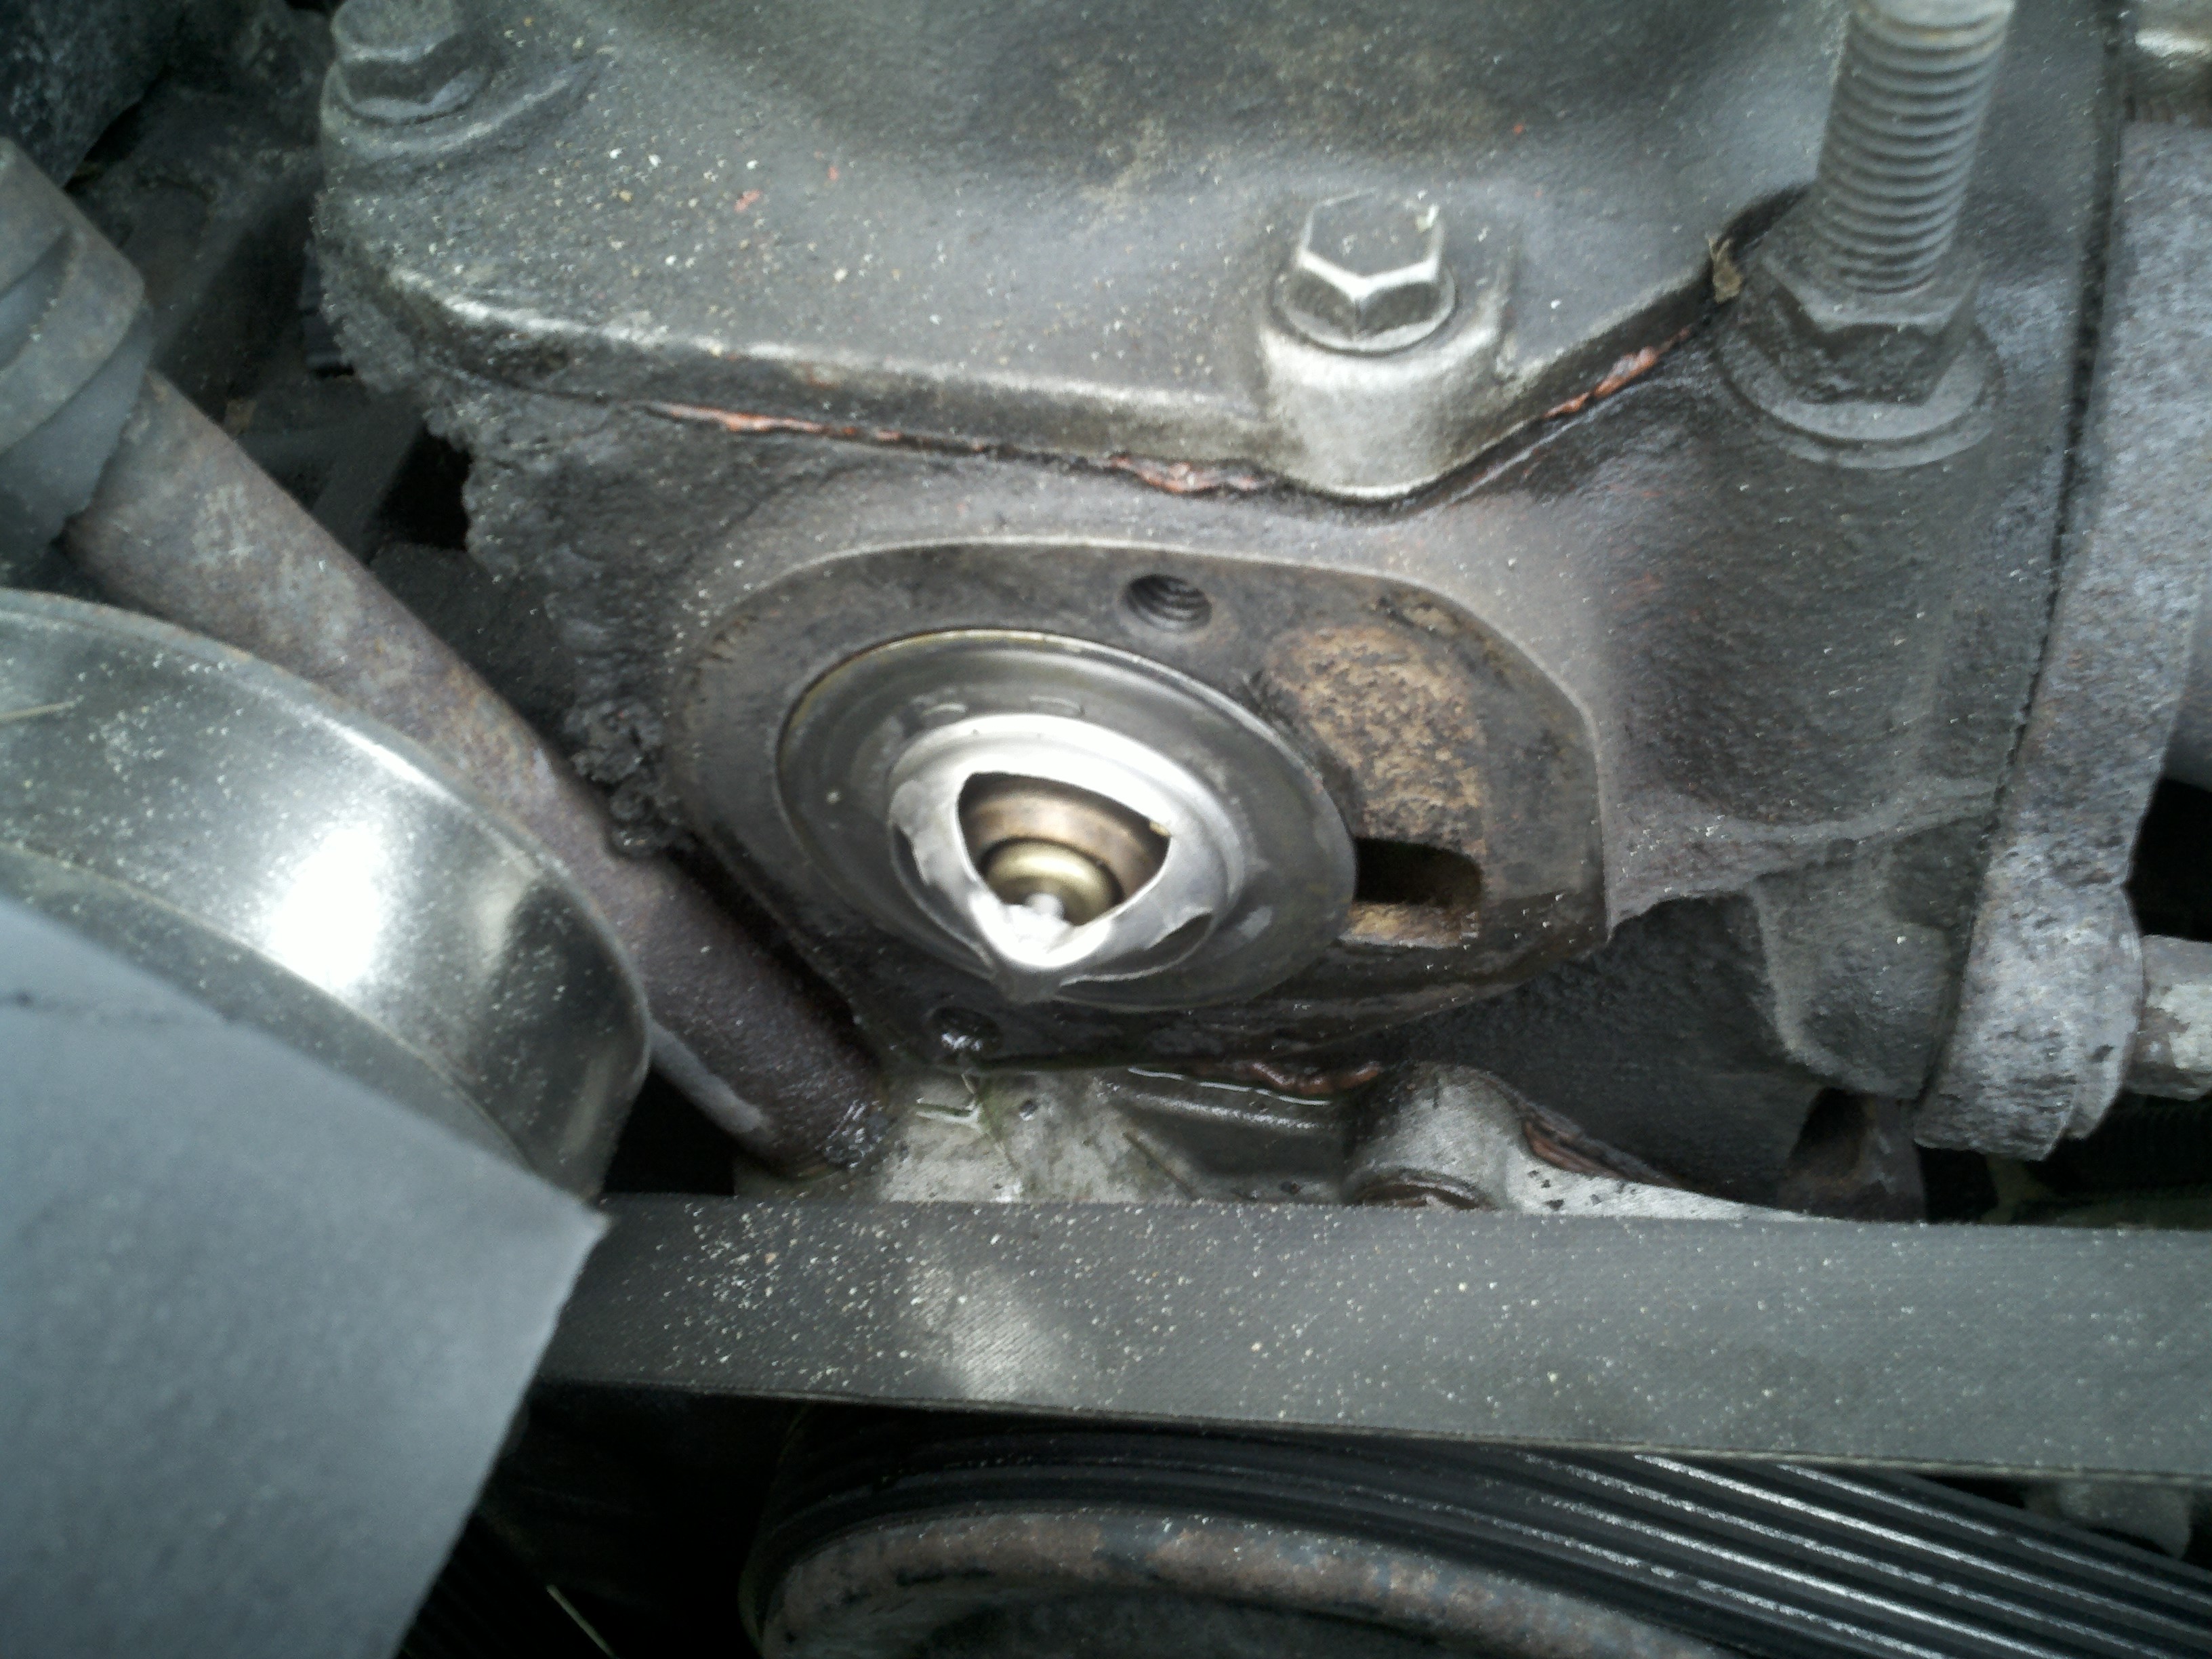
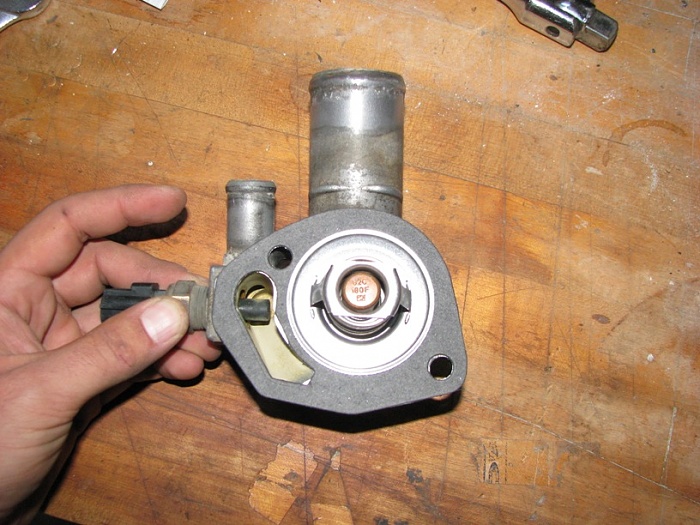
Figure 4. Thermostat housing diagram view. - With the housing removed, take note of the thermostat's orientation before removing it, as the new thermostat must be installed correctly to prevent engine overheating.
Pro Tip
The functionality of the old thermostat can be tested by placing it in a pot of boiling water. A working thermostat will open at the specified temperature (typically between 160-195 °F).
Step 3 – Clean thermostat housing and engine block
With the thermostat housing and thermostat removed, the mating surfaces of the thermostat housing and engine block must be cleaned. The use of a scraper, razor blade, and mineral spirits, such as acetone, can aid in removing the old gasket material. A clean mating surface will ensure a watertight seal to prevent coolant leaks.
Step 4 – Install new thermostat
With the mating surfaces clean, the new thermostat can now be installed.
- Place the new thermostat in the engine block. The thermostat will typically indicate which way it should face. Generally, the spring side will face towards the engine.
- Using a new gasket, place the thermostat housing and gasket in place on the engine block over the thermostat.
- Install the thermostat housing bolts. It is highly recommended that a bit of anti-seize paste be applied to the threads.
- Tighten the bolts evenly to prevent damage to the housing. Torque bolts to approximately 13 Ft/lbs.
Pro Tip
With the coolant drained, it is an opportune time to replace any other cooling system components, such as temperature sensors or radiator hoses.
Step 5 – Install hoses and fill coolant
- With the new thermostat installed, the coolant hose(s) can be installed onto the thermostat housing.
- Connect the temperature switch plug (if applicable).
- Fill cooling system with coolant.

- Start the engine and turn the heater on to allow coolant to fully circulate throughout the cooling system.
- With the engine running, check for coolant leaks around the hoses and thermostat housing. Top up the coolant level as necessary and install the radiator cap.
- Monitor the coolant temperature via the dash temperature gauge to ensure the thermostat is operating correctly. Also, make sure the heater is blowing warm air once the engine is up to operating temperature.
- Reinstall the grille (if applicable).

Pro Tip
It may be necessary to bleed air from the cooling system after refilling. This can typically be accomplished by checking the coolant level and topping it off as the system "burps" any air over the next few days. In some cases, the coolant temperature sensor installed in the rear of the cylinder head may need to be removed and the engine run to allow any residual air to escape.
Featured Video: How to Change Thermostat on Jeep Cherokee 4.0L
Related Discussions
- Need to Replace My Thermostat - CherokeeForum.com
- Replacing a Thermostat in a 91 XJ - CherokeeForum.com
- Thermostat Torque Specs - CherokeeForum.com
- Changing Thermostat - CherokeeForum.com