Jeep Cherokee 1984-2001: Why Does My Car Idle Rough?
An engine needs a precise amount of air and fuel to idle smoothly. Many systems and parts are used to keep the engine idling. These range from the fuel system, ignition system, engine mechanical systems, and electronic motors/sensors. By observing and testing these systems, you'll find your problem in the Jeep Cherokee.
This article applies to the Jeep Cherokee XJ (1984-2001).
To maintain an engine idle, the engine's computer must determine the correct idle speed, then adjust air-fuel and ignition timing to reach it. Keeping an engine running at idle is harder than while rotating at 3,000 RPM, because the centrifugal force created helps keep it running. This makes minor variations in air-fuel mixture very apparent at idle. Here's how to diagnose a rough idle issue in your Jeep Cherokee.

Materials Needed
- Flashlight
- Rubber gloves
- Safety glasses
- Brake cleaner
- Throttle body cleaner
- Propane or spray bottle with soap and water mixture
- Diagnostic scan tool
- Vacuum gauge
- Hose clamping pliers
- Tape measure
- Vacuum pump
Begin the diagnostic process by checking for OBD trouble codes. The code can lead you straight to the affected part or system.
For more testing, relevant to diagnosing a rough idle, check out the related article: Why is My Car Losing Power?
Step 1 – Perform a visual inspection
Knowing what is operating correctly by using your senses is the quickest way to find a fault. This takes some practice and is easier to do with experience, but with some helpful knowledge may lead you to a quick fix.
Start by scanning the engine bay for loose hoses (vacuum lines) and electrical connectors. Push on each connector to make sure it is fully connected to its corresponding sensor. The wiring harness can be lightly wiggled in several areas to observe a change in engine operation.
Test for a vacuum leak by spraying propane around the intake system and intake manifold. If the engine RPM rises, a vacuum leak is present. If no propane is available, a spray bottle filled with soapy water can be used. If the soapy water reaches a vacuum leak, bubbles will form in the area.
As a safeguard, check the oil level and condition. If the oil is low or old, the engine has a harder time rotating because of increased friction.
Step 2 – Perform a vacuum test
A vacuum gauge is an inexpensive, easy to use a diagnostic tool that is able to quickly determine the condition of your engine. Hook the vacuum gauge to a port on your intake piping or intake manifold.
At idle, your readings should be about 17" to 21" of vacuum. If not, see if the readings resemble any of these problems:
- A low vacuum gauge reading. This reading could be as low as 5". It's another indicator of a vacuum leak.
- A rapid needle vibration between 14" and 19". This reading indicates worn valve guides.
- A low reading that holds steady between 8" and 14" may indicate late ignition timing or leaking piston rings.
- A reading that periodically drops 2" to 6" below normal may indicate low compression.
- A reading that stays above 21" can indicate an intake restriction.
- A reading that slowly lowers below normal and continues to drop is indicative of an excessive exhaust back-pressure.
As you can see, a vacuum gauge can help you draw many conclusions to your problem and what system/component to test next.
Step 3 – Test the PCV system
The PCV system (positive crankcase ventilation) is a valve that opens at specific levels of intake vacuum to allow crankcase vapors to flow back into the intake.
First check that the hoses connected between the PCV valve and intake are not torn, creating a vacuum leak. A vacuum leak can cause a lean air-fuel mixture and a rough idle. Pinch the hose close to the intake piping with hose clamping pliers. If the idle improves, it means there is a vacuum leak at the PCV valve or on the hose.

Step 4 – Test and clean idle air control motor
If your Cherokee is a model year 1996 or later, you may be able to test the IAC motor with a scan tool. Inside the scan tool is a functions menu, and there should be an option for IAC motor testing. You can command the scan tool to open and close the IAC motor, which should change the idle speed.
If no scan tool is available, start the engine cold and then unplug the IAC. Remove the IAC and record the length of the pintle shaft. If the motor appears dirty, spray some throttle body cleaner on the pintle shaft and inside the IAC motor throttle body bore. Re-install the IAC and let the engine warm to operating temp. Unplug the IAC and remove it once again. The length of the pintle shaft should have changed in relation to engine temperature.
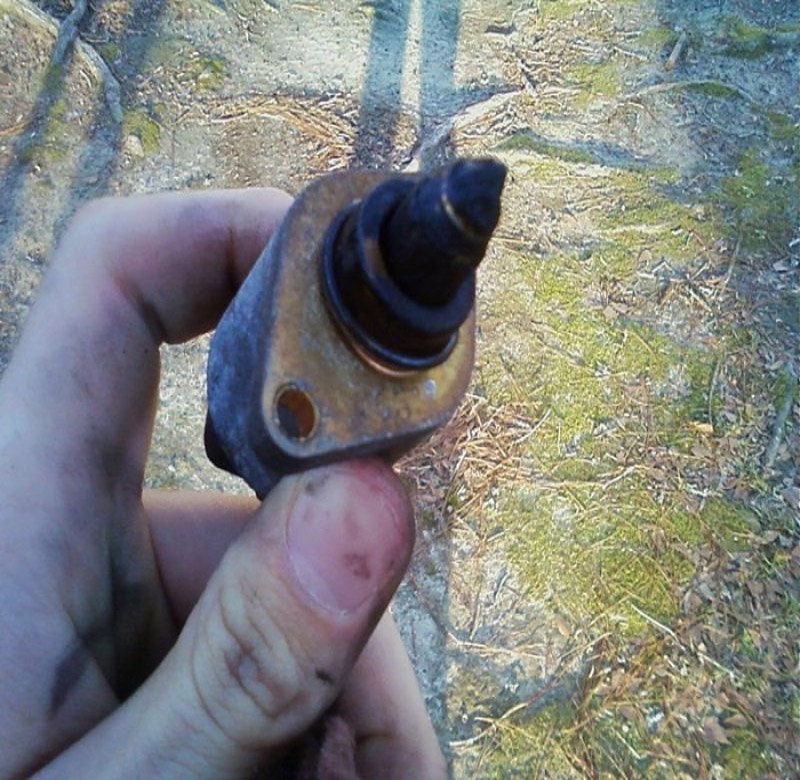
Figure 2. A dirty IAC motor. 
Figure 3. A 1999 Cherokee idle air control diagram. 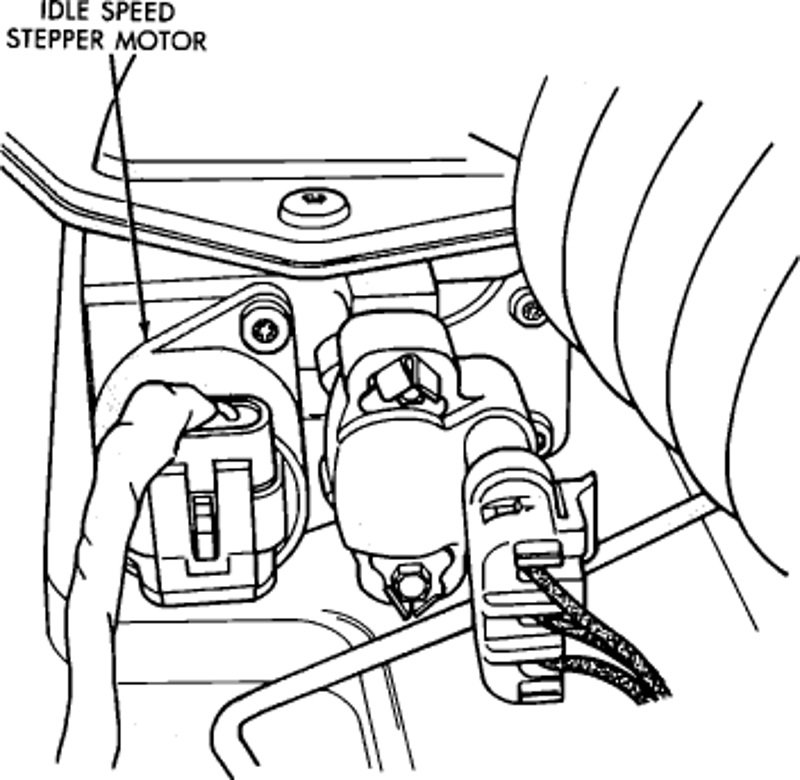
Figure 4. A diagram of the idle air control motor on a 1988 Cherokee.
Step 5 – Test and clean EGR valve
The EGR (exhaust gas recirculation) valve opens during cruise conditions to re-route some of the exhaust gases back into the combustion chamber. This cools combustion chamber temperatures, reducing nitrogen oxide emissions. When an EGR valve becomes stuck in the open position, exhaust gas constantly feeds back into the engine. This creates a rich condition that results in a rough idle.
The EGR valve can be tested using a vacuum pump. Place a vacuum of 20" on the EGR valve diaphragm port. The valve should now open. If the idle did not change, the EGR valve itself is defective. It's also possible to have the EGR valve stuck open internally due to carbon buildup. You can remove the EGR valve and clean the inside with brake cleaner.
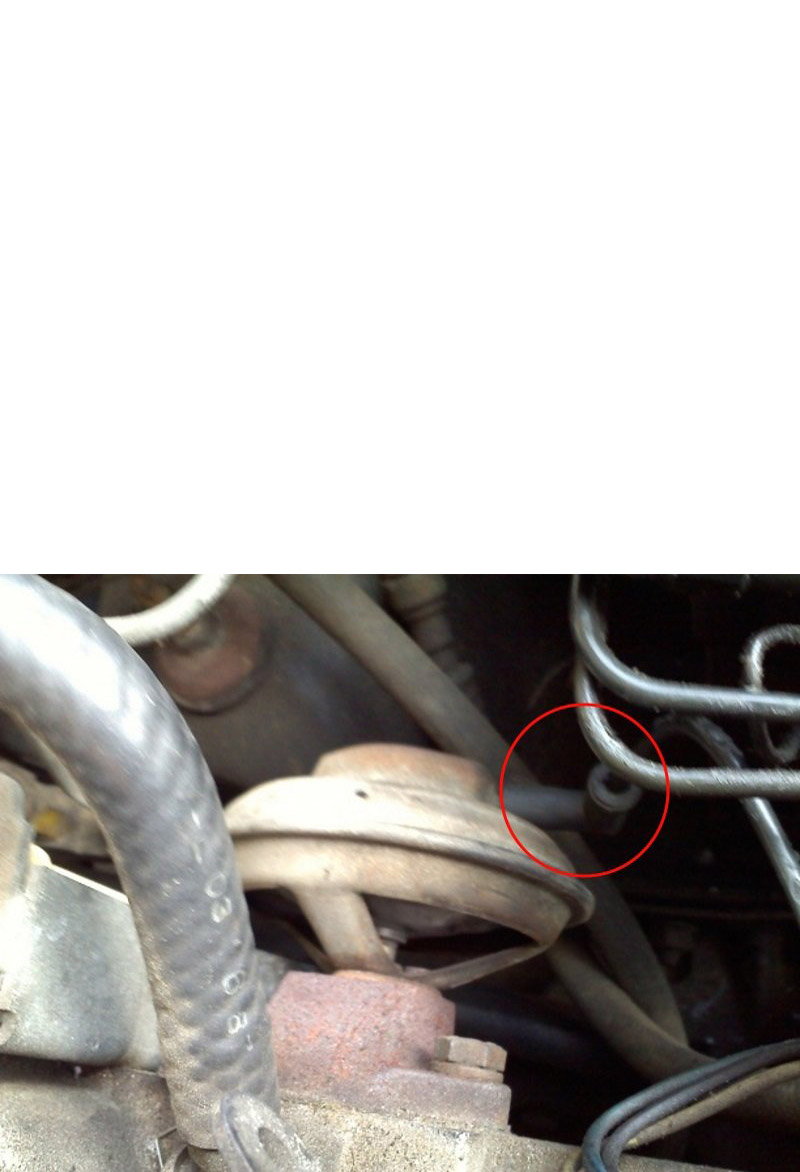
Figure 5. The red circle indicates the location of the vacuum port on the EGR valve. 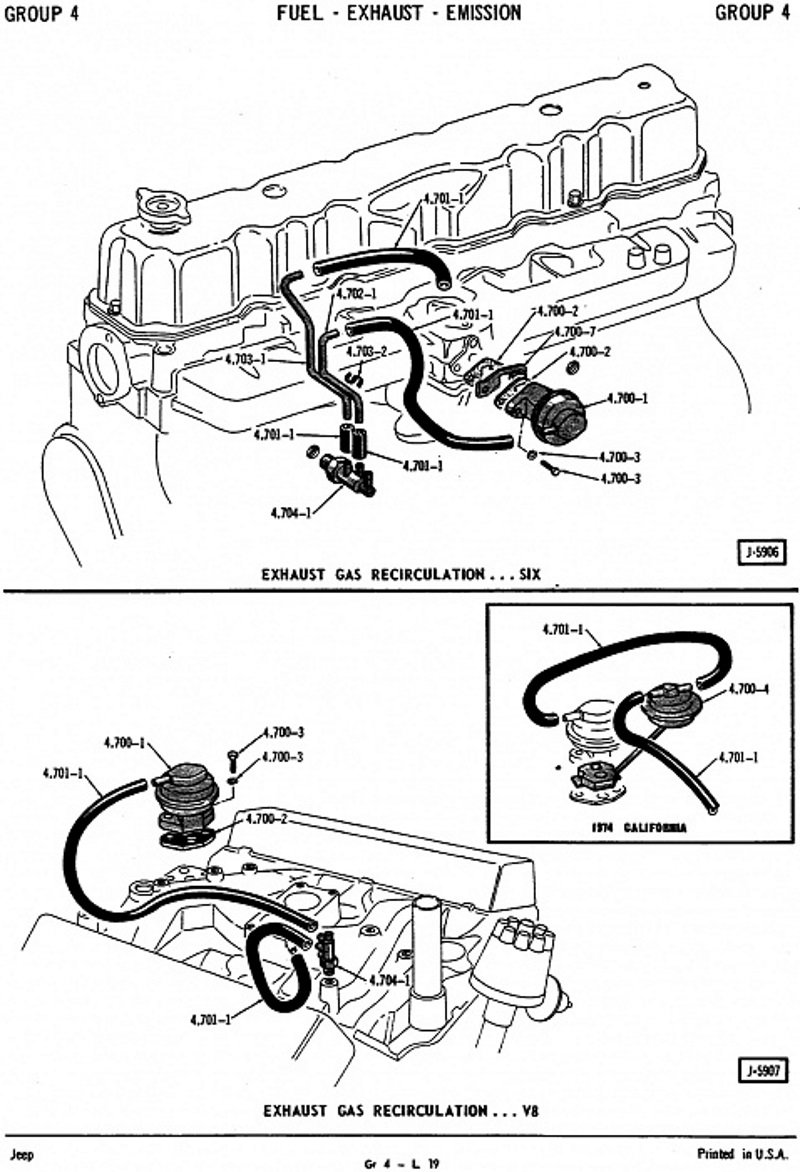
Figure 6. A diagram of the EGR valve locations on earlier model Cherokees.
Related Discussions
- 4.0 Cherokee Rough Idle/Dies on Occasion at Stop - CherokeeForum.com
- '88 Cherokee Running Rough, Low Idle - CherokeeForum.com
- '99 4.0 Sputtering Rough Idle - CherokeeForum.com