Jeep Cherokee 1984-2001: Why is My Battery Not Charging?
With a good alternator and battery (running) your Jeep should have between 13.5 and 15 volts, with normal being 14.3. Surprisingly, it should be above 12 volts.
This article applies to the Jeep Cherokee XJ (1984-2001).
The battery in your Jeep is a storage vessel for power, while the alternator creates DC voltage to charge the battery and power the vehicle when it is running. If the alternator does not work properly, the battery by itself cannot power the vehicle too long. The sequence for checking the charging system is straightforward and fairly easy. We will start with the easiest thing to check and go from there. You can do this and save some bucks, plus get a better understanding of your charging system.

Materials Needed
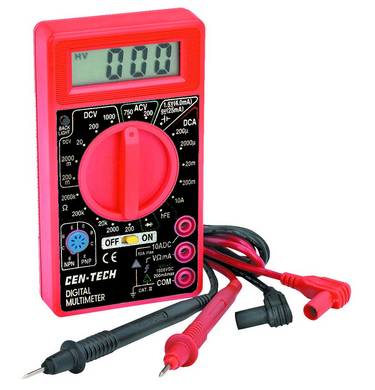
- Multimeter
- Battery
- Belt
- Alternator
- Wrenches
Step 1 – Check battery voltage
This gets you started on the journey.
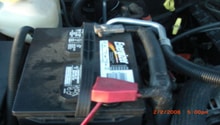
Using the DC voltage setting on the multimeter and with the vehicle not running, put the black lead to the negative (black) battery post and the red to positive. The voltage should be 12 or above. Now start the engine and the voltage should be 13.5 to 15 volts. If the readings are below these, you need to check the battery and alternator further.
Pro Tip
While you are looking at the battery terminals, be sure that they are clean and tight for a good connection.
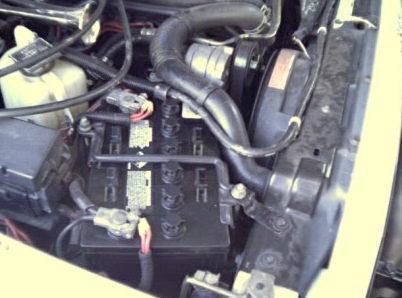
Step 2 – Check alternator and battery
One of these is the most common problem.
If you can get your Jeep to someone that can check the charging system, do it. They can check the battery with a load and see if it holds. They can also check the alternator under a load to see if it is indeed charging. If you cannot move the Jeep, it is pretty easy to remove the alternator and battery so they can be taken to an auto supply to be checked. Before you get too far, the first thing to do is to unhook the negative (black) battery terminal. If you want to remove the battery now, go ahead and unhook the positive terminal. Now remove the battery holder by loosening the nuts on the hold down rods. Lift the battery out to take for testing.
If you do not have an A/C, the alternator is easy enough to get to. Release the tension on the serpentine belt by loosening the bolts on the power steering pump, and then slip the belt loose. Remove the bolts that hold the alternator on, remove the wiring, and lift it out.
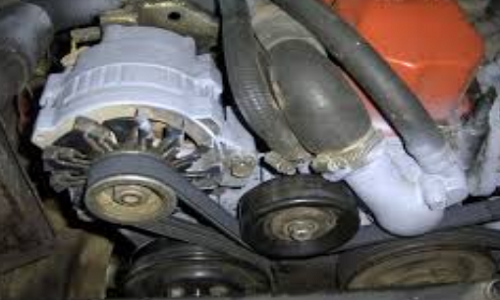
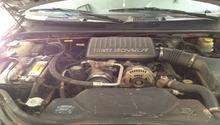
Figure 3. XJ with no A/C. 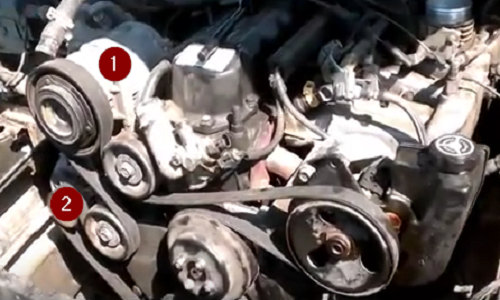
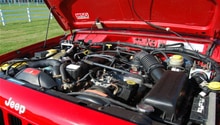
Figure 4. XJ with A/C (1 A/C pump, 2 alternator).
With A/C things are a little more difficult, since the alternator is under the A/C compressor. Remove the belt and alternator the same way, except you will have to work the alternator out.
Take both to the auto supply or electric shop and have them tested. More than likely one of them is bad. Replace either or all in the reverse order it was taken off. Be sure the belt is tensioned properly. Be sure the battery cable terminals are in good shape, or replace them.
Pro Tip
Check the belt before you remove it to be sure it is in good shape and tensioned properly. It is very possible to get a defective rebuilt unit. If you want to be sure, have them check the rebuilt one you are getting.
Now things are getting a little more challenging.
Step 3 – Check voltage regulator
Some Jeeps regulate the voltage through the ECM (Engine Control Module).
If the battery and alternator checked out, it could be the voltage regulator. Most are internal to the alternator and would have been just checked out, but some newer ones control it through the ECM. If it is, you will have to have someone hook a diagnostic tool up to the vehicle.
Pro Tip
If it is internal to the ECM, go to the junk yard for a replacement because new ones are very expensive.
Step 4 – Check the wiring
You have checked all of the usual suspects, so let's try the wiring.
A bad ground on a modern vehicle can cause strange things to happen. Since we have gone this far, the grounds need to be checked. Make sure all charging system and ECM components are thoroughly grounded. Tighten all connectors and any lug that is screwed to the body. While you are checking grounds, also check that all of the wiring is in good shape with no shorting out. Also, check that any fusible links have not blown. Since grounding starts at the battery, be sure the ground to the engine and body is sound.
Pro Tip
At this point we have hit the most likely suspects. It is OK to say 'uncle' and have another set of eyes look things over.
Related Discussions
- Battery Not Charging - CherokeeForum.com
- Battery Not Charging After Running - CherokeeForum.com
- Battery Not Charging, Checked Everything - CherokeeForum.com
- Battery Not Charging - CherokeeForum.com