Jeep Grand Cherokee 1993-2004: How to Bleed Brakes
Does your brake pedal feel spongy? If your brake pedal feels different than it normally feels in your Jeep Grand Cherokee, then you may be due for a brake bleed.
This article applies to the Jeep Grand Cherokee WJ/ZJ (1993-2004).
The brake system in your Jeep Grand Cherokee is a pressurized system, so as soon as air alters it, your brake pedal will feel spongy and your brake efficiency will decrease. Bleeding the brakes is a simple procedure that allows you to get any air out of your brake system without having to replace the brake fluid. With a little time and basic tools, this procedure can be done and your brake pedal feel could go back to normal. Read on to learn how to do it.

Materials Needed
- Brake fluid
- 5/16 wrench
- Jack, jack stands, and tire iron (optional)
- Hose
- Bottle
Step 1 – Raise the car
You can access the bleeder screws on each wheel without removing the wheels and raising the car. However, if you feel like you need more room, loosen the lug nuts on all four wheels, raise the car, secure all four corners on jack stands and remove the wheels.

Step 2 – Bleed brakes
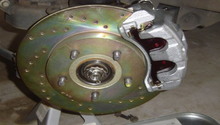
Locate the bleeder screw on the back of the brake caliper. You will have one on each caliper. When bleeding brakes, it goes right-rear, left-rear, right-front, left-front. So you start from the caliper furthest away from the master cylinder and work your way towards the master.
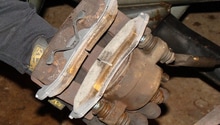
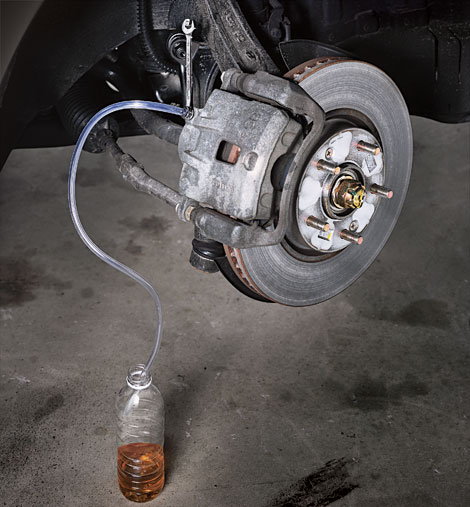
Loosen the bleeder screw on the back of the caliper using your wrench and attach a hose to it. Put the other end of the hose into a plastic bottle. Ask a friend to sit in the driver's seat, pump the brakes a few times, and then hold the pedal down. As your willing assistant holds the pedal down, crack open the bleeder valve, and brake fluid should come out. After a few seconds, close the valve and have your friend lift off the pedal. From here, repeat the process of pumping the pedal, holding the pedal down and opening the bleeder to evacuate all old brake fluid from the calipers. The old fluid will likely have small air bubbles in it. Once the fluid coming out of the caliper is free of air bubbles, then you are done. It's time to go to the next caliper and repeat the same process.
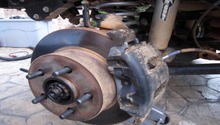
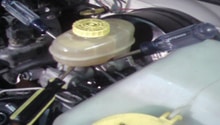
Check the brake reservoir and top it off with fluid between each wheel. If the fluid level gets too low in the reservoir, you will introduce air in the system and have to start the process all over again.
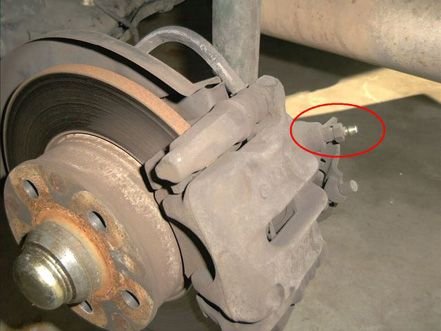
Figure 3. Bleeder valve. 
Figure 4. Bleed until you stop seeing bubbles. 
Figure 5. Top off brake fluid as you go.
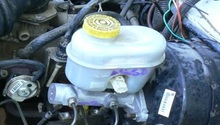
Step 3 – Top off master cylinder
After you've finished bleeding all four calipers around your vehicle, top off the master cylinder with brake fluid and go for a careful test drive. Continue checking the brake fluid level for the next few days and top off as necessary.

Related Discussions
- Bleeding Brakes - CherokeeForum.com
- Brake Bleeding Pattern - CherokeeForum.com
- Bleeding the Brakes - CherokeeForum.com