Jeep Grand Cherokee 1999-2004: How to Replace Brake Master Cylinder
This mod will help your Jeep stop much better and it is a cheap, wonderful thing that you will appreciate every time you drive it. This one uses factory Jeep parts, which is always a good deal.
This article applies to the Jeep Grand Cherokee WJ (1999-2004).
If you have modified your Jeep or just want it to stop better, upgrading the brake booster and master cylinder will get the job done. We aren't talking about a couple of thousand for Brembos either, just a hundred or so for slightly used newer factory Jeep parts. It is not a straight bolt-on, but the mods are simple items that you can do with just a couple of special tools that you can even borrow. So let's go, or stop!

Materials Needed
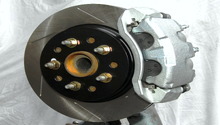
- Master cylinder and vacuum booster from an early 2000's Grand Cherokee WJ
- Turkey baster/suction device
- Brake fluid
- Tape measure
- Metal brake line
- Double flaring tool
- Line wrenches
- Locking pliers (optional)
- 3/8" ratchet, extensions, and U-joint
- Deep sockets
- Grinder
- 5/8" drill bit and drill
- Flashlight
- Hammer
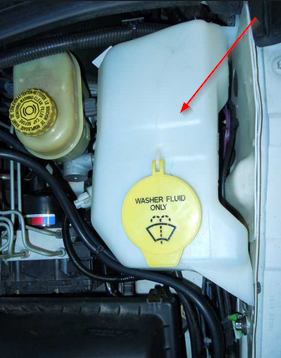
Step 1 – Remove washer fluid container
The washer container is next to the current brake setup and will have to be removed. It is possible that it will need to be relocated to the fender well.
Step 2 – Remove the brake lines
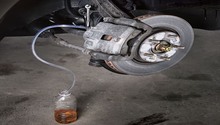
Suck up the old brake fluid in the reservoir and safely dispose of it. Remove the brake lines where they enter the proportioning valve. There may be some residual fluid leak, so be careful to keep it away from your paint since it will take it off to the bare metal.

Pro Tip
I prefer to use line wrenches for removing nuts for the fittings. You can use locking pliers, but they may mangle the nuts.
Step 3 – Remove master cylinder/booster
There are four nuts under the dash that hold the booster on. They are not the easiest to get to, so using a deep socket and a U-joint helps. Figure 3 shows one of the nuts.

The brake rod also has to be disconnected. There is a bolt that holds it to the brake pedal. The brake light switch is also on this bolt. Remove and keep it.

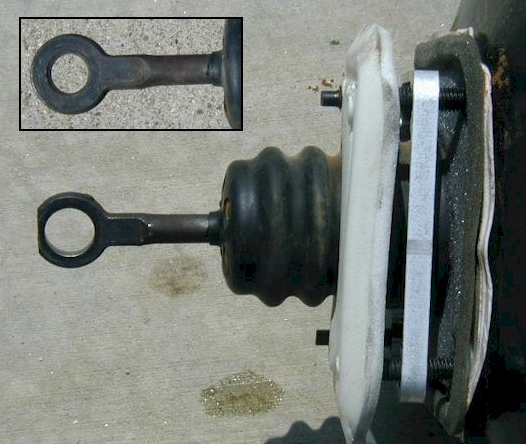
Step 4 – Measure rod length
The brake rod on the new booster will be longer than the original. Measure the distance from the face of the booster to the center of the hole. To keep the same pedal feel, the measurement of the new needs to match the old. If it is too much, some Cherokees have an aluminum spacer from the factory that works perfect. You can use washers, but seal up any gaps to keep gunk out of the vehicle.

Pro Tip
If you pull the replacement booster/master yourself, get any hardware, lines, and valve you can just in case.
Step 5 – Modify brake rod hole
The hole for the bolt to the pedal on the replacement will be different. The hole needs to be enlarged to 5/8" and it needs to be modified to use the original brake light switch. A flat spot has to be ground on the end like the original rod.
Step 6 – Put switch on brake rod
The brake light switch goes on just like the original, using the bushing and nylon washer.

Pro Tip
Brake lights are a big deal, so take your time on this mod to get it just like the original.
Step 7 – Mount the booster/master
You may need to bend a body seem lip for clearance before bolting the unit on. Just tap it down with a hammer.
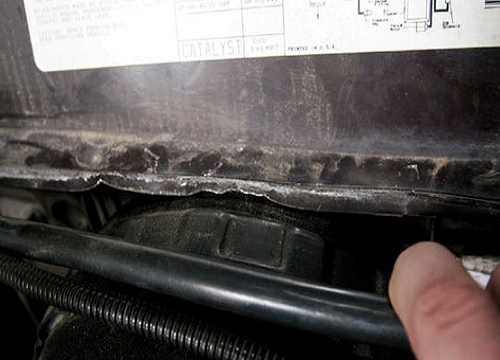
Figure 8. Body seem behind booster. 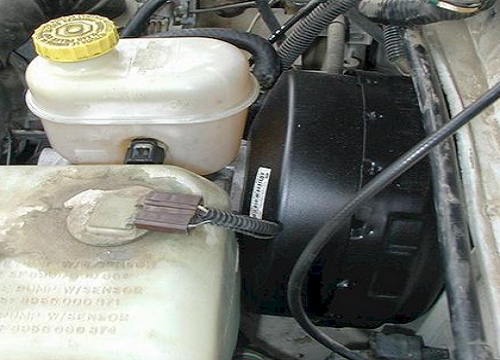
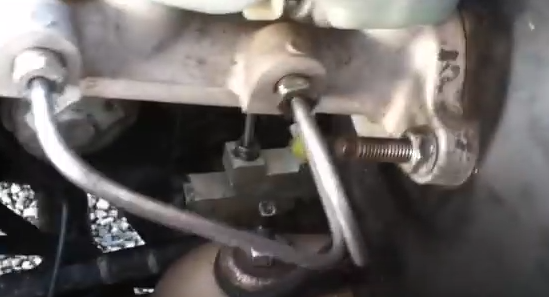
Figure 9. Updated booster assembly mounted.
Now, just mount the assembly back like the original came off. Be sure to tighten the nuts under the dash well and hook the brake rod as well as light switch up. Test the brake lights to be sure they work.
Step 8 – Bend brake lines
This will be the trickiest part of the swap, since the brake lines will probably have to be made. The lines you got with the updated master cylinder will be different than your Jeep. Use the fittings or nuts from both to see which have to go on what end. The brake line you purchased may have some that fit one. You MUST have the flare type that the lines had, which went into the master cylinder or valve originally. The flaring tool you use should be able to make them.
Pro Tip
You can bend a piece of wire to mock up the new lines; it is easier to bend. Newer steel line is easier to bend, but if you use a bender, it will look more professional. Make sure the lines do not rub against any sharp or metal edges.
Step 9 – Attach brake lines and bleed
Attach the brake lines and vacuum hose for the booster. Fill up the master cylinder with brake fluid and bleed the brake system as usual. Take your Jeep out for a test drive and get a feel for the new brakes. Now you can stop with the best of them
Related Discussions
- Master Cylinder Booster Upgrade How-to - CherokeeForum.com
- Master Cylinder Repair Kit - CherokeeForum.com
- New Brake Master Cylinder - CherokeeForum.com