Jeep Grand Cherokee ZJ 1993-1998: How to Install Factory Fog Lights
Whether you tackle fog on your daily commute or not, fog lights are never a bad idea.
This article applies to the Jeep Grand Cherokee ZJ (1993-1998).
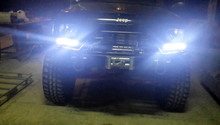
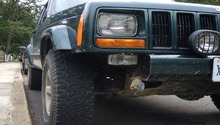
Originally, fog lights were designed to have a different hue and intensity as the driving headlights to help penetrate fog and offer a better driving experience. Eventually, fog lights became an extra set of driving lamps but the name "fog lights" stuck around. Fog lights are the lower set of bulbs normally mounted on the lower portion of the front bumper and are usually activated through a separate switch on the dash. Some vehicles come equipped with fog lights or driving lights from the factory, but on some Jeeps these may have been part of a higher or more expensive trim. We've compiled a guide on how to install a fog light kit on your Jeep. Keep in mind this guide is designed for installation on a bumper with fog light cut outs; if you don't have fog light cut outs, you can use a razor to cut your openings or get a new bumper.

Materials Needed
- Fog light kit
- Razor (optional for cut outs)
- Phillips screwdriver
- 10mm socket and ratchet
- Hammer
- T25 Torx driver
- Trim screw removal tool (optional)
Step 1 – Prep for install
If your bumper does not have the fog light cut outs, you'll want to use the razor blade at this time and cut the openings to begin installation. Once the cut outs have been made, proceed to remove the grille by removing the four screws on its corners with the Phillips screwdriver.
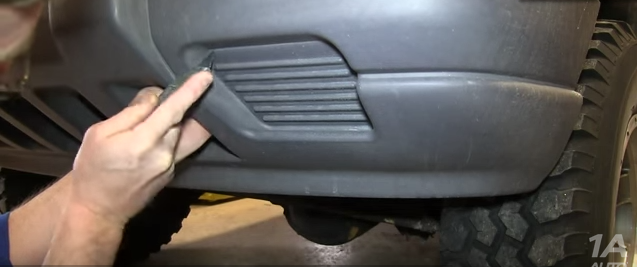
Figure 1. Use razor to cut fog light openings. 
Figure 2. Remove grille.
Once the grille is out, use the 10mm socket and ratchet to remove the 10mm bolt on top of each headlight housing, then pull the headlight out and disconnect the wiring connector behind them. Once the headlight is out, use the T25 Torx driver to undo the three Torx screws that hold the turn signal housings in place, then simply disconnect the wiring connector attached to them.
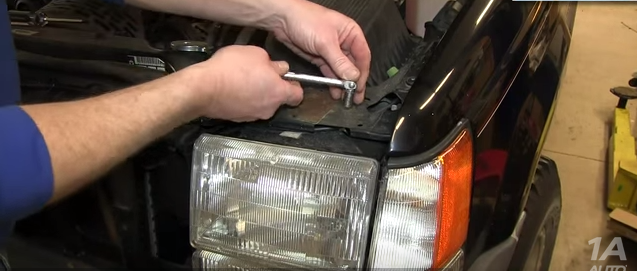
Figure 3. Use 10mm socket to remove headlight housing. 
Figure 4. Remove Torx screws on turn signals.
Step 2 – Remove bumper
You must remove the front bumper before proceeding. Start by using the trim removal tool to pop the three plastic rivets on top of the bumper, and the ones along the side of the fender by the tire well. Make sure to check for more underneath the bumper (depending on year). Then simply pull the bumper off.

Figure 5. Remove plastic rivets. 
Figure 6. There are more on the side.
Step 3 – Install fog lights
Use the diagram included to find the right location for the fog light bracket, then simply screw the bracket with the fog light against the frame using the 10mm socket and ratchet. Most Jeeps are equipped with an existing fog light wiring harness from factory, so simply remove the stock plastic cap and plug in wiring for new fog lights.

Figure 7. Mount fog light brackets. 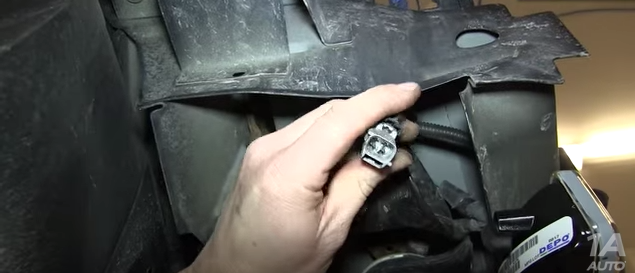
Figure 8. Existing wiring harness.
Step 4 – Finish wiring
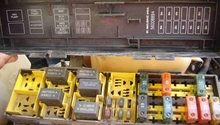
Once the lights have been installed and plugged in, it's time to install the relay for the fog light kit, as well as test the stock or aftermarket fog light switch. Start by removing the trim panel around the headlight switch, then remove the covers for the relay box in the driver's foot well. Simply find an empty relay plug and plug in the new relay.

Figure 9. Remove trim and covers to access wiring. 
Figure 10. Install relay.
Step 5 – Wrap up
Start your Jeep and make sure all the lights are working properly and the switches are responding. Then you may install the bumper and everything back in reverse order that it was removed.
- Mount bumper back on.
- Install plastic rivers.
- Install headlight and turn signal housing.
- Replace T25 Torx bolt.
- Replace 10mm bolt.
- Replace grille for 4 Phillips screws.
- Replace interior trim removed.
Related Discussion and Video
- Bolt-On Factory Fog Light Jeep Video - YouTube.com
- Jeep Factory Fog Light Discussion - Cherokeeforum.com