Jeep Grand Cherokee ZJ 1993-1998: Why is My Jeep Running Hot?
The engine cooling system combines fluid, pressure, and air to transfer heat away from the engine. The radiator, water pump, and coolant hoses cycle coolant through the system. By controlling the amount of coolant in the radiator and the airflow over it, coolant temperature can be precisely controlled.
This article applies to the Jeep Grand Cherokee ZJ (1993-1998).
Coolant must be pressurized and correctly mixed with anti-freeze to properly cool the engine. Pressure and chemical additives to water increase the coolant's boiling point to over 240 degrees when mixed correctly. The water pump moves coolant throughout the system. Once the hot coolant leaves the engine, it's sent to the radiator. Airflow from cooling fans and wind lower the coolant's temperature as it travels through the many tubes inside the radiator. Once the coolant reaches the engine again, its temperature is much lower. The coolant can now absorb some of the engine's heat, keeping it near operating temperature as the process repeats.

Materials Needed
- Safety glasses
- Rubber gloves
- 50/50 mixed coolant
- Trouble code scanner
- Multimeter
- Hydrometer/refractometer
- Thermometer
- Cooling system pressure tester
- Electric jumper wires
- Cooling system flush
Never open the cooling system when the engine is hot! Also, check for OBD trouble codes.
These steps are listed in order from least time consuming/easiest to perform to hardest.
Step 1 – Test and fill the coolant
Test the coolant's mixture using a hydrometer or refractometer. The mixture of water and coolant should be near 50/50. Adjust the concentration as needed by draining coolant from the system. Open the radiator cap and fill the system with coolant. Start the engine with the cap off. You will see bubbles rising to the top of the radiator, indicating air is leaving the system. Once the engine nears operating temperature (200 degrees Fahrenheit), re-install the cap.

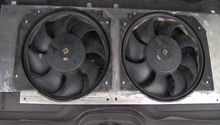
Step 2 – Check the operation of the cooling fans
Depending on your Jeep's engine and year, you may have a mechanical fan or all electric fans. The mechanical fan is belt driven and uses a viscous clutch to adjust speed. The electric fan is controlled by the powertrain control module with a relay. Ensure your drive belt is sufficiently tensioned and rides smoothly on the fan pulley. Inspect the fan shroud and fan blades for damage. Turn on the engine and set the A/C to max. DO NOT let the coolant temperature rise above 230 degrees.
On the 4.0 and 5.2 engines, the electric fan should turn on with the A/C. Low speed should begin near 210 degrees. High speed should begin near 220 degrees.
On the 4.7 and 3.7 engines, the mechanical fan is the primary cooling fan. The electric fan on these engines should turn on near the 210 degree mark.
The mechanical fan should increase airflow through the radiator as the engine temperature rises. If you can see the individual blades during rotation with the engine above operating temperature (200 degrees), the fan needs to be replaced. This operation of mechanical fans applies to all engines.
Some later model Cherokees use a hydraulic cooling fan. This fan uses fluid pressure supplied from the power steering pump. The engine computer references a temperature sensor to determine what speed the fan needs to be at. An A/C pressure switch is also used to signal the fan to turn on when the A/C is switched on. A solenoid controlled by the engine computer adjusts the fluid pressure to the fan for speed control.
A simple way to test the solenoid is by checking its resistance at the connector behind the radiator. You will see a blue/red wire and a green/orange wire. These wires lead to the solenoid. The reading here should be near 12 ohms. If the reading checks out, use a pair of jumper wires to apply 12 volts directly to the solenoid with the engine on. Attach the wires to battery positive and negative. The fan should accelerate to its maximum speed.
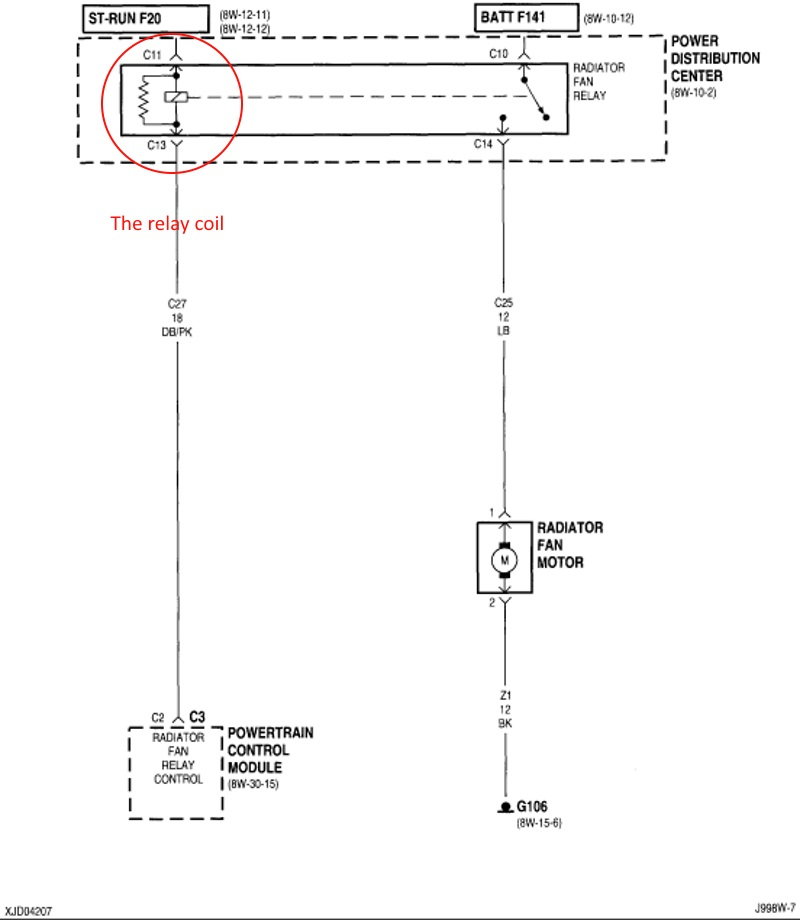
The electric fan uses a relay that is powered on by the engine computer. Attach a pair of jumper wires to the relay coil terminals. Once both positive and negative battery voltage are on each side of the coil, the relay should click (close the switch) and the fan should turn on. Also, check the cooling fan fuse located in the engine bay at the power distribution center.
Step 3 – Test the coolant temperature sensor
The coolant temperature sensor's resistance decreases as the coolant temperature rises. Some values to determine if it's bad or not are:
- 11,000 ohms at 75 degrees
- 4,000 ohms at 120 degrees
- 1,500 ohms at 175 degrees
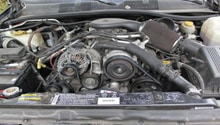
The 4.0 engine's coolant temperature sensor is found on the thermostat housing.
On the 4.7 engine, the sensor can be found between the A/C compressor and alternator.
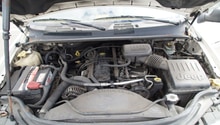
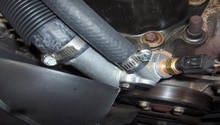
The 5.2 engine's sensor location is behind and to the right of the alternator. The sensor will have two wires going to it. Don't get this sensor confused with the one wire sensor that controls the instrument cluster coolant temperature gauge.

Figure 3. The coolant temperature sensor on the 4.0 engine. 
Figure 4. The coolant temperature sensor on the 5.2 engine.
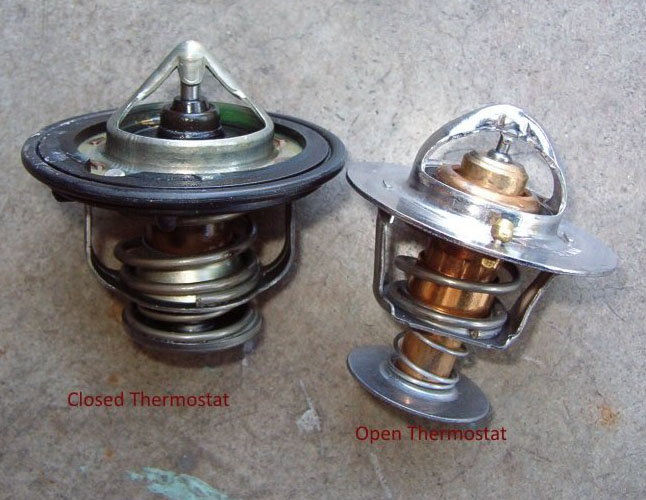
Step 4 – Test the thermostat
A stuck closed thermostat will not allow coolant to cycle through the radiator.
Test the thermostat by measuring the thermostat housings inlet and outlet temperature once the engine reaches normal operating temperature. You should feel heat and pressure increase in the hose leading to the radiator inlet.
Alternatively, the thermostat can be removed and placed in a bowl of boiling water. The thermostat should begin to open once it makes contact.
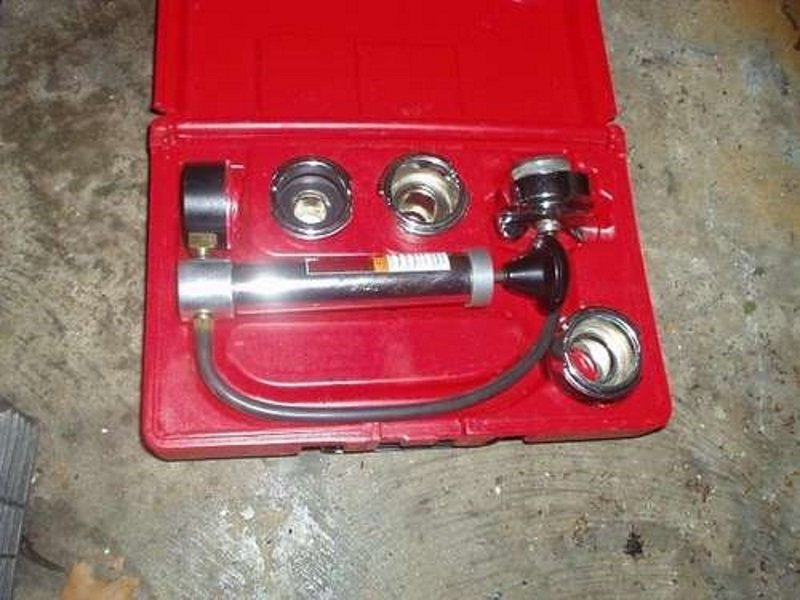
Step 5 – Pressure test the cooling system
Top of the system's coolant level. Using a pressure tester adapter that fits to your radiator pressure cap, apply the cap's rated pressure to the system. Watch the pressure reading for a drop while performing a visual check for leaks. Check common areas where leaks are found, such as heater hoses, the water pump, and soft plugs in the engine block.
Step 6 – Flush the cooling system
A coolant system flush will remove the contaminants and corrosion that are known to stop the flow of coolant throughout the system. Begin by draining the coolant. Pour some cooling system flush solution (found at most auto parts stores) into the system, and then spray water throughout. Keep the water pressure below moderate, otherwise damage to the radiator and/or heater core may occur. Thoroughly rinse the system with water and refill/bleed the system as found in Step 1 of this article.
Related Discussions
- Running Hot, But Not Overheating - CherokeeFourm.com
- Replaced Radiator, Now It's Overheating - CherokeeForum.com
- Overheating When A/C On - CherokeeForum.com